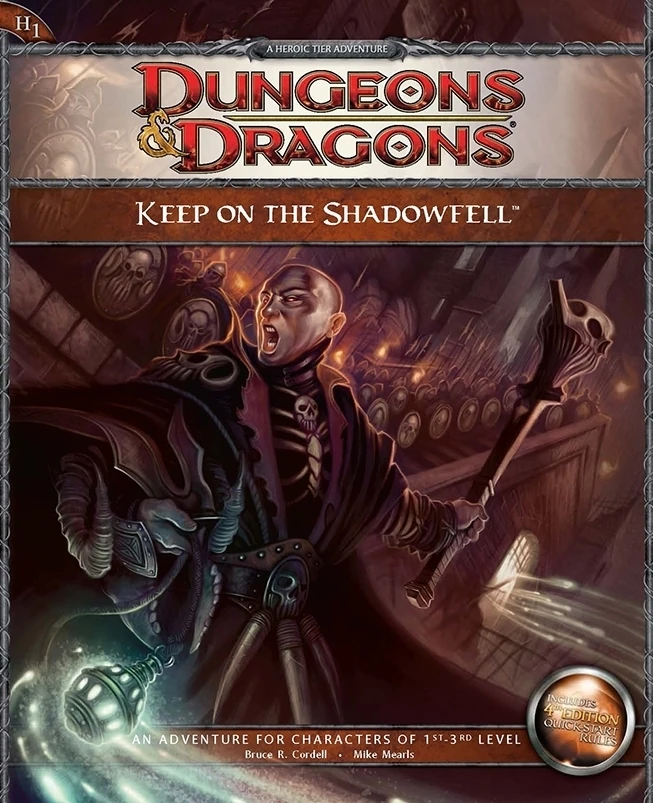
Darkness looms near Winterhaven! Kobold brigands have grown ever bolder in their attacks, marauding the once peaceful town, and a known explorer has been missing ever since their departure to the excavation site of a dragon burial site. When the party investigates, they will discover that the kobold's leader, Irontooth, bears a tattoo of a ram-headed demon. This is a troubling portent, for the townsfolk will report that this can only mean the dread god Orcus, master of death, has an active cult in that ruined keep! It is up to the party to enter the Keep on the Shadowfell and put a stop to the cult's fell machinations before it threatens all the realm. There they will fight the evil priest Kalarel, Scion of Orcus and seal off the vile portal to the dark realms he is master of. Should the heroes seize victory, glory and treasure are sure to be theirs. But first they must endure the challenges of that dreaded KEEP ON THE SHADOWFELL!

The Frozen Necromancer is a three-part adventure for Fifth Edition that takes player characters from levels 1 to 4. This adventure is the first in a storyline of four modules called The Demonplague that can be used as an entire campaign that takes characters from level 1 to 20. The entire adventure (or just pieces, characters, or encounters from The Frozen Necromancer) can be dropped into any fantasy setting with minimal changes

It is time to put a stop to the marauders! For years the coastal towns have been burned and looted by the forces of evil. You and your fellow adventurers have been recruited to root out and destroy the source of these raids. But beware, hundreds of good men and women have been taken by the slavers and have never been seen or heard from again! First part of Scourge of the Slave Lords (A1–4) TSR 9039

Devastated in a war with a nearby wizards' school, the Fighters' Academy has since been surrounded by a foul and dank swamp - the Gloomfens. Since the climatctic battle between the wizards and fighters, the tower has decayed. The spirit of the head of the academy haunts the building, eternally plotting his revenge on the wizards who killed him. his loyal sutdents remain faithful to him even in death. Other foul undead have made their home in the rotting, spacious academy. From their lair, they make forays into farmsteads near the swamp in search of victims to feed their unspeakable appetites. The Problem of these terrible attacks by the savage undead will not stop until the evil that has found a home at the tower is burned from the face of the land forever. Will your party heed the call and help the town of Melinir? Will they be able to clear the former Academy of its undead? Towers of Evil is the second in a three part adventure, The Haunted Tower. Or, it can be ran as a stand alone adventure. The choice is up to you. Part of TSR 1081 The Haunted Tower

This adventure is a prequel to the first ever stand-alone module published Palace of the Vampire Queen by Wee Warriors She is simply called the Vampire Queen. A being so powerful and evil that the mere mention of her title, raises shrieks of horror and anguish. Her reach is seemingly infinite and her machinations sinister beyond the un-derstanding of mortal men. But those very same mortals must stop her. The path to victory leads to only one place. A place of legend and mystery; the Palace of the Vampire Queen! For the first time the ruined Palace Keep is detailed and ready for exploration! The adventure includes one new monster and two new magic items. This module is designed for the First Edition game using six to eight characters of first level.

The renegade magic-user Bargle is wanted, dead or alive. Rumor holds that he dwells in the bowels of a nearby abandoned keep, performing all sorts of foul sorcery. Only the truly brave, or perilously foolish, would dare to challenge Bargle in his own domain. Expanded dungeon of the BECMI red box sample dungeon.

This adventure focuses on a Zhentarim attempt to spread terror in Mistledale, although it is suitable for almost any lightly settled area northwest of the Sea of Fallen Stars. "The Raiders of Galath's Roost" is suitable for four 1st-level characters, but PCs should be at least 2nd level before tackling the adventure's second half, the Zhentarim Citadel. Even in the first half of the adventure, many of the encounters are quite formidable for 1st-level characters, and the PCs might find it necessary to withdraw and recover one or more times before completely exploring the ruins.

No-one knows why, but many of the villagers of Greenmist have been going insane. Not only that, but something has caused the surrounding environment to transform into fetid swamps. Heroes from far and wide have gone into the swamps to destroy the source of the madness, but none have returned. The truth is that the psychic whispers of an aboleth have invaded the minds of Greenmist's people. The creature called Seedooloo has been using forbidden magic, mad science, and the strange ability of his kuo-toan worshipers to grant himself the power to drive the surface world to insanity. The Call of Seedooloo includes monsters found in Mordenkainen's Tome of Foes.
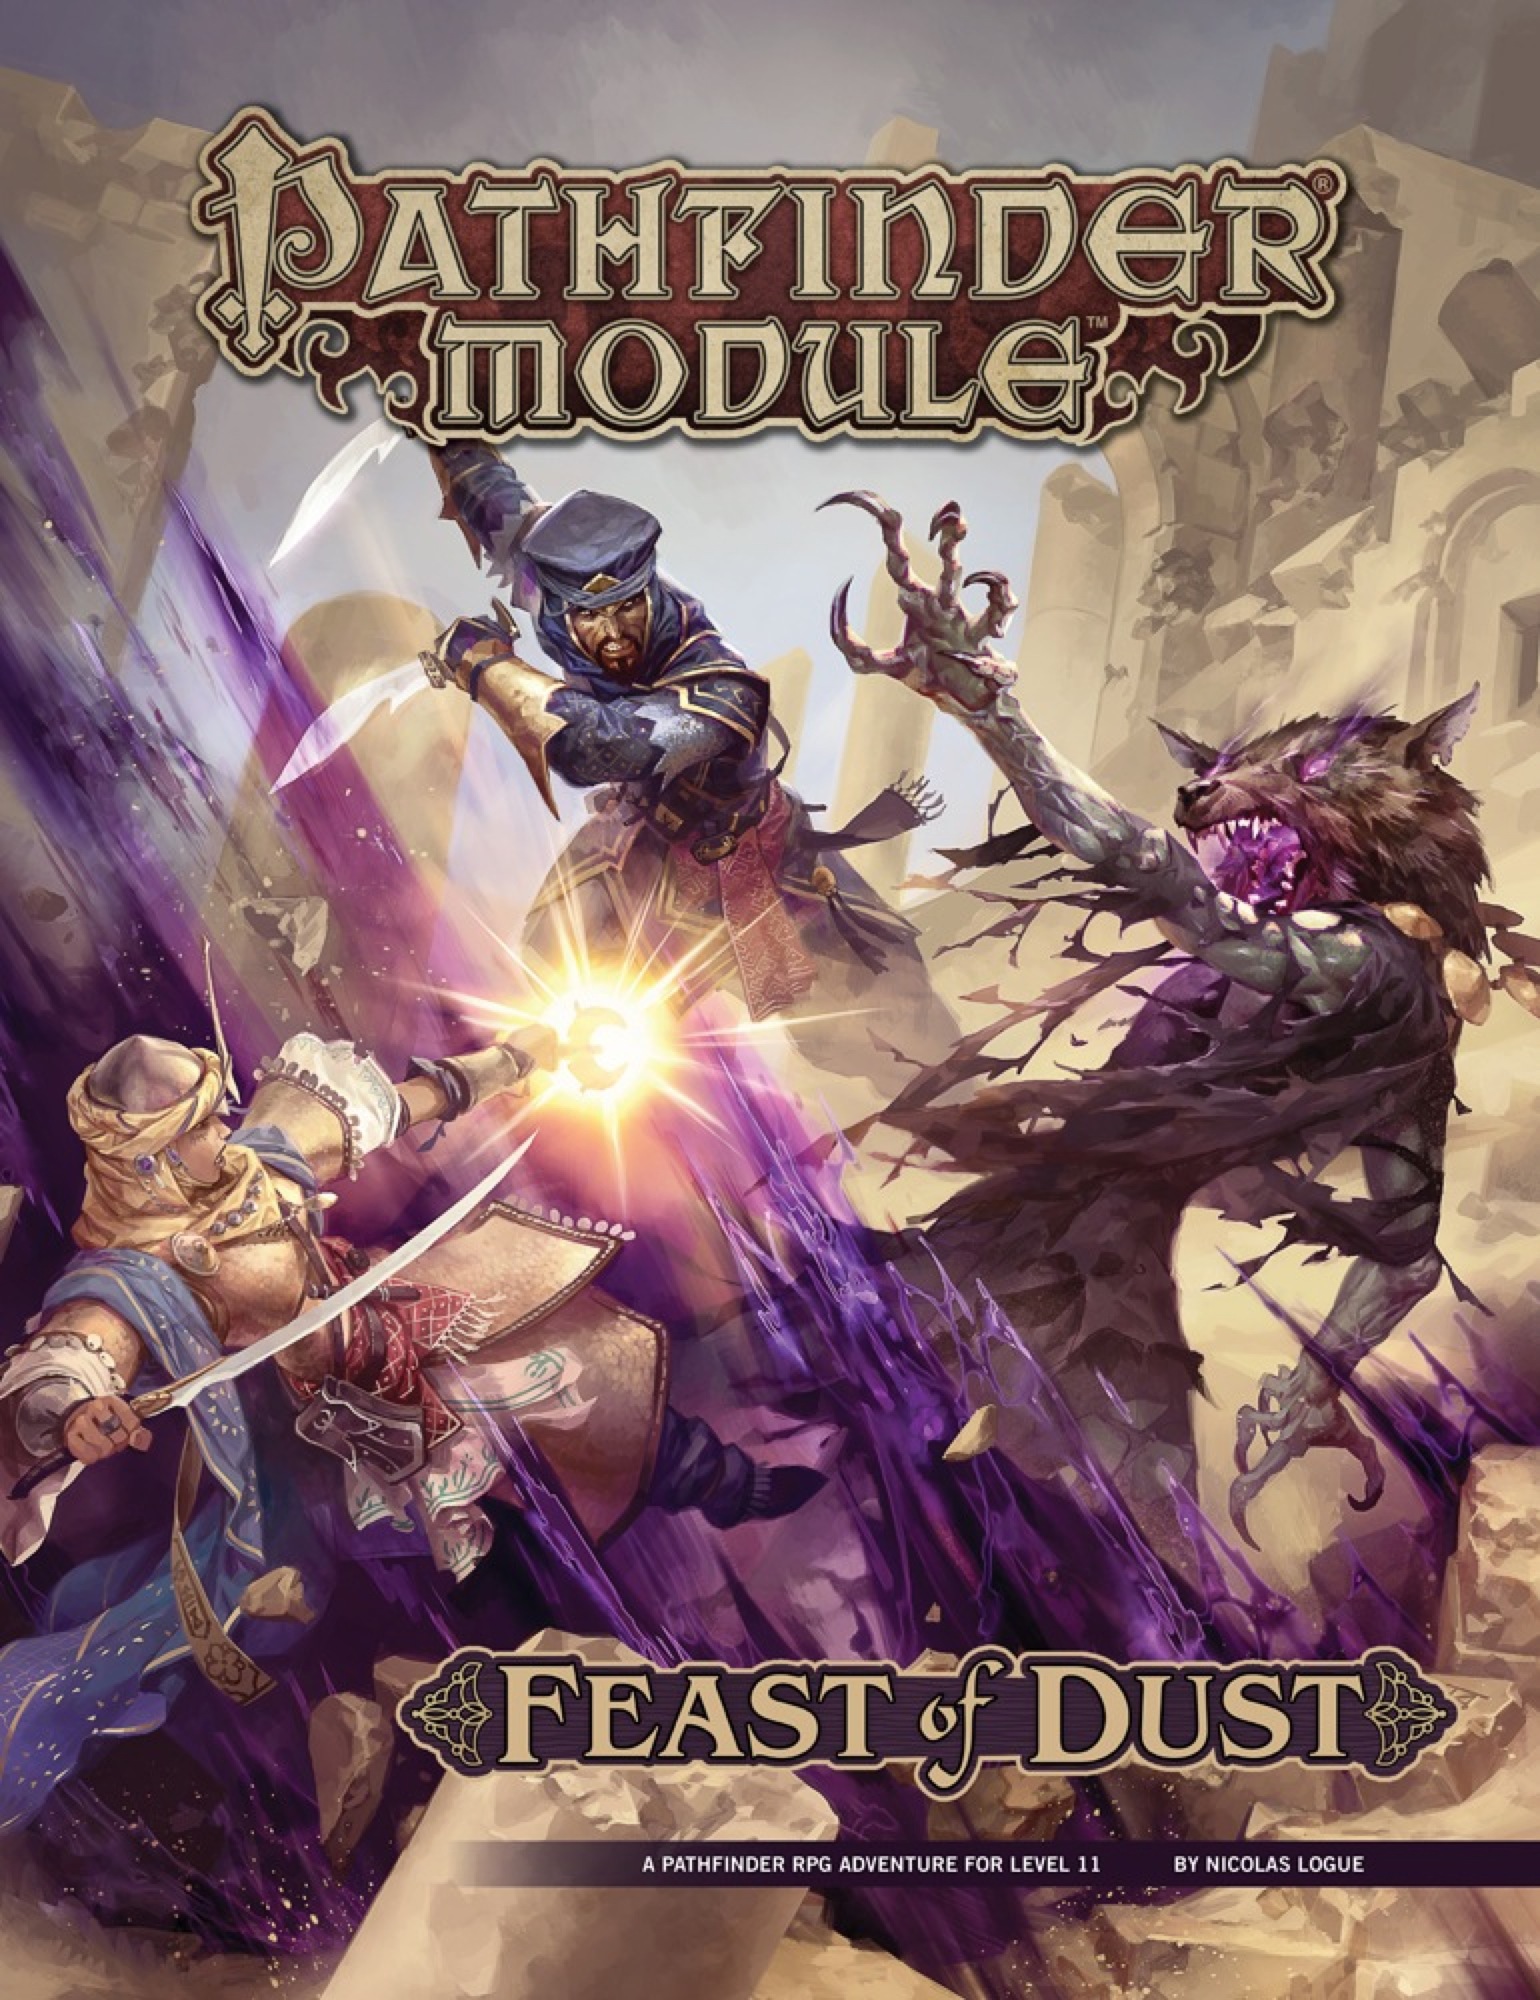
A deadly curse known as the Feast of Dust spreads rapidly through the Meraz Desert, driving its victims mad with hunger and a burning desire to flee into the sands. To find the source of this strange affliction, the heroes must investigate the plagued city of Dimayen, challenging fearsome gnoll tribes, nihilistic daemons, and the walking dead to discover the secret of a long-forgotten evil—a powerful daemon harbinger called the Jackal Prince of Famine. Despite the efforts of an ancient secret society, this twisted, unholy monstrosity walks the world again, threatening to spread his apocalyptic curse across all of Golarion! To stop the demigod's return, the heroes must uncover his three vile siblings, now bound within malevolent artifacts, and use their combined powers to stop the Jackal Prince before the entire world feels his corrupting touch.

Only True Heroes Can Find Honor Among Thieves … They lurk in the Ralferst Forest, striking out at all who pass through, robbing traders, assaulting farmers, even killing with impunity. Working from a secret base deep in the forest, a band of thieves has struck fear into the heart of Brandon's Bridge, the little village at the crossing of the Azure River. But now a band of heroes has come, seeking glory and adventure - heroes that might just be up to the challenge of driving away the Thieves in the Forest. Thieves in the Forest is a beginner-friendly, introductory OGL adventure. It features: A wilderness adventure segment featuring the Ralferst Forest, a dense wood crisscrossed with paths and fraught with perils. The nature of the forest and paths makes it easy for less experienced players and GMs to deal with this non-dungeon environment. A double-sided, fold-out poster map (17" x 22") of the thieves' hideout - an ancient ruined temple - suitable for tabletop use with miniatures or counters, for easier handling of tactical combat. Maps created in Profantasy Software's Campaign Cartographer 2, and available for download on the Atlas Games website. GMs can customize and manipulate these maps themelves, if they own CC2, and integrate them into their own game worlds. Published by Atlas Games & Truant Spiele

The lost Bloodtower has returned, arising from its earthen grave to stand as a mute sentinel over the fog-shrouded moorland. In the weeks since it's return, local travelers have spoken of new undead roaming the countryside. Pgs. 80-87

They sure don't make lawful allies like they used to. A question of morality versus ethics - made lethal. Pgs. 17-34

An Adventurers League Con-Created Content Module. Tier 1, 4 Hours. (Compatible with Homebrew games too!) May I have the next 100 words to convince you to purchase this adventure? **PITCH BEGINS!** This module features three ways to play: join the Knights of Holy Judgment, the Cult of Zariel, or the forces of Chaos as you face The Heir of Orcus! Play like it is 1990 and experience the first Adventurer’s League module to use 16-bit art for maps, tokens, NPC portraits, and magic items! Each purchase includes the PDF, Fantasy Grounds module, one map, 18 tokens, comic art for the backstory, and an imaginary high five from the author. Make a DC 92 Wisdom saving throw. On a success, reroll! On a failed save, buy this adventure! **PITCH ENDS!** Author’s note: This is part two of a two part Tier 1 series. I plan to make future Verses if these do well and people like them. Thanks for looking at my adventure and please leave an honest review! -Anthony Joyce (Twitter: @Thrawn589) All artwork was commissioned and commercially licensed for this module. Pixel Art by: Joaquin Reymundo "Dsurion" (Twitter: @Dsurion) Comic Art by: James Gifford (Twitter: @Mrjamesgifford) Fantasy Grounds Module by: Chris Jernigan
The logging town of Falcon’s Hollow has been through rough times—first a kobold tribe abducted the town’s children for an evil ritual, then an unknown force reanimated the defeated kobolds to attack the town. Now a horde of zombies approaches and a mysterious evil gathers power in the north, tainting wildlife and the buried dead, its presence hinting at ancient evils better left undisturbed.
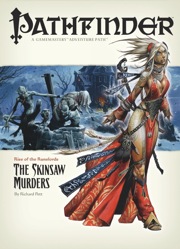
The Rise of the Runelords Adventure Path continues! A sudden string of brutal killings terrorizes the town of Sandpoint, and the killer's mark bears a familiar shape. Investigation leads to the Lost Coast's most notorious haunted mansion, a dilapidated ruin that has become the lair of a monstrous murderer. Yet this killer is but one of many, a member of a group of fanatic cutthroats calling themselves the Skinsaw Men. To defeat the cult, the PCs must travel to the bustling city of Magnimar to unravel the sinister source of these murders before they become the Skinsaw Men's next victims!

Synopsis: Goblin Bathwater, a magical drug, has taken hold in a sleepy coastal town at the edge of the Empire. As the characters investigate the origin of the drug, they uncover an international criminal conspiracy, wild and ancient magic, and a threat to reality itself. Contents: This beautifully made, 54-page adventure offers: A fully fleshed out, setting-agnostic starter area, brimming with colourful NPCs and hooks for adventure. Balanced encounters to bring characters to level 2; then some more devious encounters on their way to level 3. Three mini-dungeons built on the design philosophy of the "5 room dungeon method" Multiple big, cinematic set-piece boss encounters what will make your players feel epic. A facetted intrigue, which does not immediately suggest a simple, ready-made solution but invites the players to come up with their own, personal approach. Why pick this adventure? Hey, my name is Marius. This is my first time publishing on the DMs Guild but I wouldn't call myself a newcomer. I started playing Pathfinder 1e back in 2014. When I took over as our group's DM in 2019, we swapped over to 5e. We have run many, many modules and adventures since. Currently I play three games a week. In short: You could say I'm hooked. I created The Goblin Bathwater Incident as the ideal adventure for in-between your big modules, but it isn't a simple little adventure. With a playtime of about 30 hours, it still manages to hit that sweet-spot, where it establishes context, makes you grow fond of NPCs, and makes those big bossfight wins so much sweeter, all without taking more than a few sessions. The Goblin Bathwater Incident is different from many of the 1st tier adventures in that it pits the characters against traps and monsters, but also asks difficult, open-ended ethical questions, where a simple strategy of "apply sword to head of bad guy" will not cut it.

Alphatia, the most ancient empire, land of the arcane and obscure secrets. It has grown for centuries and its might now overshadows the cauldron of civilization. Some say the Alphatians come from elsewhere, but no one knows for sure. Beyond the scope of mortals broods an evil mastermind, still in darkness. Once a betrayed emperor of ancient Alphatia, now an entity of the Sphere of Entropy, he seeks revenge on the greatest empire and on the race of man. His plots brought a deathly fog on all of Norworld. Perhaps it will extend to the southern nations. The matter is grave, so much that lords of the spheres have now to show their might. For them, it is time for mortals to intervene. Man defends his cause for him to earn divine favor. A great armada has been raised and able commanders must be found. Prove your worth, and the eternal portals of the spheres may open for you. TSR 9159

Everything would be fine if the person you're trying to help wasn't already dead. The requirements of honor reach even beyond the grave. A spirit asks the party to help grant it passage to the afterlife.
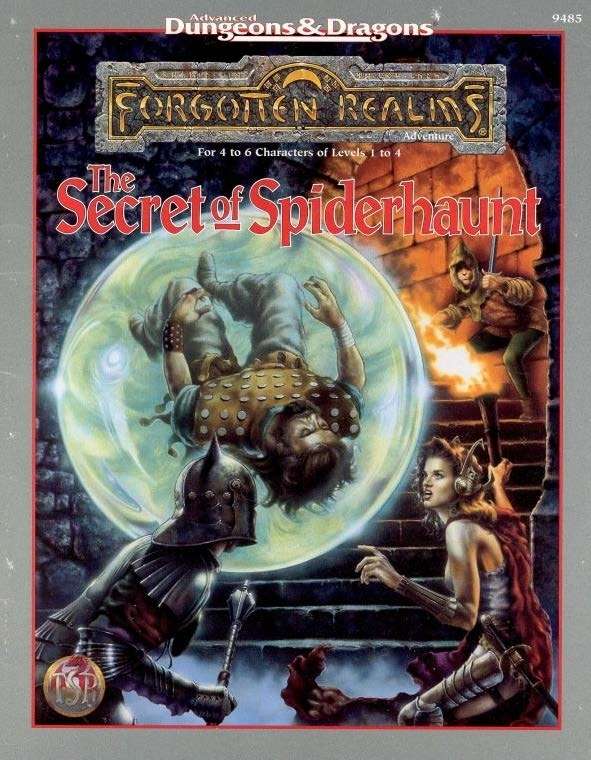
The infamous Sword of the Dales has always held a certain fascination in the eyes and hearts of the citizens of the Dalelands. Thus, it was no surprise when Randal Morn, rebel leader of Daggerdale, led an expedition into the crypt of a long-dead wizard to recover the weapon. Shaevyn the weapons-mage had created the Sword long ago, and it stood to reason that the blade would be waiting within his tomb. Perhaps the Sword of the Dales woulld allow Randal Morn to rule Daggerdale once again. But Randal Morn never returned from that fated party. Only tales of terror told by a lone survivor held any clues as to Randal's fate. A brave hand of heroes accomplished what Randal Morn's group failed to do in part one of this adventure trilogy, "The Sword of the Dales." Battling through the tomb's undead inhabitants, those heroes reached the burial crypt of Shraevyn. There, resting in the center of the coffin, was the Sword of the Dales, its azure glow filling the chamber. However, there was no sign of Randal Morn. Only a note signed by his hand held any clue as to his fate. "Seek me in Spiderhaunt," it proclaimed. "The fate of Daggerdale is in your hands." This is the second part of a trilogy of modules that began with "The Sword of the Dales." The saga concludes with "The Return of Randal Morn." TSR 9485

The rubble-strewn passageway twists and turns, winding ever deeper into the mountain, lower and lower into the bowels of the ancient, forbidding halls of long-dead dwarves. The torchlight flickers, threatening to succumb to the oppressive darkness. Creeping along one striated granite wall, Arikus the warrior moves cautiously toward the great cavern ahead, its sides and walls disappearing into the gloomy distance. Cocking his head to one side to listen, he holds his hand up for a moment, demanding unconditional quiet from from his companions. Then , his arm relaxing in relief, he waves everyone forward and moves into the open. Before him, scattered to the far walls of the enormous cavern, are piles upon piles of glittering treasure - coins from countless kingdoms, sparkling gems, exquisite jewelry, and items of wondrous power - enough for twenty kings' ransoms. Arikus laughs gleefully, thrusting both hands into the nearest cache of coins to let them runs through his fingers. At that moment, a monstrous shadow looms threateningly over him. Looking up, Arikus blanches and stumbles back in horror before the terrible visage of a Great Red Wyrm. The fearsome dragon opens its razor-filled maw and spews forth a gout of white-hot flame, engulfing the hapless warrior.... The ultimate Dungeon Master Fantasy! This is the most deluxe dungeon. Designed to appeal to discriminating and demanding role-players. Adventurers, beware. This is more than just a dragon hunt. Within the lair of the beast lie cruel and deadly traps, befuddling conundrums and puzzles, and cunning minions that will be the end of overconfident or careless adventurers. Comprised of three 64-page books, for two adventures that link to one super-campaign 12 full-color reference cards 16 special player handouts Eight Monstrous Compendium sheets A Sheet of cardstock standups with 24 plastic bases. Six full-color poster maps, two of which link together to make a giant tactical playing surface for use with miniatures or the included cardstock figures. TSR 1089