
Rumors have been spreading in small towns and hamlets, regions isolated in the far reaches of the wilderness and cut off from major cities and trade routes. Rumors of strangeness in the forest, where the animals suddenly watch with intelligent eyes while the sound of a crone’s laughter pierces the veil of night. Rumors of young men and women disappearing without a trace in the wilderness. Rumors of a cottage that walks on enormous chicken legs. Rumors of Baba Yaga. Those rumors turn out to be true and the Dancing Hut of Baba Yaga has come once again to haunt, confuse, befuddle, and terrorize the far corners of the land. The Grandmother of Witches cackles in her flying mortar as she sails over the trees, a shadow in the darkness, but what does she want? Why has she come? And what strangeness awaits in her fantastic hut on dancing chicken legs? Brave heroes are needed to head out and find the answers to these questions and more! Welcome to the Dancing Hut of Baba Yaga, an adventure unlike any other. Baba Yaga, the Grandmother of Witches, has come to town, and her dangerous and mysterious Dancing Hut beckons adventurers to brave its wondrous depths. Open the doors, unlock the puzzles, and meet the famed witch, her adopted daughters, and a host of other strange characters. This module presents the Dancing Hut and its most famous owner, Baba Yaga, as an adventure site worthy of high-level exploration. You can use the module in many different ways, and the Adventures in the Hut section provides ways to entice characters to seek out Baba Yaga. In general, the adventure environments presented are designed to challenge a party of characters levels 11-16, but with some adjusting and focus on non-combat solutions, a party of lower-level characters could also explore the Dancing Hut.

Important: The adventure is 1e but it has monster conversion notes for D&D 4th edition The town of Highport, once a human community overlooking Wooly Bay from its perch on the northern coast of the Pomarj, fell prey to hordes of humanoids swarming out of the jungle-covered hills surrounding the settlement. Though the orcs, goblins, kobolds, ogres, and gnolls razed much of the place in their ferocious rampages, the smoldering ruins they left behind soon became a new kind of community, a place of trade between the humanoid “locals” and the unsavory human traders who have no compunction about doing business with them. Slaves are a commodity in ready supply in Highport’s market, since many pirates raid up and down the coast of the bay, putting fishing villages to the torch and filling their holds with captured refugees. Slavery has become a thriving business in the town, and rumors abound of a cartel of Slave Lords who run things from behind the scenes, filling their coffers in secret from the buying and selling of human chattel. The trade has become so prolific that the good folk to the north have grown tired of these depredations and decided to fight back. Forces of righteousness and honor have recently descended upon Highport, some openly and others in secret, in various attempts to destroy the machinations of the Slave Lords and abolish the abominable enterprise that has taken far too many loved ones from home and hearth. One such doughty servant of goodness is Mikaro Valasteen, a cleric of Trithereon. Mikaro slipped unnoticed past the crumbling walls of Highport with a single mission: to rescue and transport as many slaves to their freedom as possible. Mikaro and a handful of faithful assistants located a number of escaped slaves—as well as rescued a few more not sufficiently restrained and guarded—and shepherded them through the gates and beyond the reach of their humanoid tormentors, returning them to their lands and homes. This covert freedom brigade enjoyed remarkable success early on, since the servants of the Slave Lords were often lax in their vigilance and sloppy in their efforts to prevent loss of the “merchandise.” After one too many shipments never made its destination, the humanoids stepped up their security and the normal channels of escape from Highport closed to Mikaro and his team. He cannot risk exposure by smuggling the freed slaves through the gates as merchandise any longer, since shipments of goods are now regularly stopped and checked. No longer able to free the slaves in that manner, Mikaro began hiding his charges in an abandoned villa in a particularly rundown part of the town. Although they are safe for the moment, their numbers have grown unmanageable, and the priest fears it is only a matter of time before someone slips up and brings slavers to their doorstep. Ever more desperate to find a new means of escape from Highport, Mikaro has started work on a plan that is both daring and dangerous. He intends to use a series of old sewers coupled with natural caverns running beneath the town as an escape route to the sea beyond the walls. But he needs someone to clear out the creatures and pitfalls he knows lie within. Pgs. 2-27

A shadow from the past, the Ghost Tower of Inverness has loomed ever larger in the mind of the great Seer of Urnst, Now he has convinced the Duke that an expedition should be organized to go to the ancient keep and recover its greatest treasure — the fabled Soul Gem. TSR 9038

Are you ready for some HACK 'N' SLASH action? Do you yearn to unveil the hidden mysteries of the DWARVES? Are you thirsty for some UNEXPECTED encounters? The long lost Dwarven Kindgom of Gleodemar holds a relic of the past, Svarogs's Anvil, a magical artifact that can boost weapon production. The Heroes are sent to reclaim it, but the ancient fort is not empty and the new denizens have settled for good and do not seem keen on sharing any treasures. Will the Heroes manage to overtake them in a direct (and bloody) confrontation, or will the try to slip through the shadows to reach their goal? Maybe they will be captured and the "cavalry" will have to save them? In this adventure anything goes and it takes only one mistake to unravel the Heroes' careful plans and make them prisoners of the Keep. In this slightly challenging 5e hack 'n' slash adventure for 4th level PCs you will find: - a detailed story behind the Dwarven Kingdom of Gleodemar - a powerful dwarven artifact - a back-up NPC party, in case the heroes require a "deus ex machina" intervention - an optional ethical dilemma, to spice things up - both DM and player-safe maps - 3 boss monsters that can be used as future antagonists - non-stop action and suspense until the last minute of this 3-act mad rash and if all of that still does not sound fun, there's ALSO a race against time before the curtain falls. Download away! (and don't forget to share your feedback, we'd love to hear it!)
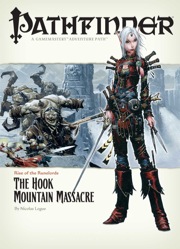
Them Ogres Ain't Right... The Rise of the Runelords Adventure Path continues! The notorious Hook Mountain ogres, known for their violent and savage ways, have slaughtered the soldiers of Fort Rannick. The few surviving rangers need heroes to help them retake this key fortification before the ogres use it as a staging ground for further assaults on the region. Yet why have the ogres chosen now to launch this sudden attack? What sinister force grows in the surrounding wilderness, and what ties to the mysterious Sihedron Rune do the ogres of Hook Mountain hide? Are the rumors of an army of giants massing for war true?

While you search for treasure, others search for you. A treasure vault without guards or traps - can it be true? Pgs. 16-30
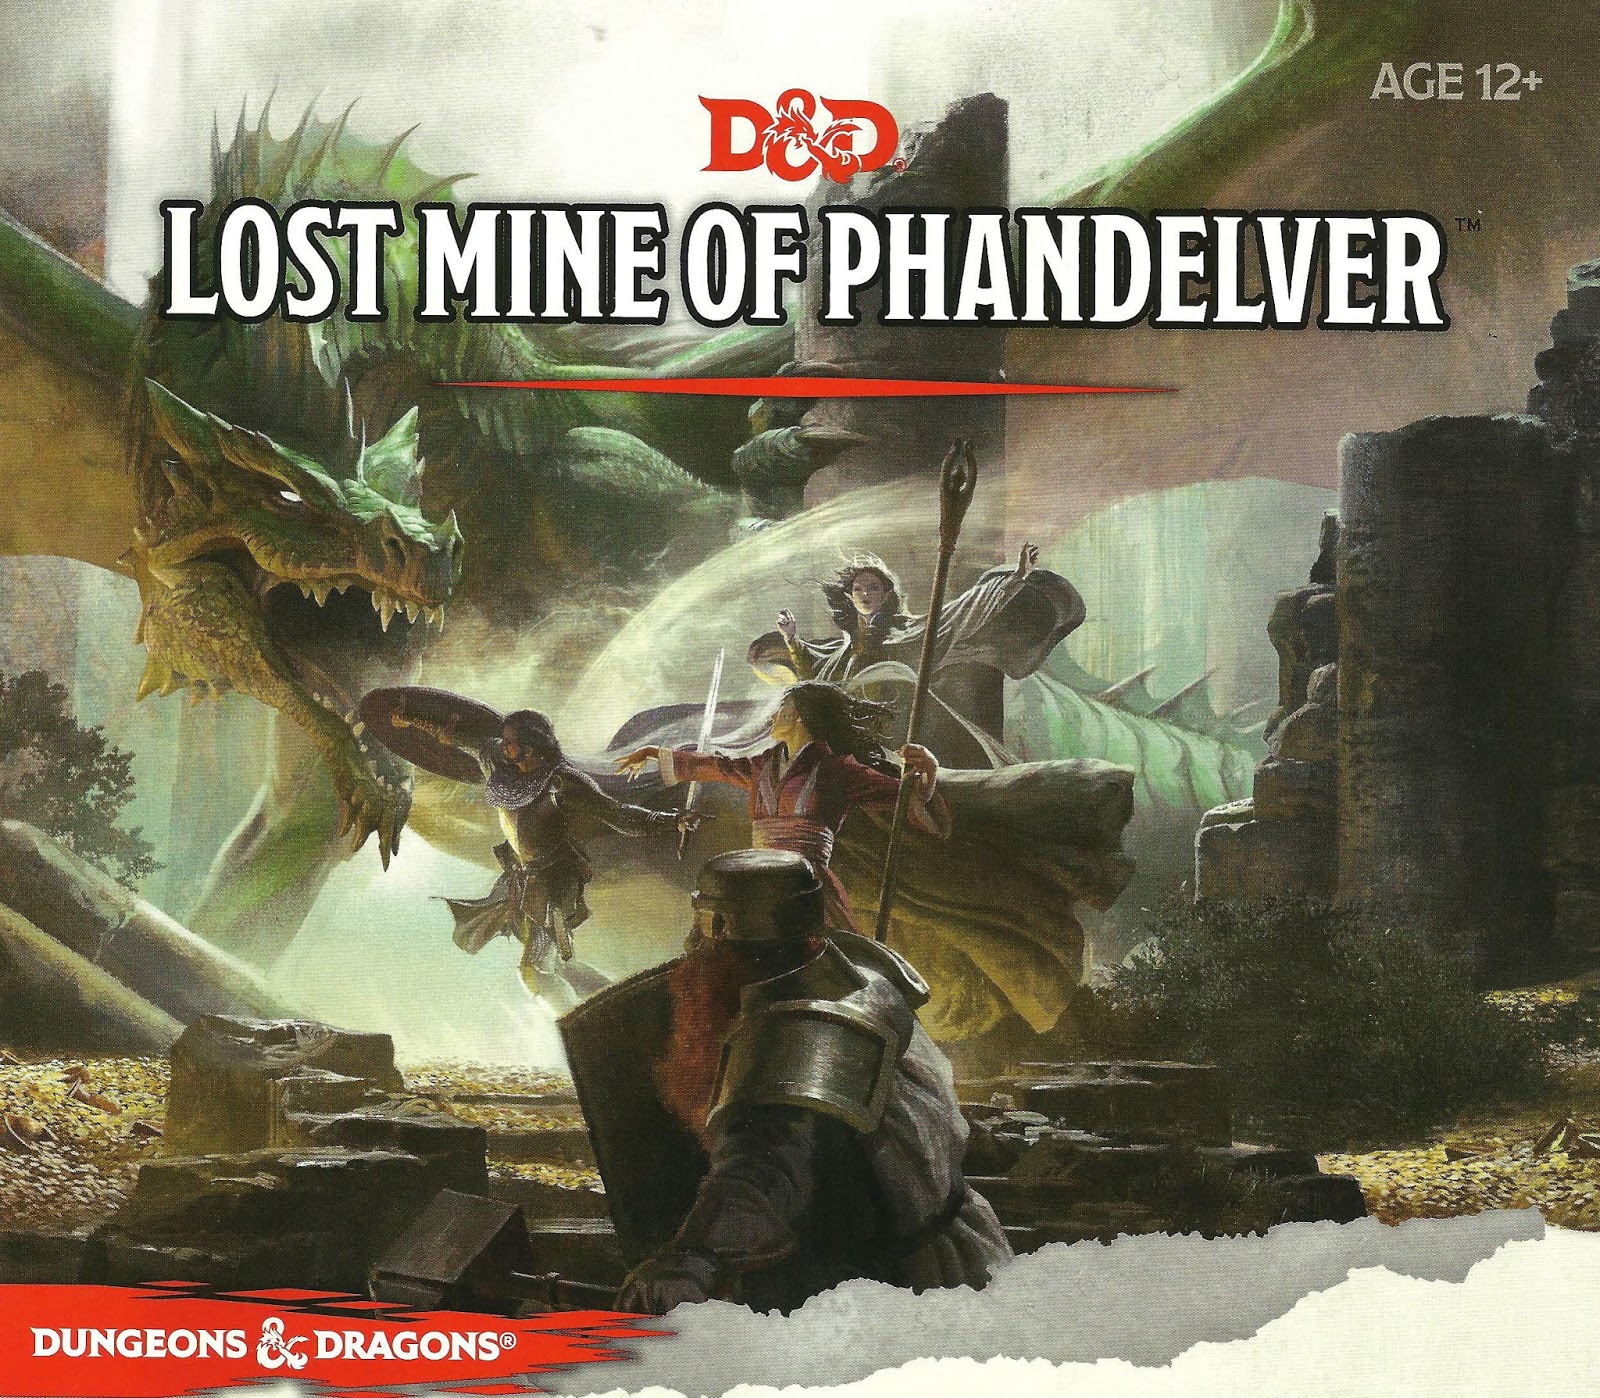
"More than five hundred years ago, clans of dwarves and gnomes made an agreement known as the Phandelver’s Pact, by which they would share a rich mine in a wondrous cavern known as Wave Echo Cave. In addition to its mineral wealth, the mine contained great magical power. Human spellcasters allied themselves with the dwarves and gnomes to channel and bind that energy into a great forge (called the Forge of Spells), where magic items could be crafted. Times were good, and the nearby human town of Phandalin (pronounced fan-duh-lin) prospered as well. But then disaster struck when orcs swept through the North and laid waste to all in their path. A powerful force of orcs reinforced by evil mercenary wizards attacked wave echo cave to seize its riches and magic treasures. Human wizards fought alongside their dwarf and gnome allies to defend the Forge of Spells, and the ensuing spell battle destroyed much of the cavern. Few survived the cave-ins and tremors, and the location of Wave Echo Cave was lost. For centuries, rumours of buried riches have attracted treasure seekers and opportunists to the area around Phandalin, but no one has ever succeeded in locating the lost mine. In recent years, people have resettled the area. Phandalin is now a rough-and-tumble frontier town. More important, the Rockseeker brothers - a trio of dwarves - have discovered the entrance to Wave Echo Cave, and they intend to reopen the mines. Unfortunately for the Rockseekers, they are not the only ones interested in Wave Echo Cave. A mysterious villain known as the Black Spider controls a network of bandit gangs and goblin tribes in the area, and his agents have followed the Rockseekers to their prize. Now the Black Spider wants Wave Echo Cave for himself, and he is taking steps to make sure no one else knows where it is." Extra Info from AL.com users: by @marcellarius. "There are a variety of locations in this adventure: the town of Phandalin, a gang hideout, a ruined keep in the forest, a destroyed village, and Wave Echo Cave (a dungeon crawl). The adventure is written in a sandbox style and relies on the players to choose their path. Phandalin offers several side-quests which could serve as hooks for continuing adventures. The premade characters have ties in their backgrounds to NPCs and locations. If you're not using these you'll need to consider other ways to introduce key NPCs."
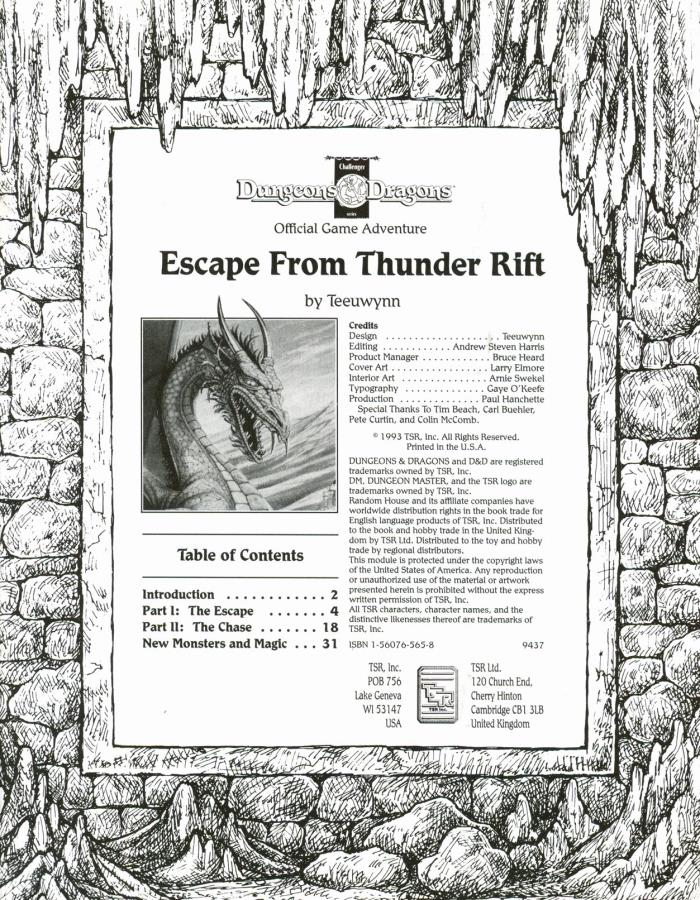
An emissary from the dwarven community of Hearth-Home approaches the player characters, beseeching them to aid the dwarves in finding a powerful mage who might bring disaster upon not only their mountain fortress, but all of the Thunder Rift! Escape from Thunder Rift adventure leads the heroes into a dark dungeon where they may discover a gate between the valley of Thunder Rift and the World of Mystara. Packaged with a DM screen. TSR 9437

An expedition of dwarf warriors from Citadel Adbar finds itself isolated and besieged by Ice Spire ogres and their allies. They require immediate relief or they risk being destroyed to a dwarf. Seer has directed you to their location in the hopes that you can rescue the dwarves and save their precious cargo, a tablet bearing secrets of ancient rune magic.

Desperately needed supplies have failed to arrive at the suffering frontier settlement of Ravendale. Rumors are flying that the supply wagon must have fallen afoul of the legendary troll of Stonebottom bridge. The townsfolk are in desperate need of heroes to reclaim their supplies or the town won't survive the encroaching winter! A 2-4 hour adventure for four to six players of 1st or 2nd level characters

The heroes arrive at the eponymous Keep on the Borderlands, a fortress on the edge of civilization built to stave off the chaos and evil of the wilderness. Using it as a home base, a party can make forays into the surrounding wilderness, encountering monster and marauder alike. The centerpiece of the adventure is certainly the CAVES OF CHAOS, a network of tunnels and caverns found in the walls of a nearby but isolated ravine. It is here that hordes of evil humanoids have made their home. Through combat and negotiation, the players can try to explore and map out these caves, perhaps with the aim of accumulating valuable treasure or even cleansing the land of evil creatures. However, even the Caves are not all they seem. Beyond the goblins and kobolds lurk dark horrors: cults dedicated to fiendish chaos and a Minotaur's enchanted labyrinth await the unprepared adventurer. But for the hero who is brave, clever, and fortunate in equal and sufficient measure, great treasures and glory await in the Caves of Chaos that lie beyond the Keep on the Borderlands! TSR 9034

The mining town of Glister has a problem. The latest caravan only arrived with a part of its supplies. Orcs waylaid them, took much needed goods, and are now making demands that the town return an artifact that is theirs, but the town is unfamiliar with. Help track down information about this artifact and possibly defend the city from an orc invasion! A 4-hour Adventure for 1st-4th Level Characters Part 2 of Kossuth's Kiss

This deluxe adventure takes heroes into the ruins of Gardmore Abbey, a monastery that was once the base of a militant order of paladins devoted to Bahamut. According to legend, the paladins brought a dark artifact back from a far crusade and stored it in their abbey for safekeeping, and evil forces gathered to assault the abbey and take it back. What the legends don’t tell is that this artifact was actually the Deck of Many Things, a force of pure Chaos. This adventure brings characters into the extensive dungeons beneath the ruins - dungeons that are warped and twisted with the raw forces of Chaos surrounding the cards of the deck.

The End of the World Is at Hand! A hideous death cult has seized control of an ancient artifact-monument known as Tovag Baragu. The power behind the cult is the Old One himself, Iuz the Evil, demonic master of an empire. He's on an all-or-nothing quest for supremacy over the world—and the heavens beyond. To stop him, heroes must face horrors never dreamed of, journeying to a shadowed city where Death rules and the living cower. Here, Iuz will achieve his mad dream by destroying the imprisoned master of that alien citadel: Vecna, the mightiest lich, an immortal demigod. Two items exist with the power to stop Iuz—the Eye and the Hand of Vecna—but using them carries fantastic risks. Not even the gods know what will be unleashed when these items are fully activated. Die Vecna Die! takes the heroes from the Greyhawk campaign to the demiplane of Ravenloft and then to the Planescape city of Sigil. However, none of the material from those settings is required for play. TSR 11662

The PCs answer a call for heroes by the Church of Traladara, asking for help in finding an ancient relic- the Shield of Halav. This is located in a lost temple, and the PCs must locate this temple, and brave its dangers to recover the shield before two competing teams from other churches find it first. Part one involves setting up the adventure, doing research, following clues, and discovering the site of the lost temple. Part two; once the site is known (ruins under a modern town) the heroes must travel there and find the entrance. Part three is braving the lost temple, filled with traps, puzzles, and other dangers, to find the missing shield, and then culminating in a climatic showdown with the completing teams.

Strange tales of a mad queen and a hoard of legendary treasure have driven adventurers into the jungles of the great trade road between Tiefon and Nextyaria for a generation, but now new information has come to light. A travelling bard has uncovered certain keys to the location of the lost queen's mysterious volcanic home, and the secret that may thwart her seeing immortality and invulnerability. Once again, the Barrens takes center stage as characters must via for a chance to grow rich and expand their legend among the heroes of the Nameless Realms! The Infamous Black Label series continues with this second part to the Barrens trilogy as characters must dodge the marauding forces of bandit lords, discover a wayward bard, and then journey to the caldera fortress of the Hall of the Spider Queen. What secrets does that dark sanctuary hold? Only time, dice, and the comradery of the gaming table will tell. This adventure is formatted to both 1E & 5E gaming rules.

It's all over (and literally so) after midnight. A mission with an unforgiving deadline. The characters must remove the magically-infused remains of a dead wizard and his medallion from a crypt. Pgs. 10-23

Part 1 of an Expert-level quest into a hostile wilderness. This adventure takes place in the Known World of the D&D game, as outlined throughout the D&D game rule books and modules. The DM may find it useful to consult the Companion and Masters Sets, as well as most of the X-series of Expert Set modules. D&D Expert Set module X9, The Savage Coast, would be especially helpful, as Tortles of the Purple Sage could easily serve and continue that module's direction and plot like, adding a previously undescribed area (the Great Northway) to the Known World. The DM may also place the areas and events of this adventure within an existing campaign setting, as long as the geographical areas of the campaign match those set forth here. Pgs. 40-62

Hunt for a Legendary Treasure! Deep beneath a peaceful valley lies the vault of the legendary drow adventurer Larin Karr. Rumor has it Larin Karr has gone, but his vast treasure acquired from years of plundering hordes in the Underdark still remains. Can you find and loot the impenetrable vault? The Vault of Larin Karr details Quail Valley, its residents and monsters, and the twisting tunnels of the Underdark that stretch beneath it. The Vault of Larin Karr takes PCs from 4th to 9th level, during which time they fight dragons, find a missing statue for a band of renegade elves, save the village of Pembrose from scheming hobgoblins, and explore the Underdark and its many dungeons - including the legendary Vault itself! Contains new monsters and magic items! 2003 ENnie Award Silver Winner: Best Adventure

Faced with an unusual alliance of giants raiding the countryside, the party must venture into the steading of hill giant chief Nosnra and uncover maps to the locations of the other giant strongholds. “Steading of the Hill Giant Chief ” can be run as a stand-alone adventure, or you can play it as the first part of a four-part series that continues with “Warrens of the Stone Giant Thane” (Dungeon 198), “Glacial Rift of the Frost Giant Jarl” (Dungeon 199), and “Hall of the Fire Giant King” (Dungeon 200). The adventure is part of the Against the Giants series originally by Gary Gygax, hence the writing credit.