
Restore an Abandoned Temple Enter the catacombs near the desecrated Temple of Muir, Goddess of Paladins, and search for the lost tomb of Abysthor. Will your party be able to cleanse the evil that now inhabits these once-sacred halls, and recover the Stone of Tircople? Can your characters survive the traps of an undead sorcerer? Will your players discover the chamber of Living Rock and the secret power it holds? Adventure awaits! Gold and Glory! A fantasy adventure published for the D20 system, The Tomb of Abysthor is the first module in Necromancer Games Dungeon series and can be played as a stand-alone story or in conjunction with The Crucible of Freya and the forthcoming city supplement Bards Gate. What secrets lie hidden in the tomb of Abysthor?

The characters have escaped the maze only to find themselves in strange dimensions of fire, stone and ice, and a strange idyllic hunting ground where all is not as it appears.

The final fate of Roslof Keep and the Company of the Ivory Scimitar hangs in the balance. With five levels conquered, the party must finally face the ultimate challenge of the sixth and final floor. Can the stalward adventures overcome the last defense of the Infernal Machine? Will Roslof Keep be freed from the violet corruption? What unforeseen plot twists still await those willing to brave the challenges presented in The Realms of Madness and Despair? This adventure is formatted to both 1E & 5E gaming rules. Also available in PDF.

The wizard Abracadamus hid the Forever Stone in the darkest depths of a failing mine, coerced monsters into serving as guardians, and rigged the dungeon with traps galore. Then he died, as all good wizards do. Many heroes have fallen prey to the Forever Stone’s lure of immortality. To date, only one stalwart band has plunged into the Mines of Madness and lived to tell the tale. You think you’re better than them? You think you got what it takes to grab life by the stones and conquer the dungeon that won the 2012 Gygaxian Award* for Bonecrushing Awesomeness? We seriously doubt it, but go ahead . . . prove us wrong! Mines of Madness is a Very Special D&D® Next Adventure written for PAX East 2013 and designed for four 3rd-level characters.

The heroes arrive at the eponymous Keep on the Borderlands, a fortress on the edge of civilization built to stave off the chaos and evil of the wilderness. Using it as a home base, a party can make forays into the surrounding wilderness, encountering monster and marauder alike. The centerpiece of the adventure is certainly the CAVES OF CHAOS, a network of tunnels and caverns found in the walls of a nearby but isolated ravine. It is here that hordes of evil humanoids have made their home. Through combat and negotiation, the players can try to explore and map out these caves, perhaps with the aim of accumulating valuable treasure or even cleansing the land of evil creatures. However, even the Caves are not all they seem. Beyond the goblins and kobolds lurk dark horrors: cults dedicated to fiendish chaos and a Minotaur's enchanted labyrinth await the unprepared adventurer. But for the hero who is brave, clever, and fortunate in equal and sufficient measure, great treasures and glory await in the Caves of Chaos that lie beyond the Keep on the Borderlands! TSR 9034

A short adventuring interlude focusing more on encountering something unusual, rather than fighting anything. The PCs come across a tree and a pool inhabited by elves. The nearby brook fizzes with "energy gas" that grants a temporary HP boost. The players can explore, but there are no real "answers" just a weird thing they found on the way from somewhere to somewhere else. Rated for between 1 and 4 characters, this could easily be run for solo play, but it is short and a little weird. There are roleplaying opportunities with the elves, but there's scant data here, the elves are flighty and capricious. Pgs. 38-41

This deluxe adventure takes heroes into the ruins of Gardmore Abbey, a monastery that was once the base of a militant order of paladins devoted to Bahamut. According to legend, the paladins brought a dark artifact back from a far crusade and stored it in their abbey for safekeeping, and evil forces gathered to assault the abbey and take it back. What the legends don’t tell is that this artifact was actually the Deck of Many Things, a force of pure Chaos. This adventure brings characters into the extensive dungeons beneath the ruins - dungeons that are warped and twisted with the raw forces of Chaos surrounding the cards of the deck.

This was supposed to be a simple job! In the small town of Haanex on Reanaaria Bay, the wizard Veoden assembles the PCs to do a simple job: find the remnants of a meteor said to be made of the rare substance mithral. First they must find a map that local rumor tells is guarded by the spirits of the dead. Upon recovering the map and locating the crater, they uncover a plot to create a powerful magical item called the Coin of Power. This artifact is a tool for wickedness and the players soon find themselves on a quest to learn the means to destroy this evil item and its insidious master before she destroys them. Complicating matters is the fact that the one man who can help them was lost during an expedition to the Reelio Jungle months ago and is yet to return. Will the PCs be able to survive the rigors of the jungle and solve the riddle of the tribesmen who live there? The lives of innocents might depend on it! This accessory provides characters with an elaborate storyline and a chance for many varied types of adventure. You will take your PCs from the quiet village of Haanex in northern Reanaaria Bay to the Vry Naasu Headlands, the City-State of Zoa and finally the forlorn Reelio Jungle. The Root of All Evil fantasy game supplement is set in the popular Kingdoms of Kalamar Dungeons & Dragons campaign setting but can be adapated for use in any setting! This module can be used by itself, or as Part One of the Coin of Power trilogy (see also Forging Darkness and Coin’s End).

The mine has been known as Tessount’s Folly for years, due to it producing nothing of value. Now Valmour, the youngest son of the mine’s late owner, has inherited the mine...and found something he should have left buried. Pgs. 56-81

Freeport's in crisis, as war breaks out on the high seas and orcs riot in the streets. A map promises the biggest haul of booty in history, but nothing is as it seems. Buried with that treasure is a terrifying evil Freeport thought banished forever. Black Sails Over Freeport, the first mega-adventure for the award-winning pirate city, is filled with enough swashbuckling challenges to test the mettle of any band of heroes. Its 256 pages are packed with action, intrigue, and danger, delivered with the style and professionalism you've come to expect from Green Ronin. Black Sails are on the horizon. Do you have what it takes to face them?
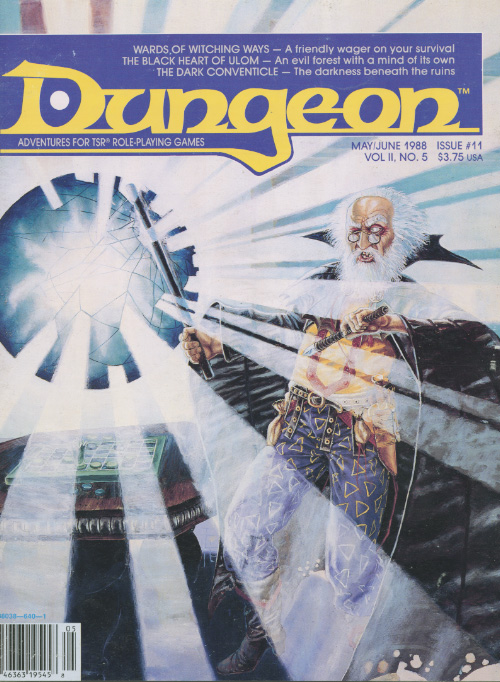
Surviving the shipwreck is easy; living through the wizardly bet afterward is not. Their game could mean your lives. A storm caused the PCs' vessel to sink and is now forcing them to seek shelter in the keep on the remote isle. Their goal is to locate a boat or some other means of transportation to return to the mainland after the storm has passed. But first, they must survive the tests and traps the island's inhabitants have set for them. Pgs. 45-64

Important: The adventure is 1e but it has monster conversion notes for D&D 4th edition The town of Highport, once a human community overlooking Wooly Bay from its perch on the northern coast of the Pomarj, fell prey to hordes of humanoids swarming out of the jungle-covered hills surrounding the settlement. Though the orcs, goblins, kobolds, ogres, and gnolls razed much of the place in their ferocious rampages, the smoldering ruins they left behind soon became a new kind of community, a place of trade between the humanoid “locals” and the unsavory human traders who have no compunction about doing business with them. Slaves are a commodity in ready supply in Highport’s market, since many pirates raid up and down the coast of the bay, putting fishing villages to the torch and filling their holds with captured refugees. Slavery has become a thriving business in the town, and rumors abound of a cartel of Slave Lords who run things from behind the scenes, filling their coffers in secret from the buying and selling of human chattel. The trade has become so prolific that the good folk to the north have grown tired of these depredations and decided to fight back. Forces of righteousness and honor have recently descended upon Highport, some openly and others in secret, in various attempts to destroy the machinations of the Slave Lords and abolish the abominable enterprise that has taken far too many loved ones from home and hearth. One such doughty servant of goodness is Mikaro Valasteen, a cleric of Trithereon. Mikaro slipped unnoticed past the crumbling walls of Highport with a single mission: to rescue and transport as many slaves to their freedom as possible. Mikaro and a handful of faithful assistants located a number of escaped slaves—as well as rescued a few more not sufficiently restrained and guarded—and shepherded them through the gates and beyond the reach of their humanoid tormentors, returning them to their lands and homes. This covert freedom brigade enjoyed remarkable success early on, since the servants of the Slave Lords were often lax in their vigilance and sloppy in their efforts to prevent loss of the “merchandise.” After one too many shipments never made its destination, the humanoids stepped up their security and the normal channels of escape from Highport closed to Mikaro and his team. He cannot risk exposure by smuggling the freed slaves through the gates as merchandise any longer, since shipments of goods are now regularly stopped and checked. No longer able to free the slaves in that manner, Mikaro began hiding his charges in an abandoned villa in a particularly rundown part of the town. Although they are safe for the moment, their numbers have grown unmanageable, and the priest fears it is only a matter of time before someone slips up and brings slavers to their doorstep. Ever more desperate to find a new means of escape from Highport, Mikaro has started work on a plan that is both daring and dangerous. He intends to use a series of old sewers coupled with natural caverns running beneath the town as an escape route to the sea beyond the walls. But he needs someone to clear out the creatures and pitfalls he knows lie within. Pgs. 2-27
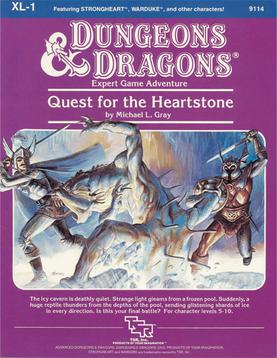
The King is dead! And the queen is in trouble. She has chosen you to find the fabled heartstone, which is buried somewhere deep in the Mountains of Ice. Is the gem I the hands of the corrupt Master Thief? Has he harnessed its powers for his own vile purposes? Or does it lie unguarded in the frozen ranges to the north, which teem with horrible creatures? This is your kind of quest! Quest for the Heartstone is a combined wilderness/dungeon adventure designed to be compatible with the Advanced Dungeons & Dragons Action Toys from LJN Toys, Ltd. and the Advanced Dungeons & Dragons Fantasy Adventure Figures from TSR, Inc. The adventure also includes complete maps, new monsters and players' illustrations. Will the heartstone be the key to peace in the kingdom? By her majesty's request... it's up to you to find out! TSR 9114
An elder warlock from the goblinoid swamp village of Urzin has been kidnapped by soldiers of the Dwendallion Empire. Now the machinations of an evil imperial inquisitor might unleash an evil that could threaten the garrison at Fort Venture and the goblinoids of Urzin alike.
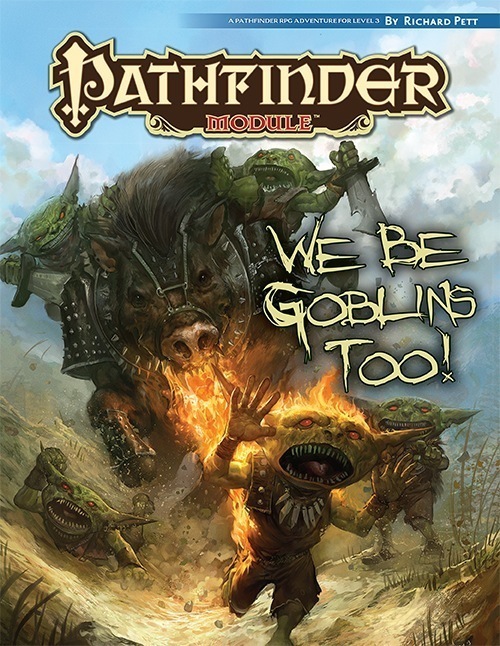
The Licktoads, once the great and fierce goblin tribe in Brinestump Marsh, were defeated by human adventurers! All that remains of the tribe are its four goblin "heroes". Homeless and bored, they left their swampy homeland to join the neighboring goblin tribe, the Birdcrunchers. The good news is that the Birdcrunchers are willing to let the goblin heroes join their tribe. The better news is that the Birdcrunchers have heard of these four, and want one of them to become their new chieftain. The bad news is that before the goblins can join, they'll need to endure a series of dangerous and humiliating tests. Very dangerous. Very humiliating. The worse news is that lately Birdcruncher chieftains have had really short lifespans—they're being killed by the pet fire-breathing boar of a local ogre who wants the Birdcruncher land as his own. Part 2 of the We Be Goblins series.

Delve into the depths of the tomb of the long forgotten elven king to bring the eternal peace onto its disturbed dwellers. A 4-hour adventure for two 4th level characters. Small Party Adventure: Though the party size of 3–5 characters is considered optimal in D&D, there are times when you can only gather one or two players at most. This adventure is designed exactly for such occasions.

Written in celebration of Swords and Wizardry Appreciation Day 2017, Return to Fel’Valashar picks up where Dungeons of Fel’Valashar left off. In this book is a collection of mini dungeon adventures with a small region called Fel’Valashar that they take place within. Each of these adventures is written in such a way that they don’t have any ties to each other or to Fel’Valashar. This means you can easily drop them into your own world with no fuss. Includes: Details of the south-western region of Fel’Valashar. Four mini dungeon adventures. New monsters. New magic items.

The party is caught between warring goblin and kobold gangs, occupying an abandoned dwarven mine. Will the heroes ally with one of the sides in this quarrel, try to make peace between old enemies, attempt to eliminate both sides, or achieve their goal stealthily and unnoticed? The choice is completely theirs! Small Party Adventure: Though the party size of 3–5 characters is considered optimal in D&D, there are times when you can only gather one or two players at most. This adventure is designed exactly for such occasions.

"Lost Halls of Everforge" is a flame dragon wyrmling lair suitable for four or five 3rd level characters. This adventure can be completed in one session.

*THIS IS A D&D NEXT/5E PLAYTEST ADVENTURE* Imani, a Turmishan wizard and former adventurer, seeks the aid of heroes to infiltrate Dretchroyaster’s lair and recover the Diamond Staff of Chomylla—the key to powerful magic and wisdom locked away for thousands of years. In addition to his own sagely interest in the lore of lost Uvaeren, Imani recognizes the dangers of such powerful magic falling into evil hands. The dracolich has secured the staff in his lair’s cen- tral chamber, using ancient wards of protection that can be bypassed only by four artifact-idols once belong- ing to a cult of Bhaal. Each group of adventurers enters the dungeon through a different section of the dun- geon—a forgotten temple of Bhaal, a vast underground lake, a troglodyte village, or Dretchroyaster’s vaults. Dretchroyaster’s lair is no simple set of caverns and ancient ruins. It sits atop a source of great power and energy, which the dracolich and his Cult of the Dragon allies hope to use to unlock the secrets of the staff. Only by undertaking a unified assault against Dretchroyas- ter’s lair can the adventurers hope to recover the Diamond Staff and survive the dracolich’s fury. The adventurers must make their way through the lair and recover the Bhaalite idols that will help unlock the Diamond Staff, all the while dealing with the lair’s creatures and avoiding the dracolich as he pur- sues intruders. Entering the Chamber of the Diamond Staff, the heroes must overcome its magical wards and claim the staff before being slain by the dracolich and his servants.