In what became known as the Age of Madness, an astral lich calling himself the Crimson Hand descended from the sea of stars, setting his fell gaze upon Gaea. Her red moon he made both his temple and his phylactery, and from there he sought to enslave those who would be ruled and devour those who would not. The Ancients of the four corners of Gaea united their knowledge against this threat, constructing a colossal golem, and inscribing the four POWER WORDS upon four scrolls. These scrolls they fed to the colossus, who ascended to the crimson moon in an instant. The sages of the realm watched as the flashes of battle signaled in the night sky, ending as the crimson moon itself split in half. The lich and the colossus were destroyed, and the Age of Madness was ended. Millennia have passed, and now a new threat rises from the netherworld. The four POWER WORDS have been forgotten, lost among the shattered remnants of the moon. The sages have once again united what remains of their power, this time to teleport a paltry handful of crusaders to retrieve the lost scrolls before the world is doomed.
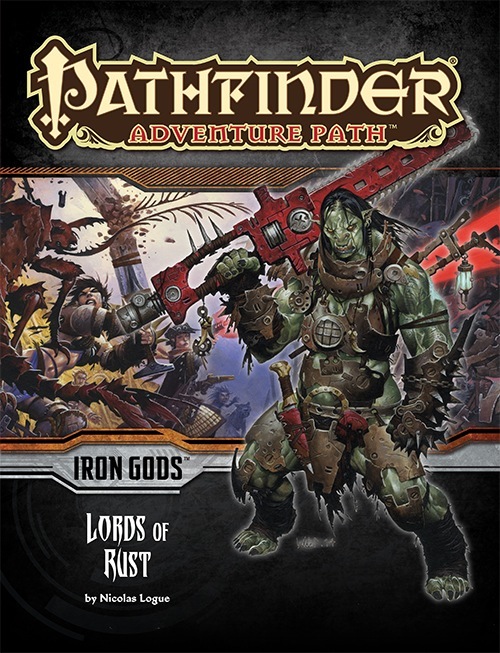
The heroes of the town of Torch follow a trail of clues to the sprawling junkyard known as Scrapwall, where bands of desperate and violent brigands vie for control of the technological remnants found within. The Lords of Rust dominate Scrapwall, and their swiftly rising power threatens more than just the town of Torch, for this gang has the support of one of the terrifying Gods of Numeria. What slumbers fitfully beneath the wreckage of Scrapwall could catapult the Lords of Rust into a new level of power if they're not stopped!

The first part of the Dreams of Red Wizards adventure path originally published for the D&D NEXT Playtest. Following the events Ghosts of Dragonspear Castle, a new set of adventurer's will see some of the repercussions of that adventure. This adventure is intended to be continued in the Dead in Thay adventure (Note that they Dead in Thay 5e adventure featured in Tales from the Yawning Portal is missing a significant portion of interlude that links Scourge of the Sword Coast to the events within the Doomvault). The adventurers arrive when Daggerford is crowded with refugees from outlying lands. Goblins, gnolls, and orcs have been raiding the countryside. Now, food is scarce and tension is high. Blame for a theft has fallen on the refugees, and the Duke of Daggerford has forbidden more of the displaced from coming into town. After overcoming difficulties to enter Daggerford, the characters learn more about the raids. As they fight against the humanoids and delve deeper in the darkness that encircles Daggerford, the characters learn of Bloodgate Keep. After a final fiendish ambush, they’re ready to confront the real threat to the area. DM Note: This adventure points the adventurers strongly towards Bloodgate Keep but that location does not appear until the Dead in Thay adventure; at several points the party may feel drawn to explore that location rather than continue their investigations around Daggerford. However, since Bloodgate Keep is only eluded to as a source of great evil power, it can serve to easily segue to an entirely different adventure path. As a NEXT Playtest adventure, Scourge of the Sword Coast uses milestone leveling and the included stat blocks for creatures do not necessarily match or even appear in the 5e Monster Manual, nor do they have XP values or challenge ratings. In some places it will reference rules used in the Playtest but dropped or changed in the 5e release, these are unlikely to substantially impact gampley with 5e rules.

For thousands of years a great and terrible secret has lain hidden in the depths of the Sea of Silt. In the heart of this vast dust basin, an endless storm of ash and shrieking wind guards the deadliest concentration of evil and power found on the dying world of Athas - The Valley of Dust and Fire Valley of Dust and Fire more than doubles the known portions of the world of Athas. Intrepid explorers will discover new wonders and perils within the deadly Sea of Silt, from the beautiful island of Shault to the savage Mountains of the Sun. New rules for traveling the dust basin and surviving its many dangers are included. With luck and determination, a skillful and well-prepared party just might pass through the Great Ash Storm and enter the Valley of Silt and Fire. But this realm of shattered badlands and awful monsters is so deadly that only one man has ever reached the valley and returned to tell the tale. TSR 2413
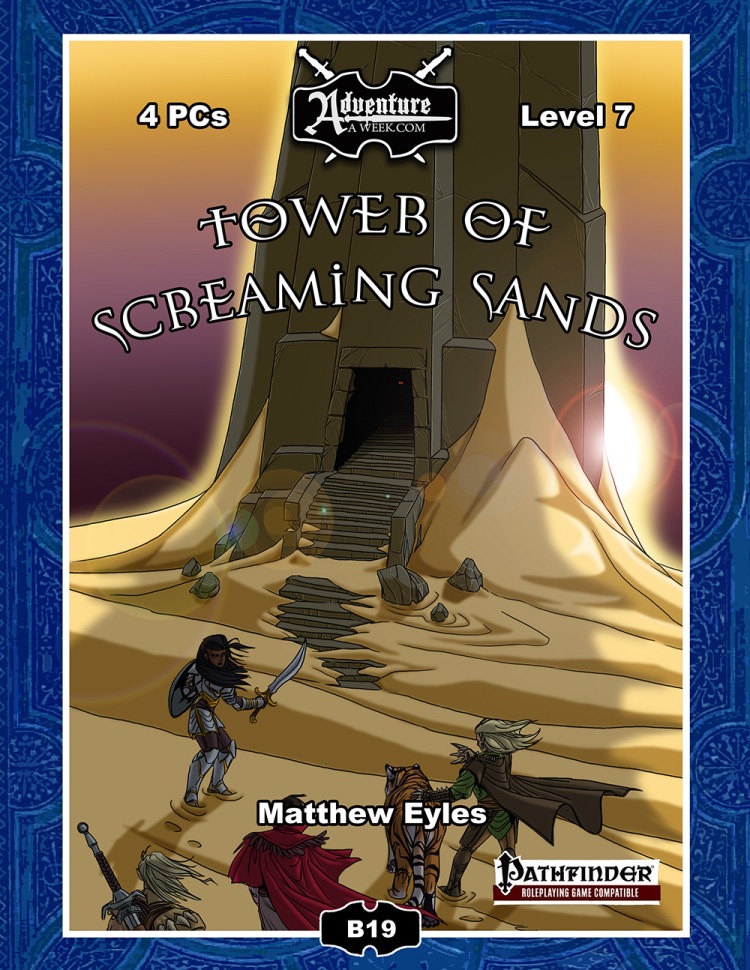
Deep within the blasted desert wastes a mysterious black tower has been sighted. The structure is not marked on any known map and has not been seen in this location by travellers in the region, yet there it stands. The adventurers set out to explore this ancient, isolated tower that appears ripe for the plundering. Within they face a gauntlet of insidious traps and supernatural horrors. The deeper the adventurers delve, the more secrets of the tower’s origins they uncover. The tower’s sinister creator does not rest easy in his arid grave – the adventurers must face him if they are to survive the Tower of Screaming Sands. Also included in “Tower of Screaming Sands”: Five deadly new traps: The Chamber of Ten Thousand Teeth, The God’s Grasp, Chamber of Flooding Sand, Hall of Arcing Blades and Descending Stone Block. A new monster – the scorpion swarm. Rules for whirlwinds, a new magical hazard GM tips for running overland travel.

This deluxe adventure takes heroes into the ruins of Gardmore Abbey, a monastery that was once the base of a militant order of paladins devoted to Bahamut. According to legend, the paladins brought a dark artifact back from a far crusade and stored it in their abbey for safekeeping, and evil forces gathered to assault the abbey and take it back. What the legends don’t tell is that this artifact was actually the Deck of Many Things, a force of pure Chaos. This adventure brings characters into the extensive dungeons beneath the ruins - dungeons that are warped and twisted with the raw forces of Chaos surrounding the cards of the deck.

The city is gripped in fear! The Ripper has returned after a 125-year absence and is once again carving a trail of blood through the slums of Millers Court. Also returned is the ghost of Mari Kell, his last victim from more than a century ago, and she haunts the streets where she was killed. The city watch is at a loss to solve this supernatural mystery, much less apprehend the Ripper himself. All the clues point back to the hovel where Mari Kell was slain long ago. If the heroes are brave enough to enter, will they find the Ripper himself there?

Disturbing shadows have grown long over the northern reaches of The Land of Song. The fierce people who once fished the chilly fjords and hunted in the evergreen peaks now huddle in their villages. An evil is abroad in the land. The heroes are charged by Jarl Yngvar with traveling to the Valley of the Sleeping Jarls, an old tomb in the hills where dead kings are laid to rest, to discover the source of the malevolence bearing down upon the land and with eradicating it. Who can say what evil lurks amid the towering peaks and shadowed fjords? For decades this malevolent being plotted his vengeance upon Hjalmar’s heirs, for the jarl had gone the way of all mortals. Taking for himself the name Mogens (“powerful”), this evil spirit, now a self-styled dark lord, gathered wicked cronies and servants to itself and came to the Valley of the Sleeping Jarls. There, he has spent nearly two decades corrupting and desecrating the sacred resting place, reshaping the hollowed tombs into a blasphemous temple to his infernal lord.

In this adventure, the PCs discover that not all souls rest easy, particularly those spirited away to Nightwyrm Fortress. To learn the truth, players must pierce death's veil itself and enter the Shadowfell, where sinister echoes of life wing through eternal gloom. This adventure can be run as a stand-alone adventure or as Part Three of a three-part series of adventures (starting with P1 King of the Trollhaunt Warrens(TM) and P2 Demon Queen's Enclave(TM)) that spans 10 levels of gameplay.

The Legend of the Black Monastery Two centuries have passed since the terrible events associated with the hideous cult known as the Black Brotherhood. Only scholars and story-tellers remember now how the kingdom was nearly laid to waste and the Black Monastery rose to grandeur and fell into haunted ruins. The Brothers first appeared as an order of benevolent priests and humble monks in black robes who followed a creed of kindness to the poor and service to the kingdom. Their rules called for humility and self denial. Other religious orders had no quarrel with their theology or their behavior. Their ranks grew as many commoners and nobles were drawn to the order by its good reputation. The first headquarters for the order was a campsite, located in a forest near the edge of the realm. The Brothers said that their poverty and dedication to service allowed them no resources for more grand accommodations. Members of the Black Brotherhood built chapels in caves or constructed small temples on common land near villages. They said that these rustic shrines allowed them to be near the people they served. Services held by the Brothers at these locations attracted large numbers of common people, who supported the Black Brotherhood with alms. Within 50 years of their first appearance, the Black Brotherhood had a number of larger temples and abbeys around the kingdom. Wealthy patrons endowed them with lands and buildings in order to buy favor and further the work of the Brothers. The lands they gained were slowly expanded as the order’s influence grew. Many merchants willed part of their fortunes to the Black Brotherhood, allowing the order to expand their work even further. The Brothers became bankers, loaning money and becoming partners in trade throughout the kingdom. Within 200 years of their founding, the order was wealthy and influential, with chapters throughout the kingdom and spreading into nearby realms. With their order well-established, the Black Brotherhood received royal permission to build a grand monastery in the hill country north of the kingdom’s center. Their abbot, a cousin of the king, asked for the royal grant of a specific hilltop called the Hill of Mornay. This hill was already crowned by ancient ruins that the monks proposed to clear away. Because it was land not wanted for agriculture, the king was happy to grant the request. He even donated money to build the monastery and encouraged others to contribute. With funds from around the realm, the Brothers completed their new monastery within a decade. It was a grand, sprawling edifice built of black stone and called the Black Monastery. From the very beginning, there were some who said that the Black Brotherhood was not what it seemed. There were always hints of corruption and moral lapses among the Brothers, but no more than any other religious order. There were some who told stories of greed, gluttony and depravity among the monks, but these tales did not weaken the order’s reputation during their early years. All of that changed with the construction of the Black Monastery. Within two decades of the Black Monastery’s completion, locals began to speak of troubling events there. Sometimes, Brothers made strange demands. They began to cheat farmers of their crops. They loaned money at ruinous rates, taking the property of anyone who could not pay. They pressured or even threatened wealthy patrons, extorting money in larger and larger amounts. Everywhere, the Black Brotherhood grew stronger, prouder and more aggressive. And there was more… People began to disappear. The farmers who worked the monastery lands reported that some people who went out at night, or who went off by themselves, did not return. It started with individuals…people without influential families…but soon the terror and loss spread to even to noble households. Some said that the people who disappeared had been taken into the Black Monastery, and the place slowly gained an evil reputation. Tenant farmers began moving away from the region, seeking safety at the loss of their fields. Slowly, even the king began to sense that the night was full of new terrors. Across the kingdom, reports began to come in telling of hauntings and the depredations of monsters. Flocks of dead birds fell from clear skies, onto villages and city streets. Fish died by thousands in their streams. Citizens reported stillborn babies and monstrous births. Crops failed. Fields were full of stunted plants. Crimes of all types grew common as incidents of madness spread everywhere. Word spread that the center of these dark portents was the Black Monastery, where many said the brothers practiced necromancy and human sacrifice. It was feared that the Black Brotherhood no longer worshipped gods of light and had turned to the service of the Dark God. These terrors came to a head when the Black Brotherhood dared to threaten the king himself. Realizing his peril, the king moved to dispossess and disband the Black Brother hood. He ordered their shrines, abbeys and lands seized. He had Brothers arrested for real and imagined crimes. He also ordered investigations into the Black Monastery and the order’s highest ranking members. The Black Brotherhood did not go quietly. Conflict between the order and the crown broke into violence when the Brothers incited their followers to riot across the kingdom. There were disturbances everywhere, including several attempts to assassinate the king by blades and by dark sorcery. It became clear to everyone that the Black Brotherhood was far more than just another religious order. Once knives were drawn, the conflict grew into open war between the crown and the Brothers. The Black Brotherhood had exceeded their grasp. Their followers were crushed in the streets by mounted knights. Brothers were rounded up and arrested. Many of them were executed. Armed supporters of the Black Brotherhood, backed by arcane and divine magic, were defeated and slaughtered. The Brothers were driven back to their final hilltop fortress – the Black Monastery. They were besieged by the king’s army, trapped and waiting for the king’s forces to break in and end the war. The final assault on the Black Monastery ended in victory and disaster. The king’s army took the hilltop, driving the last of the black-robed monks into the monastery itself. The soldiers were met by more than just men. There were monsters and fiends defending the monastery. There was a terrible slaughter on both sides. In many places the dead rose up to fight again. The battle continued from afternoon into night, lit by flames and magical energy. The Black Monastery was never actually taken. The king’s forces drove the last of their foul enemies back inside the monastery gates. Battering rams and war machines were hauled up the hill to crush their way inside. But before the king’s men could take the final stronghold, the Black Brotherhood immolated themselves in magical fire. Green flames roared up from the monastery, engulfing many of the king’s men as well. As survivors watched, the Black Monastery burned away, stones, gates, towers and all. There was a lurid green flare that lit the countryside. There was a scream of torment from a thousand human voices. There was a roar of falling masonry and splitting wood. Smoke and dust obscured the hilltop. The Black Monastery collapsed in upon itself and disappeared. Only ashes drifted down where the great structure had stood. All that was left of the Black Monastery was its foundations and debris-choked dungeons cut into the stones beneath. The war was over. The Black Brotherhood was destroyed. But the Black Monastery was not gone forever. Over nearly two centuries since its destruction, the Black Monastery has returned from time to time to haunt the Hill of Mornay. Impossible as it seems, there have been at least five incidents in which witnesses have reported finding the Hill of Mornay once again crowned with black walls and slate-roofed towers. In every case, the manifestation of this revenant of the Black Monastery has been accompanied by widespread reports of madness, crime and social unrest in the kingdom. Sometimes, the monastery has appeared only for a night. The last two times, the monastery reappeared atop the hill for as long as three months…each appearance longer than the first. There are tales of adventurers daring to enter the Black Monastery. Some went to look for treasure. Others went to battle whatever evil still lived inside. There are stories of lucky and brave explorers who have survived the horrors, returning with riches from the fabled hordes of the Black Brotherhood. It is enough to drive men mad with greed – enough to lure more each time to dare to enter the Black Monastery.

The Halls of Runehammer is a classic dwarven dungeon crawl for 5th edition dungeons and dragons. The core adventure module is desigend for characters who are second level and should take a party up to 4th level. 150 years ago a horrible plague called the Red Death swept the known world. When faced with the destruction of their entire clan some of the dwarves of Runehammer turned to a dark evil in an attempt to survive. Until recently that evil lay dormant, but now it threatens to engulf the entire region surrounding the Halls of Runehammer including the small town of Last Stop. Features over 8 episodes of encounters flled with action, excitement, and danger Blaze your own path or choose from two sets of pregenerated characters; one party of dwarves and one party of the canon characters for the Asnar: The Last Kingdom campaign (digital download) Contains 25 available digital maps for high quality printing or use with Online systems like Roll20 (digital download) Comes with Combat Encounter sheets for most combat encounters to help speed up your game play (digital download) Comes with a fully printable puzzle ring trap for Episode 7: The Pump Tower Contains 30 pieces of artwork created just for this adventure and 14 additional licensed pieces of artwork

Something awakens beneath the ruins of ancient Giustenal, the City by the Silt Sea. Many have tried to discover the secrets of this forsaken place, to plunder its legendary treasures. Few have returned from its shadowy embrace. Did they run afoul of savage raiders in the desert wastes? Did they lose their way in a sudden sandstorm only to sink hopelessly into the blowing, shifting silt? Perhaps they heard the psionic voice of the Caller in Darkness and succumbed to its mesmerizing summons? Or did they meet the true master of the ruins, a being as old as the Dragon and just as terrifying?... The burning world has reached a critical stage. For Athas, it could mean the start of a time of renewal, or it could herald the end of the world! It all begins in the ruins of Giustenal, in a place from another age, in the corpse of a shattered, long-dead city. Something stirs in the City by the Silt Sea. Something evil.... TSR 2432

Abridged description from DriveThruRPG.com: From award-winning RPG podcaster John Grana comes a new supplement for the Pathfinder RPG: a sprawling goblin warren and the tribe that inhabits it, fleshed out in full detail and turned into a campaign setting for goblin player characters. Within Bloodmoon Goblins is all the information a gamemaster needs to bring a goblin campaign, full of action and intrigue, to life.

"Ribbons of blood dance through the air, tracing wide crimson arcs before fraying into thousands upon thousands of bright red droplets. The cheerful tavern atmosphere evaporates in a moment, rent apart by screams and cries. A woman with grey hair stands near the bar, grasping at the dagger in her throat with fingers made slippery by blood. She sways and collapses. More screams. A man stands before her. He is holding the hilt of the dagger, but lets it slip from a gory hand as the woman falls. He freezes for a moment, then spins and sprints away, knocking aside people as he goes. A young, flaxen-haired woman at the back of the tavern cries out, “Stop him! Stop him!” as he approaches the entrance – the entrance where you and your comrades are standing. What do you do?" A lonely outsider murders a popular village local before a room full of witnesses. But could he be innocent? The Lurker Beneath Red Larch is a 4-6 hour adventure for characters of 3rd-4th level. It is full of roleplaying, problem solving and challenging combat encounters.

This alternate starter campaign takes you to all the familiar locations of the Lost Mine of Phandelver adventure from the other side of the veil. Some places look the same, some very different. The entire plane is trying to strip you of your mind, your memory, and your motivation. Discover how the Forge of Spells was fueled. Learn the location of lost adventurers from the original Phandelver expedition. See what Cragmaw Castle looked like in its prime. All of this and more, as this takes you from level 1 to level 5 with well over 20 hours of play time. If you are looking to start a new campaign or just experience familiar locations in a new setting, this supplement accommodates. Inside you'll find: Maps: Nine encounter maps Cragmaw Castle rebuilt, including the upper floor, and underground level. Wave Echo Cave before it was tunneled. A very different looking Redbrant Hideout Ruins of a town similar to Phandalin A swamp and muck version of Cragmaw Hideout Plus new magic items, and more Monsters: 37 new creatures Lore Information on a shadowy Yuan-ti empire A new offshoot of the abyssal demonhive A cult using the stoic ways of stone to evade the Raven Queen's watchful eye and pilfering ways. New players vying for control of the Shadowfell Shadowfell Guide: Information on the plane, its inhabitants, and included with this supplement is the best selling Shadowfell Random Encounters appendix. Easter Eggs Hidden throughout the story are references to Lost Mine of Phandelver. Including references to other hard cover books as well.

Waves of supernatural darkness sweep over the subterranean city of Stoneholme, quenching lights and bringing with it foul creatures of shadow. After heroically defending a group of dwarven children being ravaged by a group of these shadow beings, the PCs are approached by Shtawn Deppenkhut -one of the king's own advisers- and are offered the task of finding the source of the darkness that threatens the city. The PCs investigation takes them through the Underworld to hidden caverns, where demon worshiping priests offer living sacrifices in an attempt to plunge Stoneholme into everlasting darkness, a first step in destroying the hated city once and for all, but as it turns out the priests aren't the only ones behind this unfolding plan to destroy Stoneholme. Dark Days in Stoneholme is ideally suited for a group of dwarven adventurers. It is recommended that you have access to the Stoneholme section of the Rise of the Drow revised & expanded edition (2014) but it is not necessary to run the adventure. Also available for Pathfinder. Published by AAW Games.

A D&D 5e adventure set inside Shakespeares’ Romeo& Juliette. Enter Verona and Investigate what caused the Capulet mansion to sink underground and become a cursed hellscape Play as your characters or use the pre-generated characters (including Mercutio the tiefling warlock, Rosalind the elven wizard, Balthasar the halfling rogue, and more). You don’t need to know Shakespeares’ Romeo and Juliette to enjoy this dungeon dive but it helps :-) This product includes: The Adventure Printer-friendly character sheets A high Res map for VTT

In times ancient, an infamous paladin-artificer named Khaldun unearthed a cursed tome bound in the flesh of the first medusa. Driven to madness by its secrets, he used the necromantic magic contained within to call forth an army of dread warriors from the Netherworld. Though his assault was devastating, he was ultimately unsuccessful, and the mightiest crusaders of the realm banished Khaldun to the Netherworld, where he would rot for eternity at the bottom of the River Dis. Unfortunately, rather than perishing in that bleak plane, Khaldun escaped his silt grave and thrived, amassing a legion of undead followers and erecting a Tomb in which he could perfect his mechanical craft without interruption. It was not long before he shed his body and became a demilich. After several centuries of scheming, the undead warriors under the command of the ‘Iron Lich’ have burst free of the Netherworld, laying waste to not only the mortal kingdoms that exiled him, but also the exalted domains of the gods themselves. The crusaders’ quest is simple – stead the Tomb and destroy the Iron Lich. Published by Defy Danger and Save Versus Death

What begins as a simple expedition to settle a new village in the ruins of the mysterious Castle Inverness sets off a chain of events that could threaten every living being from Winterhaven to Hammerfast. Not everyone in the Nentir Vale is happy to see civilization brought to Inverness, particularly the ghost of Salazar Vladistone, who commands the spectral legion called the Phantom Brigade. "March of the Phantom Brigade" is an adventure designed for season 4 of the Dungeons & Dragons Encounters official play program. It includes the information the Dungeon Master needs to run the adventure, thirteen ready-to-play encounters (each intended for one session of play), and full-color foldout battle maps depicting the various encounter locations.

Deep in the jungles of Xen'drik, a relic of great power has lain hidden for thousands of years. Now, determined adventurers race against time and the nefarious agents of the Order of the Emerald Claw to locate the relic, overcome unimagined obstacles, and unlock its ancient secret. The Order's hunt for the parts of an ancient creation pattern nears its conclusion, but other groups also seek this powerful item. Once all of the pieces come within close proximity of each other, the ancient intelligence awakens. Suddenly all parties have a new and powerful enemy to contend with...