
Agents for the Mayor of Kleine have discovered the stronghold of the Red Hand goblins deep within the Burning Hills. They have also discovered that the goblins are forming an alliance with local hobgoblin and bugbear tribes to sweep the humans out of Thunder Rift forever. The PCs must reach the lair before the hobgoblin and bugbear agents return to their own tribes. if the envoys do not return, the tribes will assume that the goblins murdered them and attack the goblins instead of the human settlements. In this way, the humans of Thunder Rift gain some unexpected allies against the Red Hand goblins. This is the most dangerous and demanding of the three adventures in this set. It is recommended that you play it after Red Hand Trail and Trouble Below. However, it can stand alone as an adventure in its own right if you wish. Part of TSR 1076 The Goblin's Lair

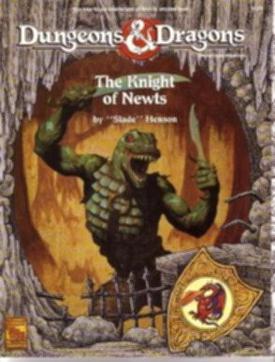
Kidnapped! The cursed Baron von Hendriks has kidnapped your betrothed. Now the madman wants as a ransom your Alandah's weight in unrefined gold! How are you going to pay? The baron himself has been kind enough to provide you with that answer: streams of raw gold gush from a burning mountain somewhere in the Sea of Dread. All you have to do is find this mysterious mountain. Unfurl the sails! The open sea awaits you and your crew as you sail from the city harbor. But beware! The Sea of Dread has more than earned its title over the centuries. Can you survive the perils of the sea? Will your crew mutiny before you reach the Burning Mountain? Or will you have to throw crew-members overboard just to make room for the gold? Solo adventure. "Lathan's Gold" is a real innovation in solo adventure design, considerably more complex than any of the gamebooks then being produced. Though the adventures uses the typical trope of numbered paragraphs, its paragraphs are divided into six types: "S"pecularum, "U"rban", Island "E"xploration", "C"oastal", "T"rade Routes, and "V"oyages. Players can jump between the sections, then return, in slightly freeform ways. Players are also required to keep track of hit points, money, and treasure (which were typical for the more advanced gamebooks), and rations, days remaining, and hull points (which were not). Another freeform element, quite unusual for gamebooks, is the "wandering monsters" table, which introduces semi-random encounters. TSR 9082
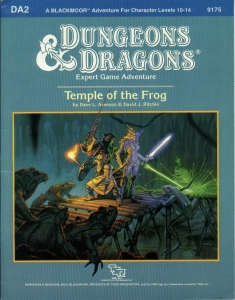
Green Death... That's what old hands call the Great Dismal Swamp. For centuries, this tangled maze of sluggish watercourses, stagnant ponds, and festering marshes has defended Blackmoor's southwestern frontier. Large armies and smaller parties have disappeared altogether inside its vast, dripping, claustrophobic corridors. Among those who have dropped from sigh in this arboral hell is young Rissa Aleford, one of Blackmoor's most important leaders. Carried off to the sinister City of the Fron, she is now being held by the eccentric Monks of the Swamp. By making the baroness captive, the deranged monks have serioulsy weakened Blackmoor at a time when enemies already threaten it from all sides. Yet, even as the Froggies gloat, the king of Blackmoor dispatches a small band of bold adventures to the rescue. Deep into the Great Dismal Swamp they must go - far from sunlight and sanity - there to seek and save the swamp, there to find the Temple of the Frog. TSR 9175

Devastated in a war with a nearby wizards' school, the Fighters' Academy has since been surrounded by a foul and dank swamp - the Gloomfens. Since the climatctic battle between the wizards and fighters, the tower has decayed. The spirit of the head of the academy haunts the building, eternally plotting his revenge on the wizards who killed him. his loyal sutdents remain faithful to him even in death. Other foul undead have made their home in the rotting, spacious academy. From their lair, they make forays into farmsteads near the swamp in search of victims to feed their unspeakable appetites. The Problem of these terrible attacks by the savage undead will not stop until the evil that has found a home at the tower is burned from the face of the land forever. Will your party heed the call and help the town of Melinir? Will they be able to clear the former Academy of its undead? Towers of Evil is the second in a three part adventure, The Haunted Tower. Or, it can be ran as a stand alone adventure. The choice is up to you. Part of TSR 1081 The Haunted Tower

The wizard Kavorquian is dead. But certain items belonging to his adopted son were in the wizard's keeping at the time of his demise. Now someone must venture into the silent vaults of Kavorquian's stronghold and recover the missing property. Queen's Harvest picks up its story where B11, King's Festival, left off. It can be played as a sequel to that adventure or as a complete adventure in itself. It is tailored for beginning Dungeon Masters and players and contains helpful hints on adventuring and the land of Karameikos. The story develops simply, but ultimately leads the player characters into the nether reaches of Penhaligon's politics to confront Ilyana Penhaligon, mad pretender to the throne! TSR 9261

A shrewd, spell-using green dragon has taken over the deepest chamber of a limestone cave as his lair. The dragon has persuaded a tribe of troglodytes to live in the outer chambers as a sort of "protective buffer" in return for gifts of magical treasure. The troglodytes cherish the useless bits of magic without realizing their modest worth. The outer chambers of the cave are protected by the troglodytes, the beetles and centipedes the troglodytes raise as cattle, and wild creatures. The green dragon uses traps, illusions and magical devices to protect his inner chamber. Wyrmhaven is the second dragon's lair to conquer. Part of TSR 1073 The Dragon's Den

Civil War Unrest. Turmoil. Rebellion. As above, so below - the cataclysmic events of the Wrath of the Immortals echo throughout the Hollow World setting. The Milenian Empire, with its classical Greek culture, has not escaped. Already the streets are un-safe, and the omens are getting worse... The emperor is dead... long live the emperor! But is the new emperor a man of the people, or a tool in the hands of malevolent powers? Walk carefully, for no stranger is safe upon the streets these days, and adventurers least of all! The mood of the capital city is turning ugly. Minions of the new emperor look on uncaring, while citizens disappear and philosophers fall to heedless mobs. The old emperor's elite guards are disbanded and scattered. Disorder reigns, and restless citizens threaten open revolt. And yet... a whisper is heard. Civil war can be averted. An ancient artifact, the Milenian Scepter, can rally those who would serve the Empire best. But the Scepter has been lost for generations, and who can say where it might be? The trail leads into the depths of the city, and across a dangerous wilderness to a forgotten oracle. For the lucky and the bold, perhaps it will lead to... THE MILENIAN SCEPTER This stand-alone adventure is compatible with the Wrath of the Immortals boxed set and the accessory HWR3, The Milenian Empire. You will need the D&D Hollow World boxed set to play this adventure. Easily adaptable to the AD&D game. TSR 9378

Buried in fire, but hardly dead. Only the Keep survived the destruction of Koralgesh, but few adventurers will survive the terrors that now stalk the lost Keep's halls. Players hear rumours of the Keep at Koralgesh and then traverse it to acquire the treasure within. Pgs. 45-64

An interesting and atypical adventure in its writing style. For one the module contains insightful "When things go Wrong" sections and DM guidance for sticking close enough to the rails for the story and fun's sake. Lots of DM hints about how to handle PCs' choices. Overall the story is fine too - a traditional hook, a mystery, some twists. There's a tower, a surprise pocket-dimension context, and a dungeon. It's mirror of life trapping, isn't it? Well, yes and no. People go in, and they don't come out. Nor can you talk with anyone inside. Somehow, that's not quite the way you remember those mirrors work. This Skarda fellow showed up a few years ago with a band of raiders, and no one in the land has been safe since then. Whole villages have disappeared into this Skarda's mirror. Your band is approached by relatives of one of the victims?and adventurer like yourselves. You have to get into that mirror of whatever-it-is, find this man, and get him out in one piece. The reward is more that adequate. Only problem is, no one out here can tell you what to expect once you get in? or even how to get there. TSR 9188

A cloud of dust forms over the horizon as a titanic army of evil threatens the entire civilized world! The Master of the Desert Nomads and his legions are back, and they form the greatest threat that you have ever faced. You must persuade powerful rulers to join you cause, stave off threats to the alliance, and lead your armies to victory! This adventure contains a full-color map of the D&D Expert Set game world, 200 counters, and a special expansion of the War Machine mass combat rules that allows you to fight the entire war as a strategic wargame! Major battles and engagements can be fought using the BATTLESYSTEM Fantasy Combat Supplement for incredible tabletop action. Never-before-published information on all the nations of the Expert Set game world provides background and detail that will enrich your campaign. This adventure includes large-scale battles and uses an expansion of Douglas Niles and Gary Spiegel's warfare system, "The War Machine", developed as part of the D&D Companion Set (BECMI Ed.) from 1984. "Red Arrow, Black Shield" is more than just a follow-up to X4/X5; it's a lynchpin for the entire B/X/CM adventure sequence. The players travel through many lands that were home to past adventures, and their past interactions with those places could affect diplomacy in this new adventure. TSR 9160
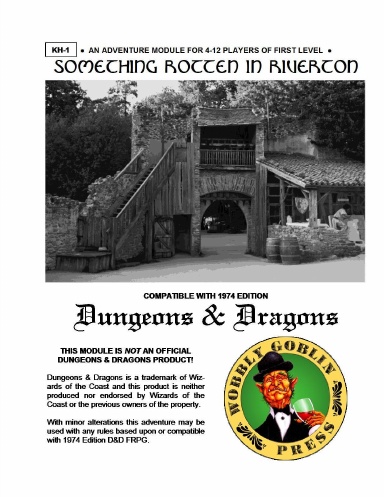
Riverton is in Peril! Chaos has reared its ugly head in the troubled town of Riverton! You and some new friends have left home to seek your fame and fortune. Brace yourselves, opportunity is about to hit you right between the eyes! The time has come to show you were made for better things than scratching out an existence on some hardscrabble farm, or slaving away in the hold of some perfumed and effete Peer of the Realm. Grab your sword, don your armor, ready your magic wand; adventure awaits!

To a wizard, knowledge is power, and the wizard Lirdrium Arkayz wants to know the mysterious secret of The Rock. Many have tried to discover it - but The Rock keeps its secret well. The wizard offers a rich reward to anyone bold enough to solve this dark mystery. But the road to The Rock leads to danger and hidden peril - dangers that have claimed the lives of many brave adventurers. Rashness and folly will lead to quick death, but riches await the clever and brave. Have you the wits, courage and skill to survive the Journey to The rock? TSR 9106
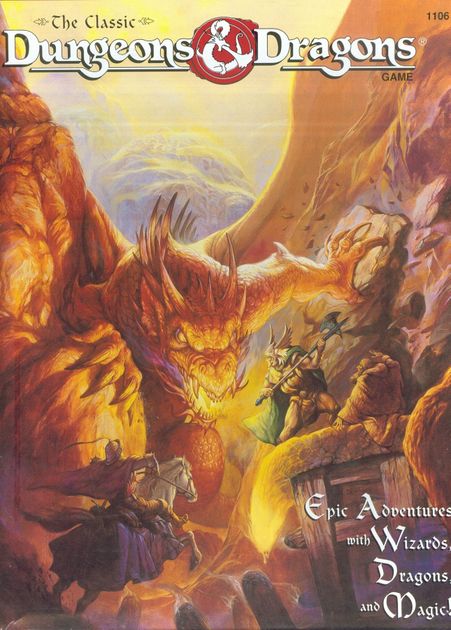
Introductory adventure included with the 1991 "Black Box" edition of D&D
A goblin warband has found the secret tunnel which leads from the dwarven keep of Hearth-Home to the nearby hills. The tunnel is intended to be a means of escape if the keep ever falls to attackers, but now it has provided goblins with an easy way into the Underkeep. So far, the goblins have confined their attentions to the various underground rooms that make up the Underkeep, but sooner or later they will find a way to the surface. They pose a serious threat to Hearth-Home - the goblins must be cleared out of the Underkeep so this breach in security can be repaired before the orcs hear of it and overrun the dwarven keep. This adventure is slightly more challenging than Red Hand Trail, and it is recommended that it is played after that quest and before Palace of Dread. However, the scenario in Trouble Below can easily be played independently from the rest. Part of TSR 1076 The Goblin's Lair

Some games aren't played for fun. A friendly little gambling game - with the most bizarre players and rules! Pgs. 24-32

The country of Rhyl has been beset nearly every night for many years by a large, terrible creature that flies out from the mountains near the city of Asereht. Nearly a year ago the creature broke through the wall of King Namreh’s castle and carried off the king’s son, Prince Laechim, along with a large amount of the royal treasure. After the creature’s raid on the castle, King Namreh ordered his army to search the mountains and discover Astylis’ complex. The soldiers made two forays into the mountain wilderness, but each time were harassed and eventually driven back by goblin raiders. Since the failure of the second assault, the king has taken to commissioning small parties of mercenaries and adventurers, sending them into the mountains with promises of great reward upon the completion of the rescue mission. For reasons which the king has never found out, none of these rescue parties has ever returned to Asereht. Your party is now attempting to be the first. Pgs. 37-44
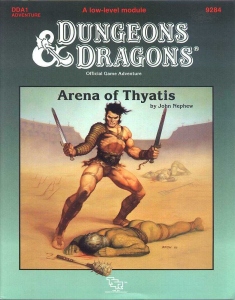
It's party time in Thyatis... And simply everyone is going to the magnificent Villa Osteropolus, home of the wealthy old senator, Helenites. Raucous fun, exotic food, and even advanced betting on the upcoming Arena games are expected. Even adventurers just in from the outlands may meet the powerful here. So don your festive togas, for in Thyatis City there are important connections to be made and deeds to be done, duels to be fought and fame to be won. (But beware, oh Adventurer! The politics of Thyatis can be as labyrinthine as mazes beneath the Coliseum...) This module is designed especially for the DM who wants to sharpen his interactive skills. Presenting the detailed layout of a Thyatian noble's mansion and maps of the multi-level Coliseum of Thyatis. Four four to six characters, levels 2-3 Brief guide to Thyatis legal system New optional class, the Rake Fast unarmed combat system, including disarming attacks Special appendix on creating Thyatian names Featuring the DM's Guide to Winging It TSR 9284
Centuries ago in the Black Swamp, Castle Kraal was a well-respected keep. Its warriors defended the folk of Thunder Rift from the marauding bands of ogres and goblins who swarmed to attack from the Horned Hills. And then one day the keep and all of its warriors vanished, never to be seen again. Now, all these years later, historians are still trying to find the answers to the disappearance of Castle Kraal, answers which may be hidden in Kraal's ruins. The heroes are asked to investigate and to try and solve the mystery. Be Warned: Not every mystery wishes to be solved! Recommended for beginning players and DMs For use with the DUNGEONS & DRAGONS Game Box. TSR 9434

Revolt of the Gladiators! The corrupt Thyatian senator, Helenites Osteropolus, his latest scheme smashed by the adventurers and their gladiator allies, hatches a new plot to destroy the influence of the Order of the Sands (even, perhaps, to attack the Emperor himself!) Yet greater dangers lie ahead. If his plot succeeds, it will remove the guardians that protect the city from the creatures that lurk in the caverns and catacombs below. Can the players block his gambit? Will the wheel of justice grind small, or will the greasy palm of political corruption reach out and save the senator once again? You decide, in the chaotic swirl of the Thyatian capital's politics. This module is designed especially for the DM who wants to sharpen his interactive skills. Recommended for four to six characters, levels 3-4 Includes map of a realistic catacomb complex below Thyatis City Unique role playing climax tests players' integrity and skill New information on the military Legions of Thyatis This module is a stand-alone sequel to DDA1 Arena of Thyatis. TSR 9296
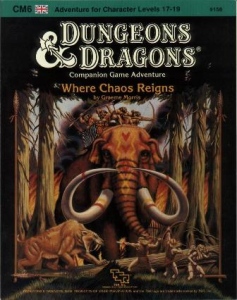
You have been chosen. Throughout the land, the omens of some cataclysmic change are clear for all to see. The flowers are blooming out of season, fish fall like rain, and a blue moon hangs in the night sky. Yet the danger is not of this land, nor even this world. Far away in the infinite planes lies Aelos, a world of peril. A world where time itself has been corrupted and where chaos reigns. Even the mighty Immortals who watch over the planes are powerless to help Aelos. Hope rests in you alone. Come then, journey through the swirling Nexus, to a world beyond the stars. You have been chosen, and Eternity beckons! TSR 9158