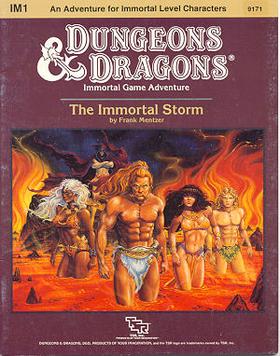
"The storm-stuff is not matter as we know it, and beyond Immortal control," the Hierarch sighs. "I fear we are doomed." It appeared only a few weeks ago - a swirling gray mass of incalculable size. And in its center, an eye. A humanoid eye. Now the storm threatens the very era of Immortal rule. The growing maelstrom emits a message to the Hierarchs. But what does it mean? Can it help save this realm of existence? Is there time to save this realm? The first Immortal adventure pits your party against the multiverse in a desperate struggle to find the essence of life. This adventure is nothing like you've ever played before. TSR 9171

Through seven gates lie seven realms. In seven realms stand seven guardians. With seven guardians lie seven symbols. From seven symbols comes one key. Alpahaks the Dark desires that key, by which he plans to release death and chaos into the realms of man. Your party may be all that stands between life and death. Will you heed the lunatic ravings of a dying madman? Travel to the top of Guardian Mesa, and enter the Septahenge. Gather the mystic symbols, create they key, and defeat the Carnifex, before it's too late... TSR 9174

Buried in fire, but hardly dead. Only the Keep survived the destruction of Koralgesh, but few adventurers will survive the terrors that now stalk the lost Keep's halls. Players hear rumours of the Keep at Koralgesh and then traverse it to acquire the treasure within. Pgs. 45-64

A young black dragon and two hatchling dragons live in an excavated sandstone burrow in the swamp west of Knacker Knob. Connected to the dragon lair is a complex of sandstone tunnels and chambers inhabited by lizard men. Some sandstone tunnels and chambers are partially flooded, and others are filled with nasty things such as slimes, oozes and gelatinous cubes. The lizard men revere the dragons as magical spirit guardians. In small groups the lizard men are easily defeated, but if allowed to prepare a common defense, the lizard men tribe with its spellcasters may present serious threat to the player characters (PCs). Wild Dragon Den is the first dragon's lair to conquer. Part of TSR 1073 The Dragon's Den

New Magic? That's what the flying egg has. New magic unlike any ever encountered in Blackmoor. New magic of a type that could give the fledgling kingdom an important edge in the wars that are brewing on its borders. There are only a few minor problems. Like the fact that the magician who piloted the metal egg to one of Blackmoor's sworn enemies, the monks of evil and eccentric Order of the Frog, are also interested in the magic represented by the egg. And, most important, the fact that the egg came from the distant and dangerous City of the Gods. Set amist the blistered salt flats of the Valley or the Ancients, the City of the Gods is a strange and deadly metal metropolis whose powerful guardians do not welcome intruders. Yet it is to this place of deadly menace that Blackmoor's leaders now send a daring expedition? to bargain for aid in the coming wars? or to steal the magic of the gods. TSR 9191

The Great Mage Cheiromar, known as Aglahund the Mighty, is said to be buried under the Leaning Stone atop Galzar's Crag. One of his apprentices, Ulthorn, has been discovered dead in an aperture of the Leaning Stone - a doorway that locals swear has never been there before! You must discover how Ulthorn died and the mystery of the Leaning Stone. In the process, you may find yourself at the Endless Stair. Those who never climbed it say is seems to lead nowhere. Those who did never lived to tell of it. Will you dare ascend into the unknown? TSR 9192

Civil War Unrest. Turmoil. Rebellion. As above, so below - the cataclysmic events of the Wrath of the Immortals echo throughout the Hollow World setting. The Milenian Empire, with its classical Greek culture, has not escaped. Already the streets are un-safe, and the omens are getting worse... The emperor is dead... long live the emperor! But is the new emperor a man of the people, or a tool in the hands of malevolent powers? Walk carefully, for no stranger is safe upon the streets these days, and adventurers least of all! The mood of the capital city is turning ugly. Minions of the new emperor look on uncaring, while citizens disappear and philosophers fall to heedless mobs. The old emperor's elite guards are disbanded and scattered. Disorder reigns, and restless citizens threaten open revolt. And yet... a whisper is heard. Civil war can be averted. An ancient artifact, the Milenian Scepter, can rally those who would serve the Empire best. But the Scepter has been lost for generations, and who can say where it might be? The trail leads into the depths of the city, and across a dangerous wilderness to a forgotten oracle. For the lucky and the bold, perhaps it will lead to... THE MILENIAN SCEPTER This stand-alone adventure is compatible with the Wrath of the Immortals boxed set and the accessory HWR3, The Milenian Empire. You will need the D&D Hollow World boxed set to play this adventure. Easily adaptable to the AD&D game. TSR 9378

Sent on a desperate mission into an unknown land, you must seek out the one called "the Master" and his Temple of Death. There is little time to waste, as you must act before the Master's armies destroy your homelands. But to complete your task, you must battle fearsome guardians, travel through a hostile kingdom, and discover the secret of the master. Can you survive his defenses and win? This module contains referee's notes, background, maps and detailed keys. It is the second adventure in the two-part Desert Nomads series begun in X4, Master of the Desert Nomads, but it can stand on its own as a seperate adventure. Wheter you play Temple of Death by itself or as part of a series, the adventure will offer you hours of excitement and fun! TSR 9069

Devastated in a war with a nearby wizards' school, the Fighters' Academy has since been surrounded by a foul and dank swamp - the Gloomfens. Since the climatctic battle between the wizards and fighters, the tower has decayed. The spirit of the head of the academy haunts the building, eternally plotting his revenge on the wizards who killed him. his loyal sutdents remain faithful to him even in death. Other foul undead have made their home in the rotting, spacious academy. From their lair, they make forays into farmsteads near the swamp in search of victims to feed their unspeakable appetites. The Problem of these terrible attacks by the savage undead will not stop until the evil that has found a home at the tower is burned from the face of the land forever. Will your party heed the call and help the town of Melinir? Will they be able to clear the former Academy of its undead? The Fighters' Academy is the first in a three part adventure, The Haunted Tower. Or, it can be ran as a stand alone adventure. The choice is up to you. Part of TSR 1081 The Haunted Tower

"A great cat sits upon the northern grasslands, my friend, waiting to pounce on adventurers just like you." As you part the tall grass with your sword, the words of the tavernkeeper echo in your head. "He was the mightiest wizard we'd ever known, and that Lion Castle was his home." Your friends' voices mingle with the tavernkeeper's. "He's but a ghost now, haunting those halls, and waiting for an heir." The ground rises slightly. A strong wind rushes through the field. Suddenly, the grasses part, and Lion Castle rises majestically before you! "Magical riches await those who enter!" "Beware of man-beasts!" Voices flood your head again. Will you brave the haunted castle? Can you afford not to? It's all up to you in this D&D Solo Adventure. Ghost of Lion Castle is for one player only, but that one player makes all of the choices and enjoys all of the rewards. An entire castle and courtyard await your exploration. The adventure also includes a complete solo combat system. TSR 9097

The end of the road. A lonely fort stands on the banks of a mighty river. It is here the hardy bands of adventurers gather to plan their conquests of The Hill, the hulking mass that looms over this tiny settlement. The Hill is filled with monsters, they say, and an evil witch makes her home there. Still, no visitor to The Hill has ever returned to prove the rumors are true or false. The thrill of discovery is too great to pass up, and only the river stands in the way. The adventurer's boat is waiting! This module is designed for use with the D&D Basic Rules. A trip through the wilderness begins a unique challenge for the novice player and Dungeon Master. TSR 9078

What sends you adventuring deep into unknown lands, across dark waters, around The Savage Coast? Adventure? The sincere desire to help others? Or greed? Cartographers Guild members tell of lost cities and hidden treasures. Sailors tell of menacing beasts and cannibals to the west. They tell of savages along the shores who use gold nuggets for fishing weights. They also tell of great mounds of gold that collect at river mouths. You must decide the grater lure; the safety of Slagovich or the glimmer of gold along The Savage Coast. This adventure includes a map which expands the D&D game world, and a special expanded monsters section. TSR 9129
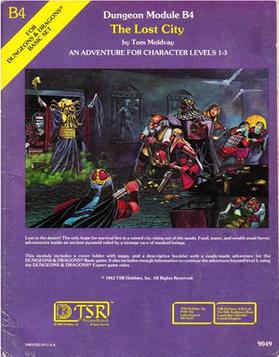
The Lost City is a low-level adventure, in which the only hope of the PCs' survival can be found in a ruined city slowly rising out of the sands. The adventure is set inside a huge step pyramid, with the lower pyramid only sketched out and the city itself described with a list of the major areas and a map. The adventure’s main villain is Zargon, a giant one-eyed monster and his minions. The entire double pyramid, not including the city, contains over 100 rooms. The module is designed to give novice Dungeon Masters experience fleshing out adventures and is only partially complete. Later TSR material hints that this adventure possibly takes place in Mystara, but the material is largely setting-neutral. TSR #9049

To arms! To arms! The battle lines are drawn as desert men and inhuman tribes wait poised to strike on the fertile and rich lands of the east. The call has gone out through the civilized lands. The armies have been raised to match the invading foes from the west. Nobles and peasants have joined swords to greet the foes. But Fate or Chance has decreed another role for a small few. No glorious banners will wave on their march. No squadrons of knights will charge at their word. Instead, they will fight the war with stealth, secrecy, and cunning. The risks they will take are great, but the fates of both armies lie with them. It begins one night for your party far from the fighting. Suddenly you are entrusted with the most dangerous mission of the war. Can you cross the Sind Desert, occupied now by enemy armies, to find the Great Pass? Can you find the one known only as The Master? What will you do if you find him? So begins your adventure in The Master of the Desert Nomads, the first module of a two-part adventure that can be concluded in the exciting Temple of Death or played entirely on its own. Can your party do what must be done? TSR 9068
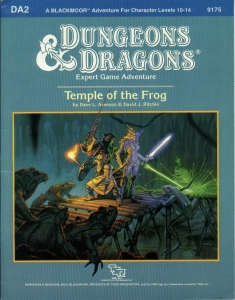
Green Death... That's what old hands call the Great Dismal Swamp. For centuries, this tangled maze of sluggish watercourses, stagnant ponds, and festering marshes has defended Blackmoor's southwestern frontier. Large armies and smaller parties have disappeared altogether inside its vast, dripping, claustrophobic corridors. Among those who have dropped from sigh in this arboral hell is young Rissa Aleford, one of Blackmoor's most important leaders. Carried off to the sinister City of the Fron, she is now being held by the eccentric Monks of the Swamp. By making the baroness captive, the deranged monks have serioulsy weakened Blackmoor at a time when enemies already threaten it from all sides. Yet, even as the Froggies gloat, the king of Blackmoor dispatches a small band of bold adventures to the rescue. Deep into the Great Dismal Swamp they must go - far from sunlight and sanity - there to seek and save the swamp, there to find the Temple of the Frog. TSR 9175

A One-on-One Competition Module for Thieves Level 8 Your peaceful evening has been interrupted by an unusual request. As a thief, your skills are unmatched, but can you rise to the challenge of thieving for a powerful and frightening wizard? Do you have a choice? The Gem and the Staff is a special One-on-One competition module designed for one player and on Dungeon Master. The Module contains two separate scenarios, so you can switch roles with the other player after the first adventure. Scoring sheets and encounter summaries are provided for each adventure to make running competitions quick and simple. Character figures and a map book are also provided to help visualize the adventures. The player's maps are designed so you can see the rooms as they would appear. Complete DM's Maps are included. TSR 9050

Beware the cat-men's fury! This entry-level module pits a single player character of 2nd to 4th level against samurai cat-men. Rage of the Rakasta is specially designed as a one-on-one for a single DUNGEON MASTER and one player. It can also be played by a DM and a group of players or by a single player without a DM. Rage of the Rakasta takes place in the Thunder Rift game setting. It can be played by itself or as part of a campaign with other modules sharing the same setting: Quest for the Siver Sword, Assault on Raven's Ruins, Sword and Shield, Knight of Newts, and the forthcoming In the Phantom's Wake. TSR 9435

Introductory module for the Hollow World setting. First Adventure in the Blood Brethren Trilogy. Into the Depths! Under the ruins of Barleycorn Monastery, a tunnel leads one thousand miles downward. Through it, a rescue mission into the Broken Lands turns much stranger. Much more Serious. For the trail leads to the Hollow World. Launch your D&D game players into fabulous lost-worlds adventure across the Hollow World! Travel the Azcan Empire. Explore the secret labyrinth of the Great Pyramid in Chitlacan. Fly to the core of the world and enter the Smoking Mirror, before the monstrous Prince Kano enacts his devastating scheme - a scheme called: NIGHTWAIL! Nightwail is the first adventure for the D&D Hollow World Campaign Set. (The Hollow World boxed set is required to play.) This 64-page adventure fits easily into your existing campaign, either as a stand-alone adventure or as part of the continent-spanning Blood Brethren trilogy. These three linked modules can be played in any order - but the adventure starts here! Easily adaptable to the AD&D game! TSR 9303

The lizard men are just pining for the fjords. A plague of locusts is bad enough, but when the locusts are each a yard long, the farmers need professional help! A swarm of giant locusts has been eating all the grapes and leaves from the vineyards of Vineyard Vale! In addition, lizard folk have attacked and destroyed several steads in the vale. The farmers are desperate, but what they don't know is that these events are linked! A mage known as Rhungold the Trickster has been orchestrating the attacks and locusts to try to scare the farmers off the land so he can claim it as his own. The players slowly piece the story together by investigating a fairly linear story through a cave, a marsh, and finally to a compound owned by the wizard Rhungold. Pgs. 6-16
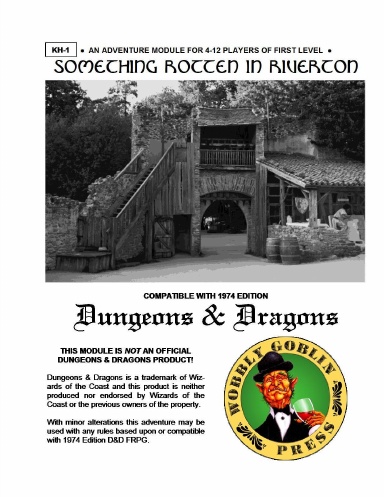
Riverton is in Peril! Chaos has reared its ugly head in the troubled town of Riverton! You and some new friends have left home to seek your fame and fortune. Brace yourselves, opportunity is about to hit you right between the eyes! The time has come to show you were made for better things than scratching out an existence on some hardscrabble farm, or slaving away in the hold of some perfumed and effete Peer of the Realm. Grab your sword, don your armor, ready your magic wand; adventure awaits!