
Despite the shaky alliance that exists with the elves of the Quivering Forest, they do not suffer trespass in their realm lightly, especially from common folk from nearby Phlan. A woodworker's recent blunder into the forest might set off a diplomatic incident. Can you help find him and mollify the aggravated elves?

The end of the road. A lonely fort stands on the banks of a mighty river. It is here the hardy bands of adventurers gather to plan their conquests of The Hill, the hulking mass that looms over this tiny settlement. The Hill is filled with monsters, they say, and an evil witch makes her home there. Still, no visitor to The Hill has ever returned to prove the rumors are true or false. The thrill of discovery is too great to pass up, and only the river stands in the way. The adventurer's boat is waiting! This module is designed for use with the D&D Basic Rules. A trip through the wilderness begins a unique challenge for the novice player and Dungeon Master. TSR 9078

Fleeing the rage that consumed their feuding families, Juliana and Orlando fled to the Cave of Echoes, where it is said every wish is granted. Two years have passed, and all attempts to return the lovers to their parents have failed, though some believe them lost in the enchanted garden beyond the cave. Many are the rescuers venturing into that enchanted park; a few have returned after long absences, their minds and memories curiously disturbed. Now, the handsome reward offered for the return of the lovers has tempted you, but who knows that lies beyond the Crystal Cave? TSR 9066
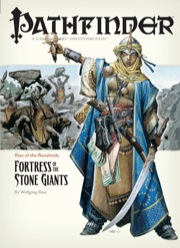
The Giants are on the March! The Rise of the Runelords Adventure Path continues! Driven to battle by a maniacal warlord, the once-peaceful stone giants of the Storval Plateau threaten to destroy the sleepy town of Sandpoint. Will fast action and quick wits be enough to save the defenseless community? Yet, even if the giants' initial raid can be repelled, only by striking at the heart of their titanic war machine—the black-towered fortress of Jorgenfist—can the menace be quelled. But who knows what mysterious bloodlust spurs the usually peaceful giants to war, or what mysteries lie beneath their ancient fortress?
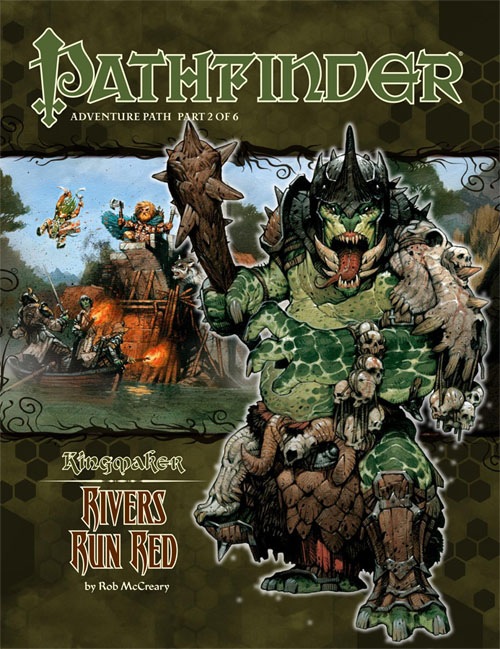
A Pathfinder Roleplaying Game adventure for 4th-level characters, this volume of Pathfinder Adventure Path is part 2 of 6 of the Kingmaker Adventure Path, in which the heroes win and defend a small kingdom from threats foreign and domestic. PCs should advance to 7th level by the end of this adventure. The PCs receive a shipment of funds, materials, and colonists from Brevoy and beyond, along with instructions to build a town and attract more pioneers to their nascent country. Having already explored the northern reaches of their new domain, the PCs must now venture into the wilds to bring the rule of law to the south. Wicked fey inhabiting a ruined keep, undead haunting an ancient barrow mound, and others must be defeated to make the region ever more secure. Along the way, the PCs might also have the opportunity to ally themselves with some of the region’s local residents, including the dryad druid Tiressia, her satyr consort Falchos, and a band of gnome explorers called the Narthropple Expedition. In addition, the PCs will be called upon to mediate between two rival factions in the area: a group of independent loggers and the angry fey sorceress who opposes them. As they explore, evidence that a group of trolls is stirring up trouble in the region becomes apparent. Meanwhile, the PCs must deal with events within their burgeoning kingdom—a rabble rouser seeks to oust the PCs from their positions of power, the secretive cult of the hag goddess Gyronna has infiltrated the town, and a werewolf is preying on the townsfolk. All of these events build to the adventure’s twin climaxes: the sudden assault on their capital city by an owlbear of unprecedented size and the expansion of Hargulka’s trolls into the north. Faced with danger on multiple fronts, the PCs must draw upon all of their resources and bravery to become the undisputed rulers of the Greenbelt.
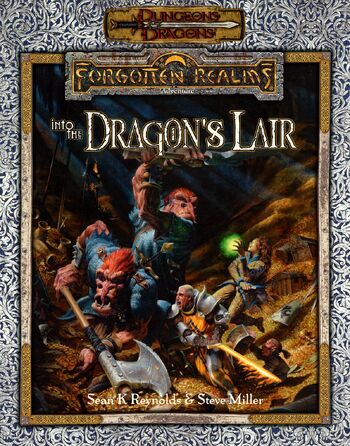
Into the Dragon's Lair takes place in the Forgotten Realms setting, and takes place after the novels The High Road and The Death of a Dragon by Troy Denning. The nation of Cormyr tries to rebuild after the death of King Azoun IV, and seeks the treasure hoard of a dragon to fund these efforts and keep the kingdom from falling into chaos. The player characters must find this treasure before all the other seekers.

Step right up, ladies and gentlemen... A carnival of laughs, thrills - and terror. "Sometimes an adventure comes along that tackles a particular idea or theme so well that it pretty much closes the door on other submissions of its kind. Such is the case with 'The Jingling Mordo Circus.' Owner and ringleader Max Mordo, an evil wizard, uses the circus as a front for his kidnapping schemes and his magic to turn his victims into sideshow monsters. It’s the first and only circus Dungeon has published." - Christopher Perkins Pgs. 48-63

"Terror by night! The village of Orlane is dying. Once a small and thriving community, Orlane has become a maze of locked doors and frightened faces. Strangers are shunned, trade has withered. Rumors flourish, growing wilder with each retelling. Terrified peasants flee their homes, abandoning their farms with no explanation. Others simply disappear. . . No one seems to know the cause of the decay -- why are there no clues? Who skulks through the twisted shadows of the night? Who or what is behind the doom that has overtaken the village? It will take a brave and skillful band of adventurers to solve the dark riddle of Orlane!" TSR 9063

Haedirn Lastlight is a respected elven wizard and sage. After the death of his lover Lyonthel, the elf has been overcome with grief and has locked himself away in his study- a small manor on the cliffs of Wailing Crag. Haedirn has not been seen for over a year now, and those that knew him are beginning to worry. Worse still, a band of ogres has been terrorizing the nearby town, slaughtering the town folk and haughtily boasting the elf wizard is dead. The PCs must put a stop to the ogres' attacks, make way to Wailing Crag to root out the rest of their gang, and lay Haedirn Lastlight's tortured remains to rest.

The Feystone Shards is an adventure for characters from levels 5-8, optimized for 4-6 player characters. This moderate length campaign should have 20+ hours of gaming, all focused around the Forgotten realms area of Red Larch. The Heroes are tasked to find five fragments of a shattered Orb, once worshipped by a faction of Elves. The search will take the party to a haunted Citadel, as they seek the scattered remnants of the Feystone. From a city of Stone Golems, to an alchemist's underground lair - the players will face obstacles and enemies that will challenge their very resolve. The Heroes will need to discover the secrets of the bauble's fey magic, finding the lost Elvin city where the Orb was once worshiped as a God. Join in the hunt for the Feystone Shards, and see if your characters are ready to transcend common Heroes...and become Legends.

The rubble-strewn passageway twists and turns, winding ever deeper into the mountain, lower and lower into the bowels of the ancient, forbidding halls of long-dead dwarves. The torchlight flickers, threatening to succumb to the oppressive darkness. Creeping along one striated granite wall, Arikus the warrior moves cautiously toward the great cavern ahead, its sides and walls disappearing into the gloomy distance. Cocking his head to one side to listen, he holds his hand up for a moment, demanding unconditional quiet from from his companions. Then , his arm relaxing in relief, he waves everyone forward and moves into the open. Before him, scattered to the far walls of the enormous cavern, are piles upon piles of glittering treasure - coins from countless kingdoms, sparkling gems, exquisite jewelry, and items of wondrous power - enough for twenty kings' ransoms. Arikus laughs gleefully, thrusting both hands into the nearest cache of coins to let them runs through his fingers. At that moment, a monstrous shadow looms threateningly over him. Looking up, Arikus blanches and stumbles back in horror before the terrible visage of a Great Red Wyrm. The fearsome dragon opens its razor-filled maw and spews forth a gout of white-hot flame, engulfing the hapless warrior.... The ultimate Dungeon Master Fantasy! This is the most deluxe dungeon. Designed to appeal to discriminating and demanding role-players. Adventurers, beware. This is more than just a dragon hunt. Within the lair of the beast lie cruel and deadly traps, befuddling conundrums and puzzles, and cunning minions that will be the end of overconfident or careless adventurers. Comprised of three 64-page books, for two adventures that link to one super-campaign 12 full-color reference cards 16 special player handouts Eight Monstrous Compendium sheets A Sheet of cardstock standups with 24 plastic bases. Six full-color poster maps, two of which link together to make a giant tactical playing surface for use with miniatures or the included cardstock figures. TSR 1089
Run silently; the Midnight Stalkers are after you. Escape from the Tower of Midnight is an AD&D* game module for 2-6 thieves of 2nd-4th level. The Dungeon Master may change the names of the thieves’ guilds, countries, deities, and so forth to fit the individual campaign. Note that all player characters are assumed to have been imprisoned at the start of the adventure; little or no equipment will be available at first. This module is well suited for tournament use. Adventure Background It must be assumed, for the sake of the adventure to follow, that the PCs have no way of avoiding capture by the Midnight Stalkers. However, the DM may find a way to play out this adventure and have some or all of the PCs captured, allowing any who escape to attempt to rescue their comrades.

Valachan: Hunter’s Moon is a slasher/gothic horror adventure for 4-5 level characters of 8-9th level. It can be played over the course of 6-8 hours and should roughly take one playing session, if the party is quick, or two if the party is progressing slowly. This is the fourth and final part of the Carnival of Lost Souls campaign, which can also be played as a standalone adventure. Valachan: Hunter’s Moon features: Fully fleshed out Trial of Hearts with dangerous encounters along the journey Rules for sabotaging rival parties before the Trial New custom monsters to make combat encounters truly memorable and exciting High-quality maps, also available in universal vtt format Check out the previous adventures in the series: Lamordia: The Hardest of Hearts, Dementlieu: Dance with the Devil and Kalakeri: The Forbidden Temple! And look out for the special Campaign Guide, which will explain in detail how to best set up and play the campaign. However, if you want to start your campaign right now, don’t worry - we have included a short appendix at the end of each adventure that will explain the basics! Disclaimer: We are a team of writers from Ukraine, so the unprovoked war and senseless aggression of the terrorist state of russia influenced our initial timelines significantly. However, we are now as safe as we can ever be under the constant threat of missile strikes, and determined to finish the whole series! And after that - who knows, maybe even more cool adventures will follow ;)

Sent on a desperate mission into an unknown land, you must seek out the one called "the Master" and his Temple of Death. There is little time to waste, as you must act before the Master's armies destroy your homelands. But to complete your task, you must battle fearsome guardians, travel through a hostile kingdom, and discover the secret of the master. Can you survive his defenses and win? This module contains referee's notes, background, maps and detailed keys. It is the second adventure in the two-part Desert Nomads series begun in X4, Master of the Desert Nomads, but it can stand on its own as a seperate adventure. Wheter you play Temple of Death by itself or as part of a series, the adventure will offer you hours of excitement and fun! TSR 9069

*THIS IS A D&D NEXT/5E PLAYTEST ADVENTURE* Imani, a Turmishan wizard and former adventurer, seeks the aid of heroes to infiltrate Dretchroyaster’s lair and recover the Diamond Staff of Chomylla—the key to powerful magic and wisdom locked away for thousands of years. In addition to his own sagely interest in the lore of lost Uvaeren, Imani recognizes the dangers of such powerful magic falling into evil hands. The dracolich has secured the staff in his lair’s cen- tral chamber, using ancient wards of protection that can be bypassed only by four artifact-idols once belong- ing to a cult of Bhaal. Each group of adventurers enters the dungeon through a different section of the dun- geon—a forgotten temple of Bhaal, a vast underground lake, a troglodyte village, or Dretchroyaster’s vaults. Dretchroyaster’s lair is no simple set of caverns and ancient ruins. It sits atop a source of great power and energy, which the dracolich and his Cult of the Dragon allies hope to use to unlock the secrets of the staff. Only by undertaking a unified assault against Dretchroyas- ter’s lair can the adventurers hope to recover the Diamond Staff and survive the dracolich’s fury. The adventurers must make their way through the lair and recover the Bhaalite idols that will help unlock the Diamond Staff, all the while dealing with the lair’s creatures and avoiding the dracolich as he pur- sues intruders. Entering the Chamber of the Diamond Staff, the heroes must overcome its magical wards and claim the staff before being slain by the dracolich and his servants.

Restore an Abandoned Temple Enter the catacombs near the desecrated Temple of Muir, Goddess of Paladins, and search for the lost tomb of Abysthor. Will your party be able to cleanse the evil that now inhabits these once-sacred halls, and recover the Stone of Tircople? Can your characters survive the traps of an undead sorcerer? Will your players discover the chamber of Living Rock and the secret power it holds? Adventure awaits! Gold and Glory! A fantasy adventure published for the D20 system, The Tomb of Abysthor is the first module in Necromancer Games Dungeon series and can be played as a stand-alone story or in conjunction with The Crucible of Freya and the forthcoming city supplement Bards Gate. What secrets lie hidden in the tomb of Abysthor?

The pearl divers of Shoalbury are in trouble. A band of birdlike kenku and ogres have been ambushing and plundering outgoing shipments of pearls, and the villagers are growing desperate. And why are the bandits stealing eyes from the bodies of their victims? A single guard survived the most recent ambush with one eye intact, and his testimony may just be enough to lead a brave band of adventurers to the bandit lair, and to the sinister cult they serve.

THE FIRST SET OF DUNGEONS ON DEMAND ADVENTURES! The first volume of Dungeons on Demand includes the first four dungeons: Bandit's Nest - Level 1 Adventure Dungeon Insidious Experiments - Level 4 Adventure Dungeon Fierce Tempers - Level 8 Adventure Dungeon Lord of Gloomthrone - Level 12 Adventure Dungeon It also includes the following supplements: New Twists on Old Monsters - Gaming Supplement Imbued with Magic - Gaming Supplement The bundle includes hundreds of pages worth of materials and supplements sure to keep your gaming sessions busy!

No Loose Ends is a mini-adventure that has a single encounter, based on a group of orcs (or ogres based on level) setting up an ambush for the players by setting up a fake bridge that they attempt to collapse under the players before attacking. The cloak of elvenkind is optional, it is included only in the higher level adjustments. Pgs. 17-18

The Thieves Guild Ebonclad has assigned to party a mission to find the missing Ebonclad Seeker, Osme Sunshadow, as well as investigate the prospective thief Korina Ren. The mission’s conclusion takes the party on a “traditional” dungeon dive in search of a missing guild member, however, how they get there will depend on the work they do in the city. Finally, the mission gives you, the GM, multiple scenarios to choose from that will affect its outcome.