
A shadow from the past, the Ghost Tower of Inverness has loomed ever larger in the mind of the great Seer of Urnst, Now he has convinced the Duke that an expedition should be organized to go to the ancient keep and recover its greatest treasure — the fabled Soul Gem. TSR 9038

All's fair in love and rivalry. Some matches are made in heaven, but not this one. Pgs. 26-36

The sea has many perils. Are the treasures of a sunken pirate ship worth the risk? Arkos Seatamer, a privateer and the sole survivor of a shipwreck has gathered a new crew. He's returning to the wreck to recover the body of his closest friend, Devek Harpwind, for a proper burial. Arkos had rammed the pirate vessel 'Striking Shadow' in combat, shattering its hull. He leapt aboard the sinking ship to take the pirate queen as a prisoner. Shortly after, a sudden storm arose, so violent that it sunk his ship as well. This isn't the whole story. The pirate queen wore a cursed gold armband, shaped like a coiled eel. The sight of the band made Arkos mad with greed and he moved to slay her to take it. Devek tried to intervene but Arkos killed his friend in rage. With his dying breaths Devek laid a horrible curse upon Arkos to become a were-eel each night. The PCs are hired to accompany Arkos and his crew to the wreckage and recover Devek's body from the wreck, along with the armband he still lusts for. Pgs. 18-35

Someone in the misty, wooded Moonshae isles needs hundreds of brand new swords taken under guard from Sword Coast smiths to a certain place on the Isles. The swords are needed so badly, and their safe arrival is considered so unlikely, that someone is willing to pay adventurers a lot of gold - someone fairly important. Adventures foolish enough to take assignments too good to be true (or merely desperate for coins) will soon find themselves embroiled in a dark and mysterious struggle against evil that will take them into sacred groves, crumbling castles, and through ancient magical gates to the halls of the High King - and beyond -- An adventure that takes place on the Moonshae Isles, in which a mid-to-high level party fights against the encroaching darkness of The Cult of Bane. Although helped by the Harpers, players will have to uncover the plans of the cult, and thwart them where possible. Preventing the summoning of the "Godson", a manifestation of Bane's evil. Part of the "Forgotten Realms Adventure" series, this is FA1 - Halls of the High King. FA2 is "Nightmare Keep" TSR 9301

Player's pickup the quest from the Greyhawk Adventurer's Guild to escort a barge down the Nyr Dyv.

The king requests your presence in the honorable kingdom of Norwold. If you're worthy, you may be appointed lord of a dominion filled with friendly villages, sturdy fortresses, and raging band of monsters. Raging bands of monsters? Well, yes, and you may have to lead your forces into a war or two. But you'll be ready for the challenge. You'll be ready for treacherous spies who conspire to steal you land. You'll be ready for a foul band of giants that raids your dominions. And you'll be ready for the inevitable clash of empires, the outcome of which may alter the fate of millions. You'll be ready! Won't you? Test of the Warlords includes a complete campaign setting, several new NPCs, and dungeon and wilderness encounters, and guidelines for running a war between empires. TSR 9117

Introductory module for the Hollow World setting. First Adventure in the Blood Brethren Trilogy. Into the Depths! Under the ruins of Barleycorn Monastery, a tunnel leads one thousand miles downward. Through it, a rescue mission into the Broken Lands turns much stranger. Much more Serious. For the trail leads to the Hollow World. Launch your D&D game players into fabulous lost-worlds adventure across the Hollow World! Travel the Azcan Empire. Explore the secret labyrinth of the Great Pyramid in Chitlacan. Fly to the core of the world and enter the Smoking Mirror, before the monstrous Prince Kano enacts his devastating scheme - a scheme called: NIGHTWAIL! Nightwail is the first adventure for the D&D Hollow World Campaign Set. (The Hollow World boxed set is required to play.) This 64-page adventure fits easily into your existing campaign, either as a stand-alone adventure or as part of the continent-spanning Blood Brethren trilogy. These three linked modules can be played in any order - but the adventure starts here! Easily adaptable to the AD&D game! TSR 9303

The Lost Tombs, Volume 3 The Doomgrinder, a mysterious stone windmill many leagues east of the City of Greyhawk, has for centuries been a source of rumors, frustration and fear. The rumors say that vast treasures are stored inside-all cursed. The frustration belongs to hundreds of adventurers who over the years have attempted to enter the windmill and failed. The fear is felt by those who believe the world will end when the stone sails of the Doomgrinder turn again. In the City of Greyhawk, powerful spellcasters read bad omens for the future, and the Doomgrinder is part of them. Some see no future at all, good or bad. TSR 9581
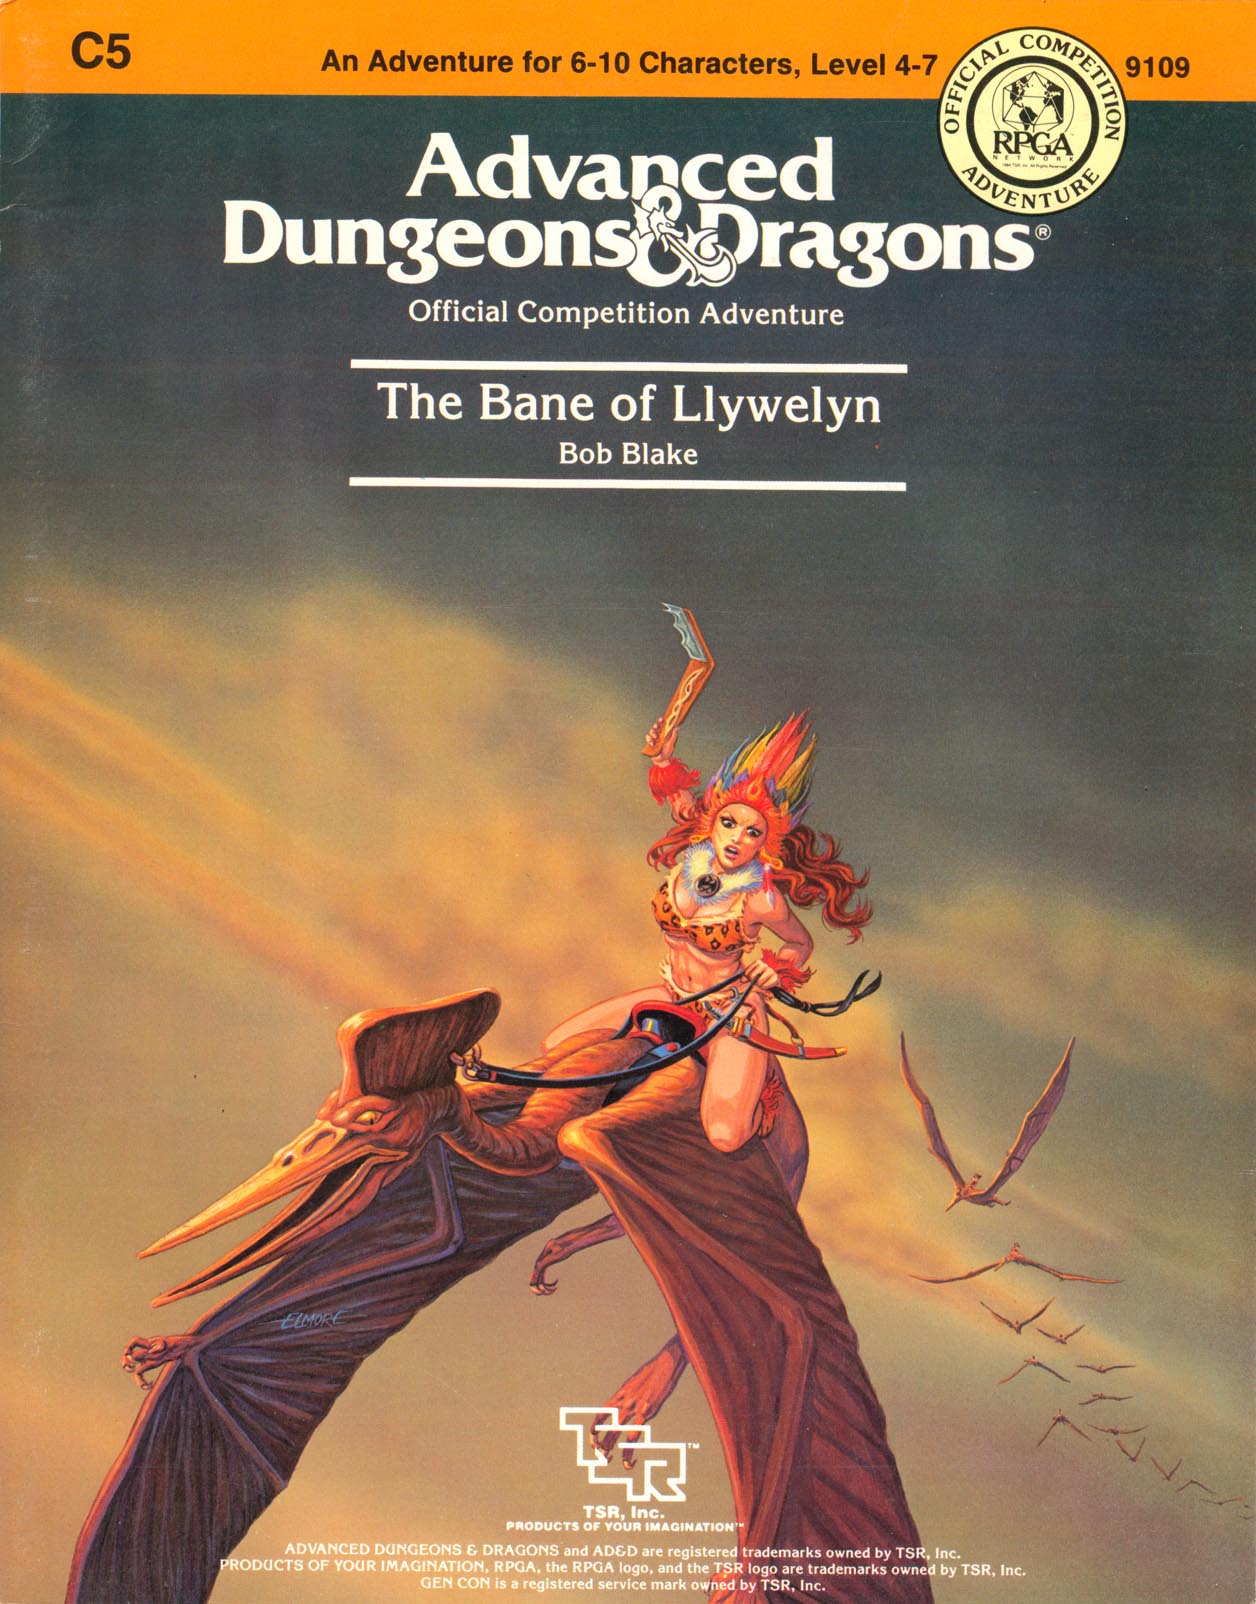
Excitement and unrest grip the land of Pellham. Two hundred years ago, the royal line of kings was deposed and replaced by a High Council. The current council is well-meaning but hopelessly incompetent. Everyone agrees that a drastic change is needed for the kingdom to survive. The ancient Prophecy of Brie foretells that in Pellham's darkest hour, a king from the past will return to restore the kingdom. The time of the prophecy is now. All is in readiness: the symbols of the ancient kings have been recovered, the keys to the royal tomb are in hand, powerful magics to revive the long-dead king have been secured at great cost. Only one problem remains... no one knows where the king is buried! The Bane of Llywelyn concludes the epic adventure of the Prophecy of Brie -- can YOU insure that the quest will be a success? The adventure can be played as a separate adventure or as the second part of the Prophecy of Brie series. TSR 9109

Stopping an undersea war wasn't in your contract. The seas will boil with war, and you're going to be right in the middle of it. Pgs. 34-47

It's all over (and literally so) after midnight. A mission with an unforgiving deadline. The characters must remove the magically-infused remains of a dead wizard and his medallion from a crypt. Pgs. 10-23

Thief's Challenge is primarily a mystery, a story thick with finger-pointing and double-crosses. It takes a thief to catch a thief in this ONE-ON-ONE™ adventure for one player and the DUNGEON MASTER™. A low- to mid-level character will need sharp wits to bag the Gullwing Bandit! TSR 9420
A vanished tome, a faded legend, and the end of the world. Out of the eons, the deadliest artifact. At least one magic-user is required, and fighters and thieves would be very helpful. Magic-users may have a special interest in this quest due to the nature of the item for which they search. Traps and puzzles are a dominant theme, and problem solving is necessary. Pgs. 41-64
The orcs remember Tarran Kratys. Today he wishes they had not.

This adventure is about a quest to save a city that disappear underneath there feet in a power play by a wizard from another plane. The previous ruling wizards are trapped in magic coins scattered nearby and help defeat the evil wizard on an inverse material plane and end with the players going into the middle of a sun to convince the ruling fire elemental to give the city back. TSR 9204

A bizarre puppet master pulls the strings in this introductory RAVENLOFT® adventure for lower level characters. "Beware what you wish, for it might come true" is an old Vistani saying. In the small town of Odiare, a toymarker has wished a puppet to life--only this puppet is not a friendly, playful toy. It is a thing of evil, bent upon killing all the adults of Odiare. When the player characters are trapped within this town, Maligno the puppet and his animated toys begin to hunt them down. The PCs' only chance for escape is to defeat the mad marionette.

Some dozens of leagues to the north and west of the STEADING OF THE HILL GIANT CHIEF (Module G1 of this series), amidst the tallest mountain peaks, is the stronghold of Grugnur, Lord of Frost Giants. As frost giants have been amongst those who have been in the reaving bands, the party is to deal with them as the hill giants have been dealt with. Death and destruction are to be meted out to the frost giants in the same measure they gave to the peoples below. This module contains background information, referee's notes, two level maps, and exploration matrix keys. It provides a complete module for play of ADVANCED DUNGEONS & DRAGONS, and it can be used alone or as the second of a three-part expedition adventure which also employs DUNGEON MODULE G1 (STEADING OF THE HILL GIANT CHIEF) and DUNGEON MODULE G3 (HALL OF THE FIRE GIANT KING). TSR 9017

For a long time you have heard legends about the Island of Vacros; when you were only a child, the stories about evil minotaurs were used to scare you into behaving. Now you are grown, and you no longer believe children's stories. But King Trueon of Cathos is worried: his daughter Princess Lydora has been kidnapped, and he has found clues that she has been taken to the ancient and evil island of Vacros. You have heard rumors that a large and dangerous mazework lies beneath the surface of the island - a mazework that is guarded by minotaurs. Of course many rumors are false, but then again... The Maze of the Riddling Minotaur is the second in a series of invisible ink modules: using the invisible ink pen included in this module, you may play the adventure by yourself. After you have played the solo version, you have not used up the module: instructions are provided as to how you may change the solo version into an exciting group adventure! TSR 9060
A desperate rescue beneath the waves. The Deadly Sea is an oceanic quest for 4-8 characters of 4th-7th level in the AD&D® game. The use of magical items or spells which aid undersea combat, movement, and breathing is strongly advised. The ability to open locks is also helpful, as are mariner skills and knowledge. See additional notes in the section ‘‘For the Dungeon Master.” The adventure begins at a seaport which the Dungeon Master should name and develop as desired, to fit the circumstances of his campaign. The names of other areas may be changed to fit the campaign as well. This module requires some detailing and planning prior to use.

After hiring a group of brave adventurers to help him "acquire" a beholder specimen, the mage Velinax disappears! Rumors blame an insidious thieves' guild called the Unblinking Eye for this turn of events. Why would the Unblinking Eye wish to "take care" of the mage? Why does the guild want to speak to anyone involved with Velinax? Finally, what dark goal does the guild truly intend to accomplish? Finding out the answers to these questions will lead doughty adventurers straight through the shadows of a crafty thieves' guild and onto the threshold of an even deeper and more dangerous darkness. "Eye of Doom" is the second of three adventures featuring the nightmarish beholder. It can be played as an individual mission or as part of the series that began with "Eye of Pain" and concludes in "Eye to Eye." TSR 9530