
Devastated in a war with a nearby wizards' school, the Fighters' Academy has since been surrounded by a foul and dank swamp - the Gloomfens. Since the climatctic battle between the wizards and fighters, the tower has decayed. The spirit of the head of the academy haunts the building, eternally plotting his revenge on the wizards who killed him. his loyal sutdents remain faithful to him even in death. Other foul undead have made their home in the rotting, spacious academy. From their lair, they make forays into farmsteads near the swamp in search of victims to feed their unspeakable appetites. The Problem of these terrible attacks by the savage undead will not stop until the evil that has found a home at the tower is burned from the face of the land forever. Will your party heed the call and help the town of Melinir? Will they be able to clear the former Academy of its undead? Lair of the Vampire Lord is the third in a three part adventure, The Haunted Tower. Or, it can be ran as a stand alone adventure. The choice is up to you. Part of TSR 1081 The Haunted Tower
Centuries ago in the Black Swamp, Castle Kraal was a well-respected keep. Its warriors defended the folk of Thunder Rift from the marauding bands of ogres and goblins who swarmed to attack from the Horned Hills. And then one day the keep and all of its warriors vanished, never to be seen again. Now, all these years later, historians are still trying to find the answers to the disappearance of Castle Kraal, answers which may be hidden in Kraal's ruins. The heroes are asked to investigate and to try and solve the mystery. Be Warned: Not every mystery wishes to be solved! Recommended for beginning players and DMs For use with the DUNGEONS & DRAGONS Game Box. TSR 9434

This material was originally published as two separate adventures, D1: "Descent into the Depths of the Earth" and D2: "Shrine of the Kuo-Toa." Contained herein are referee notes, background information, maps, and exploration keys intended for use with the Advanced Dungeons & Dragons rules. The adventure can be used alone or as part of an extended adventure that begins with G1-3: "Against the Giants" and continues with D3: "The Vault of the Drow" and Q1: "Queen of the Demonweb Pits." TSR 9059
Nothing living guards this island - that's the problem. The party must clear a burned out abbey, only recently the home to a group of evil clerics.
In the frozen wastes, one can find wealth, beauty and one's own death. A deadly hunt deep in the arctic wastes Pgs. 11-26

What sends you adventuring deep into unknown lands, across dark waters, around The Savage Coast? Adventure? The sincere desire to help others? Or greed? Cartographers Guild members tell of lost cities and hidden treasures. Sailors tell of menacing beasts and cannibals to the west. They tell of savages along the shores who use gold nuggets for fishing weights. They also tell of great mounds of gold that collect at river mouths. You must decide the grater lure; the safety of Slagovich or the glimmer of gold along The Savage Coast. This adventure includes a map which expands the D&D game world, and a special expanded monsters section. TSR 9129
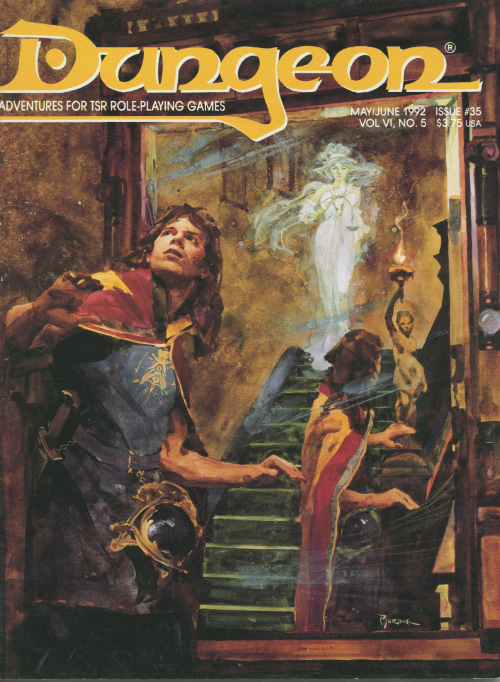
Trouble always comes in threes. For years the mansion has hidden its secrets and its sorrows, but now it has returned to dreadful life. The Ghost of Mistmoor is an investigative adventure where the PCs are tasked with finding the entrance to a secret vault in a haunted mansion. There are ghosts to be had, but unbeknownst to the characters also a cunning thief and her sidekick took residence here. It does not contain many combat encounters but has a rich list of spooky events, some from the ghosts, some staged by the thief. Pgs. 52-70

Who among you dares to challenge the high seas? Inspired by the tales of Sinbad, Golden Voyages provides teh source material and adventures needed to run a mini-campaign on the Crowded Sea. Detailed backgrounds, perilous locations, and wondrous NPCs populate the enchanted seas. Player characters will discover wildly different adventures as they sail from place to place. DM Notes There are multiple options for plot hooks which is nice, of course they all lead to the same spot, follow clues that take you to all corners of the Crowded Sea to find a Great Treasure. TSR 9366

'Help wanted: Fearless crew to stop undead pirates. Pay bills before applying." The first thing you'll hear is dead silence. The party must hunt down a ghostship disrupting commerce in the trade port of Koll. At least, everyone thinks it's a ghostship, the party may discover otherwise.

This adventure is set in the van Richten estate, a free-floating realm in the Mists of Ravenloft. While this scenario serves as the conclusion to the other adventure included in this boxed set, it can also stand alone with relatively minor modifications. Removing most of the monsters and emphasizing the intangible supernatural phenomena makes this adventure especially apt for a Masque of the Red Death campaign. Regardless of where it is set, you may play this adventure many times without it unfolding exactly the same way twice. Suitable for use with the Bleak House campaign or the Masque of the Red Death Setting. Included in Bleak House: The Death of Rudolph van Richten TSR 1141
When the wizard's gone, who minds his home? The wizard's gone, and his pets are home alone - but not for long! The wizard, Asflag, has met a horrible fate as a result of a sorcerous accident! Dangerous creatures have since been escaping from his home. The players are hired by the town to stop this danger. Pgs. 8-21

Into the Drachensgrab Mountains! Hot on the trail of the marauding slavers, you and your fellow adventurers plunge deep into hostile hills. Spurred on by your past success, you now seek the heart of the slaver conspiracy. But hurry! Your must move quickly before the slavers recover from your previous forays and attack! This module was originally used for the official Advanced Dungeons & Dragons Tournament at Gen Con XIII and is the third of four in a series of related tournament modules. This module contains a challenging scenario, the tournament scoring system, plus nine pre-rolled, playtested tournament characters. Also included are large scale referee's maps, notes, and background information. A3 is a complete adventure in itself, but it is also a companion to A1 (Slave Pits of the Undercity), A2 (Secret of the Slavers' Stockade), and A4 (In the Dungeons of the Slave Lords). TSR 9041

Lots of stronghold assaults and shipboard travel/encounters in this one. This adventure's deep political basis might be seen as an introduction for the domain-focused adventures of Companion-level play. This adventure is for use with the Dungeons & Dragons Basic, Expert, and Companion Rules, and includes the intrigue of engaging with nobility's lands and agendas. Intro: All is not well in the kingdom of Vestland. Not only is the king dead and the holy Sonora Crown missing, but the heir to the kingdom was lost at birth and no on knows where to find him. As if this wasn't bad enough, the forces of the Ethengar Khanate, never on the best of terms with Vestland, are now massing on the borders, hoping to take advantage of Vestland's plight. To complete the rosy picture, traitors from within also threaten to speed the downfall of the High Kingdom. Sounds like a job for you. You must find the long-lost heir to the kingdom and recover the Sonora Crown, the mystical device without which a king cannot be crowned. Standing in your way are traitors and spies from within and invaders from without the kingdom of Vestland. Time is running out! Can you save Vestland from disaster? TSR 9218

The followers of the many gods of Kara-Tur have always fought, to prove the superiority of their martial discipline and the greater wisdom of their deities. The strict hierarchy of the gods is now threatened by the sudden prominence of the followers of the Dragon Claw, a new and deadly school of martial arts that threatens to destroy all other schools. The players, recruited by a mysterious old monk with a bizarre fighting style, must find out what's behind the emergence of the Dragon Claw and put a stop to it. Mad Money vs. The Dragon Claw will take players across the entire country of T'u Lung, from the mouth of the great river Fenghsintzu to its headquarters, where they must deal with the legendary Cult of the Black Leopard - all in the name of the Mad Monkey. Mad Monkey vs. The Dragon Claw is a scenario for the ORIENTAL ADVENTURES supplement to the AD&D game. It is set in KARA-TUR, the oriental world in the Forgotten Realms. Mad Monkey vs. The Dragon Claw is designed for five to eight characters of Levels 6-9. TSR 9242

Through seven gates lie seven realms. In seven realms stand seven guardians. With seven guardians lie seven symbols. From seven symbols comes one key. Alpahaks the Dark desires that key, by which he plans to release death and chaos into the realms of man. Your party may be all that stands between life and death. Will you heed the lunatic ravings of a dying madman? Travel to the top of Guardian Mesa, and enter the Septahenge. Gather the mystic symbols, create they key, and defeat the Carnifex, before it's too late... TSR 9174

In this scenario, the adventurers pass through magical portals into a series of interlinked chambers. The characters are encouraged by a young scholarly mage to voyage into the Sea of Pastures, to explore a mysterious island connected with a number of recent shipwrecks and disappearances. The island is grassy and windblasted, but eventually the characters discover a stone door leading into a subterranean complex. There, they discover 18 rooms linked by secret passages and magical portals. Most of these rooms have been ransacked by a variety of other survivors, human and monstrous. These survivors are likewise trapped within the labyrinth and are either eking out a miserable existence there or else desperately searching for a means of escape. Also within the building are a number of extraplanar creatures, collectively known as gingwatzim, who can shift between various forms: an energy form (glowing ball of light), an inanimate form (usually a magical weapon), and an animate form (an animal or monster). Eventually the characters may find the exit, and are once again deposited on the dreary islands to await rescue. TSR 9110

Look who's dropping in. A short encounter with a most unusual boarding party. A ruthlus pirate has been terrorizing a local port and it is up to the party to hunt him down and capture his ship. Pgs. 30-33

"Between a Dragon and His Wrath" is an adventure for a well-balanced party set in the lands of Nordmarr. Although the adventure is best set a generation after the War of the Lance, the DM should have little trouble placing it in other times in Ansalon's history.

This module was originally used for the AD&D Tournament at Origins '79. Your party is lost! You should never have abandoned the ship and struck out into the marshes, but your pursuers were closing on your trail, and it seemed the only way. Stumbling onward through the fens, your party makes for higher ground ahead. As you cross the ridge, you see a clearing before you. There in an ancient ruin - a worn and overgrown pyramid fills the courtyard, shining in the moonlight, seeming almost brighter than the moon itself. TSR 9032

For a long time you have heard legends about the Island of Vacros; when you were only a child, the stories about evil minotaurs were used to scare you into behaving. Now you are grown, and you no longer believe children's stories. But King Trueon of Cathos is worried: his daughter Princess Lydora has been kidnapped, and he has found clues that she has been taken to the ancient and evil island of Vacros. You have heard rumors that a large and dangerous mazework lies beneath the surface of the island - a mazework that is guarded by minotaurs. Of course many rumors are false, but then again... The Maze of the Riddling Minotaur is the second in a series of invisible ink modules: using the invisible ink pen included in this module, you may play the adventure by yourself. After you have played the solo version, you have not used up the module: instructions are provided as to how you may change the solo version into an exciting group adventure! TSR 9060