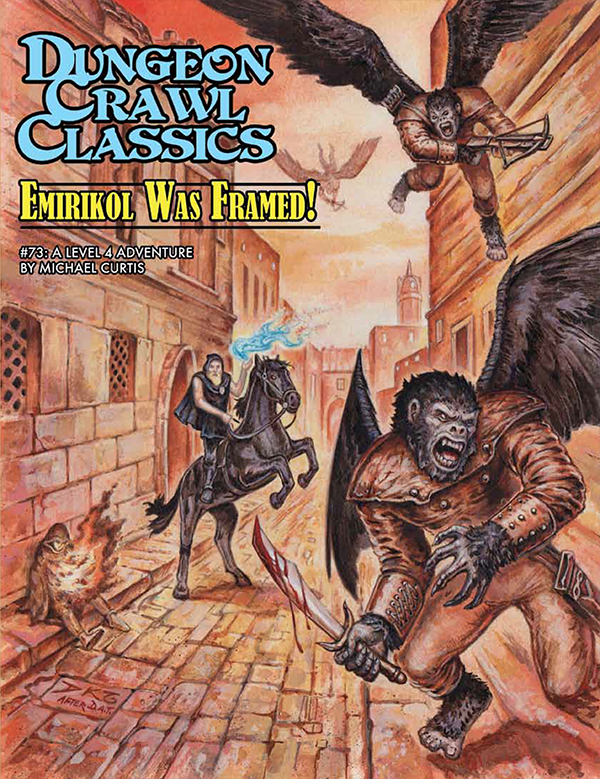
The mad wizard Emirikol is terrifying the city! Striking without reason and sending his winged apes to slaughter the populace, the famous archmage has gone too far. Now a coffer of jewels is offered to those who would dare defeat him. The ever-changing walls of his Shifting Tower are guarded by a host of diabolical traps, fiendish guardians, and unimaginable terror. Will your adventurers come out victorious…or lose their very souls in the attempt?

An adventure included in the Essentials Kit (2019). The party starts in Phandalin, the starting town for the Starter Set (2014) adventure, Lost Mine of Phandlever. Various jobs are posted by Harbin Wester, townmaster, which the PCs can pursue. These jobs culminate in a raid on Icespire Hold, where Cryovain, a young adult white dragon, has recently claimed as its lair.

An immense urban sandbox and eastern fantasy noir mega adventure for D&D 5E that takes 4–6 characters from 3rd through 12th level! An enmity between the Gekido, Hakaisuru, Kirai, and Namida clans has persisted for ages, the wounds from the Battle of Broken Spears torn open every few years by border skirmishes and trade disputes. Seeking to win the minds of the people by a grand gesture during these dark times, Emperor Hitoshi Masuto has arranged an alliance between the quarreling noble families—20 brides and grooms have been chosen to wed in celebration of the 10th anniversary of the decisive final battle in the rebellion against more than a century of foreign occupation. Imperial Matchmaker Weddings Decree Whether the adventurers seek honor and glory by protecting these fiancees or choose to line their pockets by ensuring the unions never come to pass, opportunity knocks at their door as the bengoshi of several clans sift through the mercenaries and spellswords that walk the streets of Sanbaoshi. To rise above the chaff in the capital of the Imperial Prefecture the PCs must be willing to do whatever is necessary to achieve their goals and survive among their cutthroat competition, the corrupting Mists of Akuma, and any designs of the monstrous forces keen to strike a foothold anew in Soburin. What's to be found in Imperial Matchmaker? Statistics for over 120 monsters and NPCs! No matter where the party goes or who they interact with GMs will quickly be able to provide skill bonuses, hit points, and everything else they might need to populate the world, creating a dynamic and seamless environment around the adventurers. Over 40 maps including an insane 2-page isometric illustration of Sanbaosh by Indi Martin! The urban sandbox where most of the mega adventure takes place has a staggering amount of cartography to make certain GMs are never hard-pressed when figures are needed. 147 pages of material focused on the capital of the Imperial Prefecture! With NPCs and maps galore the detail poured into Sanbaoshi make its chapter a book unto itself, making this an outstanding addition to any GM's collection (whether running the mega adventure or not). New magic items including the sheathe ring and black glass dagger, as well as innovative rules for Absentee & Memorial cards! New character options! Put your allies (or pet) into a frenzy with the College of the Maddening Flute, use a deadly bladed brush to turn painting into reality as a Genjitsugaka fighter, look upon the Kami when making a pact to gain a spiritual companion, or become a warlock of Ancestors to pierce through the veil of time. A unique adventure unlike any you've played before! There are 10 high profile matrimonies set to take place in this gigantic module but so very much more awaiting the PCs as they walk the streets of Sanbaoshi: specialized sidequests for the Mists of Akuma Iconics, unexpected trials like Nobukai Bamboo Grove, and virtually endless intrigues amongst the gangs, criminal organizations, noble clans, and other folk that make their homes in the capital of the Imperial Prefecture.

A Place and Time for Death is a companion adventure made to go along with the events unfolding in Folio Digital Quarterly #1, (GK1 The Adventure Begins). Far out in the uncharted territories, the Enlightened still cling to life, but the ever encroaching presence of the xenophobic Samaya threatens the last of their hidden enclaves. Now, a bounty hunter has been dispatched to deal with the supposed Enlightened sympathizers in the border town of Hogan's Hooch, but there is more to the story than meets the eye. Unbeknownst to the citizens of the town and old relic of the Final War is the price the bounty hunter seeks. Can the party find a way to thwart the bounty hunter and deal with the relic before it falls into the hands of Samaya willing to use it to sway the balance of power in the world? This adventure is formatted to both 1E & 5E gaming rules.

This higher level adventure takes the group on a survey mission for the Merchant’s Guild. The party will be asked to go through Uvarno, home of the Horselords, and attempt to locate a suitable passage for a merchant caravan into The Melcore. The party’s previous dealings with one of the Horselords, as well as they proven abilities to resolve “problems” has made them a natural choice for the mission. Built as a hex crawl, this scenario will require the party to map the wilderness as well as clearing out any “hostiles”.

This adventure can be used as stand-alone or continuing the arc started by Death in Freeport. Terror in Freeport leads the PCs deeper into the intrigue they began to glimpse in Death in Freeport. The investigation takes them from the corridors of power to the bowels of the underworld, with terrifying insights into who really controls the city. They discover that the Brotherhood of the Yellow Sign has its claws in the town's power elite, but thanks to some clever camouflage by Sea Lord Drac. they may not find out just whom the serpents control until it's too late. As the adventure begins, the PCs are contacted once more by a very nervous Brother Egil. He tells them that while staying with Lucius one evening, he awoke to find a burglar in the roomstealing a scroll. Egil is certain that the Brotherhood have penetrated further into Freeport than anyone imagines. He wants the PCs to investigate Milos's other ties to the city and find out what's being done about the temple of the Unspeakable One. The PCs search the cultist's lodgings and discover it has been carefully gone over, and several possibly incriminating books are missing. But the burglars overlooked one thing: a Tome with a diagram of the Lighthouse of Drac sketched onto the back page, marked with the letter V. Upon leaving Milos's lodgings, the PCs come upon a gang of orcs beating up a hapless messenger. They lend a hand, only to discover they've been tricked - the messenger makes off with Milos's book! A chase through the back streets leads them to the boarded-up building the y discovered in Death What they find isn't encouraging. There is a guard posted out front, courtesy of "V"- -Verlaine. head of the Captains' Council. Meanwhile, down below, the cultists continue to have the run of the caverns-— in fact, they have been shipping their unholy relics to Verlaine's own home!

This is an incredibly deadly dungeon that will strain the limits of any party that dares to tread within. I consider this to be a challenge dungeon of sorts, and I would suggest it as a dungeon to throw at players if they ever want to run a gauntlet with new characters. This dungeons is filled to the brim with traps, puzzles, and vicious creatures. It is also quite a long dungeon - be prepared to spend at least two sessions working through the pathways of this horrifying Tomb.

Part Three of the Umbral Aristocracy Trilogy. You’ve been set up. However, the man you were set against is more than willing to forgive and forget, if you are willing join forces to seek a terrible vengeance.

This series of singular adventures center around the small town of Penchant. The area in question is home to a variety of challenges depending on the level of the PC. This adventure begins with the new PCs mentor sending them to a religious coronation that they cannot attend. The PC is to travel, via burro, to the Bu-San Monastery and extend salutations to the new head of the order. In this case the journey IS the adventure!

The Ivory Scimitar now has a choice, continue on into the azure glow that leads to Mithelvarn's Dungeon or retrace their steps and investigate the source of the sounds they heard on the way in. Inside the unknown region is a massive forge, home to mad Kin who has been crafting weapons and armor that are delivered to his 'god', although in reality they are transported into Mithelvarn's Dungeon. This adventure is formatted to both 1E & 5E gaming rules.

'The Sunken Village of Little Corth' is a 2nd level Dungeons and Dragons adventure centred on a time-paradox puzzle. The PCs travel across a necrotic marsh (the Grey Creeping) to a sunken village where, upon being transported back 2000 years into the past, they must prevent a necromancer freeing Orcus (demon prince of Undeath) from the imprisoning veils of the spirit plane. If only it was as simple as that, for the PCs must also contend with deactivating a giant mechanical orrery, and be sharp enough to realise that the useful items that helped them survive the Grey Creeoing must be found and placed for their 'future-past' selves.

Evil Reigns in the Elven Ruins Where elves once built the shining city of Myth Drannor, demons and devils now prowl in search of prey. Ancient evil slumbers beneath mossy stones, waiting for those foolish enough to venture within its grasp. Bold swordsmen, stealthy rogues, and skillful wizards have all met their end within the walls of Myth Drannor. But the lure of the city's magical treasures still draws heroes and villains alike to tempt death—or worse. Drawn by the dream of limitless magical power, the Cult of the Dragon has carved out a secret stronghold in the heart of the ruins. Using the power of a corrupted pool of radiance, the Cultists stand poised to attain their goal of subjugating all of Faerûn... unless a group of brave heroes can stop them first.
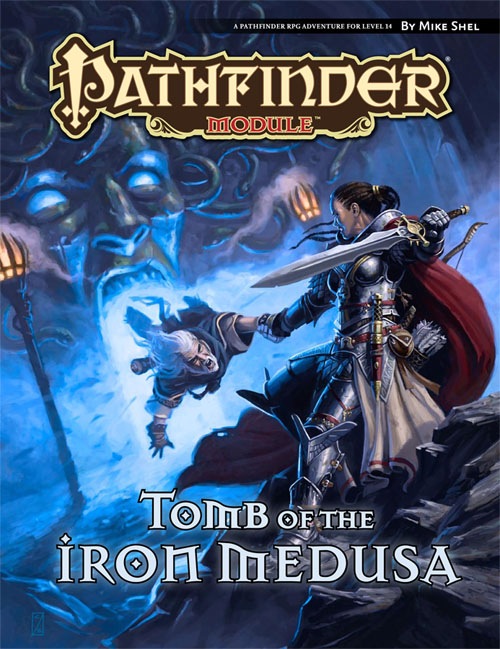
Hidden in the remote southern range of the World’s Edge Mountains lies a mysterious necropolis known in legend as the Tomb of the Iron Medusa. When the last heir of the dungeon’s long-dead noble builders hires the PCs to explore the forlorn and deadly site in search of evidence that may clear his family name, the intrepid heroes soon find themselves in over their heads. For the Tomb of the Iron Medusa does not give up its secrets lightly, and the dangerous truths that lie within its ancient, trap-laden crypts may have been hidden for very good reasons indeed.

Some of the hamlets outlying Hillsfar have been struck by an odd malady. Rumor has it a traveling carnival visited those hamlets before the disease struck. Does coincidence not equal causation or is something sinister afoot?

In order to stop a series of devastating giant raids, the party must venture into the stronghold of the frost giant jarl Grugnur to both recover the giants' plans and eliminate Grugnur, who is the tactical head behind the operations. The adventure is part of the "Against the Giants" series originally by Gary Gygax, hence the writing credit.

A fiend lurks among the Black Blade goblins. A shapeshifting barghest fashioned by the General of Gehenna to exact revenge on all goblin-kind. It’s aim: to kill as many goblin leaders as possible… A masked goblin approaches the party asking for help. Two tribe leaders are dead. But a rival for chief has control of the crime scene. Will the party discover the barghest among the goblin ranks? Can they stop this imposter before it strikes again? Adventure Overview The adventure’s story is spread over 4 parts and takes approximately 4 hours to play. The adventure begins with a Call to Action scene. Part 1: Goblin Politics. Krill sends his emissaries to implore help from any strong intermediary. The party is asked to investigate the murder of Thrawn in Dringly’s lair. This is Story Objective A. Part 2: The Opposition. Gain entry into Dringly’s lair and investigate the murder of Thrawn. Gather enough evidence to find the killer. This is Story Objective B. Part 3: To The Lair! Now that the players have determined the barghest (Yeep) is to blame, they need to get to Krill’s lair quickly as he is in imminent danger. This is Story Objective C. Part 4: The Barghest.When the players arrive at the lair, they need to get to Krill and expose and defeat the barghest. This is Story Objective D. Adventure Background A barghest named Yeep has begun its onslaught of attacks against the Black Blade goblins. Starting with Chief Gnar, then his second in command Thrawn, the barghest is moving methodically down the line of command. Krill is now chief. But he has some problems: Two leaders of the Black Blades are dead. Who killed them and why? Is he next? Dringly, the next in command, has decided to take his lair for himself, declaring himself Chief of the Black Blades. Who are the Black Blades? The Black Blades are a tribe of goblins in the local area. They are known for dipping their blades in a dark black substance. It is rumored these blades are poisonous. The Black Blades regularly attack passersby on the road to rob them. The Black Blades have two lairs, one run by a chief who leads the whole tribe, and another overseen by a boss lieutenant. The Black Blades have a well-established pecking order which is how Krill stands to become chief. The next in line is Dringly, who has also declared himself chief and wants Krill dead. Krill suspects that there is something suspicious about two leaders being killed within a day of each other, but he has already burned Gnar’s body without any investigation. He needs to investigate the body of Thrawn, but it is in Dringly’s lair. Krill wishes to avoid direct confrontation with Dringly at the present for three reasons: 1) Any violence would only kill his own tribe members and further divide the lairs. 2) He believes there is still hope for negotiation to reunite the Black Blades. 3) He believes that if he were to attempt negotiations himself, Dringly would kill him. This adventure features: Two maps. Ready for your favorite Virtual Tabletop. A full color pdf. A black and white pdf. One custom monster, a reprint of barghest, all others available in the Monster Manual. Four hours of entertainment involving: roll playing a goblin bard, investigating a murder scene, tracking down a barghest before it strikes again. Applicable to any setting.

The Temple of Xhodes is half wilderness adventure, half dungeon crawl for 4-6 characters of 2nd level. People have been disappearing from Eastbrook and surrounding lands. Can the adventurers figure out why – and who’s behind it? Can they stop the cultists before they take over?
In what became known as the Age of Madness, an astral lich calling himself the Crimson Hand descended from the sea of stars, setting his fell gaze upon Gaea. Her red moon he made both his temple and his phylactery, and from there he sought to enslave those who would be ruled and devour those who would not. The Ancients of the four corners of Gaea united their knowledge against this threat, constructing a colossal golem, and inscribing the four POWER WORDS upon four scrolls. These scrolls they fed to the colossus, who ascended to the crimson moon in an instant. The sages of the realm watched as the flashes of battle signaled in the night sky, ending as the crimson moon itself split in half. The lich and the colossus were destroyed, and the Age of Madness was ended. Millennia have passed, and now a new threat rises from the netherworld. The four POWER WORDS have been forgotten, lost among the shattered remnants of the moon. The sages have once again united what remains of their power, this time to teleport a paltry handful of crusaders to retrieve the lost scrolls before the world is doomed.

The Hardest of Hearts is a gothic horror adventure for 4-5 characters of 5-6th level. It can be played over the course of 6-8 hours and should roughly take one playing session if the party is quick, or two if the party is progressing slowly. This is the first part of the Carnival of Lost Souls campaign. It can also be played as a standalone adventure. The Hardest of Hearts features: - Exciting journey through the cold wilderness of Lamordia, which features a special travel system and survival rules - Exploration of the old mansion which has been taken over by the vicious local gang - the Corpse Collectors - Several custom diseases to challenge your players - Moral dilemma at the end of the adventure which the characters will have to solve - New custom monsters to make combat encounters truly memorable and exciting - High-quality maps, also available in universal vtt format Look out for the next adventures in the Carnival of Lost Souls series: Dementlieu: Dance with the Devil, Kalakeri: The Forbidden Temple and Valachan: Hunter’s Moon! They will be released over the course of the next two months. Once all four adventures are out, we will also release a special Campaign Guide, which will explain in detail how to best set up and play the campaign. However, if you want to start your campaign right now, don’t worry - we have included a short appendix at the end of each adventure which will explain the basics!

He wanted a scabbard - but got the shaft. If the book is to believed, there's a magical sword - completely unguarded! - ripe for the taking. This short adventure starts with the players finding a diary describing the final resting place of Hrothgar and his powerful intelligent sword. In a quest for the sword, the players investigate a small cavern system and find the sword in a gelatinous cube. Pgs. 32-37