
Under the Temple Crypt is the first in a series of site-based, Swords & Wizardry** compatible, “micro modules” that can be dropped into just about any campaign (especially a sandbox-style campaign). No underlying story-hook or rationale for exploring the site is given here. This dungeon assumes that there is a temple somewhere with a mysterious walled-in doorframe in the basement crypt. The walled-in doorframe predates the temple itself and leads to ancient subterranean structures that hint of an older civilization as well as an expansive underworld.

The end of the road. A lonely fort stands on the banks of a mighty river. It is here the hardy bands of adventurers gather to plan their conquests of The Hill, the hulking mass that looms over this tiny settlement. The Hill is filled with monsters, they say, and an evil witch makes her home there. Still, no visitor to The Hill has ever returned to prove the rumors are true or false. The thrill of discovery is too great to pass up, and only the river stands in the way. The adventurer's boat is waiting! This module is designed for use with the D&D Basic Rules. A trip through the wilderness begins a unique challenge for the novice player and Dungeon Master. TSR 9078

Your search for Volo’s key in Skullport has you playing a dangerous game between The Xanathar Guild, Bregan D’aerthe, and the Zhentarim. In the Port of Shadow, how do you know who you can trust when lives are on the line? Part Two of the Skullport Shakedown trilogy.

A shadow from the past, the Ghost Tower of Inverness has loomed ever larger in the mind of the great Seer of Urnst, Now he has convinced the Duke that an expedition should be organized to go to the ancient keep and recover its greatest treasure — the fabled Soul Gem. TSR 9038

Chapter 1 - When a relative of someone close to the characters goes missing from a nearby village, the players are asked to investigate. The party has to recover stolen goods from a thief before setting out from the City of Ravens Bluff. They travel through the wilds of Vesperin in search of the missing person, finding trouble and helping locals along the way. Chapter 2 - As the journey continues, the party arrives in a small hamlet suffering from a strange blight. The players will need to investigate the situation and choose sides in a longstanding feud between the mayor and a local magic user. Chapter 3 - After clearing a tribe of violent orcs from a nearby mountain pass to protect the residents of a town, the party will have to enter the lair of a long-dead dragon to rescue their quarry from a band of goblinoid slavers, where they discover an entrance into a dwarven city, lost and forgotten centuries ago. Chapter 4 - The party will have to traverse the ruins of the dwarven city, avoiding hazards and battling the horrors that lurk there, to uncover the identity of the slaver's leader. A discovery that will lead them through a treacherous forest to the city of Tsurlagol in search of a pirate ship called the Star Carver, and its drow captain, The Viper's Kiss. Along the way, they meet an unlikely ally. Chapter 5 - Once they arrive in Tsurlagol, the players will have to choose between gaining the assistance of the city council to fight the pirates head on, or making a deal with the Viper's Kiss, herself. The path they choose will either lead to an epic battle on the Sea of Fallen Stars, or into the deadly sewers and tunnels beneath the city to face an enclave of wererats, undead, and a tribe of mad, kraken-worshipping kuo-toa, in search of a fabled relic. The Laughing Horde of Ruin, Part 1 is the first module of an original 5e adventure campaign. It is designed for character level 1-5, and uses material from the Dungeon Master's Guide, Monster Manual, and Volo's Guide.

This material was originally published as three separate adventures: G1 (STEADING OF THE HILL GIANT CHIEF), G2 (THE GLACIAL RIFT OF THE FROST GIANT JARL), and G3 (HALL OF THE FIRE GIANT KING). Contained herein are referee notes, background information, maps, and exploration keys for three complete adventures using the ADVANCED DUNGEONS & DRAGONS rules. This module can be used alone or as the first in a series of adventures that includes Dungeon Modules D1-2 (DESCENT INTO THE DEPTHS OF THE EARTH), D3 (VAULT OF THE DROW), and Q1 (QUEEN OF THE DEMONWEB PITS). TSR 9058

Crippled, wingless, old and a thousand times more dangerous. Surely, a crippled dragon is less dangerous than a healthy one. Pgs. 35-45

Agents for the Mayor of Kleine have discovered the stronghold of the Red Hand goblins deep within the Burning Hills. They have also discovered that the goblins are forming an alliance with local hobgoblin and bugbear tribes to sweep the humans out of Thunder Rift forever. The PCs must reach the lair before the hobgoblin and bugbear agents return to their own tribes. if the envoys do not return, the tribes will assume that the goblins murdered them and attack the goblins instead of the human settlements. In this way, the humans of Thunder Rift gain some unexpected allies against the Red Hand goblins. This is the most dangerous and demanding of the three adventures in this set. It is recommended that you play it after Red Hand Trail and Trouble Below. However, it can stand alone as an adventure in its own right if you wish. Part of TSR 1076 The Goblin's Lair

Many Cannith creation forges were lost on the Day of Mourning, but a rogue artificer has uncovered one of those that pursued some of the most experimental and dangerous research during the Last War. But while seeking the forbidden knowledge in the forge, this explorer awakened a dark power that was more than she could handle, and that now threatens the region. Pgs. 4-34

Dragonspear Castle. All who live within several hundred miles have heard the name and know its import. Once home to the proud and the brave, it stands now a ruin, cloaked behind a history of murder and diabolic plots. Few go there, for the only reward to be found is death. Rumors abound that Dragonspear holds a portal to the sinister planes, but until now those have been unfounded. Following a great battle against orcs and trolls from the High Moor who had taken possession of the castle, a temple to ward against further evil was established. However, by the Time of Troubles, that temple and its clergy had disappeared. Now, a horde of fiends and monsters has amassed at Dragonspear Castle, and it terrorizing the surrounding countryside. The portal is active, that is for certain. The army of Daggerford needs reinforcements! Is you party made of the stuff of heroes? Hordes of Dragonspear can be played using either the Battlesystem miniatures rules, or the quick combat resolution system found in DMGR2, The Castle Guide. Alternatively, a few simple changes render the entire module playable without any special rules. TSR 9369

Giants have been raiding the lands of men in large bands, with giants of different sorts in these marauding groups. Death and destruction have been laid heavily upon every place these monsters have visited. This has caused great anger in high places, for life and property loss means failure of the vows of noble rulers to protect the life and goods of each and every subject -- and possible lean times for the rulers as well as the ruled. Therefore, a party of the bravest and most powerful adventurers has been assembled and given the charge to punish the miscreant giants. This module contains background information, referee's notes, two level maps, and exploration matrix keys. It provides a complete module for play of ADVANCED DUNGEONS & DRAGONS, and it can be used alone or as the first of a three-part expedition adventure which also employs DUNGEON MODULE G2 (GLACIAL RIFT OF THE FROST GIANT JARL) and DUNGEON MODULE G3 (HALL OF THE FIRE GIANT KING). TSR 9016
The PCs intervene in an attempted murder and are hired to find out what made a guy go mad. This leads them to search for Yenejg Togan's tower/a strange merchant in the nearby forest, where they discover that bugbears have moved in. After exploring the tower, finding the "merchant", and dealing with the bugbears and the lamia that caused the incident in the first place, they were still unable to get into Yenejg's inner sanctum without a key. The PCs return with the key and figure out how to use it to enter Yenejg's sanctum. They then explore it, dealing mostly with traps, and finally discover the resting place of the treasure Yenejg stole from the town. This adventure begins with a skill-based roof-top chase and can include some complex non-combat interactions with potentially hostile NPCs. It includes some semi-interesting traps as well as some nifty puzzles. No villain to speak of. Fool-hardy adventurers can get themselves killed, but some caution will result in only one extremely hard fight, and even that can be avoided if action is taken quickly. Pgs. 74-107
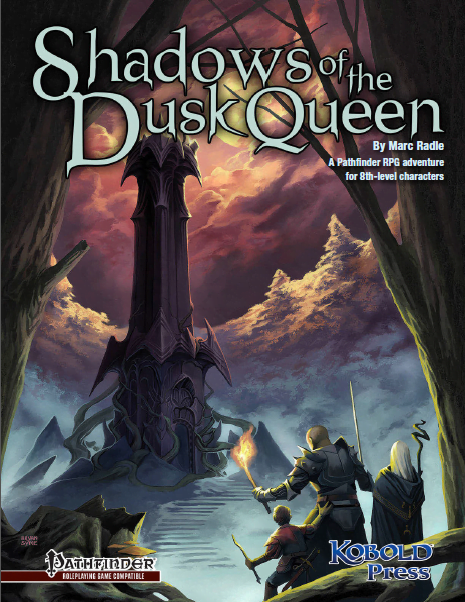
Throughout the land, legends of the Dusk Queen persist. They speak of a sometimes kind, other times cruel, yet always mysterious fey queen who ruled from her Dusk Tower—a tall spire of smooth, dark stone in the heart of a great, shadowy forest. Perhaps the most gripping legends, however, whisper of the Dusk Queen’s sudden and mysterious disappearance. Also available in 5e format.
The brilliant (if somewhat eccentric) detective Viktor Saint-Demain has put more criminal masterminds behind bars than any three other inqusitives. But when the master sleuth fails to get the recogintion he deserves, he sets out to prove to Sharn that they can’t live without him. Pgs. 16-34

When a series of grisly murders and raids on farms and fishing boats come to light, accompanied by a strange fog, the people of Elmwood need heroes to investigate and stop the attacks. There is hardly anyone in the Moonsea who’s life hasn’t been touched by one of the tragedies over the past years, and these attacks may have deeper causes than anyone knows. Part of the Elmwood Adventures Series

Written by the setting’s creator, incomparable RPG author Monte Cook, Ptolus: Queen of Lies is an action-packed fantasy adventure painstakingly re-designed for Ptolus: Monte Cook’s City by the Spire. Involving numerous challenging scenarios for characters of 11th level, Queen of Lies is filled with dozens of dark elf personalities, cunningly showcasing their alien culture—a world of merciless betrayal and sinister lusts. Deep below the surface, in the sunless lands of the Netherdeep, creatures of darkness build weapons and amass armies, dreaming of invasion. An attack on a peaceful elven shrine in Emerald Hill sends the heroes on a quest to retrieve stolen artifacts and kidnapped friends. All signs point to the actions of the dark elves of Ul-Drakkan, far below the city of Ptolus. However, even within that ancient fortress, there exists a deeper darkness.... Underground enemies lurk beyond every twisting passage, and strange creatures abound. The foul culture of the dark elves is both decadent and cruel, and the heroes may discover that they’ve stumbled into a web of deceit and treachery spun by the self-styled queen of the dark elves. Can the player characters complete their mission without being discovered, or will they find out, perhaps too late, that their actions been orchestrated all along by the wicked Queen of Lies? Published by Fiery Dragon Productions

A strangely delivered advertisement has led you to a sage named Demetrios. He needs a rare component to complete a desperately needed potion. The journey to retrieve it will take you through a large, unexplored swamp to a ruined keep, the former headquarters of a vile cult that once claimed the lives of many innocent youths. You cautiously accept the mission... To solve the mysteries of "Baltron's Beacon," the characters must excel in handling wilderness, building ruins, traps, puzzles, and new monsters. This adventure, originally designed for tournament use, is now available for your own campaign. TSR 9152

He wanted a scabbard - but got the shaft. If the book is to believed, there's a magical sword - completely unguarded! - ripe for the taking. This short adventure starts with the players finding a diary describing the final resting place of Hrothgar and his powerful intelligent sword. In a quest for the sword, the players investigate a small cavern system and find the sword in a gelatinous cube. Pgs. 32-37
A Scavenger Hunt? The adventure begins in the city-state of Zoa as the wizard Geolain tasks the player characters with a quest to gather three ingredients they will use to forge a magic coin to defeat an evil wizard. Which will be more dangerous to collect, the mysterious diamond touched by death, the blood of a devil spilled by a coward or a blue dragon's breath? As the player characters race around Reanaaria Bay ti find the rare items, their nemesis Daresh the wizard begins to grow in strength and wrest power from the Skryvalkkers of the Lands of Skaarna. Will the player characters find the ingredients and enchant the coin in time? They just might be Skaarna's only hope. Published by Kenzer & Company

The characters, members of the Clifftop Adventurers’ Guild, have been tasked with acquiring the Chains of Mur’taal, an artifact tied to Thelanis, by their guild handler, Lhara. This artifact is the latest in a series that Provost Nigel Faurious has commissioned the Clifftop guild to retrieve for him. The adventure starts when the characters arrive in Rhukaan Draal via Orien caravan. They’re given a chance to explore a small portion of the city before they head to a local bar to meet their contact provided by Lhara. Accompanied by a local guide, they make their way to the Seawall Mountains, where they’ll have to follow clues and their intuition to find the Valley of the Hero, which conceals the artifact that they’ve been hired to obtain. In order to earn the artifact, characters must first pass three tests laid before them by the Story: The Test of Courage, the Challenge of Wisdom, and the Trial of Honor. Once they finish the tests and collect the artifact, the party heads back toward Rhukaan Draal. But there are Marguul forces in the area, and they don’t intend to let the heroes escape with a priceless piece of their folklore…