
Blood and Gold is an adventure involving crime, drugs and vampires. The quest takes place in an urban area and can be played in any (low) fantasy campaign setting. This scenario features a new captivating and deadly drug. The storyline is hardboiled and probably better fitting for characters of low morality, who won’t take to heart when it comes down to beating people in order to extract information and working for thugs and criminals. Still, the party can be kindhearted and their reasons for meddling with a shady crowd can be for a just cause. But by the end of the day, they themselves will be tempted with the pleasures of sinister life. Adventure Synopsis: Vampire Aris is a self-proclaimed prince of thieves and murderers. He is a ruler of the underground and a demon of night. Aris rose to power through gold and a drug he created from his own blood. Red Sinew is highly addictive, but gives pleasure mortals can’t resist. Aris is a sole vampire who knows how to create this potent toxin, or at least that’s what he thinks. Couple of months ago, his business got stale. There is a new dealer on the street who did not only steal Aris’ local customers but also his exporters. The ancient Vampire is furious as his dominion is shaken. He is set on revenge and blood will be shed, mortal and immortal alike. Published by: Adventurer's Inn

The characters are summoned by the Norse gods to track down two dwarves, one of whom has made a weapon for the giants to use against the gods. The mission takes the characters to Jotunheim, on the plane of Gladsheim, to take the god-slaying weapon from the giants.

Jarl Aelfric Whitehand of Jotunspine, one of the Moonshae Isles, is not happy. His ward, Cordin Wainthrower, has disappeared. Clues imply that Cordin has headed for a ruined keep deep in the Giantspine Mountains. The characters are tasked by the jarl to track down Cordin and bring him back to safety – the Giantspines are filled with many dangers including the legendary Winter King, a fey of great power. Will the characters force Cordin to return to the keep or help him in his quest to restore a family heirloom? If they help him, they must face the chilling depths of the crypt of Icegate Keep. Icegate Keep is an adventure for the first tier, levels 1 to 4. The adventure includes full scaling recommendations for each level, as well as four pre-generated PCs at each of the four levels. The adventure is designed to be tough for the pre-gen PCs, who have little magic to brave the icy mountains. It is estimated to take 4-6 hours to play. The adventure has several new monsters including Ice Wights, Ice Zombies, Frostsnakes, and the infamous Winter King. New magic items are also included such as the greatsword Frostreaver, the ancient Snowbane dagger, the Horn of the Howling Wolf, and the Throne of the Winter King. There is a player handout outlining the legend of the Winter King and three battlemaps showing separate levels of the small keep.

Abominable Adventures - An Encounter Guidebook In The Frozen Tundra is a collection of 12 unique Tier 1 side stories filled with danger, horror, & mystery for Dungeons & Dragons 5th Edition. It can be easily integrated into your adventures set in the frozen lands of the North or during any Icewind Dale: Rime of the Frostmaiden campaign. Featuring ❄12 unique pre-adjusted Tier 1 encounters ❄38 pages filled with amazing artworks by artists from all around the World ❄A handy and image-free print-friendly version ❄Coloured battle maps that can be printed or used in your VTT platforms ❄New frightening creatures!
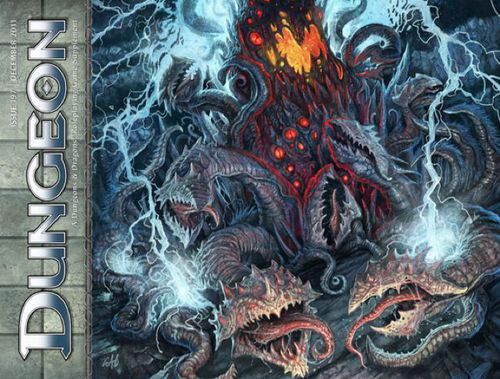
Faced with an unusual alliance of giants raiding the countryside, the party must venture into the steading of hill giant chief Nosnra and uncover maps to the locations of the other giant strongholds. “Steading of the Hill Giant Chief ” can be run as a stand-alone adventure, or you can play it as the first part of a four-part series that continues with “Warrens of the Stone Giant Thane” (Dungeon 198), “Glacial Rift of the Frost Giant Jarl” (Dungeon 199), and “Hall of the Fire Giant King” (Dungeon 200). The adventure is part of the Against the Giants series originally by Gary Gygax, hence the writing credit.

One of the original D&D classics, "The Isle of Dread" is a hex crawl wilderness adventure. It focuses on surviving primitive beasts, dinosaurs, and pirates while uncovering the mystery of the island's inland city, where a great treasure awaits. From the cover: "This module contains maps and background material for the Isle, fifteen new monsters, and suggestions for further adventures. In addition, The Isle of Dread contains a map and background information for a large continent, and eleven smaller maps for encounters on the island itself. In this module, players will push their way through dark jungles and treacherous swamps to discover the lost plateau, and the final secrets of - the Isle of Dread!" TSR 9043
:strip_icc()/pic530611.jpg)
Travelling long distances is the constant lot of the adventurer. This time, their quest will take them across the sea, and deep into the interior of a country they know little about, to retrieve an artefact stolen by one bunch of clerics from another. Now, we all know that meddling in the affairs of the Gods can be a hazardous affair, but this time the Gods haven't been worshipped for hundreds of years, and their clerics slaughtered each other in a great battle back in the distant past. Maybe this is that adventure we've all been waiting for, where the treasure is just sort of sitting there, and all we have to do is go and get it... A complete 40-page adventure, with stats for the D&D/AD&D games, and background information to use with the Pelinore campaign.

From The Magazine: "Every summer, Duke Hightower holds a competition quite different from the traditional jousting and archery tournaments held by similar lords of his station. The rules of his tournament change from year to year, and, to oversee the games, the duke has appointed two wizard brothers who help choose the setting and create the rules and challenges of the competition. This year the competition is called the “Owlbear Run,” an overland race that requires each participating team to escort a live owlbear from the town of Telvorn to the town of Milvorn. The teams will face a variety of challenges; some are devised by the wizards, others by the competing teams or their sponsors, and some occur entirely at random. All of these tests are in addition to the challenges inherent in motivating a temperamental owlbear. Fortune and fame await the first team to cross the finish line, and the local lords sponsoring the race are eager to enlist skilled champions for their causes." Pgs. 2-27

Valachan: Hunter’s Moon is a slasher/gothic horror adventure for 4-5 level characters of 8-9th level. It can be played over the course of 6-8 hours and should roughly take one playing session, if the party is quick, or two if the party is progressing slowly. This is the fourth and final part of the Carnival of Lost Souls campaign, which can also be played as a standalone adventure. Valachan: Hunter’s Moon features: Fully fleshed out Trial of Hearts with dangerous encounters along the journey Rules for sabotaging rival parties before the Trial New custom monsters to make combat encounters truly memorable and exciting High-quality maps, also available in universal vtt format Check out the previous adventures in the series: Lamordia: The Hardest of Hearts, Dementlieu: Dance with the Devil and Kalakeri: The Forbidden Temple! And look out for the special Campaign Guide, which will explain in detail how to best set up and play the campaign. However, if you want to start your campaign right now, don’t worry - we have included a short appendix at the end of each adventure that will explain the basics! Disclaimer: We are a team of writers from Ukraine, so the unprovoked war and senseless aggression of the terrorist state of russia influenced our initial timelines significantly. However, we are now as safe as we can ever be under the constant threat of missile strikes, and determined to finish the whole series! And after that - who knows, maybe even more cool adventures will follow ;)
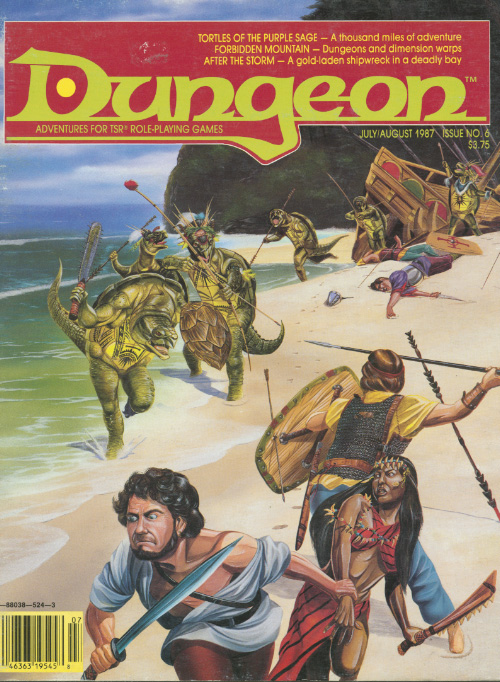
Part 1 of an Expert-level quest into a hostile wilderness. This adventure takes place in the Known World of the D&D game, as outlined throughout the D&D game rule books and modules. The DM may find it useful to consult the Companion and Masters Sets, as well as most of the X-series of Expert Set modules. D&D Expert Set module X9, The Savage Coast, would be especially helpful, as Tortles of the Purple Sage could easily serve and continue that module's direction and plot like, adding a previously undescribed area (the Great Northway) to the Known World. The DM may also place the areas and events of this adventure within an existing campaign setting, as long as the geographical areas of the campaign match those set forth here. Pgs. 40-62
In ancient times, the area now known as the Dyrgalas Fens was home to a flourishing civilization of nature worshippers who wrested a living from the forest around them, built open-air temples, and generally did well. Over the centuries, a series of natural disasters (some say a series of foolish magical experiments) led to a rising water table and turned the forest into a vast swamp. As the water rose, most of the people left. Today, a few stalwart humans remain in the fens, living off the land through hunting, fishing, trapping, and even some agriculture. In addition to these honest folk, the Dyrgalas has some less savory residents, including both black and green dragons, trolls, hags, escaped criminals, and a host of lycanthropes. Most of these creatures prey on travelers foolish or unlucky enough to enter the fen, and sometimes raid both inside and outside the fen. This adventure, intended for characters of levels 6 to 8, deals with one group of raiders who make their lair in the Dyrgalas. A weretiger called Gavriil has formed a group of assorted lycanthropes into a band of cunning brigands. The lycanthropes favorite caper involves infiltrating a merchant caravan while posing as travelers, merchants, or swords for hire, then attacking it from within. Gavriil and his servants also take on kidnappings, murder for hire, and any other unsavory tasks that come their way.

A Ravaged Land... Villains that really are larger than life... A time for heroes... A decade ago, the land of Geoff was overrun by a horde of giants, ogres, and evil humanoids, its people either slain, enslaved, or driven into exile. Now at last the tide has turned. The time to free the people of Geoff from their servitude to the giantish tyrants has come! But don't forget to watch your step when you confront the true masters behind the giant Clans! Contains the full text of three classic adventures by Gary Gygax: G1, Steading of the Hill Giant Chief; G2, The Glacial Rift of the Frost Giant Jarl; and G3, Hall of the Fire GIant King. Details Eighteen new encounter sites in the war-torn land of Geoff, linked together to form a grand campaign. Provides dozens of hours of gameplay as the heroes struggle to free an entire country from the grasp of giant overlords. TSR 11413

This module is especially for a party of elven PCs, level 8+. The Feadiel clan's Tree of Life is dying. As the bravest and strongest elves in the clan, you must undertake the challenge of the elders: seek out the source of the disease and destroy it. If you fail, the Tree of Life will surely perish, and all your family with it. The quest is great and you may die on the journey, never to find the cause of the disease. The journey will take you to the deepest part of ancient Selinar, Elvenhome, to find the guarded grave of the first Treekeeper... TSR 9166

Everyone in Moonfern Ford knows to avoid the Tainted Grove, a place of darkness and evil amidst the sylvan beauty of Cormanthor. When a young hunter goes missing in the forest, things in the village take a dark turn. Part 3 of the Elvenflow Saga.

When huge stones fall out of the night sky, A deadly curse settles over Gravencross. Help the village exorcise the Demon Stones. “The sun had set an hour ago, and the rain lashed down and the wind howled on the dark moor. A storm this late in the season was unusual, but this one seemed different. The clouds were more menacing, tinged with anger, the rain colder and more biting than usual. Skerrill had to find the lost calf and get him back to the farm before his father came back from the city on business. He’d been looking for two hours now, and he was right in the middle of the moor when the storm hit. He knew he should have turned back as soon as darkness fell, but then he was never the brightest boy in the valley. If only he had remembered to lock the farm gate. The calf was now likely dead anyway having stumbled among the boulders and rocks, panicking in the dark, and then fallen in a floodwater stream and drowned. Either way, he was in more trouble than he could imagine. Suddenly, a bright flash of white light and a roaring peal of thunder were preceded by an explosion as a huge object fell from the sky and impacted the ground of the moor no more than a stone’s throw from him. Dirt, mud, water, and debris erupted from the impact site, flying high into the air and then covering the moor for hundreds of feet all around. Skerrill was knocked to the ground instantly and covered in the fallout from the blast. His ears rang and his head spun, but he staggered to his feet in a daze. He stumbled to where the blast had happened only moments before, and in a depression in the ground lay a huge stone glowing orange as if hot. Skerrill passed out. Two more thunderous explosions crashed in the distance.”
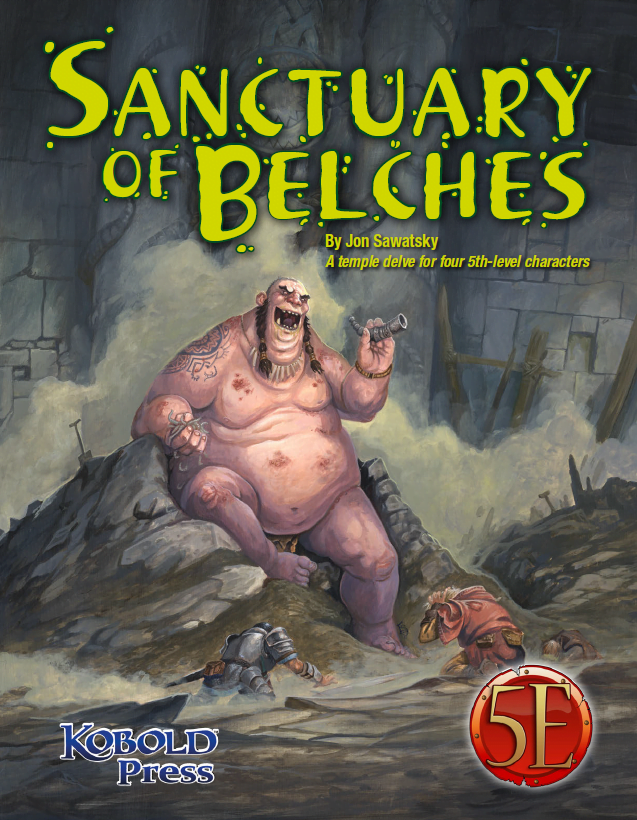
The trouble began several weeks ago when a duergar excavation team went to work in a long-abandoned temple. Drawn to the temple by stories of riches and artifacts, the duergar hired several giants as laborers before cracking the temple’s sealed doors. The largest of the giants, a loathsome Thursir mutant named Huppo, used his acidic vomit to expedite tunneling into the temple’s collapsed hall of worship. Then, Huppo found the horn—an unusual instrument made from a single piece of stone, with a mouthpiece so intricate only a master carver could have made it. The horn became the giant’s obsession. Seeing only the horn’s potential sale value, the dwarves demanded Huppo turn it over to them, but Huppo refused. To force compliance, the dwarves stopped feeding the gluttonous brute, but Huppo had already found his own source of food; in deep areas of the temple, worms were chewing out of the rocks, and Huppo ate them by the fistful. He also played the horn. Then, after several days of blowing the horn and devouring the strange worms, Huppo released a belch so noxious the dwarves had no choice but to lock him in a sealed chamber and carefully consider their next move. The horn’s call, however, had caught the attention of passing nomadic orcs. They set up camp outside the temple entrance in the hope of finding the horn and its player. That’s the current situation at the temple: the giant refuses to stop blowing the horn and belching out deadly clouds of stomach gas; the dwarves are frightened and edgy while their leader is obsessed with malevolent whispers; orcs are threatening to overrun the place; and the population of worms grows steadily as something awakens deep in the stone beneath the sanctuary of belches.

The village of Farleigh's Well is the target of a vindicative fey noble. The villagers have been seen parading through the Misty Forest, leaving their crops to rot in the field. The characters must contend with powerful fey creatures on their home plane in this action-packed adventure. What's Inside: A highly adaptable single session adventure. Two original NPCs with full stat blocks. Two original magic items. Detailed combat tactics and roleplaying hints for novice and experienced DMs alike. Two brilliant maps to help you bring the adventure to life. Choose from either the Full version with art and page design or the Lite version for easy printing.

Special Basic/Expert Transition Module Barely one day's march from Kelven, the uncharted tracts of the Dymrak forest conceal horrors enough to freeze the blood of civilized folk. Those who have ventured there tell how death comes quick to the unwary - for the woods at night are far worse than any dungeon. But you are adventurers, veterans of many battles, and the call of the wild is strong. Will you answer the call, or are you afraid of the dark terrors of the night? The campaign adventure is for characters just beginning Expert play (levels 2-4) and hurls them into the exciting outdoor world which awaits in the Expert rulebook. With a 64 page booklet, 2 double-panel covers, a double-sided, fold-out mapsheet and 120 die-cut counters, this super module provides all you need for epic wilderness and dungeon adventuring. Journey across the Grand Duchy of Karameikos in a desperate race against time and the forces of evil. This adventure is for use with the Dungeons & Dragons Expert Set, which continues and expands the D&D Basic Rules. This adventure cannot be played without the D&D Basic and Expert rules produced by TSR inc. TSR 9149

Devastated in a war with a nearby wizards' school, the Fighters' Academy has since been surrounded by a foul and dank swamp - the Gloomfens. Since the climatctic battle between the wizards and fighters, the tower has decayed. The spirit of the head of the academy haunts the building, eternally plotting his revenge on the wizards who killed him. his loyal sutdents remain faithful to him even in death. Other foul undead have made their home in the rotting, spacious academy. From their lair, they make forays into farmsteads near the swamp in search of victims to feed their unspeakable appetites. The Problem of these terrible attacks by the savage undead will not stop until the evil that has found a home at the tower is burned from the face of the land forever. Will your party heed the call and help the town of Melinir? Will they be able to clear the former Academy of its undead? Lair of the Vampire Lord is the third in a three part adventure, The Haunted Tower. Or, it can be ran as a stand alone adventure. The choice is up to you. Part of TSR 1081 The Haunted Tower
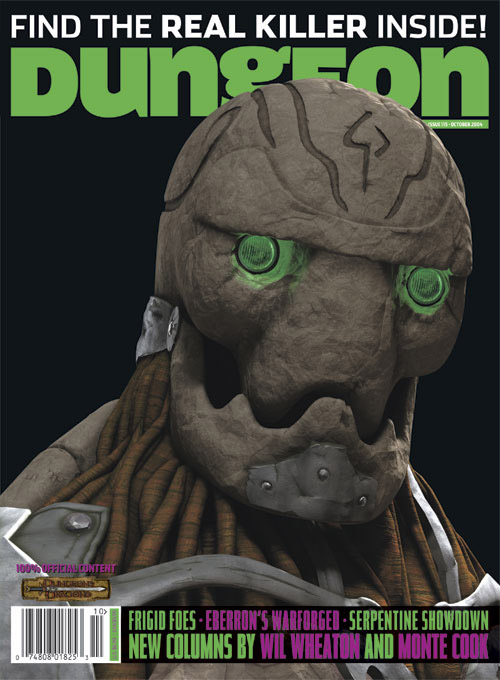
Smoke still rises from the shattered buildings and ruined streets of the troubled town of Cauldron, yet if not for the actions of a band of heroes, it would not exist at all. A sinister cabal of cultists bent on plunging Cauldron into the prison plane of Carceri had awakened the volcano below the town, and amidst the attacks of dragons and fiends from the outer planes, these heroes were able to evacuate the city and then strike at the cultists in their lair near the volcano's heart. Now, this cult, the Cagewrights, lies shattered, their members put on the defensive for the first time. All that remains is to finish the job, but the surviving Cagewrights still have some surprises left in their mysterious stronghold under the snake-haunted ruins of Shatterhorn. "Strike on Shatterhorn" is a Dungeons & Dragons adventure designed for four 18tth-level characters. This adventure is part of the Shackled City Adventure Path that began with "Life Bazaar" (Dungeon #97) and continued with "Flood Season" (Dungeon #98), "Zenith Trajectory" (Dungeon #102), "The Demonskar Legacy" (Dungeon #104), "Test of the Smoking Eye" (Dungeon #107), "Secrets of the Soul Pillars" (Dungeon #109), "Lords of Oblivion" (Dungeon #111), "Foundation of Flame" (Dungeon #113), and "Thirteen Cages" (Dungeon #114). The Adventure Path concludes in Dungeon #116 with "Asylum." Pgs. 56-82