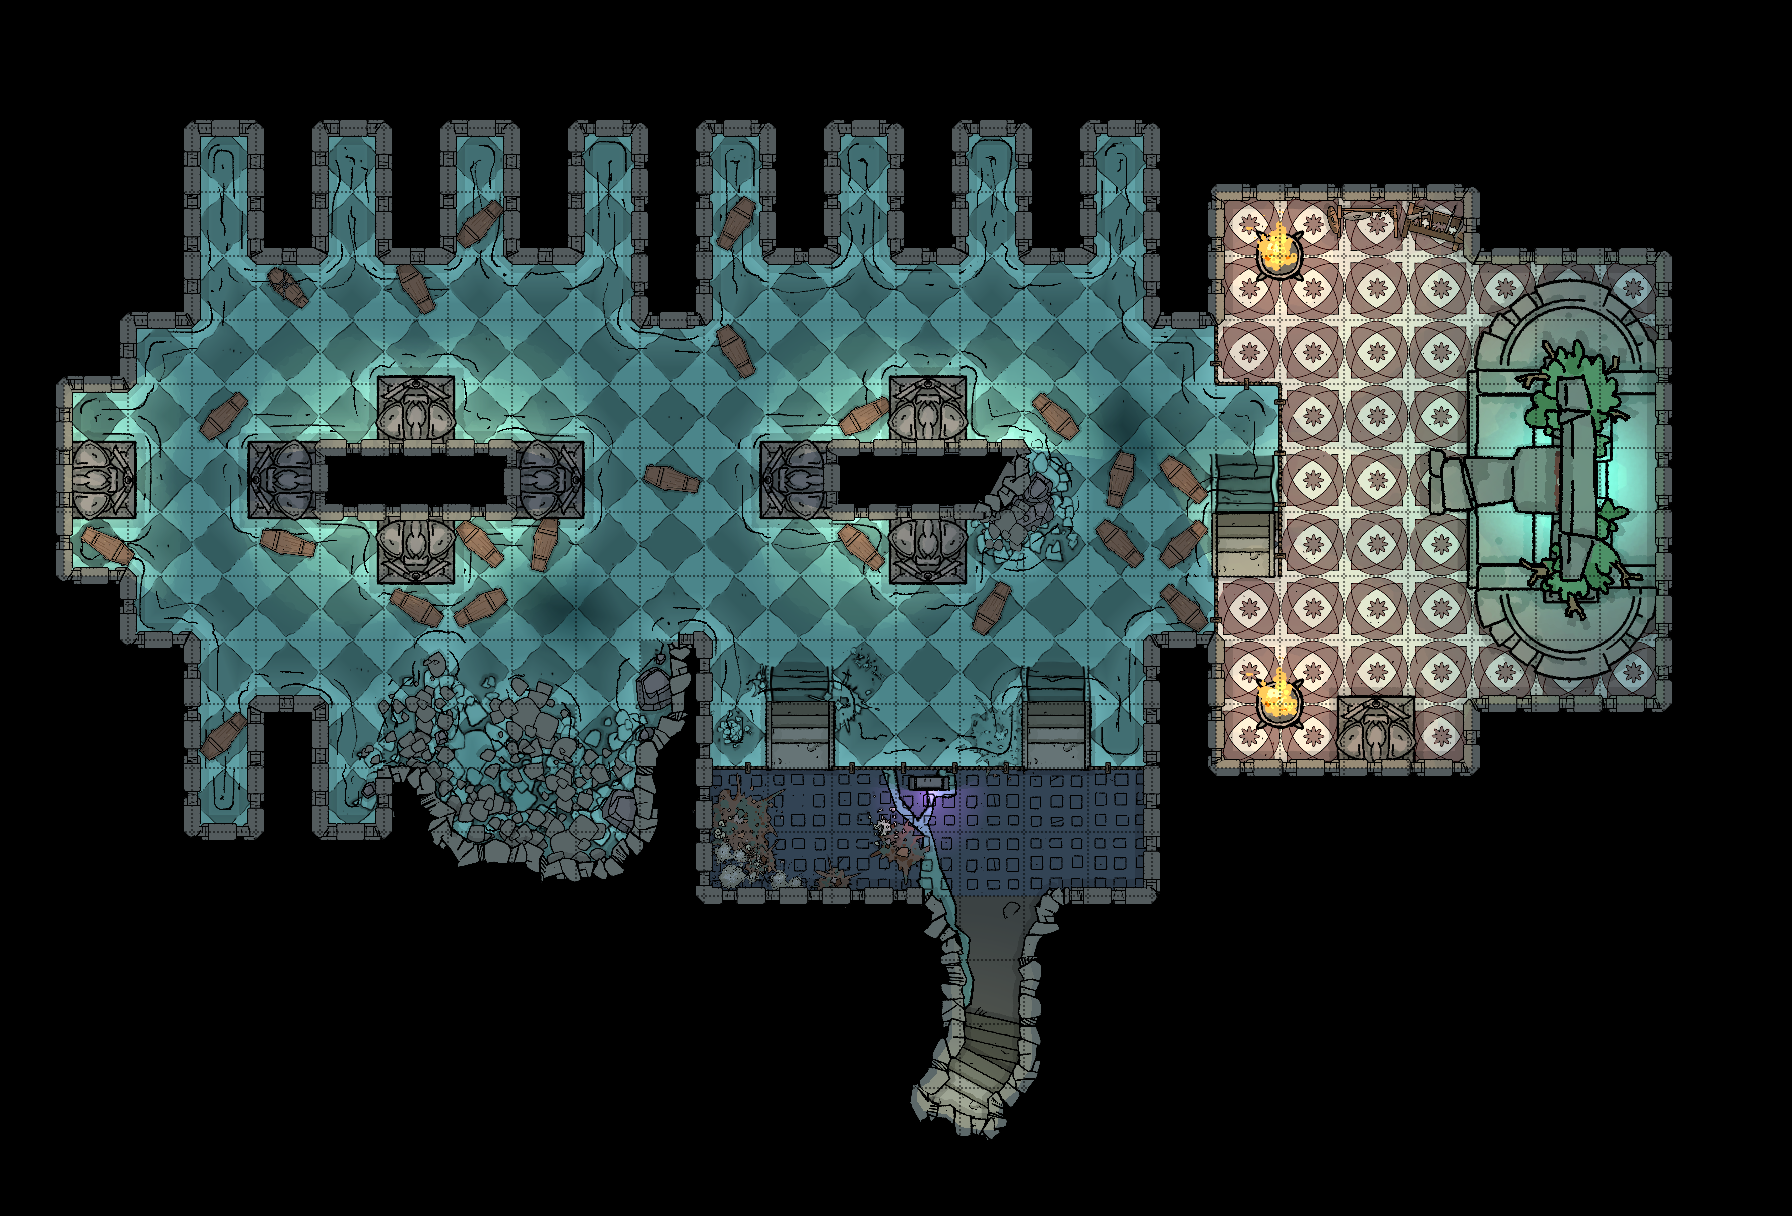
Play Tonight! Echoes Under Fort Thunder is the first of a collection of plug-and-play combat encounters for your 1st-Echelon Draw Steel campaign. These encounters are not strictly contextualized in any narrative. They are not adventures themselves, nor are they carved from any over-arching adventure. They're adventure-agnostic, so that you can just plug them into your own adventures and PLAY! Two encounters are enclosed. Each encounter consists of: - A map ready for use in VTT - A reference map for the Director - Some number of victory point conditions and mechanics of the encounter - Three monster tables (one for each level) for parties of 2-6 heroes. - Tips for monster tactics at each level In This Set: 001A: Secure Fort Thunder - Siege the fort against either goblins, gnolls, or time raiders! 001B: Silence the Echoes - Close the portal to Arcadia underneath the fort while battling both the undead knights and the invading creatures from all corners of the strange realm!

The battle against the slavers continues! You end your fellow adventurers have defeated the slavers of Highport, but you have learned of the existence of another slaver stronghold, and you have decided to continue the attack. But beware! Only the most fearless of adventurers could challenge the slavers on their own ground, and live to tell of It! Second part of Scourge of the Slavelords (A1-4) TSR 9040

A primer for the noir, pulp-fantasy setting of Sharn, the City of Towers, sending the party on a fast-paced urban investigation to track down a missing courier and ancient magical relics.

The first part of the Dreams of Red Wizards adventure path originally published for the D&D NEXT Playtest. Following the events Ghosts of Dragonspear Castle, a new set of adventurer's will see some of the repercussions of that adventure. This adventure is intended to be continued in the Dead in Thay adventure (Note that they Dead in Thay 5e adventure featured in Tales from the Yawning Portal is missing a significant portion of interlude that links Scourge of the Sword Coast to the events within the Doomvault). The adventurers arrive when Daggerford is crowded with refugees from outlying lands. Goblins, gnolls, and orcs have been raiding the countryside. Now, food is scarce and tension is high. Blame for a theft has fallen on the refugees, and the Duke of Daggerford has forbidden more of the displaced from coming into town. After overcoming difficulties to enter Daggerford, the characters learn more about the raids. As they fight against the humanoids and delve deeper in the darkness that encircles Daggerford, the characters learn of Bloodgate Keep. After a final fiendish ambush, they’re ready to confront the real threat to the area. DM Note: This adventure points the adventurers strongly towards Bloodgate Keep but that location does not appear until the Dead in Thay adventure; at several points the party may feel drawn to explore that location rather than continue their investigations around Daggerford. However, since Bloodgate Keep is only eluded to as a source of great evil power, it can serve to easily segue to an entirely different adventure path. As a NEXT Playtest adventure, Scourge of the Sword Coast uses milestone leveling and the included stat blocks for creatures do not necessarily match or even appear in the 5e Monster Manual, nor do they have XP values or challenge ratings. In some places it will reference rules used in the Playtest but dropped or changed in the 5e release, these are unlikely to substantially impact gampley with 5e rules.

“Den of the Destroyer” is the sequel to “The Lost Mines of Karak,” continuing the unfolding story of the Scales of War adventure path. In this adventure, the PCs are called back to Brindol by a surprising summons. There they learn that a platinum sword they had collected back in "Rescue at Rivenroar" is no mundane item - the blade is sentient! The blade charges the PCs to undertake a dangerous mission to an abandoned githzerai fortress in order to perform a ritual to awaken the blade's true form. Along the way, they must deal with bounty hunters hired by an old enemy (from "Shadow Rifts of Umbraforge"), and confront a vile gang of gnolls terrorizing Elsir Vale. Pgs. 14-54
Jobel the genie was famous for his bejeweled creations. But when a job to build a wizard’s tower took a turn for the worse, Jobel was imprisoned in a massive gemstone and buried deep within the earth. For one hundred years, the genie plotted his escape, using subtle magics, and slowly, he was able to work the gem toward the surface, where he’d be much more likely to be found and freed.
This is the second of the "High Forest Factbook" adventures series. The caravans have stopped arriving from the North. Lady Morgwais has asked you to investigate and help reopen the trade routes. What begins as a quick job turns into a race to save a queen. This module includes a detailed description of the Elven village of Reitheillaethor including it's NPCs. It can be run either as a continuation of the adventure started in "Menace of Merric", as an extended stand alone adventure or the three individual tombs included in it can be run as short one-off adventures.

Important: The adventure is 1e but it has monster conversion notes for D&D 4th edition The town of Highport, once a human community overlooking Wooly Bay from its perch on the northern coast of the Pomarj, fell prey to hordes of humanoids swarming out of the jungle-covered hills surrounding the settlement. Though the orcs, goblins, kobolds, ogres, and gnolls razed much of the place in their ferocious rampages, the smoldering ruins they left behind soon became a new kind of community, a place of trade between the humanoid “locals” and the unsavory human traders who have no compunction about doing business with them. Slaves are a commodity in ready supply in Highport’s market, since many pirates raid up and down the coast of the bay, putting fishing villages to the torch and filling their holds with captured refugees. Slavery has become a thriving business in the town, and rumors abound of a cartel of Slave Lords who run things from behind the scenes, filling their coffers in secret from the buying and selling of human chattel. The trade has become so prolific that the good folk to the north have grown tired of these depredations and decided to fight back. Forces of righteousness and honor have recently descended upon Highport, some openly and others in secret, in various attempts to destroy the machinations of the Slave Lords and abolish the abominable enterprise that has taken far too many loved ones from home and hearth. One such doughty servant of goodness is Mikaro Valasteen, a cleric of Trithereon. Mikaro slipped unnoticed past the crumbling walls of Highport with a single mission: to rescue and transport as many slaves to their freedom as possible. Mikaro and a handful of faithful assistants located a number of escaped slaves—as well as rescued a few more not sufficiently restrained and guarded—and shepherded them through the gates and beyond the reach of their humanoid tormentors, returning them to their lands and homes. This covert freedom brigade enjoyed remarkable success early on, since the servants of the Slave Lords were often lax in their vigilance and sloppy in their efforts to prevent loss of the “merchandise.” After one too many shipments never made its destination, the humanoids stepped up their security and the normal channels of escape from Highport closed to Mikaro and his team. He cannot risk exposure by smuggling the freed slaves through the gates as merchandise any longer, since shipments of goods are now regularly stopped and checked. No longer able to free the slaves in that manner, Mikaro began hiding his charges in an abandoned villa in a particularly rundown part of the town. Although they are safe for the moment, their numbers have grown unmanageable, and the priest fears it is only a matter of time before someone slips up and brings slavers to their doorstep. Ever more desperate to find a new means of escape from Highport, Mikaro has started work on a plan that is both daring and dangerous. He intends to use a series of old sewers coupled with natural caverns running beneath the town as an escape route to the sea beyond the walls. But he needs someone to clear out the creatures and pitfalls he knows lie within. Pgs. 2-27

A desperate ghost, a plea for help, and a forgotten crypt filled with peril and plunder. This is a tale of past conflicts, where blood magic has left a foul and dire aftermath, and time is of the essence. Maps and illustrations help guide you through rugged wilderness to re-discover a tomb lost to all but its denizens - creatures enslaved by an unholy item or awakened by its looming threat. Published by Roan Studio
A deadly curse known as the Feast of Dust spreads rapidly through the Meraz Desert, driving its victims mad with hunger and a burning desire to flee into the sands. To find the source of this strange affliction, the heroes must investigate the plagued city of Dimayen, challenging fearsome gnoll tribes, nihilistic daemons, and the walking dead to discover the secret of a long-forgotten evil—a powerful daemon harbinger called the Jackal Prince of Famine. Despite the efforts of an ancient secret society, this twisted, unholy monstrosity walks the world again, threatening to spread his apocalyptic curse across all of Golarion! To stop the demigod's return, the heroes must uncover his three vile siblings, now bound within malevolent artifacts, and use their combined powers to stop the Jackal Prince before the entire world feels his corrupting touch.

Restore an Abandoned Temple Enter the catacombs near the desecrated Temple of Muir, Goddess of Paladins, and search for the lost tomb of Abysthor. Will your party be able to cleanse the evil that now inhabits these once-sacred halls, and recover the Stone of Tircople? Can your characters survive the traps of an undead sorcerer? Will your players discover the chamber of Living Rock and the secret power it holds? Adventure awaits! Gold and Glory! A fantasy adventure published for the D20 system, The Tomb of Abysthor is the first module in Necromancer Games Dungeon series and can be played as a stand-alone story or in conjunction with The Crucible of Freya and the forthcoming city supplement Bards Gate. What secrets lie hidden in the tomb of Abysthor?
The city is plagued by an affliction being called "stone sickness" or "the gorgon’s touch" that disorients people and turns them to stone. Those with, or suspected to have, the affliction are being banished from the city. Some demand a cure, but most are just scared for their loved ones. A ravenfolk woman named Spinel Larkdon, mother to a child with the gorgon’s touch, begs the PCs for assistance. An artifact known as the Shroud of Tiberesh, capable of curing any sickness, is locked away within The Umbers' vault of spoils below the city. Passionate, she is determined to save her son and all those afflicted. Fortunately for the player characters, completing the Umber’s Gauntlet alive means they are not only entitled entrance into the cult, but also a single item from its vault of spoils. The PC's only hope of procuring the Shroud is by traversing this initiation Gauntlet – a series of traps, monsters, and puzzles devoted to the demon-god Nakresh - and claiming the Shroud as their prize.

We saw it—don’t turn your heads. Up near Hilltop Crossroad and the temple. It walked south; the trees fell in its path. Even the moon hid. Gods help Father Dren . . .
The slave markets of Katapesh may be an unsavory sort of business, but the trade metropolis’s enigmatic law enforcers have few qualms with the legal act of selling and buying flesh. Other factions, including the abolitionist Eagle Knights of Andoran, have their own opinions on the matter, however, and frequently send undercover agents into dangerous territory to break up slave rings. When one such Eagle Knight goes missing while investigating an underground slave operation beneath the dilapidated Twilight Gate district, it’s up to the PCs to delve an abandoned (but hardly uninhabited) qanat beneath Katapesh and discover her dire fate. Yet not everything is as it seems in the dank slave caverns under Twilight Gate, and clues hint that the slavers may have even more loathsome connections than initially suspected.

It's a frigid New Year's Eve, and the heroes gather near midnight in a small condemned tavern wihtin the Free City-State of Gate Pass. Located in the mountain pass which separates two hostile nations. Gate Pass has been neutral since the end of their last war. That neutrality is about to be put to the test, as a scourge comes for the city from the nearby empire of Ragesia. By now, every magic-user in Gate Pass knows of the Scourge. The Emperor of Ragesia died barely a month ago, and a witch named Leska has moved to cementer herself as the next empress. Leska leads the Ragesian Inquisitors, clerics specialized in countermagic and has decreed ass disloyal mages to be tracked down and killed to prevent future threats to the empire. Their first target is Gate Pass, whose neutrality has long been viewed as an insult to the nation's honor. This is the first of twelve adventures in the War of the Burning Sky adventure path from E.N. Publishing.

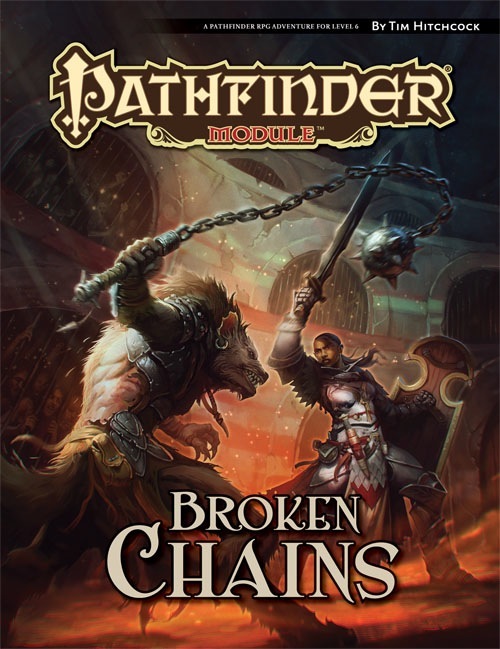
"Gnolls have captured the heroes! After stripping the characters of all equipment except their armor and clothing, the gnolls drag them to an expansive briar maze known as the Twisted Thickets and set them loose. Then, armed to the teeth, the gnolls hunt down their prey. The characters must survive the hunt and outwit their pursuers. Stripped of your armor and weapons, you are cast into the Twisted Thicket and hunted like rabbits. If you want revenge, you must first survive Yeenoghu's evil Hunters. After dealing with the gnoll hunters, the heroes can try to reclaim their lost equipment and exact revenge on the tribe, which lairs in the caves beneath Dead Gnoll’s Eye Socket." Pgs. 2-14

"A great cat sits upon the northern grasslands, my friend, waiting to pounce on adventurers just like you." As you part the tall grass with your sword, the words of the tavernkeeper echo in your head. "He was the mightiest wizard we'd ever known, and that Lion Castle was his home." Your friends' voices mingle with the tavernkeeper's. "He's but a ghost now, haunting those halls, and waiting for an heir." The ground rises slightly. A strong wind rushes through the field. Suddenly, the grasses part, and Lion Castle rises majestically before you! "Magical riches await those who enter!" "Beware of man-beasts!" Voices flood your head again. Will you brave the haunted castle? Can you afford not to? It's all up to you in this D&D Solo Adventure. Ghost of Lion Castle is for one player only, but that one player makes all of the choices and enjoys all of the rewards. An entire castle and courtyard await your exploration. The adventure also includes a complete solo combat system. TSR 9097
Someone kidnapped Lady Anilah Salhar—the Chelish wife of Dremdhet Salhar, one of Osirion's many Grand Ambassadors to Absalom—and sold her into slavery. With Salhar holding delve permits over the heads of the Decemvirute, the Pathfinders are sent to assist the Osirian Ambassador. Venturing into Absalom's darkest corners to save Lady Anilah, the Pathfinders must face the secrets of the Slave Pits to avoid becoming slaves themselves.

Appearing only once a century in the western deserts of Katapesh, the Asmodeus Mirage has plagued Golarion for thousands of years. Powered by a crystal bone devil skeleton and legendary for trapping unwary travelers, the Society has a vested interest in studying and cataloging the source of its power. You have been sent deep into the deserts of northern Garund to enter the Mirage—but there's a catch! The Mirage only exists on Golarion for 24 hours every 100 years. Get trapped in the Mirage, and you may never see Golarion again.

Danger Lurks in the Lendore Isles. Bands of evil creatures prowl the hills overlooking the town of Restenford. Now you have come to this sleepy little village looking for adventure and excitement. You seek to fathom the unexplored reaches of Bone Hill and unlock the mysteries of Restenford. TSR 9045