
Captured! While trekking across a trackless wasteland, your stalwart band has fallen into the clutches of a nefarious gang of desert raiders. Imprisoned in a subterranean chamber, you are bereft of all of your equipment and magic items, save for a few tattered loincloths. But as chance would have it, an opportunity to escape the cell presents itself. To escape, you must head deeper into an ancient sealed tomb, armed with nothing but your wits and anything you can find along the way. Getting to the surface is just one of many challenges, as you still need to recover your precious equipment, and flee the Lost Oasis, which is surrounded by an inhospitable sea of solid glass!

Deep in the wooded wilderness, the village of Grimmsgate is an outpost town on a seldom-traveled trail, right at the edge of nowhere. The village’s half-ruined temple of Law, dilapidated inn, drunken blacksmith, exiled trader and a few fur-trappers are enough to keep the bloody-minded denizens of the dark forest at bay, but nobody really expects the village to still be there in another ten years. The woods have become too dangerous for the trappers who once caught animals for fur, and merchants no longer travel the poorly-maintained road. What great evil and what fabulous treasures are to be found in these lands? A brave band of adventurers might make their fortunes here. Or perhaps they might never return… Grimmsgate is an introductory adventure for the Swords & Wizardry tabletop roleplaying game. The Swords & Wizardry rules are needed to play this adventure.

Sometimes its better not to know... Citizens are turning up in the city in catatonic states, alive but devoid of personality. Are they the victims of an illness or disease, or is there something more sinister at work? Encountering one of these poor souls, the characters are drawn into an investigation of politics and treachery, seedy underworld dealings and rooftop chases, culminating in a fiery conclusion. Can they discover the cause of this epidemic before it’s too late?

The outpost of Fort Dolor has experienced an unprecedented stretch of peace in recent times. Then nearly the entire garrison disappears on a supposed routine patrol, and the town— still on the frontier— is left nearly defenseless. Can the adventurers dig to the bottom of the mystery at Fort Dolor before they, too, disappear? Pgs. 82-103

Hurry! Hurry! Hurry! Step right up, ladies and gentlemen, and behold the greatest circus in the land! Behold the skilled mummers performing at The Stage; you’ll literally feel like you’re part of the play! Thrill to the death-defying acts (and audience) in the two rings under the Big Top! Laugh at the antics of the baleful buffoons, harmful harlequins, and malevolent merrymakers of Clown Alley! Gaze in wonder at the wild beasts of the Menagerie, (just make sure you know which side of the bars you’re on)! All this and more, for the small price of a single admission, to Bitterbark’s Magnificent Circus! The circus is in town! But there’s something not quite right about it. There are rumors of missing children, evil plots, and more. Can you discover the secrets hidden inside Bitterbark’s Magnificent Circus? Intended as a stand-alone adventure, but there are notes on how to include it as part of the Castle of the Mad Archmage mega-dungeon adventure. Published by BRW Games

The ancestral swords of a powerful lord have been stolen! In the dark of night, on the eve of battle, a shadowy figure crept into Lord Kunemura's chamber and made off with the most potent symbols of his power and lineage. Worse, Lord Kunemura had declared war on his old enemy, Lord Shotokami. The imminent battle will be decisive, and the future of Lord Kunemura's lands and family hang in the balance.

“Den of the Destroyer” is the sequel to “The Lost Mines of Karak,” continuing the unfolding story of the Scales of War adventure path. In this adventure, the PCs are called back to Brindol by a surprising summons. There they learn that a platinum sword they had collected back in "Rescue at Rivenroar" is no mundane item - the blade is sentient! The blade charges the PCs to undertake a dangerous mission to an abandoned githzerai fortress in order to perform a ritual to awaken the blade's true form. Along the way, they must deal with bounty hunters hired by an old enemy (from "Shadow Rifts of Umbraforge"), and confront a vile gang of gnolls terrorizing Elsir Vale. Pgs. 14-54

This module is designed for characters who have made their way through the Freeport Trilogy. Characters new to Freeport are at disadvantadge, however. Hell in Freeport sends the characters to the depths of the Hell as pawns of an undead duke. When they discover the truth of their mission, they must race against a sinister clock to save two cities. Act 1 kicks off with a battle against a cornugon on the Freeport docks. The characters are hailed as heroes for defeating the fiend, and are summoned to the Church of Retribution to help in the battle against Hell. Tee old inquisitor who greets them is actually Jalie Squarefoot, an infernal lich who took this form to search for the perfect cat's-paw. Squarefoot wants to take the souls of Freetown, a city in Hell, but must first get around a contract poin: he can't take the city until the Tyre tower clock-now stopped- strikes midnight. He sends the party to Devil's Cry, an inslan off the coast of Freeport, with instructions to close the gate to Hell hidden inside. In truth, he knows the party will be transported straight to the Third Circle when they try. Inside Devil's Cry the party finds the remnants of a great battle fought between an invading devil's army and the Church of Retribution, and battle their way past undead defenders until they reach the gate itself and unwittingly trigger it. Act 2 begins with the party in a twin of the complex they explored in Devil's Cry, but now they are deep in Hell. They fight their way back to the cavern entrance, only to find that they are not on the Prime anymore. When they voyage back their homeport, they instead find themselves in Freetown, a city of scaped slaves in a dark mirror image of Freeport. Once in Freetown, they make the acquaintance of the city's mayor Wycleffe-a servant of Jalie Squarefoot-who persuades them to go on a quest to Tyre to restart the tower clock. They travel the Styx to the Eight Circle and fight their way into a long-buried vity, and then into the tower clock itself. They restart the clock and begin the trip home, but are waylaid by devils and taken prisioner. Act 3 opens with the party naked and in chains in the infernal prison called the Forge. They learn that Jalie Squarefoot and Wycleffe have duped them, and that the supposed rebels of Freetown are actually its protectors. The characters must escape or win their freedom in the gladiator pits before the tower clock they restarted destroys both Freetown and their home city of Freeport. They battle back to Freetown, taking revenge on their captors in the process, and capture the city from Wycleffe with the help of the rebels. Finally it falls to the PCs to enter the tower clock and stop it and Jalie Squarefoot before the fiend's plan can come to fruition. After being tricked and manipulated throughout the adventure, the party finally has their revenge on the duke and his minions.

“Siege of Bordrin’s Watch” is the sequel to “Rescue at Rivenroar,” continuing the unfolding story of the Scales of War campaign. This adventure features exploration, roleplaying opportunities, and combats in dynamic environments. In this adventure, a new threat looms to the west: A vast horde of orcs and their despicable kin emerge from the barren lands bent on plunder and conquest. While the Elsir Vale and other lands mobilize their meager forces to respond to the danger, a call has gone out to those heroes of the Vale to join forces and help to push back this new evil before it’s too late. Pgs. 4-55

The Thieves Guild Ebonclad has taken on a new contract to locate a missing item. The mission’s primary objective is to recover a missing branding iron for the wainwright, Veshka Vern, who suspects it was stolen by her rival, Ramses Hill. This mission will likely force the players to do some breaking and entering, specialties of the guild. The mission also presents the players with competing sets of objectives, and lets them decide which course of action is most beneficial to the guild. It’ll be up to the party to determine which objectives to complete to finish the mission.

Three important citizens of Phlan, who stand against the tyrannical dragon that rules, seek to escape and find refuge across the Moonsea. Can you extricate those that are vital to the factions before it’s too late?

Ever feel like you just want to snatch all the blankets and pillows you can find and hide in your own warm little nest? Goblin Heist is a chaotic Tier 1 adventure where 1-6 players take control of goblin characters on a mission to steal as many cozy things as they can from the sleepy winter village of Little Humbleton. But be wary... the town has hired an adventurer to stop you! Can you and your goblin gang survive the cold, sneak into houses, steal the cozies, and escape before daybreak all without being caught? Goblin Heist is highly replayable, and features: - A choice of four adventurers protecting the town, each adding their own difficulty and flavour to the game - Variable weather conditions - Pursuit mechanics - Randomly generated challenges - Cozies - Stuffing sweets in your face

The Archpriest, leader of the Church, has defied a summons to the Immortal Capital. You have been chosen to retrieve the recalcitrant pontiff. Kidnap the Archpriest is designed to be an implicit tutorial for diplomacy, stealth, theft, bluffing, and cunning. It is a system-less, setting-less heist module featuring: a city (with a map) a fortress (with interior and exterior maps) two hectic days and nights a guide to designing your own heists. glorious black and white art by Luka Rejec scheming cardinals, frantic servants, and secret plots By the author of the CoinsandScrolls blog and Tomb of the Serpent Kings.
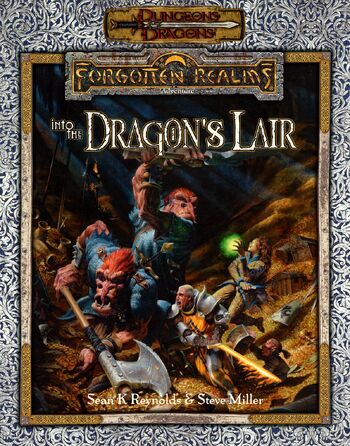
Into the Dragon's Lair takes place in the Forgotten Realms setting, and takes place after the novels The High Road and The Death of a Dragon by Troy Denning. The nation of Cormyr tries to rebuild after the death of King Azoun IV, and seeks the treasure hoard of a dragon to fund these efforts and keep the kingdom from falling into chaos. The player characters must find this treasure before all the other seekers.
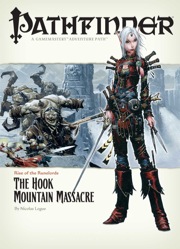
Them Ogres Ain't Right... The Rise of the Runelords Adventure Path continues! The notorious Hook Mountain ogres, known for their violent and savage ways, have slaughtered the soldiers of Fort Rannick. The few surviving rangers need heroes to help them retake this key fortification before the ogres use it as a staging ground for further assaults on the region. Yet why have the ogres chosen now to launch this sudden attack? What sinister force grows in the surrounding wilderness, and what ties to the mysterious Sihedron Rune do the ogres of Hook Mountain hide? Are the rumors of an army of giants massing for war true?

The search for a missing paladin takes the PCs deep into the heart of a frontier torn apart by cult wars—and face to face with an ancient evil. The paladin Jaryd set out to find and destroy the Hand of Naarash. He was never heard from again. Now the PCs must retrace Jaryn’s steps across the harsh wilderness and determine what has become of the noble warrior. Pgs. 29-59

This adventure has been designed as a one shot adventure for 4-8 players, pregen 5th level characters included, in 4-6 hours. It tells a classic story of the "good" races oppressing the "dark" races, with their warlike expansionist ways.
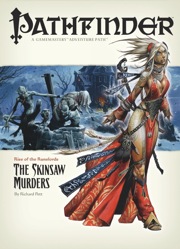
The Rise of the Runelords Adventure Path continues! A sudden string of brutal killings terrorizes the town of Sandpoint, and the killer's mark bears a familiar shape. Investigation leads to the Lost Coast's most notorious haunted mansion, a dilapidated ruin that has become the lair of a monstrous murderer. Yet this killer is but one of many, a member of a group of fanatic cutthroats calling themselves the Skinsaw Men. To defeat the cult, the PCs must travel to the bustling city of Magnimar to unravel the sinister source of these murders before they become the Skinsaw Men's next victims!

The carcass of a gigantic sea monster is now a small dungeon... Gargantuel was a gigantic sea monster (a whale? a prehistoric serpent? the Kraken? Leviathan itself?). She used to roam the high seas, destroying ships and devouring everything. Some of the people she swallowed survived in her belly. One of them, the sailor Torsti Seppänen, actually managed to turn the place into a comfortable habitat. One day, Gargantuel passed away. Her body now lies out in the open, luring the carrion-eater, the curious, the foolish. Strange creatures and artifacts await in the mounds of decaying flesh, and the insane Torsti Seppänen will do everything to defend his “home” from intruders. Statted for Lamentations of the Flame Princess, usable with any OSR type game. Hosted by eldritchfields.blogspot.com

Jungle, tomb rading style adventure that sets the group to a new locale, with it's own eco systems and cultures. Exploration adventure, with glint of gold as a catalyst. The adventurers accidently find a map, which leads them to this unknown land. "Can you unravel the map's mysteries and find your way to the promised treasure? Or will your dreams end only in death and an unmarked grave far from home! Only the bravest characters of levels 3-5 will live to discover that all that glitters is not gold, but much, much more!" TSR 9126