
Outside Briar Glen lies a dangerous swamp, and deep within it runs the Weeping River. Those who venture too far into the swampland near the river are overcome with grief and cry until their tears turn to blood. If they’re lucky, they die quickly. Lately, however, women in town disappear into the swamp near the Weeping River at night... and return in the morning, entranced but unscathed. Their families want to know why they return at sunrise with no memory of the previous night. These women found themselves a friend in the boo-hag, angry at the townsfolk for damaging her swamp. She initiated the women into her coven and tasked them to drain the life energy from their families to help the boo-hag heal the swamp.

You are hired by the Greenskull orc clan as merceneries to assist in the eradication of a firblog settlement from the swamp the orcs need to conquer in order to survive. You are first sent in to retrieve the bodies of scouts that never returned, but you soon realize that something wicked is going on in the swamp. Will you escape with your lives, or will you also become a victim of the Druid's Curse?
The characters are introduced to the coup occurring in Whitehorn and are tasked with warning a friend, whose family is involved, about it. (characters can choose one instrument as a reward)

FVC8 – Youngblood Keep has a seasoned party meeting with Lady Enorra, a noblewoman at the northern frontier. She has requested the party by name to help her recover a valuable artifact called the Eggstone. After accepting the job you find yourself at a locale known as the Chapel of Ancients and that is when things really get strange! Youngblood Keep used to be a fortress in the area but was ripped from this plane of existence to another. Who’s up for a quick trip to Hell and back?

Years ago a Gnome female named Carlota retired from adventuring and built a small tower not far from Dano’s Point. While the illusionist/tinker kept to herself her home was reputed to have a cache of magical items from years on the trail. It has been several years since anyone has seen the diminutive woman and she is believed to be deceased. As you begin your adventuring career you decide that a trip to the tower is in order. If Carlota is alive, perhaps she can give you advice, if she isn’t perhaps you can help yourselves to some of her items.

The Director of the precognitive mages puts out a call to the Guilds for assistance in investigating a new threat which would disrupt an upcoming annual celebration along the Transguild Promenade in Precinct Four and cause the deaths of many Ravnican citizens. The Adventurers must find the evidence pointing to the perpetrators and stop the oncoming riot during the celebration in 24hrs. This is a One shot adventure for a group of four, at 3rd level. It could possibly be the first of many other adventures you might run in Ravnica!

Sometimes protecting the cargo is easy but getting the pay not so much. Work has been scarce, coin hard to come by, armor needs maintenance, weapons need to be sharpened and food is needed in the belly. Monsters on the road, on the other hand, are more and more common.

A fiend lurks among the Black Blade goblins. A shapeshifting barghest fashioned by the General of Gehenna to exact revenge on all goblin-kind. It’s aim: to kill as many goblin leaders as possible… A masked goblin approaches the party asking for help. Two tribe leaders are dead. But a rival for chief has control of the crime scene. Will the party discover the barghest among the goblin ranks? Can they stop this imposter before it strikes again? Adventure Overview The adventure’s story is spread over 4 parts and takes approximately 4 hours to play. The adventure begins with a Call to Action scene. Part 1: Goblin Politics. Krill sends his emissaries to implore help from any strong intermediary. The party is asked to investigate the murder of Thrawn in Dringly’s lair. This is Story Objective A. Part 2: The Opposition. Gain entry into Dringly’s lair and investigate the murder of Thrawn. Gather enough evidence to find the killer. This is Story Objective B. Part 3: To The Lair! Now that the players have determined the barghest (Yeep) is to blame, they need to get to Krill’s lair quickly as he is in imminent danger. This is Story Objective C. Part 4: The Barghest.When the players arrive at the lair, they need to get to Krill and expose and defeat the barghest. This is Story Objective D. Adventure Background A barghest named Yeep has begun its onslaught of attacks against the Black Blade goblins. Starting with Chief Gnar, then his second in command Thrawn, the barghest is moving methodically down the line of command. Krill is now chief. But he has some problems: Two leaders of the Black Blades are dead. Who killed them and why? Is he next? Dringly, the next in command, has decided to take his lair for himself, declaring himself Chief of the Black Blades. Who are the Black Blades? The Black Blades are a tribe of goblins in the local area. They are known for dipping their blades in a dark black substance. It is rumored these blades are poisonous. The Black Blades regularly attack passersby on the road to rob them. The Black Blades have two lairs, one run by a chief who leads the whole tribe, and another overseen by a boss lieutenant. The Black Blades have a well-established pecking order which is how Krill stands to become chief. The next in line is Dringly, who has also declared himself chief and wants Krill dead. Krill suspects that there is something suspicious about two leaders being killed within a day of each other, but he has already burned Gnar’s body without any investigation. He needs to investigate the body of Thrawn, but it is in Dringly’s lair. Krill wishes to avoid direct confrontation with Dringly at the present for three reasons: 1) Any violence would only kill his own tribe members and further divide the lairs. 2) He believes there is still hope for negotiation to reunite the Black Blades. 3) He believes that if he were to attempt negotiations himself, Dringly would kill him. This adventure features: Two maps. Ready for your favorite Virtual Tabletop. A full color pdf. A black and white pdf. One custom monster, a reprint of barghest, all others available in the Monster Manual. Four hours of entertainment involving: roll playing a goblin bard, investigating a murder scene, tracking down a barghest before it strikes again. Applicable to any setting.

The Candy Isle - home to a confectionary shore, saccharine jungles, and a chocolate volcano, it epitomizes the phrase "sweet but deadly." The PCs must avoid gummy tribesmen and other weird, sugary dangers to retrieve the apotheosis of all sweets, the Confection Perfection!

This module features 5 locations ready to be put in any D&D 5e game. It features these 5 locations: - An old warehouse (lvl 1) An old building occupied by a gang of Kenkus that are trying to build a mechanical way to fly. - Ruined Sanctum (lvl 2) A decayed temple lost to time, some decades ago it was breached by some blights and they still use it as a resting place and a trap for adventurers. - The Lunar dove (lvl 3) A small and secretive brothel used by the elites. Unbeknownst to them, however, the Owner spies and hoards secrets to use to their advantage. - Cave of Mending (lvl 4) A cave with a magical healing lake, protected by a Druid that uses it to heal the wildlife from the surrounding area. - The temple to Xotarr (lvl 4) A hidden temple to an evil God where the cultists partake in calculated sacrifices.
The interrogation of the rogue wizard, Askalan, by the magocracy of Bemmea exposed his creation of unstable magical artifacts built in a ruined ley-line conduit. This Leystone, built by the mages of Vael Turog, had been dormant for centuries until Askalan discovered a way to power it. Now, after his untimely death, the Leystone's unstable power continues to grow at the edge of the Western Wastes. The magocracy hires the characters to find the awakened Leystone, uncover the mystery of this growing power, and return the source of the power to Bemmea for study.
A venom maw hydra lair suitable for four or five 10th-level characters. The Red Craw Marsh, so called because of the delicious and plentiful red crayfish that live in the area, is a boon to the nearby village. More than a few intrepid souls brave the swamp each season to collect the crayfish. They either sell the crayfish to local establishments or ship them to nearby cities, where they earn a good price as the crayfish is a delicacy among the wealthy. The villagers have established a tentative peace with a clan of trollkin that inhabit the swamp. The crayfish collectors pay a small fee to the trollkin, who allow them to ply their trade in the marsh without (much) interference. It is a tense but profitable relationship for all involved. A powerful creature has moved into the marsh, however, threatening the delicate balance. When a venom maw hydra decided to move to the area of the marsh between the human and trollkin villages, it brought along a number of creatures that worship and serve it. This hydra and its allies have killed some of the crayfish hunters and some of the trollkin. Each side, unfortunately, believes that the other has broken the truce, thus stirring up animosity and putting both groups on the verge of war.

People in the Blight begin to awaken at night burning with an all-too-real fire. Most of them die horribly, spouses or lovers staring in shocked horror at their sudden death throes in the grip of consuming flames. A few of the truly unlucky actually manage to survive -- if living in such a state can be called survival. There seems to be no rhyme or reason in the victims of these incinerating dreams, as those among the high and low fall victim to its touch, and the locals each pray that he or she will not be next. Now no one dares to sleep. By renowned author and creator of the Blight, Richard Pett, The Crucible is a 7th-level stand-alone adventure of urban horror set in his own crooked city of the Blight. This adventure may not be suitable for children below the age of 13.
For ages, “the old monastery on the hill” was simply that and nothing more to those that knew of it – a small building of a forgotten age and purpose, overgrown by the land around it. But recently, rumors have been making way among the educated that there is a wealth of knowledge that hides within the old monastery, waiting for someone to find it. Most dismissed these rumors as hearsay... but those with their eyes on the prize continued to pay attention. There must have been some merit to these claims, because seemingly overnight a monstrous creature has appeared on the monastery grounds - a serpent the size of a dragon, with a dozen legs and breath that crackles with lightning! There's no doubt the rumors and the monster's appearance are related somehow, and the PCs are tasked to put their skills to work to figure it out!
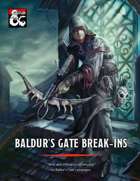
Baldur's Gate Break-Ins collects three heist and infiltration adventures for characters of levels 3-5, for use as a continuation of Burial in Baldur's Gate or as standalone modules. This collection fleshes out several locations around Baldur's Gate, providing adventures in every quarter of the city: Crash the world's worst dinner party in Eomane House! Contend with a criminal operation, a murderous raid, and a Feywild crossing in Jopalin's! Break up a blood-drenched cultist lair in Hamhocks Slaughterhouse! This book includes adventure hooks for running each location separately or as part of a campaign, a guide to running heist and infiltration adventures, three possible group patrons for the party, maps and rosters for each location, more than a dozen creature and NPC stat blocks, and a map pack with player and DM maps by Dyson Logos.
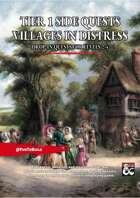
An exceptionally smart ogre and its pet dire wolf have figured out the easy life. Why loot and pillage, when with a few words of common, you can threaten and intimidate your way to comforts?

Gnomish denizens of Berribury are terrorized by flooding. Their only hope is for adventurers to summon the archfey of their domain; Tiddy Mun, to take the waters away. A Two-Hour Adventure for Tier 1 Characters. Optimized for APL 3

THE FIRST SET OF DUNGEONS ON DEMAND ADVENTURES! The first volume of Dungeons on Demand includes the first four dungeons: Bandit's Nest - Level 1 Adventure Dungeon Insidious Experiments - Level 4 Adventure Dungeon Fierce Tempers - Level 8 Adventure Dungeon Lord of Gloomthrone - Level 12 Adventure Dungeon It also includes the following supplements: New Twists on Old Monsters - Gaming Supplement Imbued with Magic - Gaming Supplement The bundle includes hundreds of pages worth of materials and supplements sure to keep your gaming sessions busy!

A mysterious adventurer stumbles into an inn in the night, looking for an escort to the nearest temple. Before the night is over, he inexplicably disappears, leaving a trail of corruption leading into the nearby woods as packs of twisted forest creatures emerge to plague travellers. Pgs. 83-89

This is the introductory adventure in the Bugger's Mill campaign. It introduces the characters to the village of Oak Mill along edge of Border Forest and has them hunt down a local arsonist, as well as assist with putting out a forest fire.