Don't feed the animals. Be kind to animals or else. The party is shown a rare set of baby monsters that they must face. Pgs. 56-59

Your group has been requested by Archbishop Telamor Constran from the Church of Koassak to go on a rescue mission for one of his missing brothers who was taken by pirates. You have been enlisted because of your growing fame to barter a release out of the Pirate Lord Hannibal the Black. After three days of storms you awake to a really bad sound....Abandon Ship!

Exploring Baba Yaga's Dancing Hut. This adventure design to test high level PCs can be used in a variety of scenarios as the DM sees fit.

Welcome to Cappadocia! This ruined ancient city is home to a group of shipwrecked Gnome adventurers. For the past several years they have tried to make the best of their situation and are starting to feel at home. This is also a side adventure to FP13 - Odie's Staff. Oh yea and two more words.....Gnome Airship!

The Holdfist Mountain range hosted many battles during the Troll Wars and during the dark years many villages, shrines, and castles were destroyed. When the fighting was over the villages were rebuilt so that farmers could resupply the duchy and the former strongholds were lost to the sands of time. One of these forgotten areas is the Church of Scakla and is said to be home to lost magical items...

A small valley in the Basalt Mountains is home to a small farming community and a priory for the deity Enyndeth. Here young acolytes study to be full-fledged clerics of their faith. The priory was built into the side of one of the mountains when the community specialized in mining. This town should be able to provide road weary adventurers a reprieve from problems….or will it?

A barque with a bark; or, You can't be Sirius! Another day, another kidnap victim to rescue - but this victim has four feet and likes old soup bones. An adventure with some bite. Sir Veneti of Chardon's prize mastiff was stolen just before the city's mastiff duel. He knows that it was his biggest rival, Sir Machi. Sir Veneti needs the party to seize Sirius, the mastiff, from a ship called Gale's Teeth. What the party doesn't know is that a pirate stranged in town is also planning a heist on this ship the very same night that they plan to steal back the mastiff! This adventure has opportunities for both combat and roleplaying, and allows for multiple ways for the players to finish the adventure. Pgs. 32-38
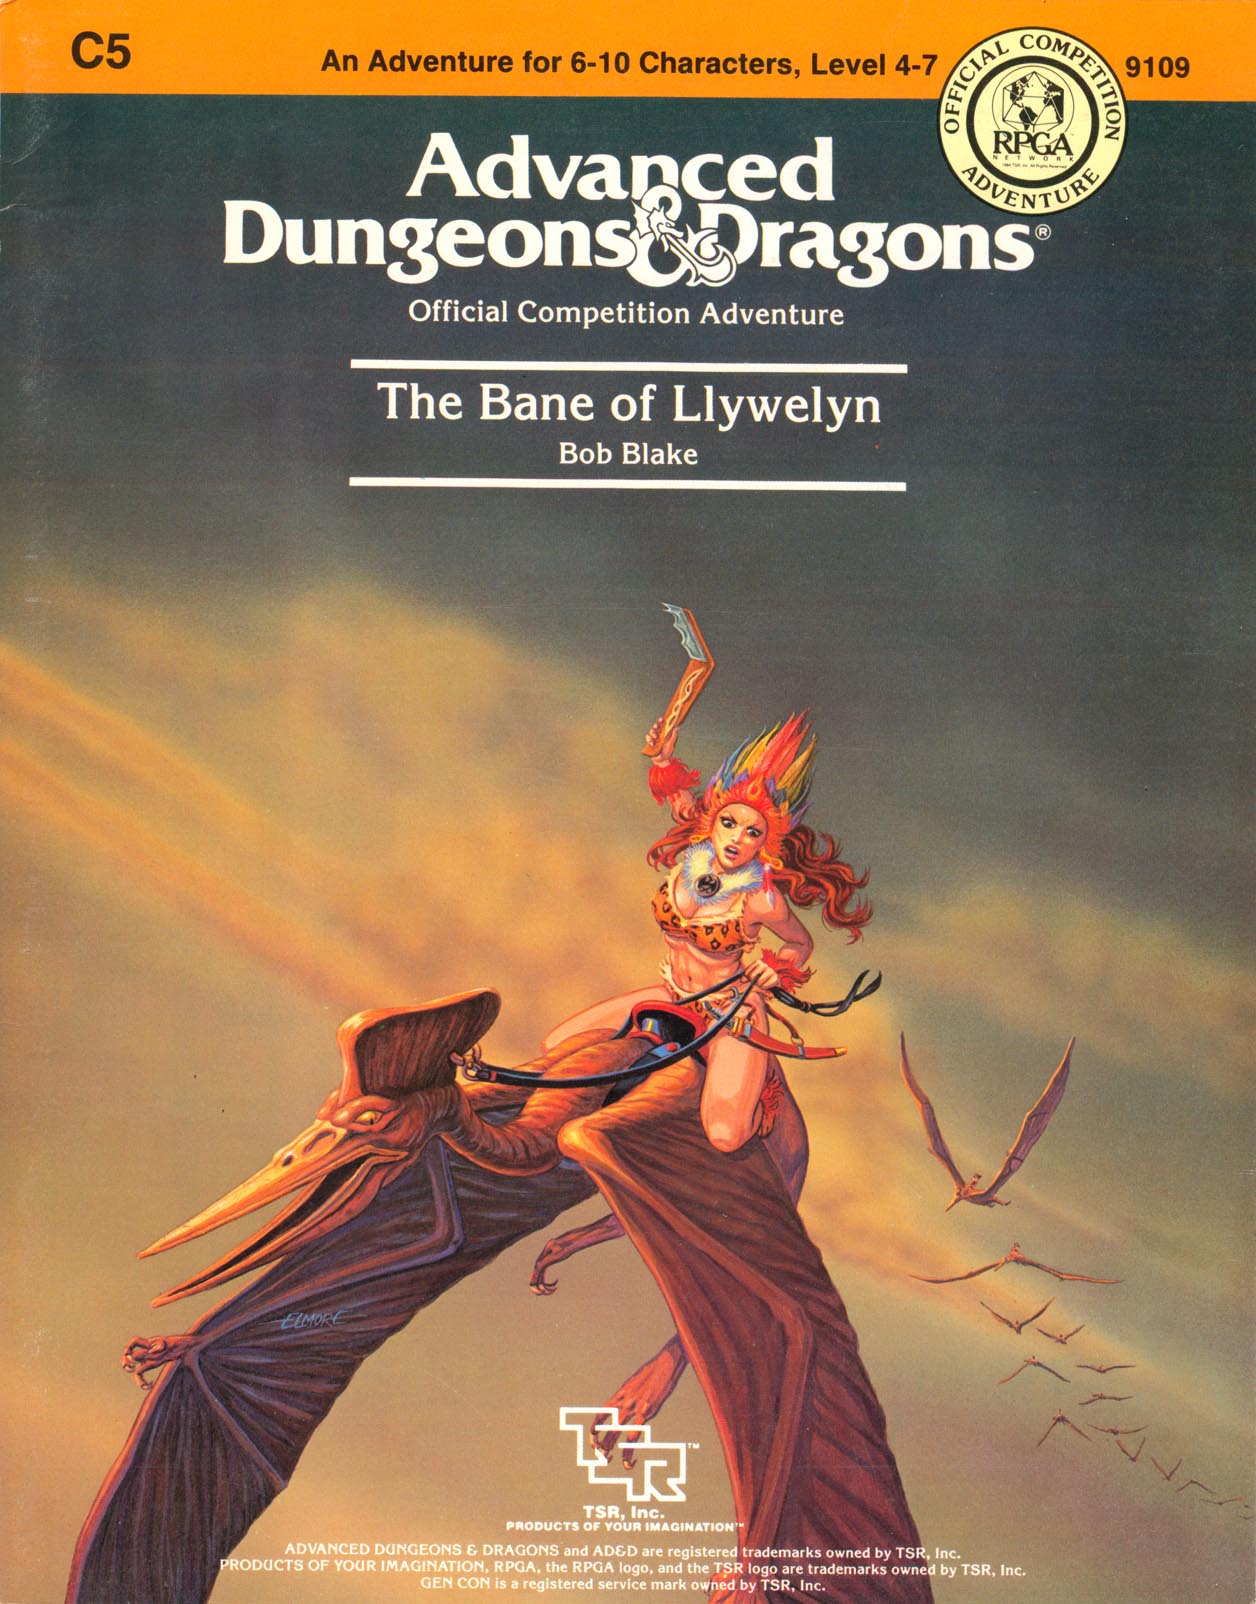
Excitement and unrest grip the land of Pellham. Two hundred years ago, the royal line of kings was deposed and replaced by a High Council. The current council is well-meaning but hopelessly incompetent. Everyone agrees that a drastic change is needed for the kingdom to survive. The ancient Prophecy of Brie foretells that in Pellham's darkest hour, a king from the past will return to restore the kingdom. The time of the prophecy is now. All is in readiness: the symbols of the ancient kings have been recovered, the keys to the royal tomb are in hand, powerful magics to revive the long-dead king have been secured at great cost. Only one problem remains... no one knows where the king is buried! The Bane of Llywelyn concludes the epic adventure of the Prophecy of Brie -- can YOU insure that the quest will be a success? The adventure can be played as a separate adventure or as the second part of the Prophecy of Brie series. TSR 9109

Important: The adventure is 1e but it has monster conversion notes for D&D 4th edition The town of Highport, once a human community overlooking Wooly Bay from its perch on the northern coast of the Pomarj, fell prey to hordes of humanoids swarming out of the jungle-covered hills surrounding the settlement. Though the orcs, goblins, kobolds, ogres, and gnolls razed much of the place in their ferocious rampages, the smoldering ruins they left behind soon became a new kind of community, a place of trade between the humanoid “locals” and the unsavory human traders who have no compunction about doing business with them. Slaves are a commodity in ready supply in Highport’s market, since many pirates raid up and down the coast of the bay, putting fishing villages to the torch and filling their holds with captured refugees. Slavery has become a thriving business in the town, and rumors abound of a cartel of Slave Lords who run things from behind the scenes, filling their coffers in secret from the buying and selling of human chattel. The trade has become so prolific that the good folk to the north have grown tired of these depredations and decided to fight back. Forces of righteousness and honor have recently descended upon Highport, some openly and others in secret, in various attempts to destroy the machinations of the Slave Lords and abolish the abominable enterprise that has taken far too many loved ones from home and hearth. One such doughty servant of goodness is Mikaro Valasteen, a cleric of Trithereon. Mikaro slipped unnoticed past the crumbling walls of Highport with a single mission: to rescue and transport as many slaves to their freedom as possible. Mikaro and a handful of faithful assistants located a number of escaped slaves—as well as rescued a few more not sufficiently restrained and guarded—and shepherded them through the gates and beyond the reach of their humanoid tormentors, returning them to their lands and homes. This covert freedom brigade enjoyed remarkable success early on, since the servants of the Slave Lords were often lax in their vigilance and sloppy in their efforts to prevent loss of the “merchandise.” After one too many shipments never made its destination, the humanoids stepped up their security and the normal channels of escape from Highport closed to Mikaro and his team. He cannot risk exposure by smuggling the freed slaves through the gates as merchandise any longer, since shipments of goods are now regularly stopped and checked. No longer able to free the slaves in that manner, Mikaro began hiding his charges in an abandoned villa in a particularly rundown part of the town. Although they are safe for the moment, their numbers have grown unmanageable, and the priest fears it is only a matter of time before someone slips up and brings slavers to their doorstep. Ever more desperate to find a new means of escape from Highport, Mikaro has started work on a plan that is both daring and dangerous. He intends to use a series of old sewers coupled with natural caverns running beneath the town as an escape route to the sea beyond the walls. But he needs someone to clear out the creatures and pitfalls he knows lie within. Pgs. 2-27

After hiring a group of brave adventurers to help him "acquire" a beholder specimen, the mage Velinax disappears! Rumors blame an insidious thieves' guild called the Unblinking Eye for this turn of events. Why would the Unblinking Eye wish to "take care" of the mage? Why does the guild want to speak to anyone involved with Velinax? Finally, what dark goal does the guild truly intend to accomplish? Finding out the answers to these questions will lead doughty adventurers straight through the shadows of a crafty thieves' guild and onto the threshold of an even deeper and more dangerous darkness. "Eye of Doom" is the second of three adventures featuring the nightmarish beholder. It can be played as an individual mission or as part of the series that began with "Eye of Pain" and concludes in "Eye to Eye." TSR 9530

Something awakens beneath the ruins of ancient Giustenal, the City by the Silt Sea. Many have tried to discover the secrets of this forsaken place, to plunder its legendary treasures. Few have returned from its shadowy embrace. Did they run afoul of savage raiders in the desert wastes? Did they lose their way in a sudden sandstorm only to sink hopelessly into the blowing, shifting silt? Perhaps they heard the psionic voice of the Caller in Darkness and succumbed to its mesmerizing summons? Or did they meet the true master of the ruins, a being as old as the Dragon and just as terrifying?... The burning world has reached a critical stage. For Athas, it could mean the start of a time of renewal, or it could herald the end of the world! It all begins in the ruins of Giustenal, in a place from another age, in the corpse of a shattered, long-dead city. Something stirs in the City by the Silt Sea. Something evil.... TSR 2432

In Feast of Goblyns, a party of adventurers is mysteriously transported from the lands they know to a dark and dangerous demiplane known as Ravenloft. Trapped in this realm of terror, they must use all their skills to escape the manipulations of one of Ravenloft's most powerful lords as they attempt to seek out the accursed Crown of Soldiers. If all goes well, they just might live long enough to escape this dread land and return to their homes. Also of note: As the first published adventure, is bundled with a DM screen for running games in Ravenloft. TSR 9298

TSR 9375, from 1992

The Filbar Quest series continues with FQ8 – Uprising of the Undead. As you continue to pursue the lost pages from the Codex of Gamber Dauch (Daw-sch) you quickly discover that the dead have risen from their graves. A rogue mage known as Mortatus the Wicked has discovered the emerald pages from the ancient tome and is using the powerful magic to raise an army of the dead. Your cleric had better be in good graces with their deity!

The Lost Tombs, Volume 3 The Doomgrinder, a mysterious stone windmill many leagues east of the City of Greyhawk, has for centuries been a source of rumors, frustration and fear. The rumors say that vast treasures are stored inside-all cursed. The frustration belongs to hundreds of adventurers who over the years have attempted to enter the windmill and failed. The fear is felt by those who believe the world will end when the stone sails of the Doomgrinder turn again. In the City of Greyhawk, powerful spellcasters read bad omens for the future, and the Doomgrinder is part of them. Some see no future at all, good or bad. TSR 9581

Traveling the space lanes is risky and mysterious, and danger comes in many forms. The rescue of a tiny ship from pirate attackers leads to the discovery of a monumental, supernatural evil. Nothing is ever routine in space. Crystal Spheres takes player characters through four unique crystal spheres to battle a powerful force of darkness. Player Characters will find themselves fighting not just for their lives, but the fate of an entire solar system and its millions of inhabitants. TSR 9299

It's all over (and literally so) after midnight. A mission with an unforgiving deadline. The characters must remove the magically-infused remains of a dead wizard and his medallion from a crypt. Pgs. 10-23

The Ivory Scimitar becomes convinced that some key of the Violet Corruption can be found in the old House Fleetwood within Daern Kelton. Braving the city, they journey to the house and discover several key pieces of informantion along the way may help them stop the corruption and defeat the dungeon once and for all. This adventure is formatted to both 1E & 5E gaming rules.

Caverns of the Dorgel Mountains is/was the finale in Filbar series. It features Lexicon Meridius the Ancient Red Dragon and scourge of the Dwarf Lords (F4 & F5). This large adventure represents how I look at the difficulty of taking on the deadliest dragon of the Prime Material plane. Will your party return to the Halls of the Dwarf Lords to help aid them one more time?
Remember Fluffy? The cute little dog? Well... Fluffy Goes to Heck is a shamelessly absurd AD&D® game adventure for the six silly characters provided on pages 39-40, or 4-6 characters of 3rd-5th level, played by those with senses of humor. A good mix of classes and races is helpful but hardly necessary.