
When her father goes missing, a young adventurer has no other choice than to gather her friends and head for the city of Loudwater. Soon after she gets swept away in an obscure design threatening to drag the entire region into chaos and war. At the heart of this mystery, lies not only her father, but the long-forgotten history of her once-despised family and a primordial beast influencing events from the shadows, moving her family like pieces on a chess board. Visit www.perfumersdaughter.com for more information. You can also address me directly on The Perfumer's Daughter Q&A on Facebook. All battlemaps and dungeons are free to download for use in digital platforms (such as roll20) on the aforementioned site.

The village of Hammerston is the site of a quick meal stop for a single PC and they quickly discover that the people are highly superstitious. A mage booms into the Kingfisher Tavern and reports his apprentice was chased while returning from collecting some items. The apprentice refuses to return to the cemetery where he was attacked and the mage, seeing your adventurer garb seeks your assistance.

The Dread tunnels of Ruxbar were created by a cult of a lesser evil deity of the giant pantheon, known as Jargain to serve as a planar gate in hope of bringing chaos and destruction to the natural order of the world and power to the one who would control the gate. Ruxabar was the high cultist who completed the ritual but to his surprise nothing of what he expected came through the gate. Plague creatures, toxic gases and vapors, diseases of all kinds and decay lay quick waste to him and his cult. For some time the gate remained open and the settlements nearby were afflicted with diseases never seen before. The nearby town of Stagwood was quickly abandoned due to the plague. Rumor has it that the gods have weakened the gate and the cult has been destroyed. The remaining villages that managed to somewhat resist the plague are now hiring brave adventurers to venture into the tunnels and close the planar gate for good! Are you capable enough of surviving the horrors that reside in the Dreaded Tunnels of Ruxabar? Published by Mistfactor Press
The shipping lanes south of Candlekeep have been disrupted. Unknown to anyone, an incredible alliance between a terran and a waterfolk tribe has caused the lamp at Gloomhaze Point lamptower to be extinguished. Merchant ships are being wrecked and plundered. The story unfolds in the nation of Amn. Adventurers will face a formidable kobold tribe that knows how to maximize its tactics, its smaller-than-human size tunnels, and an abundance of unique traps. The bloodthirsty sahaugin won’t be defeated without the adventurers taking a dive.

The bustling metropolis of Saydown City is the largest settlement in the Denali land and home to the current ruler King Pellet. As your party reaches the watery entrance a huge iron statue guards the docks. Upon closer inspection you notice that the item is actually a golem. After continued investigation you discover that the ‘heart’ of the creature has been stolen and you accept the job to uncover the loss!

Laveth, Lolth's half drow daughter, is plotting to seize power from her chaotic evil mother.
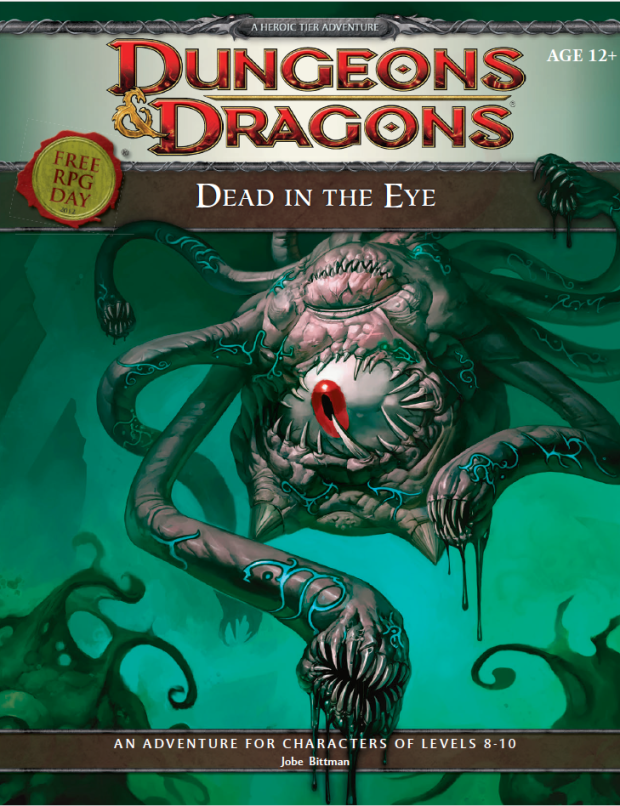
"The Keepers of the Celestian Order, valiant defenders dedicated to destroying horrors from the Far Realm, have trapped a beholder in its lair. However, the evil aberration has proven far more dangerous than expected, and the Keepers need the help of adventurers to end the threat of Omaranthax once and for all. This Dungeons & Dragons Roleplaying Game adventure, created for Free RPG Day 2012, pits player characters against a mutated beholder and its vile underlings. Although set in the Forgotten Realms campaign setting, the adventure can be easily adapted to any* D&D world." *: The adventure mentions that it is suitable for any setting touched by the Spellplague.

The fifth offering of the Filbar Dual (FD) series is Venture into Sordack Valley and takes the small group of young adventurers and puts them on the border of the frontier. The small town of Commerstance is located on the edge of the Lordek River separating civilization from the wild. Several locales are present for the aspiring group of adventurers including two wanted criminals.

"The first raid on our village happened a little over 3 months ago. We awoke in the morning to discover that the Cooper family's house at the edge of town had been sacked in the entire family was missing," croaks Obed, the village elder. "We mounted a search party, but found no trace of them." The old man lifts his gaze to the west woods. "After the third such attack, we sent a messenger to seek aid from one of the larger towns nearby. He never returned." He turns back to face your party and continues, "We had no idea who or what was attacking our village... Until last week. Creatures in black robes drifted out of the woods to the west and began setting houses on fire. Then, they seized four of our bravest men and carried them, screaming, into the mists." Obed throws his mug of ale into the fire, suddenly angry, "The only creature capable of this evil is the Barrow King, who lives in the burial mounds to the west. But I swear, we have done nothing to focus his anger upon us, nothing!" Warily, the elder stands, leaning heavily on his walking stick. Slowly, he lifts it, pointing at each one of you in turn. "If it is the Barrow King, God help us!"
Pursued by wolves and worse, the party must fight a running battle to take refuge at the relative safety of the Bittermoon Inn, a decrepit old inn high in the mountains. But night is falling, can they uncover the secrets of the inn and use them to survive the night? This adventure can be played as a stand alone one-shot, or can be used as a drop-in side quest to almost any campaign. It is suitable for a party of about 5 characters at the First Tier (Levels 1-4). The players must fight a running battle with wolves to reach Bittermoon, then they must discover the secrets of the inn before escaping through a smuggler's tunnel. Finally they must face off against their unseen opponent at Skull Cavern. There are four encounter maps included with this title.

This introductory level scenario brings a new group of players into an area formerly controlled by the Tunnmaa Dynasty. This group of rulers was rich in gold and gems before collapsing. It is well known that their kings, known as Ga Mantse, were buried in underground barrows that are well hidden and protected by traps. A few days ago a group much like your own found one of these hidden tombs and attempted to investigate. Sadly for them they were not up to the task. Can your party succeed where they failed?
Sometimes it is the simplest of tasks which end up taking much more of time and energy than they should. When the party is asked by the local sage to collect some rare flora, it feels like relatively easy money; a journey into the woods they’ve traveled before, a conversation with someone they’ve met before and then on to gather the crop. The characters can hear the Thirsty Serpent tavern calling them after a brisk afternoon’s work. But the PCs’ plans go awry when it turns out nothing is quite that straightforward. Deals have to be struck, foes defeated, anger and scorn dealt with and then the whole process gone through again. When there is duplicity at every turn and double-crossing is done with relish, the PCs have to keep their wits and weapons equally sharp. Dealing with someone who is prepared to cross the line between humiliation and harm at a moment’s notice is a tough challenge; this quickly becomes about much more than mere mushrooms!

The Hag's Hexes is a 66 page guide designed by Dungeon Masters Guild luminaries like JVC Parry and Janek Sielicki alongside rising stars and old stalwarts like Matt Butler, Matthew Gravelyn, and Tim Bannock. It was created with one thing in mind: to make hags more than the sum of their (often meager) Challenge ratings, giving them the mechanics, roleplay potential, and weird magic that can inspire campaigns, lay low kings and warlords, and potentially ensnare unwary Player Characters into campaign-changing curses or long-term bargains that force them into terrible moral quandaries! Split into five chapters, the authors have provided everything a DM needs to terrify their players for years to come. The Bestiary features over a dozen monsters; some are new hags, some are their minions or even their mobile lairs, and one of them -- the Shaitan AKA Desert Hag -- was featured in Monsters of the Guild! Bargains & Curses is a chapter filled with ideas that can kick-start campaigns, threaten valued NPCs, or put Player Characters' very existence and morality at stake. Chapter 3 includes two dozen items of wonderment, weirdness, and dread, ranging from fairy tale-inspired items of whimsy to terribly cursed items of horror. Chapter 4 is titled "Filthy, Vile & Downright Dirty" and provides dozens of roleplaying tips to make hags come alive, new mechanics inspired by and expanding on Volo's Guide to Monsters (coven spell lists, aunties, grandmothers, alternative coven members), and ends with useful combat tactics for each of the hags from the Monster Manual and Volo's Guide, as well as tactics for covens. Finally, Chapter 5 presents five encounter groups (with sub-encounters) to give you quick story seeds and monster lists that you can put together in minutes to create a single encounter or to inspire a full campaign, and ends with three full-length adventures -- each with 3-5 encounters -- that showcase many of the new monsters, rules, magic items, and so on that appeared in earlier chapters. Each of these adventures comes with an encounter map meant to act as inspiration for hag lairs, and they include useful mechanical ideas for terrain effects and descriptive keywords listed directly on the map for added inspiration and easy customization! Designed by Tim Bannock. Written by Matt Butler, JVC Parry, Janek Sielicki, and Tim Bannock. Edited by Matthew Gravelyn and Tim Bannock. Cover Art by Elena Naylor. Cartography by Tim Bannock using Inkwell Ideas' Dungeonographer (Dungeonographer is copyright Inkwell Ideas). Layout & Graphic Elements by Elena Naylor with Tim Bannock. Interior Art by Arcana Games, Bruno Balixa, David Lewis Johnson, Dean Spencer, Earl Geier, Filip Gutowski, Jacob E. Blackmon, Joyce Maureira, Petr Kratochvil, Jayaraj Paul, Brian Brinlee, and Wizards of the Coast.
Excitement and unrest grip the land of Pellham. Two hundred years ago, the royal line of kings was deposed and replaced by a High Council. The current council is well-meaning but hopelessly incompetent. Everyone agrees that a drastic change is needed for the kingdom to survive. The ancient Prophecy of Brie foretells that in Pellham's darkest hour, a king from the past will return to restore the kingdom. The time of the prophecy is now. All is in readiness: the symbols of the ancient kings have been recovered, the keys to the royal tomb are in hand, powerful magics to revive the long-dead king have been secured at great cost. Only one problem remains... no one knows where the king is buried! The Bane of Llywelyn concludes the epic adventure of the Prophecy of Brie -- can YOU insure that the quest will be a success? The adventure can be played as a separate adventure or as the second part of the Prophecy of Brie series. TSR 9109

This adventure was featured at GriffonCon in South Bend in 2016. Two countries are uniting for a wedding when one of the most important gifts of the union is stolen. Without the dowry of the 40 Golden Eggs from Lord Griffon the wedding will not occur and war will be the likely outcome. A quartet of the most loyal warriors has been sent into to Chromatic Canyon to deal with the bandits and retrieve the items! This is an “EGGSELLENT” adventure for convention tourneys!

Noel Needs Elves is our Christmas tongue-in-cheek adventure! While it could be a 'real' adventure it was designed to just have a good time with some holiday strangeness! After getting done with your first adventure you head to a fortress in a canyon to resupply and heal up. There you meet Lady Noel who is involved in a fight of her own. She trades you healing for the promise to deliver a message to the Elves on the other side of the canyon. Happy holidays everyone!
From the magazine: "'That's right," said the druid. "You must steal the giant's cauldron - without harming him in the slightest.'" The adventurers are sent on a mission to reclaim the legendary Cauldron of Plenty for a celtic inspired kingdom. This magic item is kept by an intelligent Verbeeg called the Bolg Mor. A secondary goal is to discover the command words for the cauldron in the cave system. There is a curse on the cauldron, stating that violence breeds violence; he who slays the owner of the cauldron and steals the device will also fall prey to acts of violence. Players are encouraged to attempt to roleplay and negotiate with the villain to gain the cauldron.

Your party of stalwart heroes must venture into a lost dwarven mining complex, fighting terrible monsters, bypassing deadly traps, and exploring chambers heavy with the dust of ages. Somewhere deep below the surface lies the heart of darkness--a corrupting evil that must be stopped before its influence can spread! TSR 9844
A band of shipwrecked adventurers awake to twilight on an uncharted jungle island to the Northwest of the Nalanthars with amnesia, little do they know the amnesia is recurrent at the completion of each long rest until an ancient curse powered by an incomplete Mythallar is lifted.

The party is enlisted to assist the Righteous Host, an army formed as a last resort to defend the world against the monsters of Elemental Evil. The host is greatly outnumbered. Its leaders send the party on a series of missions, each of which will give the Righteous Host an edge in the great battle to come. This epic adventure ends with the final push against the forces of Elemental Evil in the Meadows, and the outcome is informed by how effective the party is in their missions... and whether they are willing to risk putting themselves in the front lines. If the Righteous Host loses, players may decide to travel to Hommlet or other nearby towns to defend them. Whether the host is successful or not, players can decide to follow many different plot threads: exploring the Temple of Elemental Evil, finding the lich Kell the Eldest's lair and destroying his phylactory, or following the will of Bitbaern's Shield and discovering historical sites that were previously lost. Pgs. 44-69