
There's trouble in Allesley! An Eastbrook farm has been attacked and people slain. But by what? The people are frightened, the Reeve is concerned, and the Constable wants you to figure out what’s going on. The last time this happened, goblins attacked the town. Does this mean war? This is the first adventure in a series to come in 2017 which builds on the introductory mini-adventure in the Eastbrook starting area.
In a small hamlet, things are strangely becoming tidy in the night. Far from being pleased, the citizens are alarmed by these events. A local painter has gone missing, as has a travelling scholar. What is going on here?

Seductive vampires, hungry werewolves, sinister drug dealers, trouble in the sewers, and an undead beholder? Just another day in Waterdeep! The first adventure in the Vampires of Waterdeep Campaign Arc. Pgs. 62-77

The Ghost Tribe of Orcs were driven from their home under Wyvern Tor by some terrible evil. They marched to Phandalin and attacked only to be defeated. Then, the heroes journeyed to the orc’s former settlement beneath Wyvern Tor and found the source of the orc’s sardonyx and the umber hulk that drove the orcs out. Now, the party has to go deeper to deal with the terror from the Underdark that caused all of this excitement.

Continue the adventure inside the Dwarven Forge world of Mythras with the second part of this new gaming trilogy, The Hidden Valoria Campaign. Now entrenched in the tapestry of The Patina Court, the players must begin unraveling an even greater mystery that lies beneath the streets. Taking the adventure to the sewers, get ready to explore some of the locations that have made Valoria so famous among its players over the years This adventure is formatted to both 1E & 5E gaming rules. Also available in PDF.

𝐍𝐨𝐰 𝐰𝐢𝐭𝐡 𝐚𝐧 𝐢𝐥𝐥𝐮𝐬𝐭𝐫𝐚𝐭𝐢𝐨𝐧 𝐛𝐲 𝐂𝐇𝐑𝐈𝐒 𝐇𝐎𝐋𝐌𝐄𝐒 𝐚𝐧𝐝 𝐚 𝐏𝐑𝐈𝐍𝐓𝐄𝐑-𝐅𝐑𝐈𝐄𝐍𝐃𝐋𝐘 𝐃𝐔𝐍𝐆𝐄𝐎𝐍 𝐌𝐀𝐏! 𝐓𝐇𝐄 𝐑𝐔𝐈𝐍𝐄𝐃 𝐓𝐎𝐖𝐄𝐑 𝐎𝐅 𝐙𝐄𝐍𝐎𝐏𝐔𝐒 is a fifth edition (5E) conversion of the ground-breaking introductory adventure for Dungeons & Dragons that served as a DM aid in the first 𝐃&𝐃 𝐁𝐚𝐬𝐢𝐜 𝐒𝐞𝐭, released by TSR in 1977. This set included a 48-page rulebook covering the first three levels of play, and was skillfully edited by 𝐃𝐫. 𝐉. 𝐄𝐫𝐢𝐜 𝐇𝐨𝐥𝐦𝐞𝐬 from the original 1974 D&D rules written by 𝐆𝐚𝐫𝐲 𝐆𝐲𝐠𝐚𝐱 and 𝐃𝐚𝐯𝐞 𝐀𝐫𝐧𝐞𝐬𝐨𝐧. Holmes advanced the "Sample Dungeon" concept by writing a new thematic dungeon with a strong backstory, creating an adventure that has remained a fan favorite over the decades. Officially, its only title is "Sample Dungeon" but colloquially it goes by various names based on Zenopus, the doomed wizard who built the dungeon under his tower. An adventure for 1st to 2nd level characters; four pregenerated characters are included. Also includes ideas for using it as an adventure site in 𝐆𝐡𝐨𝐬𝐭𝐬 𝐨𝐟 𝐒𝐚𝐥𝐭𝐦𝐚𝐫𝐬𝐡. 𝐍𝐎𝐓𝐄: Using this conversion requires a copy of the original dungeon found in the (1977) Basic D&D rulebook. However, Wizards of the Coast has provided a free pdf of this dungeon since 2008 on their website, see the first page of the pdf for the link. 𝐂𝐎𝐍𝐓𝐄𝐍𝐓𝐒: Introduction, page 2 The Setting, page 3 About the Dungeon, page 4 Dungeon Master's Map, page 5 Areas of the Dungeon, pages 6-13 Appendix A: Further Reading, page 13 Appendix B: Dungeon Factions, page 14 Appendix C: Portown Rumors, pages 15-17 Appendix D: Use with Ghosts of Saltmarsh, pages 18-19 Appendix E: Pre-generated 1st level characters, page 20 𝐈𝐧𝐜𝐥𝐮𝐝𝐞𝐬 𝐭𝐡𝐞 𝐟𝐨𝐥𝐥𝐨𝐰𝐢𝐧𝐠 𝐧𝐞𝐰 𝐦𝐨𝐧𝐬𝐭𝐞𝐫𝐬, 𝐍𝐏𝐂𝐬, 𝐚𝐧𝐝 𝐌𝐚𝐠𝐢𝐜 𝐈𝐭𝐞𝐦𝐬 𝐟𝐨𝐫 𝟓𝐄: Cleaning Cube, Veteran Smuggler, Thaumaturgist, Monstrous Sand Crab, Lemunda, Monstrous Rat, Brazen Head of Zenopus, Verminslayer Longsword, Lesser Wand of Petrification, Scroll of Stone to Flesh The Ruined Tower of Zenopus was featured as part of the "D&D Classics" column in Issue #32 of Dragon+ magazine! Go to 𝐝𝐫𝐚𝐠𝐨𝐧𝐦𝐚𝐠.𝐜𝐨𝐦 or find the link on the Wikipeda page for Dragon magazine. 𝐂𝐑𝐄𝐃𝐈𝐓𝐒: Original Dungeon: J. Eric Holmes Conversion, Added Content & Cartography: Zach Howard Content Review & Editing: Scott McKinley Interior Art: Chris Holmes (“Octopus Attack”, page 9) Cover Art: “Italian Coast Scene with Ruined Tower” by Thomas Cole, 1838. Open Access Image from the National Gallery of Art at images.nga.gov Format: Derived from the “Adventure Template for Open Office/LibreOffice” by Dale Robbins on DMs Guild Dungeon Maps drawn using the application Gridmapper by Alex Schroeder

Old-School Essentials Adventure A hole in an old oak tree leads characters down to a maze of twisting, root-riddled passageways, the chambers of an ancient wizard-complex, and the banks of an underground river where once a reptile cult built their temples. A classic expedition into the Mythic Underworld for characters of 1st to 2nd level. 60 keyed areas, rumour table, loot summary, dungeon background info, suggestions for expanding the dungeon. Keyed in a quick-reference, bullet point format. Unlabelled map included for VTT use. The Hole in the Oak can be linked with The Incandescent Grottoes to form a large, 3 level dungeon with over 115 keyed encounter areas!
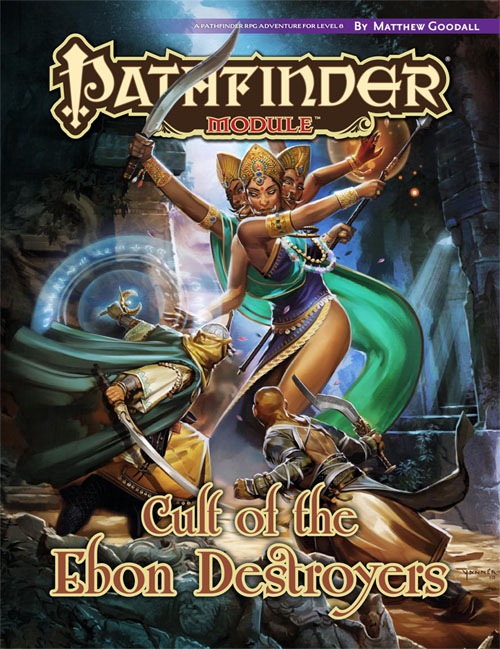
A malignant cult has taken root in the mystical and magical realm of Jalmeray. Known and feared throughout distant Vudra, the cult of Dhalavei has expertly destroyed organizations and societies from within for millennia. Now a new sect of the sinister Cult of the Ebon Destroyers has its sights set on Thakur Kharswan of Jalmeray, and the magistrates and bureaucrats behind the throne must hunt down and eliminate the cult before the unthinkable happens. If only there were someone they could trust to behead Dhalavei's cult before the assassins do the same to their beloved ruler…

This setting was used in the FN series and like the others in the FA series, it was used as an area for multiple adventure opportunities as well as a semi-safe haven. The main community in the area is the Village of Tomore. This community is offered as a free download! With a multitude of side adventures this area helps mid-level adventurers increase their experience point base. Close to this area is the previously published Sunken Temple of Bulu and the Ruins of Tarlac Keep.

When an attempt to arrange an early inheritance backfires, a man of lesser ambition than Vanthus Vanderboren would no doubt withdraw into his sister's manse to hide under her skirts and pray that the truth of his patricide remain hidden. Fortunately for Vanthus, lack of ambition has never been a problem. Now the Vanderobrens' prodigal son slinks east along the coast of Blood Bay, lured by rumors of an incredible prize kept in a smuggler's hideout called Kraken's Cove. Yet what he is destined to find there is far more than a lucrative bit of banditry. What awaits him is the savage tide. "The Bullywug Gambit" is the second chapter of the Savage Tides Adventure Path, a complete campaign consisting of 12 adventures appearing in Dungeon magazine. For additional aid in running this campaign, check out Dragon magazine's "Savage Tidings" articles, a series that helps players and DMs prepare for and expand upon the campaign. Issue #349 of Dragon magazine looks into the region surrounding Sasserine, and provides useful information if your PCs wish to explore this area more thoroughly than they do in the course of this adventure. The hidden caves of Kraken's Cove have long served the pirates of the Crimson Fleet as a place to stage their smuggling operations. When their latest cargo backfires, the PCs find themselves faced with something far worse than murderous pirates. Pgs. 12-48

East of Beregost, nestled in the outskirts of the Wood of Sharp Teeth, Durlag’s Tower has intrigued and yet stymied adventurers for decades. Stuffed full of mechanical traps and arcane wards, and rumored to be inhabited by fiends, very few have managed to extract any REAL treasure from the former home of Durlag Trollkiller. However, a powerful item in the ancient fight against the giants is said to be housed there, and the cloud giant Baron Rajiram has committed significant resources toward recovering it. After a pleasant tea in her garden, Seer calls upon you to beat him there and put a stop to his efforts! Sequel to Durlag's Tower.
Pursued by wolves and worse, the party must fight a running battle to take refuge at the relative safety of the Bittermoon Inn, a decrepit old inn high in the mountains. But night is falling, can they uncover the secrets of the inn and use them to survive the night? This adventure can be played as a stand alone one-shot, or can be used as a drop-in side quest to almost any campaign. It is suitable for a party of about 5 characters at the First Tier (Levels 1-4). The players must fight a running battle with wolves to reach Bittermoon, then they must discover the secrets of the inn before escaping through a smuggler's tunnel. Finally they must face off against their unseen opponent at Skull Cavern. There are four encounter maps included with this title.

Just when you thought it was safe to take a long rest. She's Back! The terrifying SEQUEL to the PLATINUM bestselling, and Dragon+ Magazine featured horror adventure: The Haunt. The Haunt 2 is both a one-shot, and a sequel that can be run as either. Long, long ago St. Greycastle’s Hospital served the city through the years, mainly treating the wounded and sick among the militia. Over time, the lower basement was converted into a sanatorium, housing those who became maddened from enduring the violent, brutal orcs raids which plagued the region during that time. This was the place where Gertrude, the night hag, tormented patients, and created her masterpiece, the Evil Doll. Now, after all of these years, Montarthas Manor has finally fallen, and the Evil Doll has been wounded. She has returned to the only familiar and safe place she remembers, to lick her wounds and plot her next move. Her presence in the hospital awakens the evil inside, creating a nightmarish charnel house of terror. In addition, the hospital itself feeds on fear. Do your players have what it takes to enter the haunted and evil hospital, to finally end the haunt and terror of the Evil Doll?! Published by P.B. Publishing.

Figgy Puddin' Steals Christmas is a short adventure for three to six characters, and optimized for 2nd level characters. We also include Scaling Suggestions, allowing you to run this adventure for lower- or higher-level characters. We anticipate a run-time of 2- to 4-hours. There's a bit of roleplay in this adventure, which may extend the playtime. Adventure Background A traveling jester known as Figgy Puddin’ and her Coal Smudge Gang have stolen Christmas presents and now hold them for ransom. While safe and secure in her lair, she awaits either a payment of an outrageous ransom, or a crew of heroes to claim the presents after they navigate her not-so-festive lair. What's the Adventure? After you introduce the hook, the adventure occurs in Figgy Puddin's lair - a refurbished kobold bunker consisting of eight rooms. As the characters explore the linear dungeon, they encounter new creatures, complete challenges, and are tested about their Christmas knowledge. However, the final confrontation with the naughty Figgy Puddin' could make for a very Unhappy and Unmerry Christmas for our heroes, the children of Thistleton, and their parents. Who Is Figgy Puddin’? Figgy Puddin’ was once a happy jester who loved Christmas. For years she traveled the realm, bringing fun and festive cheer to villages and children while preparing the way for Santa. However, times have become tough, and entertainment doesn’t always pay as well as one would like. As Figgy prepares for retirement, she’s learned she doesn’t have enough gold to last. During this time, she’s also decided that Santa doesn’t know who she is, let alone appreciate the work she puts in every year. Using her savings, extortion, blackmail, and other nefarious means, she’s convinced several mechanical geniuses and arcane specialists to help her refurbish her underground bunker with wondrous effects, creatures, and tests. To fund her retirement, she’s taken extreme measures to make some quick gold — holding Christmas presents for ransom.

The Kierhammer clan of dwarves pride themselves as excellent excavators, but the respective families are not without friction. While clearing the entrance to the tomb of an ancient king, tensions rose following the death of one of the Kierhammers, who seemingly fell accidentally. It is your job to ensure the clan stays united, and when disease strikes, to make sure resources are managed properly, so that the mission is complete and you all return alive. A wicked force, however has other plans...
For ages, “the old monastery on the hill” was simply that and nothing more to those that knew of it – a small building of a forgotten age and purpose, overgrown by the land around it. But recently, rumors have been making way among the educated that there is a wealth of knowledge that hides within the old monastery, waiting for someone to find it. Most dismissed these rumors as hearsay... but those with their eyes on the prize continued to pay attention. There must have been some merit to these claims, because seemingly overnight a monstrous creature has appeared on the monastery grounds - a serpent the size of a dragon, with a dozen legs and breath that crackles with lightning! There's no doubt the rumors and the monster's appearance are related somehow, and the PCs are tasked to put their skills to work to figure it out!

A fiend lurks among the Black Blade goblins. A shapeshifting barghest fashioned by the General of Gehenna to exact revenge on all goblin-kind. It’s aim: to kill as many goblin leaders as possible… A masked goblin approaches the party asking for help. Two tribe leaders are dead. But a rival for chief has control of the crime scene. Will the party discover the barghest among the goblin ranks? Can they stop this imposter before it strikes again? Adventure Overview The adventure’s story is spread over 4 parts and takes approximately 4 hours to play. The adventure begins with a Call to Action scene. Part 1: Goblin Politics. Krill sends his emissaries to implore help from any strong intermediary. The party is asked to investigate the murder of Thrawn in Dringly’s lair. This is Story Objective A. Part 2: The Opposition. Gain entry into Dringly’s lair and investigate the murder of Thrawn. Gather enough evidence to find the killer. This is Story Objective B. Part 3: To The Lair! Now that the players have determined the barghest (Yeep) is to blame, they need to get to Krill’s lair quickly as he is in imminent danger. This is Story Objective C. Part 4: The Barghest.When the players arrive at the lair, they need to get to Krill and expose and defeat the barghest. This is Story Objective D. Adventure Background A barghest named Yeep has begun its onslaught of attacks against the Black Blade goblins. Starting with Chief Gnar, then his second in command Thrawn, the barghest is moving methodically down the line of command. Krill is now chief. But he has some problems: Two leaders of the Black Blades are dead. Who killed them and why? Is he next? Dringly, the next in command, has decided to take his lair for himself, declaring himself Chief of the Black Blades. Who are the Black Blades? The Black Blades are a tribe of goblins in the local area. They are known for dipping their blades in a dark black substance. It is rumored these blades are poisonous. The Black Blades regularly attack passersby on the road to rob them. The Black Blades have two lairs, one run by a chief who leads the whole tribe, and another overseen by a boss lieutenant. The Black Blades have a well-established pecking order which is how Krill stands to become chief. The next in line is Dringly, who has also declared himself chief and wants Krill dead. Krill suspects that there is something suspicious about two leaders being killed within a day of each other, but he has already burned Gnar’s body without any investigation. He needs to investigate the body of Thrawn, but it is in Dringly’s lair. Krill wishes to avoid direct confrontation with Dringly at the present for three reasons: 1) Any violence would only kill his own tribe members and further divide the lairs. 2) He believes there is still hope for negotiation to reunite the Black Blades. 3) He believes that if he were to attempt negotiations himself, Dringly would kill him. This adventure features: Two maps. Ready for your favorite Virtual Tabletop. A full color pdf. A black and white pdf. One custom monster, a reprint of barghest, all others available in the Monster Manual. Four hours of entertainment involving: roll playing a goblin bard, investigating a murder scene, tracking down a barghest before it strikes again. Applicable to any setting.

Gazing down from the pinnacle of Hardway Mountain, who would not be drawn by the far-off glint of the Serpent's Eye? The descent will be hard, the mountains know neither mercy nor compassion. Many are the lessons to be learned, but fate has left you little choice - are you equal to the challenge? "Eye of the Serpent" is a one-on-one wilderness adventure module for one player and one Dungeon Master, and has been designed to develop the specialist skills of a 1st-level druid, ranger, or monk character. It can also be used for a normal party of four to six 1st-level player characters. The perils of Hardway Mountain are unchanging, but the routes between them are not. This module includes a unique route planning system with different of routes linking the encounters to challenge the abilities of druids, rangers, or monks. TSR 9125

In your last adventure you discovered a strange, and somewhat sinister looking, key. After a long wait it appears you have found an answer to what it opens. The good news is that it leads to great wealth, the bad news is that it opens a tomb. Oh yea, there may, also, be some…individuals that want the key too…

Where's Robin Hood When You Need Him? The Sheriff of Nottingham and the outlaws of Sherwood Forest share a common enemy. Will an unlikely alliance end this newest threat to the land? Pgs. 42-67