
The Hag's Hexes is a 66 page guide designed by Dungeon Masters Guild luminaries like JVC Parry and Janek Sielicki alongside rising stars and old stalwarts like Matt Butler, Matthew Gravelyn, and Tim Bannock. It was created with one thing in mind: to make hags more than the sum of their (often meager) Challenge ratings, giving them the mechanics, roleplay potential, and weird magic that can inspire campaigns, lay low kings and warlords, and potentially ensnare unwary Player Characters into campaign-changing curses or long-term bargains that force them into terrible moral quandaries! Split into five chapters, the authors have provided everything a DM needs to terrify their players for years to come. The Bestiary features over a dozen monsters; some are new hags, some are their minions or even their mobile lairs, and one of them -- the Shaitan AKA Desert Hag -- was featured in Monsters of the Guild! Bargains & Curses is a chapter filled with ideas that can kick-start campaigns, threaten valued NPCs, or put Player Characters' very existence and morality at stake. Chapter 3 includes two dozen items of wonderment, weirdness, and dread, ranging from fairy tale-inspired items of whimsy to terribly cursed items of horror. Chapter 4 is titled "Filthy, Vile & Downright Dirty" and provides dozens of roleplaying tips to make hags come alive, new mechanics inspired by and expanding on Volo's Guide to Monsters (coven spell lists, aunties, grandmothers, alternative coven members), and ends with useful combat tactics for each of the hags from the Monster Manual and Volo's Guide, as well as tactics for covens. Finally, Chapter 5 presents five encounter groups (with sub-encounters) to give you quick story seeds and monster lists that you can put together in minutes to create a single encounter or to inspire a full campaign, and ends with three full-length adventures -- each with 3-5 encounters -- that showcase many of the new monsters, rules, magic items, and so on that appeared in earlier chapters. Each of these adventures comes with an encounter map meant to act as inspiration for hag lairs, and they include useful mechanical ideas for terrain effects and descriptive keywords listed directly on the map for added inspiration and easy customization! Designed by Tim Bannock. Written by Matt Butler, JVC Parry, Janek Sielicki, and Tim Bannock. Edited by Matthew Gravelyn and Tim Bannock. Cover Art by Elena Naylor. Cartography by Tim Bannock using Inkwell Ideas' Dungeonographer (Dungeonographer is copyright Inkwell Ideas). Layout & Graphic Elements by Elena Naylor with Tim Bannock. Interior Art by Arcana Games, Bruno Balixa, David Lewis Johnson, Dean Spencer, Earl Geier, Filip Gutowski, Jacob E. Blackmon, Joyce Maureira, Petr Kratochvil, Jayaraj Paul, Brian Brinlee, and Wizards of the Coast.

In the frontier stronghold of Purdey’s Rest, rumors of mysterious lost ruins lead a group of young adventurers into the wilderness — and the forgotten dungeons of a legendary dark mage. Facing off against evil bandits, foul undead, and ravenous monsters, the characters seek the rewards of wealth and fame. But before they can claim either, they must survive all the deadly threats of Hazakor’s lost halls. The Hidden Halls of Hazakor is a starter adventure for fifth edition fantasy roleplaying, written with a special focus on young, beginning Gamemasters of ages twelve and up. In a friendly and straightforward fashion, this adventure explores some of the ways a good fantasy RPG dungeon crawl can be put together. It offers advice on how to just let things happen during a game session, and how to not be overwhelmed by all the directions in which an adventure can go. It talks about how to bring nonplayer characters to life, how to have fun running monsters, and how to challenge the other players and their characters alike. The Hidden Halls of Hazakor is for any player who’s ready to sit in the GM’s chair for the first time — and who is ready to learn some of the tricks and techniques that help all GMs run great games. The PDF download also includes untagged maps for Purdey's Rest and the Hidden Halls of Hazakor dungeon, making it easy to run the adventure in a virtual tabletop setup. These maps are missing the number key and any features that should initially be known only to the GM (including traps and secret doors). The publisher's website offers free pregenerated characters for the adventure, but they are not included in the adventure. The website also has a free GM Guide as well. Insane Angel Studios

Legends of a "mountain of gold" provoke a mad scramble for a mysterious book laden with clues to find certain statues around the city, which themselves hold additional clues leading to the hiding place of the fabulous treasure. An adventure for using old-school advanced rules with twists and open-ended problem-solving in a city rife with overt treasure-hunting and covert Byzantine plotting by multiple factions. Published by Coiled Sheets of Lead

A fiend lurks among the Black Blade goblins. A shapeshifting barghest fashioned by the General of Gehenna to exact revenge on all goblin-kind. It’s aim: to kill as many goblin leaders as possible… A masked goblin approaches the party asking for help. Two tribe leaders are dead. But a rival for chief has control of the crime scene. Will the party discover the barghest among the goblin ranks? Can they stop this imposter before it strikes again? Adventure Overview The adventure’s story is spread over 4 parts and takes approximately 4 hours to play. The adventure begins with a Call to Action scene. Part 1: Goblin Politics. Krill sends his emissaries to implore help from any strong intermediary. The party is asked to investigate the murder of Thrawn in Dringly’s lair. This is Story Objective A. Part 2: The Opposition. Gain entry into Dringly’s lair and investigate the murder of Thrawn. Gather enough evidence to find the killer. This is Story Objective B. Part 3: To The Lair! Now that the players have determined the barghest (Yeep) is to blame, they need to get to Krill’s lair quickly as he is in imminent danger. This is Story Objective C. Part 4: The Barghest.When the players arrive at the lair, they need to get to Krill and expose and defeat the barghest. This is Story Objective D. Adventure Background A barghest named Yeep has begun its onslaught of attacks against the Black Blade goblins. Starting with Chief Gnar, then his second in command Thrawn, the barghest is moving methodically down the line of command. Krill is now chief. But he has some problems: Two leaders of the Black Blades are dead. Who killed them and why? Is he next? Dringly, the next in command, has decided to take his lair for himself, declaring himself Chief of the Black Blades. Who are the Black Blades? The Black Blades are a tribe of goblins in the local area. They are known for dipping their blades in a dark black substance. It is rumored these blades are poisonous. The Black Blades regularly attack passersby on the road to rob them. The Black Blades have two lairs, one run by a chief who leads the whole tribe, and another overseen by a boss lieutenant. The Black Blades have a well-established pecking order which is how Krill stands to become chief. The next in line is Dringly, who has also declared himself chief and wants Krill dead. Krill suspects that there is something suspicious about two leaders being killed within a day of each other, but he has already burned Gnar’s body without any investigation. He needs to investigate the body of Thrawn, but it is in Dringly’s lair. Krill wishes to avoid direct confrontation with Dringly at the present for three reasons: 1) Any violence would only kill his own tribe members and further divide the lairs. 2) He believes there is still hope for negotiation to reunite the Black Blades. 3) He believes that if he were to attempt negotiations himself, Dringly would kill him. This adventure features: Two maps. Ready for your favorite Virtual Tabletop. A full color pdf. A black and white pdf. One custom monster, a reprint of barghest, all others available in the Monster Manual. Four hours of entertainment involving: roll playing a goblin bard, investigating a murder scene, tracking down a barghest before it strikes again. Applicable to any setting.
The Pathfinders descend deeper into the ruins of Bonekeep, a centuries-old siege fortress. The deeper dungeons hold even deadlier threats, yet even they cannot compare to the terrible revelations of the tower's true purpose.

“Do not try to escape. You are in my control. Look at me. I am the sum of all evils. Look carefully. My power infests all times, all galaxies, all dimensions...many seek me out...But see how I destroy their lives..." (from the film, Heavy Metal, 1981) For half a century, life in the mining outpost of Piktown has been peaceful and prosperous until a strange green glow in the nearby mountain range rekindled a frightening legend from the past. Does this recent luminous phenomenon signal the return of the dreaded Cult of the Green Orb? The Overlord has hired you and your fellow adventurers to stop the troubling green glow! This module is a classic-style dungeon crawl meant for a single night’s play, with plenty going on behind the scenes to keep players (and referees) interested. For use with Swords & Wizardry** or the Original Edition of the First Fantasy Roleplaying Game

A shrewd, spell-using green dragon has taken over the deepest chamber of a limestone cave as his lair. The dragon has persuaded a tribe of troglodytes to live in the outer chambers as a sort of "protective buffer" in return for gifts of magical treasure. The troglodytes cherish the useless bits of magic without realizing their modest worth. The outer chambers of the cave are protected by the troglodytes, the beetles and centipedes the troglodytes raise as cattle, and wild creatures. The green dragon uses traps, illusions and magical devices to protect his inner chamber. Wyrmhaven is the second dragon's lair to conquer. Part of TSR 1073 The Dragon's Den

Civil War Unrest. Turmoil. Rebellion. As above, so below - the cataclysmic events of the Wrath of the Immortals echo throughout the Hollow World setting. The Milenian Empire, with its classical Greek culture, has not escaped. Already the streets are un-safe, and the omens are getting worse... The emperor is dead... long live the emperor! But is the new emperor a man of the people, or a tool in the hands of malevolent powers? Walk carefully, for no stranger is safe upon the streets these days, and adventurers least of all! The mood of the capital city is turning ugly. Minions of the new emperor look on uncaring, while citizens disappear and philosophers fall to heedless mobs. The old emperor's elite guards are disbanded and scattered. Disorder reigns, and restless citizens threaten open revolt. And yet... a whisper is heard. Civil war can be averted. An ancient artifact, the Milenian Scepter, can rally those who would serve the Empire best. But the Scepter has been lost for generations, and who can say where it might be? The trail leads into the depths of the city, and across a dangerous wilderness to a forgotten oracle. For the lucky and the bold, perhaps it will lead to... THE MILENIAN SCEPTER This stand-alone adventure is compatible with the Wrath of the Immortals boxed set and the accessory HWR3, The Milenian Empire. You will need the D&D Hollow World boxed set to play this adventure. Easily adaptable to the AD&D game. TSR 9378

(2017 ENNIE Awards Judges' Spotlight Winner!) THE MOST AWESOME ADVENTURE EVER Since the invention of the adventure module, there have only been five adventures that were rated the most awesome, the most epic. Broodmother Sky Fortress leaves them all behind. It’s got these creatures that are half shark. Half elephant. All badass. They fly around in this cloud fortress, wrecking everything in the campaign until the players step up to stop them. It’s all terribly exciting! And all brought to you by none other than the world-famous Arch-Mage of Old-School, Jeff Rients! As an added bonus, we’ve included a Greatest Hits of the ol’ Arch-Mage’s essays and game tools to build your campaign into the unstoppable juggernaut you’ve always wanted it to be. Your game won’t suck anymore! Broodmother SkyFortress: Buying any other adventure is just throwing your money away (includes "3.PF" edition stats by Jukka Särkijärvi because somebody somehow convinced me that would be a good idea back when this thing was being crowdfunded) Writing by Jeff Rients Art by Ian MacLean Graphic Design by Alex Mayo Cartography by Jez Gordon

Trouble Cubed is a is a pseudo-adventure with three interesting gelatinous cube encounters. These three encounters are structured in a way that they can be used together as one adventure, or each individually dropped into any adventure from EL5 to 7. The encounters vary the cube's encounter situation significantly, and the tactics needed to deal with them, such as by trapping a character with a portcullis between a cube and a pit trap, placing a cube half down a pit trap, and having the cube accidentally ingest a beneficial potion (such as spider climb). Pgs. 29-30

What was supposed to be a simple prisoner transfer grows complicated when the PCs arrive at a prison that’s recently come under new management.
What's waiting for you at the bottom? Adventurers are more than welcome - they're nourishment! Pgs. 4-15

Displace Beast Maze is an adventure that has one long encounter that is a combination of a puzzle (maze) and combat encounter (Displacer beast). The Displacer beast tentacle's ability to attack through the maze walls, knowledge of the layout, and hit-and-run tactics make the labyrinth both a useful and possibly deadly lair for the creature. Pgs. 27-29

A generic tomb usable for one off adventures or unexpected exploration discovery. An abandoned dwarven tomb has been taken over by goblins.

*** WARNING: this adventure contains strong scenes and descriptions which may not suit all kinds of public. It's heavy on horror, suspense, gore and sadism. The entire adventure available in the Full Preview, so that you can self-assess the content and buy in confidence. *** The main theme of the adventure is horror, using suspense elements as well as gore and sick scenes to shock your players. The adventure is divided in 2 parts: the first part involves a mad vampire spawn who tortures as a hobby, full of scary stuff like you see in horror movies. The second part involves a lesser demon lord stuck in a kind of inverted world (Stranger Things/Silent Hill style) which has a dread passion for a very disturbing and wicked art. There are tips on how to set the mood and make your players actually tense or even scary.

Days ago, a portal to the Elemental Chaos appeared near the PCs’ home city. Since then, it has grown into an enormous sinkhole that periodically belches fire and brimstone. The rip in reality threatens to overwhelm settlements and a nearby river unless someone ventures through and closes it from the other side. Pgs. 102-107
At long last, the first adventure ever published for DCC RPG is now available! This is the updated second printing that was first released at Gary Con 2014. It features a fresh edit and several new pieces of art! High above the windswept moors and darksome woods, the village of Hirot is under siege. Each night, as the sun sinks beneath the western mountains and the candles burn low, a devil-beast stalks the village streets, unleashing its savage fury on the living. From warlord to pauper, crone to child, no one is safe. Defeating the immortal hound will require more than mere blades or even spells. To slay the beast, the characters must delve into the mysteries of the land and its Savage Kings. Only then, armed with relics forged from a bloody past, can the most cunning and courageous of adventurers challenge the hound of Hirot!
In Treasure of Talon Pass, the player characters explore an ancient mountain garrison in search of a jade chalice reputed to be worth a small fortune. But the path to the jade chalice isn’t easy. A dragon and its kobold minions have taken up residence in the garrison, and some undead soldiers from long ago still haunt its halls as well. Nor are the PCs the only ones seeking the jade chalice. A band of orc mercenaries known as the Nightfists are after the chalice . . . and they arrived at the dungeon only minutes before the PCs
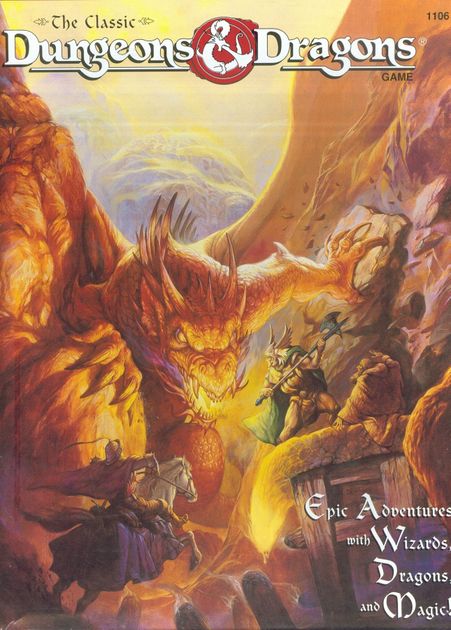
Introductory adventure included with the 1991 "Black Box" edition of D&D

"...the Ultimate Campaign Adventure..." A sinister force, long thought destroyed, stirs from the black hole that spawned it. Like an ebony darkness it prowls the land and safety is but an illusion, for it watches from every shadow and ponders possibilities. What began years ago with the introduction of the players to the quiet village of Hommlet and the amazing lands of Greyhawk, at last is complete. Here is the long awaited campaign adventure featuring the ruins of the Temple of Elemental Evil! Evil broods and grows beneath those blasted stones. This is your chance to drive it back and scatter its forces again. This product includes the village of Hommlet, the filthy shire of Nulb, and reveals the ruins of the Temple of Elemental Evil and the labyrinths that lie beneath, a warren of darkness. And beyond these ruins, even more is revealed. For the first time this product provides a complete campaign adventure which will take beginning characters from 1st all the way to 8th level and possibly beyond! Hours of adventure await you! TSR 9147