
While you search for treasure, others search for you. A treasure vault without guards or traps - can it be true? Pgs. 16-30
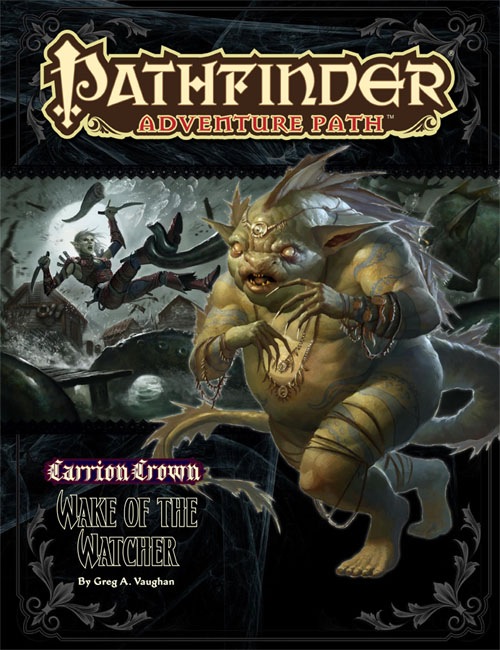
Part 4 of the Carrion Crown Adventure Path brings the heroes to the small fishing village of Illmarsh. The party is searching for a dark rider of the necromantic Whispering Way cult and will discover the strange practices of the deeply religious inhabitants of Illmarsh. Rumors of madness, strange disappearances and human sacrifices to things best left unnamed lead them to investigate the town church and its history. They'll find a desperate people, caught in a war between beings from beneath the seas and invaders from the darkest corners of the cosmos. Can the heroes save Illmarsh from its tradition of terror? It is worth noting that this story is heavily inspired by The Shadow over Innsmouth by H.P. Lovecraft and the role playing game Call of Cthulhu. If you're planning on going through the whole adventure path of Carrion Crown, the module Carrion Hill could easily be fit between book 3 and 4, as the party will travel directly through the area where this one shot adventure takes place. This book includes: - “Wake of the Watcher,” a Pathfinder RPG adventure for 9th-level characters, by Greg A. Vaughan - Blasphemous secrets of the foul faiths known collectively as the Old Cults and sanity-shattering gods such as Azathoth, Nyarlathotep, and Cthulhu, by James Jacobs - A giant bestiary filled with eight classic monsters inspired by the writing of H. P. Lovecraft and the tales of the Cthulhu Mythos, by James Jacobs and Greg A. Vaughan - Laurel Cylphra’s discovery that the dead aren’t the only dangers in Ardis in a new entry into the Pathfinder’s Journal, by F. Wesley Schneider.
Freeport is a fantasy “free city” you can place in a fantastic setting. Its basic premise is a pirate city gone legit… at least on the surface. In truth, the pirate tradition is alive and well in Freeport, but camouflaged by a veneer of respectability. These days the city’s pirates are privateers, legalized pirates Freeport loans out to the highest bidder. You’ll learn more in the short history of the city that follows. This should help give you a taste of the flavor of Freeport before the adventure begins and the given background is all you need to run this adventure. It is an ideal starting place for a new campaign as the player characters find themselves stranded in Freeport after a deal goes sour. A seemingly simple job plunges them into the strange underside of the city, where they uncover secrets worth dying for. Death in Freeport is the first from the Freeport trilogy, together with Terror in Freeport and Madness in Freeport. Synopsis: Death in Freeport drops the player characters into the midst of political and magical intrigue, as the hidden Brotherhood of the Yellow Sign manipulates events to bring its dread god to the world. Freeport is still a bustling center of trade, but evil currents run beneath the surface. There are secrets here, and questions unanswered. The characters will undoubtedly learn there is more here than they expect in a simple seaport. The question is, will that knowledge kill them? As the adventure begins, the player characters (PCs) have just come to Freeport on a merchant ship. While on the docks, the PCs are attacked by a press gang, who mistake them for easy marks. The press gang is handily beaten off; since they are unused to real resistance. A bookish young man named Brother Egil then approaches the PCs. He says that he’s been looking for a group that can take of itself, and that he has a job for them if they are interested: finding a missing librarian. The missing man, Lucius, disappeared two days previously, and Egil is eager to find him. Egil gives the PCs some background on Lucius and his strange behavior. The PCs are then free to investigate: They are likely to visit Lucius’s home, the temple to the God of Knowledge, and an orc pirate ship. This should form a picture of Lucius as a man searching for his own past—who found something he wasn’t counting on. Following a trail of clues, the PCs learn about the Brotherhood of the Yellow Sign. With a little luck, the PCs can trail the cultists back to their hideout, penetrate the lair, and discover secret tunnels underneath it. Deep underground they find degenerate serpent people, and eventually Lucius himself. The librarian has been tortured badly and will die without aid. The PCs also have to deal with the leader of the cult, a man they may recognize from the temple. When the cult priest is slain, they are in for an even bigger surprise. He was not human at all, but a serpent man in disguise. What this means for Freeport only the gods can say.

A fiend lurks among the Black Blade goblins. A shapeshifting barghest fashioned by the General of Gehenna to exact revenge on all goblin-kind. It’s aim: to kill as many goblin leaders as possible… A masked goblin approaches the party asking for help. Two tribe leaders are dead. But a rival for chief has control of the crime scene. Will the party discover the barghest among the goblin ranks? Can they stop this imposter before it strikes again? Adventure Overview The adventure’s story is spread over 4 parts and takes approximately 4 hours to play. The adventure begins with a Call to Action scene. Part 1: Goblin Politics. Krill sends his emissaries to implore help from any strong intermediary. The party is asked to investigate the murder of Thrawn in Dringly’s lair. This is Story Objective A. Part 2: The Opposition. Gain entry into Dringly’s lair and investigate the murder of Thrawn. Gather enough evidence to find the killer. This is Story Objective B. Part 3: To The Lair! Now that the players have determined the barghest (Yeep) is to blame, they need to get to Krill’s lair quickly as he is in imminent danger. This is Story Objective C. Part 4: The Barghest.When the players arrive at the lair, they need to get to Krill and expose and defeat the barghest. This is Story Objective D. Adventure Background A barghest named Yeep has begun its onslaught of attacks against the Black Blade goblins. Starting with Chief Gnar, then his second in command Thrawn, the barghest is moving methodically down the line of command. Krill is now chief. But he has some problems: Two leaders of the Black Blades are dead. Who killed them and why? Is he next? Dringly, the next in command, has decided to take his lair for himself, declaring himself Chief of the Black Blades. Who are the Black Blades? The Black Blades are a tribe of goblins in the local area. They are known for dipping their blades in a dark black substance. It is rumored these blades are poisonous. The Black Blades regularly attack passersby on the road to rob them. The Black Blades have two lairs, one run by a chief who leads the whole tribe, and another overseen by a boss lieutenant. The Black Blades have a well-established pecking order which is how Krill stands to become chief. The next in line is Dringly, who has also declared himself chief and wants Krill dead. Krill suspects that there is something suspicious about two leaders being killed within a day of each other, but he has already burned Gnar’s body without any investigation. He needs to investigate the body of Thrawn, but it is in Dringly’s lair. Krill wishes to avoid direct confrontation with Dringly at the present for three reasons: 1) Any violence would only kill his own tribe members and further divide the lairs. 2) He believes there is still hope for negotiation to reunite the Black Blades. 3) He believes that if he were to attempt negotiations himself, Dringly would kill him. This adventure features: Two maps. Ready for your favorite Virtual Tabletop. A full color pdf. A black and white pdf. One custom monster, a reprint of barghest, all others available in the Monster Manual. Four hours of entertainment involving: roll playing a goblin bard, investigating a murder scene, tracking down a barghest before it strikes again. Applicable to any setting.

The Pyramid of Amra is a challenging adventure designed for characters of at least 12th level. Due to the nature and numbers of undead enemies (vampires), having a cleric on hand with the ability to cast raise dead and greater restoration is advisable. The PCs should be rounded out with a wizard or sorcerer and a pair of front-line fighters. In this adventure, the PCs travel to the Pyramid of Amra and the ancient Monastery of Night, where they face one of the most dangerous of opponents they are likely to meet, C’nosretep the Champion of Set.

What began as a subtle sickness has now spread into a full-blown contagion of magical origins around Roslof Keep! Although protected from the outbreak by their Mithel Standard, the Company of the Ivory Scimitar is now challenged with not only continuing their quest to defeat the Dungeon but also saving the town that they have grown to love. With unlikely allies forming from the other Mithel Companies, as well as unforeseen help within the labyrinth itself, the Ivory Scimitar must now take on the perilous task of curing the Violet Corruption while trying to discern the nature of its cause from somewhere deep within Mithelvanr's mad dungeon of self-propagating monstrosities! This adventure is formatted to both 1E & 5E gaming rules. Also available in PDF.
Most adventurers like to think that when their number is finally up, their colleagues will bring them home, either to be raised or at least returned to their families for a proper burial. But how far will the PCs go in order to do right by a fallen adventurer? And will they draw the line at hauling his coffin out of the Underdark? Pgs. 20-40

The adventure takes players from a town devastated by an unexpected flood, through a drowned land where nature is turned upside down and desperate families cling to the roofs of their ruined homes, hiding from the monstrous products of a disordered world, through the strange tomb of an ancient race, to a profundal zone, hidden for millennia and now exposed, and finally to the Observatory itself, an eerie abandoned treasure palace, where they will encounter a pale and unexpected terror which will seek to claim their lives. The adventure is suitable for a lucky mid-range party, a stupid high-level party or an exceedingly clever low level party. It is difficult, with a meaningful possibility of character death. Should you find them, and defeat their guardians, the treasures of an ancient culture will be yours. At the final point of the Observatory is a glimpse of another world. Published by False Machine Publishing

The Raiders’ Hideout is a series of underground chambers (or perhaps the interior of a pyramid) that serves as a base of operations for a band of gnoll desert raiders. The PCs have come to exact a measure of justice for recent brutal caravan raids. They’ve tracked the gnolls to their lair, where they intend to end the threat to desert trade once and for all. Pgs. 30-35

What elder evils lurk in the depths of the freezing mountain ruins? Find out in The Stoneheart Ruin! The adventure features: An adventure set in a desolate, wintry mountain landscape. 16 pages full of intrigue and mystery, containing full color maps, plus 2 unique monster stat blocks. Provides a great introduction to Mind Flayer lore and mythos for Tier 1 players. Can easily be set in the Spine of the World for use in Rime of the Frostmaiden. Let your characters test their mettle as they climb and face the ancient dangers lurking in the cracks of The Stoneheart Ruin! “I have no explanation for any of these finds. We heard disturbing noises coming from further within the mountain; thunderous and growling.” Excerpt from a pamphlet, signed: “Koralia Meadring, Anthropologist Extraordinaire” Koralia needs you to investigate her most recent discovery: a ruined cavern deep in the mountains. Her small team of academics did a cursory walk-through and think they've found a big breakthrough! However, they left in a hurry after being frightened by the horrors they heard coming from deeper in the mountain. They escaped and found one of their team was missing - a goliath named Marek. You must climb the mountains and locate the ruin, make certain that it is safe for study by Koralia’s team, and if possible, find and rescue Marek, whose fate is uncertain. Made during the November 2020 RPG Writer's Workshop.

𝐏𝐚𝐩𝐞𝐫 𝐐𝐮𝐞𝐬𝐭 𝐏𝐫𝐞𝐬𝐞𝐧𝐭𝐬: 𝐓𝐡𝐞 𝐀𝐛𝐲𝐬𝐬 𝐄𝐪𝐮𝐚𝐭𝐢𝐨𝐧 Embark on an unforgettable journey with an immersive 71-page adventure tailored for 6-8 Level characters, utilizing only this book and freely available SRD rules. Set foot in the idyllic town of Suncrop Hill, where mystery looms in every shadow and secrets lie buried beneath the surface. 𝐒𝐨𝐦𝐞𝐭𝐡𝐢𝐧𝐠 𝐢𝐬 𝐫𝐨𝐭𝐭𝐞𝐧 𝐢𝐧 𝐭𝐡𝐞 𝐭𝐨𝐰𝐧 𝐨𝐟 𝐒𝐮𝐧𝐜𝐫𝐨𝐩 𝐇𝐢𝐥𝐥 Unravel the secrets of Suncrop Hill as you brave its hidden depths, confronting challenges that will test your wit and courage. • 6 compelling adventure hooks, for your players to be drawn into a web of intrigue • 6 intricately detailed locations to explore, from quaint taverns to ominous dungeons, each teeming with secrets waiting to be unearthed 𝐓𝐡𝐞 𝐁𝐫𝐮𝐭𝐚𝐥 𝐌𝐨𝐧𝐬𝐭𝐞𝐫𝐬 𝐨𝐟 𝐓𝐡𝐞 𝐀𝐛𝐲𝐬𝐬 𝐄𝐪𝐮𝐚𝐭𝐢𝐨𝐧 • 9 unique monsters, each more formidable than the last, as you fight to uncover the truth and emerge victorious • Each with their own strategic battle tactics, enhancing the thrill of combat for an even more immersive experience • 1 Multi-phased Boss fight that will force your players to be tactical in order to survive 𝐀𝐧𝐝 𝐰𝐡𝐚𝐭 𝐚𝐝𝐯𝐞𝐧𝐭𝐮𝐫𝐞 𝐰𝐨𝐮𝐥𝐝 𝐛𝐞 𝐜𝐨𝐦𝐩𝐥𝐞𝐭𝐞 𝐰𝐢𝐭𝐡𝐨𝐮𝐭 𝐭𝐫𝐞𝐚𝐬𝐮𝐫𝐞? • 13 unique magic items to discover • 4 items with different rarity variants, reaching from uncommon to legendary, each with its own tantalizing power waiting to be wielded 𝐈𝐭'𝐬 𝐝𝐚𝐧𝐠𝐞𝐫𝐨𝐮𝐬 𝐭𝐨 𝐠𝐨 𝐚𝐥𝐨𝐧𝐞! 𝐓𝐚𝐤𝐞 𝐭𝐡𝐢𝐬. To aid in your quest, equip yourself with our meticulously crafted item and monster cards, perfectly sized for convenience and portability. • 24 magic item cards, the perfect handout to print and hand your players • 11 monster cards, with which you'll have everything you need at your fingertips

Tired and sore, you struggle over the burning sands toward the long-forgotten city. Will you reach the place in time to save yourselves from the evil efreeti? The sun beats down, making your wounds stiff and worsening the constant thirst that plagues anyone who travels these waterless wastes. But there is hope - are those the ruins over there? In the midst of broken columns and bits of rubble stands a huge statue. This is the place! You've found it at last. Gratefully, you sink onto the sand. But there is no time to lose. You must hurry. So with a quavering voice you say the magic words. And then you wait... A hush falls over the ruins, making the back of your neck prickle. Then, out of the east, a wind rises, gentle at first but quickly growing stronger and wilder, until it tears at your clothes and nearly lifts you off your feet. The once clear sky is choked with white and grey clouds that clash and boil. As the clouds blacken day turns to night. Lightning flashes followed by a menacing growl of thunder. You are beginning to wonder if you should seek shelter, when all of a sudden there is a blinding crash and a bolt of lightning reduces the statue to dust. For a moment, silence. The, out of the statue's remains, soars a blue flame. Its roar deafens you as higher and higher it climbs, until it seems about to reach the clouds. Just when you think it can grow no larger, its shape begins to change. The edges billow and soften, their roar lessens, and before your eyes materializes a gigantic blue man. This adventure can be played alone or as the second part of the Desert of Desolation series. For characters level 6-8. TSR 9053

In this all-new adventure, the characters acquire a treasure map tattooed on tanned human skin. It shows the location of famed pirate Bloody Jack’s last haul, where hundreds of thousands of gold coins lie waiting to be taken. But exploring his long-abandoned island hideaway isn’t as easy as it first seems. Bloody Jack didn’t leave his treasure unguarded — and the best way to keep the undead legions well-stocked is to lure treasure-hunters to their death…
The Bloody Maul of Kord is a magic weapon protected by the priests of Kord, who occasionally allow a noteworthy hero to use it when going on a dangerous quest worthy of the storm deity’s blessing. Six months ago, Atrimos of Ardor took the Bloody Maul for a quest to the Caverns of Demise, hoping to end attacks to the realm being launched from the caverns. He never returned. Now, the clerics of Kord hire the PCs to go into the caverns to retrieve the Bloody Maul of Kord—and to find Atrimos, if possible. Pgs. 108-113

In which the Many seek the One, and the Heroes must retrieve a Sword lost amid myriad Threats to the Flesh. Chapter II of the "Well of Worlds" adventure anthology. Pgs. 24-33 TSR 2604

Having now realized that they require 4 Mithel Standards at the same time, the Ivory Scimitar will be faced with actually taking a Banner from another Mithel Company. This scenario pits the characters against the waning might of Men of Iron, and should allow them to claim the Banner for House Aldenmier, thus guaranteeing that they can clear the final level of Mithelvanr's Labyrinth. This adventure is formatted to both 1E & 5E gaming rules.

Old-School Essentials Adventure A hole in an old oak tree leads characters down to a maze of twisting, root-riddled passageways, the chambers of an ancient wizard-complex, and the banks of an underground river where once a reptile cult built their temples. A classic expedition into the Mythic Underworld for characters of 1st to 2nd level. 60 keyed areas, rumour table, loot summary, dungeon background info, suggestions for expanding the dungeon. Keyed in a quick-reference, bullet point format. Unlabelled map included for VTT use. The Hole in the Oak can be linked with The Incandescent Grottoes to form a large, 3 level dungeon with over 115 keyed encounter areas!

Three months ago the township of Durgon’s Rest exiled Elia Fenfrost for practicing witchcraft. Now as the first harvest approaches there are signs that something is amiss. The crops are failing, local farm animals are becoming sick with disease, and all of the food stores have gone foul. The town’s folk suspect that the accursed blight is the work of Elia - exacting her revenge for casting her out into the wild. The PCs are the villager’s last hope, but can they find Elia and end the evil curse that has been laid upon the town before all comes to ruin?
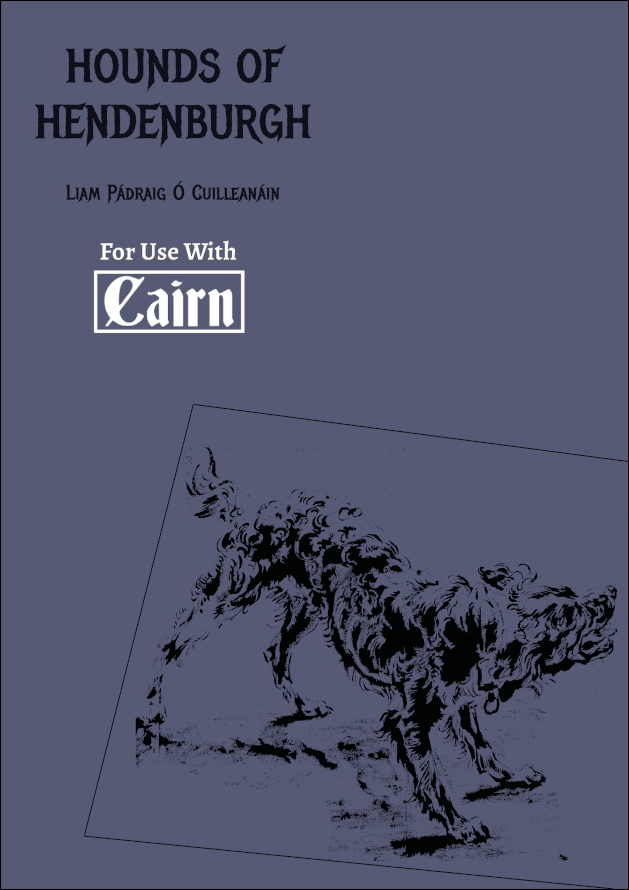
Terror roams the dark and brambled paths of the Kryptwood. A pack of giant spectral hounds rule the night, savaging those foolish enough to brave the forest. The villagers of Hendenburgh cower in the shadows of the ancient boughs as each morning heralds a newly savaged corpse. Explore the ancient paths of the Kryptwood in a 25-hex hexcrawl. Discover the mysterious Tyrant's Tomb. Negotiate, serve or betray the factions of the Kryptwood (a ghostly despot, a gang of highwaymen with excellent PR, a horrifying witch coven, and the eccentric inhabitants of Hendenburgh). Fight new monsters such as owlboars, kryptwood hounds and ghostly tyrants. Hounds of Hendenburgh is designed for use with Cairn by Yochai Gal but compatible with other OSR systems. If using OSRIC, OSE or other OSR rulesets then the adventure is best suited to low-level parties (1-3). Reviews Hounds of Hendenburgh is an adventure brimming with potential energy, like a domino run—any prodding by the players is sure to set off a chain reaction, but where any individual piece will end up is anyone’s guess . . . For me, Hounds of Hendenburgh is a major highlight of A Town, A Forest, A Dungeon. I’m eager to bring it to the table, and I expect it’s the sort of adventure that will reward referees who run it multiple times. - Dododecahedron Blog This 22 page adventure presents a delightful little romp through a colourful town, a dreadful forest, and a small haunted dungeon/crypt. Would that everything I reviewed were at least this good. A credit to county Donegal! - Bryce Lynch (tenfootpole.org)

𝐍𝐨𝐰 𝐰𝐢𝐭𝐡 𝐚𝐧 𝐢𝐥𝐥𝐮𝐬𝐭𝐫𝐚𝐭𝐢𝐨𝐧 𝐛𝐲 𝐂𝐇𝐑𝐈𝐒 𝐇𝐎𝐋𝐌𝐄𝐒 𝐚𝐧𝐝 𝐚 𝐏𝐑𝐈𝐍𝐓𝐄𝐑-𝐅𝐑𝐈𝐄𝐍𝐃𝐋𝐘 𝐃𝐔𝐍𝐆𝐄𝐎𝐍 𝐌𝐀𝐏! 𝐓𝐇𝐄 𝐑𝐔𝐈𝐍𝐄𝐃 𝐓𝐎𝐖𝐄𝐑 𝐎𝐅 𝐙𝐄𝐍𝐎𝐏𝐔𝐒 is a fifth edition (5E) conversion of the ground-breaking introductory adventure for Dungeons & Dragons that served as a DM aid in the first 𝐃&𝐃 𝐁𝐚𝐬𝐢𝐜 𝐒𝐞𝐭, released by TSR in 1977. This set included a 48-page rulebook covering the first three levels of play, and was skillfully edited by 𝐃𝐫. 𝐉. 𝐄𝐫𝐢𝐜 𝐇𝐨𝐥𝐦𝐞𝐬 from the original 1974 D&D rules written by 𝐆𝐚𝐫𝐲 𝐆𝐲𝐠𝐚𝐱 and 𝐃𝐚𝐯𝐞 𝐀𝐫𝐧𝐞𝐬𝐨𝐧. Holmes advanced the "Sample Dungeon" concept by writing a new thematic dungeon with a strong backstory, creating an adventure that has remained a fan favorite over the decades. Officially, its only title is "Sample Dungeon" but colloquially it goes by various names based on Zenopus, the doomed wizard who built the dungeon under his tower. An adventure for 1st to 2nd level characters; four pregenerated characters are included. Also includes ideas for using it as an adventure site in 𝐆𝐡𝐨𝐬𝐭𝐬 𝐨𝐟 𝐒𝐚𝐥𝐭𝐦𝐚𝐫𝐬𝐡. 𝐍𝐎𝐓𝐄: Using this conversion requires a copy of the original dungeon found in the (1977) Basic D&D rulebook. However, Wizards of the Coast has provided a free pdf of this dungeon since 2008 on their website, see the first page of the pdf for the link. 𝐂𝐎𝐍𝐓𝐄𝐍𝐓𝐒: Introduction, page 2 The Setting, page 3 About the Dungeon, page 4 Dungeon Master's Map, page 5 Areas of the Dungeon, pages 6-13 Appendix A: Further Reading, page 13 Appendix B: Dungeon Factions, page 14 Appendix C: Portown Rumors, pages 15-17 Appendix D: Use with Ghosts of Saltmarsh, pages 18-19 Appendix E: Pre-generated 1st level characters, page 20 𝐈𝐧𝐜𝐥𝐮𝐝𝐞𝐬 𝐭𝐡𝐞 𝐟𝐨𝐥𝐥𝐨𝐰𝐢𝐧𝐠 𝐧𝐞𝐰 𝐦𝐨𝐧𝐬𝐭𝐞𝐫𝐬, 𝐍𝐏𝐂𝐬, 𝐚𝐧𝐝 𝐌𝐚𝐠𝐢𝐜 𝐈𝐭𝐞𝐦𝐬 𝐟𝐨𝐫 𝟓𝐄: Cleaning Cube, Veteran Smuggler, Thaumaturgist, Monstrous Sand Crab, Lemunda, Monstrous Rat, Brazen Head of Zenopus, Verminslayer Longsword, Lesser Wand of Petrification, Scroll of Stone to Flesh The Ruined Tower of Zenopus was featured as part of the "D&D Classics" column in Issue #32 of Dragon+ magazine! Go to 𝐝𝐫𝐚𝐠𝐨𝐧𝐦𝐚𝐠.𝐜𝐨𝐦 or find the link on the Wikipeda page for Dragon magazine. 𝐂𝐑𝐄𝐃𝐈𝐓𝐒: Original Dungeon: J. Eric Holmes Conversion, Added Content & Cartography: Zach Howard Content Review & Editing: Scott McKinley Interior Art: Chris Holmes (“Octopus Attack”, page 9) Cover Art: “Italian Coast Scene with Ruined Tower” by Thomas Cole, 1838. Open Access Image from the National Gallery of Art at images.nga.gov Format: Derived from the “Adventure Template for Open Office/LibreOffice” by Dale Robbins on DMs Guild Dungeon Maps drawn using the application Gridmapper by Alex Schroeder