The first part of the Dreams of Red Wizards adventure path originally published for the D&D NEXT Playtest. Following the events Ghosts of Dragonspear Castle, a new set of adventurer's will see some of the repercussions of that adventure. This adventure is intended to be continued in the Dead in Thay adventure (Note that they Dead in Thay 5e adventure featured in Tales from the Yawning Portal is missing a significant portion of interlude that links Scourge of the Sword Coast to the events within the Doomvault). The adventurers arrive when Daggerford is crowded with refugees from outlying lands. Goblins, gnolls, and orcs have been raiding the countryside. Now, food is scarce and tension is high. Blame for a theft has fallen on the refugees, and the Duke of Daggerford has forbidden more of the displaced from coming into town. After overcoming difficulties to enter Daggerford, the characters learn more about the raids. As they fight against the humanoids and delve deeper in the darkness that encircles Daggerford, the characters learn of Bloodgate Keep. After a final fiendish ambush, they’re ready to confront the real threat to the area. DM Note: This adventure points the adventurers strongly towards Bloodgate Keep but that location does not appear until the Dead in Thay adventure; at several points the party may feel drawn to explore that location rather than continue their investigations around Daggerford. However, since Bloodgate Keep is only eluded to as a source of great evil power, it can serve to easily segue to an entirely different adventure path. As a NEXT Playtest adventure, Scourge of the Sword Coast uses milestone leveling and the included stat blocks for creatures do not necessarily match or even appear in the 5e Monster Manual, nor do they have XP values or challenge ratings. In some places it will reference rules used in the Playtest but dropped or changed in the 5e release, these are unlikely to substantially impact gampley with 5e rules.

THE FIRST SET OF DUNGEONS ON DEMAND ADVENTURES! The first volume of Dungeons on Demand includes the first four dungeons: Bandit's Nest - Level 1 Adventure Dungeon Insidious Experiments - Level 4 Adventure Dungeon Fierce Tempers - Level 8 Adventure Dungeon Lord of Gloomthrone - Level 12 Adventure Dungeon It also includes the following supplements: New Twists on Old Monsters - Gaming Supplement Imbued with Magic - Gaming Supplement The bundle includes hundreds of pages worth of materials and supplements sure to keep your gaming sessions busy!

The town of Sandpoint, Varisia, Inner Sea Region has put out a bounty on the nearby tribe of Licktoad Goblins in retribution for the goblins raiding traders and travelers near the quiet town. The party takes up the bounty and ventures into the swamp; eventually finding the goblin village in ruins and it's inhabitants scared in it's burned huts. The party finds out; either through investigation of the ruins or the goblins themselves; that a group of skeletons with eastern arms and armor had ransacked the village and took a stash of fireworks that the goblins stole from an old shipwreck. The party then makes it to this cave and finds it empty except for a half dozen skeletons. Further in past the skeletons is their leader, a skeletal samurai who fights the party in an attempt to defend his treasure. The treasure turns out to be a letter that reveals that secrets of the Kaijitsu family; the same family their good friend Ameiko who runs the Rusty Dragon inn belongs to; that lies in wait in the abandoned town of Brinewall to the northern boarder of Varisia. Ameiko along with several other important NPCs with a caravan north. It's recommended that GMs create encounters for the caravan trip north as it's essentially 3 weeks of travel with nothing in it. It's also recommended that GMs completely ignore caravan rules; they're not flushed out and they're not fun to run. The party and the caravan reaches the abandoned town of Brinewall where their friend Ameiko becomes possessed and is thrown into a coma; where the other NPCs agree to take care of her while the party explores the town and castle. The castle is a three floor behemoth of a dungeon populated by Dire Corbies, Troglodytes, and various other monsters all under the leadership of Kikonu, an Yamabushi Tengu Oni. The goal of exploring Brinewall Castle is to find the two keys to the vault; one of which is on the Yamabushi Tengu while the other is on a Half-Fiend Decapus that lives in the basement of Brinewall. Once the PCs enter the vault they find the Amatatsu Seal; one of the seals that cement authority to one of the ruling houses in Minkai of Tian Xia; as well as several visions that show that Ameiko Kaijitsu is the rightful heir to be ruler of Minkai and that they'll need to travel north to do so. Such ends the first book of six.

The party has been tasked with bringing the head of the fire giant king Snurre Ironbelly to the storm giant lord Krombaalt, as well as capturing the dwarven traitor Obmi Ironwhisper. Delving into Snurre's stronghold, they will also discover the sinister drow manipulating the giants. The adventure is part of the "Against the Giants" series originally by Gary Gygax, hence the writing credit.

Devastated in a war with a nearby wizards' school, the Fighters' Academy has since been surrounded by a foul and dank swamp - the Gloomfens. Since the climatctic battle between the wizards and fighters, the tower has decayed. The spirit of the head of the academy haunts the building, eternally plotting his revenge on the wizards who killed him. his loyal sutdents remain faithful to him even in death. Other foul undead have made their home in the rotting, spacious academy. From their lair, they make forays into farmsteads near the swamp in search of victims to feed their unspeakable appetites. The Problem of these terrible attacks by the savage undead will not stop until the evil that has found a home at the tower is burned from the face of the land forever. Will your party heed the call and help the town of Melinir? Will they be able to clear the former Academy of its undead? The Fighters' Academy is the first in a three part adventure, The Haunted Tower. Or, it can be ran as a stand alone adventure. The choice is up to you. Part of TSR 1081 The Haunted Tower

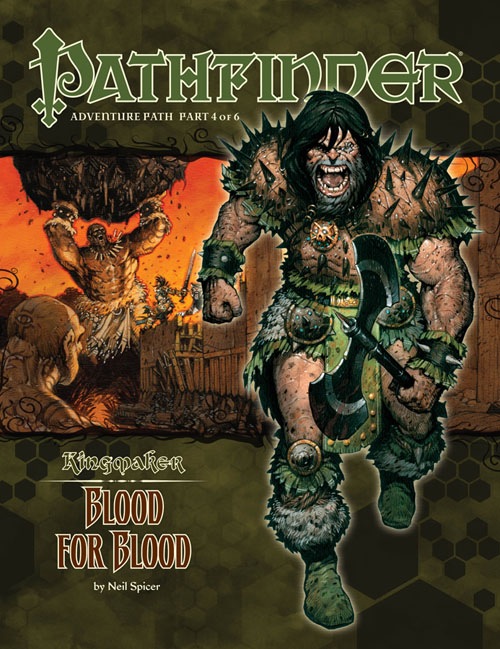
A Pathfinder Roleplaying Game adventure for 10th-level characters, this volume of Pathfinder Adventure Path is part 4 of 6 of the Kingmaker Adventure Path, in which the heroes win and defend a small kingdom from threats foreign and domestic. PCs should advance to 13th level by the end of this adventure. “Blood for Blood” begins with the PCs having returned home from solving the mystery of the Varnhold Vanishing. Shortly after their arrival, they learn that new problems have developed during their absence—there are rumors of an army marching toward their nation!The PCs race to the village of Tatzlford, where they help defend the village from an attack by a small but earnest force of bandits, barbarians, and several lumbering trolls after being warned in advance by a troubled woman who has fled from Fort Drelev to the west. Following the skirmish, she pleads with the PCs to save her father and sister from peril.From there, the PCs strike out into the swamplands of the Slough to the west, exploring new lands and finding opportunities to make new allies and eliminate long-term threats to the region. Their initial goal, though, should be infiltrating Fort Drelev, where they’ll have a chance to confront the traitor Drelev with his crimes and rescue the Fort’s beleaguered settlers. During this time, the PCs learn where Armag’s tribe has been holding the daughters of Drelev’s senior officers hostage. Arriving at the ancient site, the PCs attack Armag’s barbarian encampment and overcome the sinister powers of the Black Sisters to free the girls. Then, entering the tomb, they face deadly traps, ancient undead horrors from a war-torn age, and the trials of the tomb’s immortal, divine guardian. In the final chamber, the PCs encounter Armag himself, armed with the ancient sword of his namesake.

The battle against the slavers continues! You end your fellow adventurers have defeated the slavers of Highport, but you have learned of the existence of another slaver stronghold, and you have decided to continue the attack. But beware! Only the most fearless of adventurers could challenge the slavers on their own ground, and live to tell of It! Second part of Scourge of the Slavelords (A1-4) TSR 9040

A galvanice weird has torn apart an Izzet laboratory in the Blistercoils. The weird’s path of destruction leads to Tin Street where the weird was spotted being subdued and taken aboard the notorious Palace of Pain’s Pleasures, a mobile Cult of Rakdos performance stage. To return the weird to its proper owner and discover the mystery behind its bizarre behavior the party must brave The Palace of Pain’s Pleasures! The Palace of Pain’s Pleasures is a 2-hour Guildmasters' Guide to Ravnica adventure for 2nd - 3rd level characters. Picking up where Off to a Weird Start left off, this adventure is designed to be part of an ongoing campaign. For Dungeon Masters who wish to incorporate The Palace of Pain’s Pleasures independently from the ongoing story, 20 Adventure Hooks (two for each guild) are included, giving The Palace of Pain’s Pleasures flexibility for one-shot play or for inclusion in your own campaign! The Palace of Pain’s Pleasures contains: A new location that is also a magical construct. New trinket tables for the Cult of Rakdos. A new NPC antagonist (or contact), Ophyira, the star performer of the Palace! Two new magic items. One new spell. Discover the secrets of The Palace of Pain’s Pleasures TODAY!

A Halfling girl battling a rare disease that no magic can cure. A fruit, which has the power to heal and the power to corrupt, now guarded by mad siblings. A journey through a hostile forest, a trapped tower, and a dungeon to retrieve the fruit to heal the young girl. Will your heroes be triumphant, or will they perish while attempting to retrieve the mysterious fruit?

OP5 – Corsair Cove is a short scenario involving the recently discovered lair of a pirate ship. With raids becoming a huge problem, the local magistrate has enlisted your group’s assistance to resolve the issue. The hidden lair has been found and you are being sent directly into this hidden cave along the cliffside to deal with them. Only a lightning raid stands the best chance of solving the problem.

While at times cliché there are few adventures better than an old fashioned trek into the ruins of a deserted castle. This adventure pits a new adventurer against the decades old remains of a hilltop castle that is “haunted”. The old keep was the site of a mighty battle years before that swayed the power in the area but now it is the crumbling remains of the once powerful Baron Sancrist. While the old fortress is supposed to be deserted the area farmers and villagers swear they have seen the dead walk the parapets in the moonlight. Well you wanted adventure….here it comes!

Under raging stormclouds, a lone figure stands silhouetted against the ancient walls of castle Ravenloft. Count Strahd von Zarovich stares down a sheer cliff at the village below. A cold, bitter wind spins dead leaves around him, billowing his cape in the darkness. Lightning splits the clouds overhead, casting stark white light across him. Strahd turns to the sky, revealing the angular muscles of his face and hands. He has a look of power - and of madness. His once-handsome face is contorted by a tragedy darker than the night itself. Rumbling thunder pounds the castle spires. The wind's howling increases as Strahd turns his gaze back to the village. Fas below, yet not beyond his keen eyesight, a party of adventurers has just entered his domain. Strahd's face forms a twisted smile as his dark plan unfolds. He knew they were coming, and he knows why they came, all according to his plan. He, the master of Ravenloft, will attend to them. Another lightning flash rips through the darkness, its thunder echoing through the castle's towers. But Strahd is gone. Only the howling of the wind - or perhaps a lone wolf - fills the midnight air. The master of Ravenloft is having guests for dinner. And you are invited. TSR 9075

5e Solo Gamebooks presents Citadel of the Raven, the third in our series of solo adventures. Citadel of the Raven is the sequel to Tyrant of Zhentil Keep, but is also playable as a standalone solo adventure. The first solo adventure in this series is titled The Death Knight’s Squire. At 589 entries, you can expect a lot of variety from this solo quest. There are several main paths your character could take, and numerous encounters and options on those paths (including short sub-threads designed for specific classes), making the number of possible adventures practically endless. Add to that the characteristics of your class, and the numerous variegated combat encounters, and it’s safe to say that no two run-throughs of Citadel of the Raven will be the same.

The Clockwork Queen and the Dame of Dirt have been fierce rivals for years--but a brazen abduction sees the situation escalate dangerously. To put matters right, the party must scale an ever-changing clockwork tower full of weird magic and mechanical mayhem, and attempt a daring rescue!

Devastated in a war with a nearby wizards' school, the Fighters' Academy has since been surrounded by a foul and dank swamp - the Gloomfens. Since the climatctic battle between the wizards and fighters, the tower has decayed. The spirit of the head of the academy haunts the building, eternally plotting his revenge on the wizards who killed him. his loyal sutdents remain faithful to him even in death. Other foul undead have made their home in the rotting, spacious academy. From their lair, they make forays into farmsteads near the swamp in search of victims to feed their unspeakable appetites. The Problem of these terrible attacks by the savage undead will not stop until the evil that has found a home at the tower is burned from the face of the land forever. Will your party heed the call and help the town of Melinir? Will they be able to clear the former Academy of its undead? Lair of the Vampire Lord is the third in a three part adventure, The Haunted Tower. Or, it can be ran as a stand alone adventure. The choice is up to you. Part of TSR 1081 The Haunted Tower

The orcs remember Tarran Kratys. Today he wishes they had not.

Red for love, white for purity, black for death. He was thoughtful, obedient, and trustworthy - the epitome of a traitor. All he needed were some heroes. A powerful undead knight, Agrovale, wants to be released from a necromancer named Talakara. He sets in motion an elaborate plan to get the players involved in overthrowing Talakara in her bid to become a goddess. He frames the necromancer for a kidnapping and murder and leaves a trail of clues to lead the players to her stronghold. The party travels through an extensive stronghold filled with many different monsters, finishing with a fight with the demigod Talakara and subsequently the freedom-seeking Agrovale. Pgs. 38-63

The dragonmen have taken Solace. Its beautiful tree houses lie black and battered amid the stumps of great vallenwood trees. Kapak Draconians, armed with poisoned weapons, enforce a brutal martial law on the survivors. And Solace is only one outpost: the dragon armies control the plains. Only the elven kingdom of Qualinesti stands unconquered. The rest of the plainsmen suffer the most: a long slave caravan hauls hundreds of them to the fortress prison of Pax Tharkas. "Dragons of Flame" is the second in TSR's series of Dragonlance adventures for use with the AD&D game system. Your players will adventure in the world of Krynn and visit strange places such as Qualinost or the Sla-Mori, encountering bizarre draconians and disgusting Aghar. They can play the modules as a set of separate adventures or as a great quest that spans the entire Dragonlance story. Art by Jeff Easley. TSR 9132

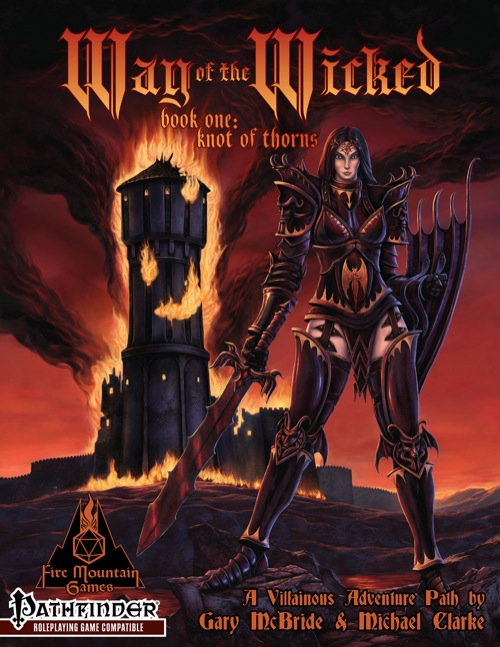
BE THE BAD GUY! The Kingdom of Talingarde is the most noble, virtuous, peaceful nation in the known world. Herein is the story of how you burned this insipid paradise to the ground. It's only fair. They burned you first. They condemned you for your wicked deeds. They branded you. They shipped you to the worst prison in the kingdom. In three days, you die. In three days, the do-gooders pray they'll be rid of you. They've given you three days. The fools, that's more than you need to break out. And then, it will be their turn to face the fire. Published by Fire Mountain Games.

Some ports are more dangerous than the storm. It's alive, it's hungry, it's growing. And you're on the menu. Alone, out in the wilds with a savage winter storm bearing down on you, you need shelter to survive. You stumble through the trees and smell wood-smoke. Ahead you spot the small fortified trading outpost known as Jacob's well. You're not the only traveller to find themselves stranded here in the teeth of the storm. The only problem, someone has bought something with them, it's alive, it's growing, it's voracious and you are all on the menu. Think Aliens and The Thing and you're on the right track. Has potential to be scaled to suit a group of adventurers. Pgs. 8-23