
Dread tales told in the dead of night! When the shadows grow long in Waterdeep and the fireplace in the taproom of the Yawning Portal dims to a deep crimson glow, adventurers from across the Forgotten Realms, and even from other D&D worlds, spin tales of dark dungeons and spread rumors lost treasures. Within this tome are seven of the deadliest dungeons from the history of Dungeons & Dragons. Some are classics that have hosted an untold number of adventurers, while others are newer creations, boldly staking a claim to their place in the pantheon of notable adventures. The seeds of these stories now rest in your hands. D&D’s deadliest dungeons are now part of your arsenal of adventures. Enjoy, and remember to keep a few spare character sheets handy. Includes seven adventures: Against the Giants Dead in Thay Forge of Fury Hidden Shrine of Tamoachan Sunless Citadel Tomb of Horrors White Plume Mountain
Provost Faurious has procured an Aethervane, an astrolabe-like instrument tied to Kythri that's used to navigate manifest zones. Unfortunately for the Provost, the Riedran ship that was carrying the Aethervane across the Sea of Rage to deliver it to their agent in Regalport fell victim to piracy. The player characters are dispatched to Regalport to meet up with the Provost’s agent there and petition High Prince Rygar for more information about the stolen cargo. When the characters dock in Regalport, they meet the Provost’s contact and are ushered into a meeting with High Prince Rygar. Wishing to show his intolerance for piracy, Rygar charters one of his own ships for the party’s use as they investigate the stolen cargo. Upon arriving at the crash site of the stolen cargo, the party is set upon by a fleet of pirates known as the Wind Whisperers. When things turn sour, a new surprise reveals itself as an unnatural storm rolls in, a stolen airship at its heart. The Wind Whisperers have found a way to convert the Aethervane to serve their own purposes. Seeking aid from Rygar and House Lyrandar, the heroes chase after the pirates by sail and airship. As they do, they are bedeviled by the Chaos Fleet—strange ships sailed by an even stranger crew that are drawn to the Aethervane and the chaos it brings. In a final airborne confrontation, the party boards the rogue airship and retrieves the sought-after artifact, with a chance to salvage or sink the stolen vessel in the process…

Something strange is afoot within the Quivering Forest. So much so that even the elves of Greenhall have left their homes to seek out help from their newfound neighbors. But, their tales of a strange beast are not earning them any favors; especially among the Vistani, whom the elves suspect are to blame for their ills. Return once more to the Quivering Forest and learn the terrifying truth! Part Two of Misty Fortunes and Absent Hearts.

CORE 1-3 Threats from outside Melvaunt and within push heroes to the brink as a terrified populace counts on the bravery of a few heroes to avert total disaster. Part Three of The Chaos in Melvaunt. The characters make a choice between finding orc saboteurs (who intend to destroy the city walls), or spy on a red wizard (who can shrink or even move a portal to Mechanus), or both given time. Depending on the outcome they must battle the orcs and/or the modron in the city.
Two thieves' guilds fight to the death - with you in the middle. Run silently; the Midnight Stalkers are after you. Escape from the Tower of Midnight is an AD&D* game module for 2-6 thieves of 2nd-4th level. The Dungeon Master may change the names of the thieves’ guilds, countries, deities, and so forth to fit the individual campaign. Note that all player characters are assumed to have been imprisoned at the start of the adventure; little or no equipment will be available at first. This module is well suited for tournament use. Adventure Background It must be assumed, for the sake of the adventure to follow, that the PCs have no way of avoiding capture by the Midnight Stalkers. However, the DM may find a way to play out this adventure and have some or all of the PCs captured, allowing any who escape to attempt to rescue their comrades. Pgs. 16-27
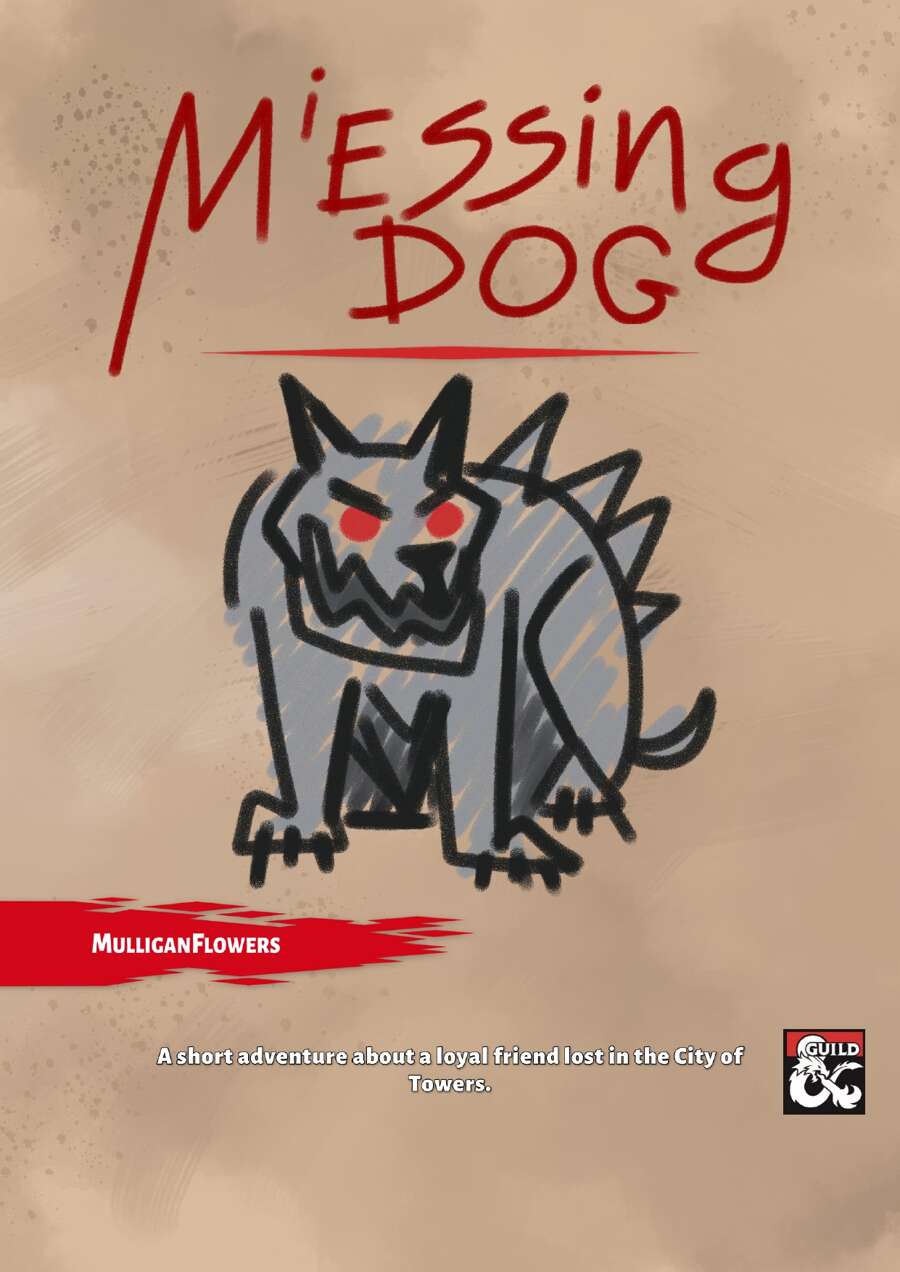
Floof went missing somewhere in the City of Towers. Can you help with his search? This short adventure for Level 1 characters familiarizes the players with some essential Eberron concepts: warforged, Sharn's architecture, Cannith arcanic gizmos, and the bitter legacy of the Last War. At the same time, a lighthearted tone of the adventure and a low-risk quest would totally fit novice adventurers.
The brilliant (if somewhat eccentric) detective Viktor Saint-Demain has put more criminal masterminds behind bars than any three other inqusitives. But when the master sleuth fails to get the recogintion he deserves, he sets out to prove to Sharn that they can’t live without him. Pgs. 16-34
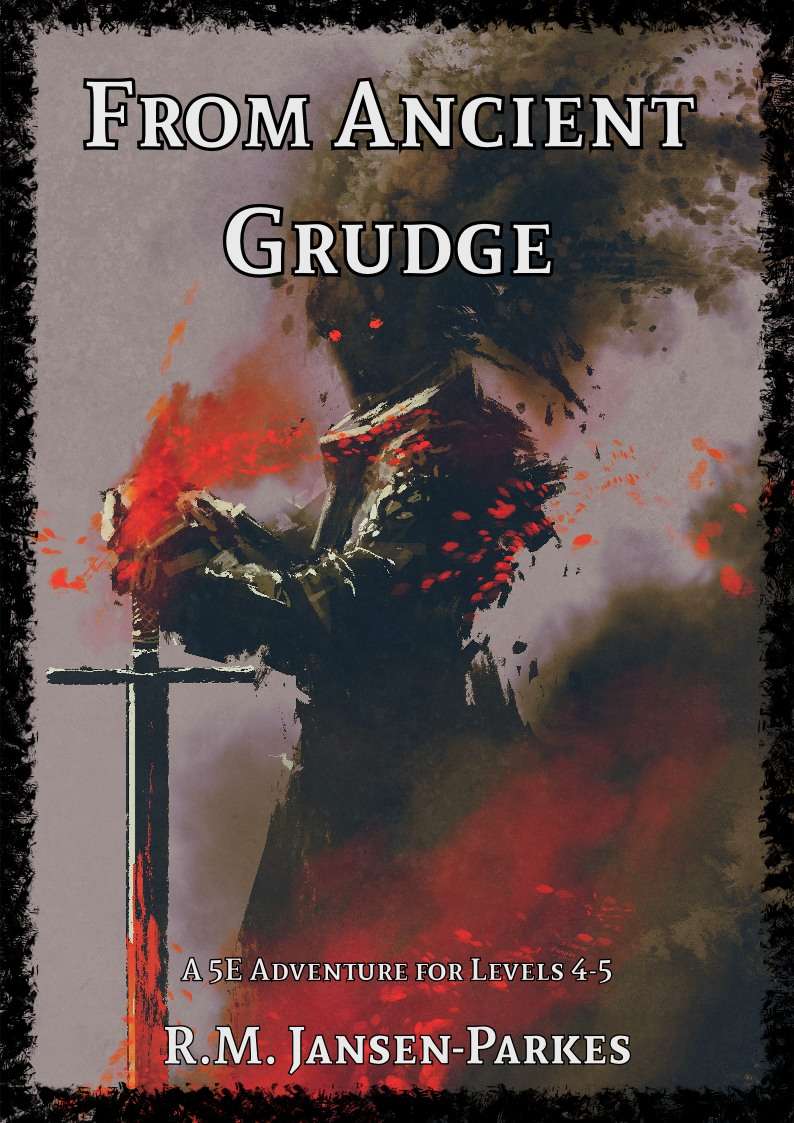
A Star-Crossed Tragedy. When the party is hired to investigate a haunted castle, they’re drawn into a tale of hatred, love and betrayal stretching back more then 300 years. Will they be able to free the ghosts haunting Arevon Castle, or will they find themselves just another footnote in its long history of misery?

This scenario picks up where the Ga Mantse Tombs left off. As your party delves deeper into the natural caverns they begin to uncover more and more unusual amphibian creatures in their path. With the amount of bad guys you’ve found in the tunnels it is hard to imagine what will be at the end! This adventure is the perfect segway to a much larger problem in the lands beneath Mellowmarble.

The Ghost Tower is a companion adventure made to go along with the events unfolding in Folio #19 (WS6 Duel on The White Ship). It contains the information needed to run a side adventure that will help characters get to the White Ship temple Complex. The deck of the White Ship is filled with peril, and the stamina of the characters has already been worn down just getting to it. However, a single tower, and its now crumbling bridge, might allow the characters to skirt the bulk of the wandering monsters on the deck and get to the temple complex intact, but only if the tower proves less deadly... This adventure is formatted to both 1E & 5E gaming rules.

Today we bring out a scenario for a pair of budding first level adventurers. Originally used to teach D&D to a novice, this fleshed out into a trio of adventures set on the northern island of Esaq off the coast of the ancient Greyloch Kingdom. Home to a Halfling population, the adventure takes two young people on a thrilling adventure after the duo’s home is raided by slavers. The novice delvers head east to rescue their family and fellow villagers!

A sunken ruin deep beneath the bay of Mulmaster holds the key to unraveling the Cult of Glaugrax’s nefarious plans. Dare you brave danger and duplicity to plumb its depths? Part 2 of The Neverdusk Trilogy. A Two-to-Four Hour Adventure for Tier 2 Characters. Optimized for APL 8. The Sequel to Ooze There?, an ENnie Awards 2019 nominee in the Best Organized Play category! This adventure is Part 2 of "The Neverdusk Trilogy", and continues the tale of Fenaria Neverdusk, Sovad Klim, and the mysterious Cult of Glaugrax! Ooze Next? debuted at Lion City Conclave 2019 - a charity convention by the D&D AL Singapore Community. The v1.02 package includes: - Full color cover art by digital artist Lau Shang Hui (NezArt), with additional art inserts for key scenes - A high quality digital map pack for key encounter locations - A two (2) page cheat sheet with Jason's personal tips for running Ooze Next?
Pursued by wolves and worse, the party must fight a running battle to take refuge at the relative safety of the Bittermoon Inn, a decrepit old inn high in the mountains. But night is falling, can they uncover the secrets of the inn and use them to survive the night? This adventure can be played as a stand alone one-shot, or can be used as a drop-in side quest to almost any campaign. It is suitable for a party of about 5 characters at the First Tier (Levels 1-4). The players must fight a running battle with wolves to reach Bittermoon, then they must discover the secrets of the inn before escaping through a smuggler's tunnel. Finally they must face off against their unseen opponent at Skull Cavern. There are four encounter maps included with this title.

Tortles of the Purple Sage - Part 2 completes a D&D Expert Set wilderness adventure which began in DUNGEON issue #6. Through the gate stones, into the unknown. This adventure takes place in the Known World of the D&D game, as outlined throughout the D&D game rule books and modules. The DM may find it useful to consult the Companion and Masters Sets, as well as most of the X-series of Expert Set modules. The DM may find it useful to consult the Companion and Masters sets, as well as most of the X-series of Expert Set modules. Expert Set module X9, The Savage Coast, would be especially helpful, as Tortles of the Purple Sage should easily serve to continue that module's direction and plot line, adding previously undescribed areas to the Known World. The DM may also place the areas and events of this adventure within an existing campaign setting, as long as the geographical areas of the campaign match those set forth here. Pgs. 8-25

This campaign was created as a response to comments from some friends of mine. Though they were avid board game players, they didn’t want to try D&D because it seemed like too much of a time commitment with too many rules to learn before getting started. This campaign uses stripped down characters and a simple campaign, and was made to give them a chance to try it for half an hour on a regular board games night. I’m putting it online in the hopes that other people can do the same with it and expand the community. Inspired by /u/plaintreality of Reddit.

Have you ever wanted to raid your neighbor’s garage for that tool they “borrowed” a year ago? Or dig through your friend’s closet because you know half your wardrobe is hiding in there? What if you had a band of adventurers to do it for you? The wizard Rastakeen needs a book returned that he lent his not-so-esteemed colleague, Frex, some time ago. Apprentices are for running errands you don’t want to do yourself, right?

The Doom Desert in the Decanter of Delirium is an exotic OSR romp through a mysterious world of riddles, puzzles, inscrutable denizens. 5e compatible, this love letter to psychedelia is as vivid and beautiful as exciting and surreal. Get wrapped up in conversation with the dead drunks at the last saloon on earth, solve the sphinx riddle and discover the secrets of the Ziggurat, or break bread and wine with whispering harpies or the sun itself. This compelling narrative is written by Austin Holm and captures the exploration, social, and challenge pillars of a great game with the deft prose of a poet. With art by Maya Bee that captures the essence of the adventures many stunning scenes and characters. Your players will thank you for this one.

5e Solo Gamebooks presents Tyrant of Zhentil Keep by Paul Bimler, a 160+ page solo adventure for Dungeons and Dragons Fifth Edition. This adventure is designed for one 3rd-level PC of any race or class, without a DM. Tyrant of Zhentil Keep continues the narrative of The Death Knight’s Squire (the first solo adventure in this series) but can be played as a standalone also. It follows the story of your PC as they continue their journey across Faerun, a lone adventurer wandering wherever the wind takes them. Eventually, it takes them to Zhentil Keep in the Moonsea Region, a strange city, full of secrets. There they begin a quest which takes place over two books, this being the first one, part 2 being Citadel of the Raven. Tyrant of Zhentil Keep is a mini-sandbox in gamebook form, with multiple sidequests and locations to explore. Everything leads towards a central story arc that becomes clearer as the book progresses. Where Death Knight’s Squire had a clear-cut mission at its core, this adventure is pure exploration at first, similar to how a game with a Dungeon Master might commence. The nature of your quest becomes clearer as you advance, collecting snippets of information and encountering various NPCs and locations. The adventure builds upon The Death Knight's Squire in several ways, introducing new combat sheets, sidequests and even audio sound FX embedded in the PDF! You have two ways to approach playing this adventure. You could print out the maps booklet and use actual tokens or miniatures (you’ll need access to a printer for this), or you can load individual .png files of the maps (included) into Roll20 or similar applications and place and move tokens on your device.

She lay down her sword and wept; her tears are the water. She lay down her body and slept; her bones are the fountain. Atop the mountain, at the war’s end, a place for gods to wonder.

Many years ago, Evard came to Duponde to destroy his rival Vontarin, a powerful wizard who lived in a manor at the edge of town. The two mages met near the walls of the abbey of St. Avarthil and dueled all night long with black spells, laying the old monastery in ruins with their magic. In the morning, the surviving friars found Evard dead in the wreckage and buried him in the town’s graveyard. Vontarin was never seen again. Now, almost fifty years after his death, Evard’s final curse is about to descend on the town and everyone within it. Also available in Dungeon Magazine #219 Pgs. 30-90