
5e Solo Gamebooks presents Drums at Daggerford, the fifth in our continual series of solo adventures set in the Forgotten Realms. This quest enables you to experience D&D without a dungeon master! Simply roll up a level 5 PC and get playing. Drums at Daggerford is the way you must experience solo adventuring. Players and DMs beware, a new standard has been set. This solo adventure continues the story arc first begun in Death Knight’s Squire, developed further in Tyrant of Zhentil Keep & Citadel of the Raven, and left in The Tortured Land. Drums at Daggerford’s ability to echo a Tolkien spirit reverberates throughout the narrative no matter which path you may choose. But choose wisely because a razor’s edge separates peril from glory. Over a year in the writing, this latest instalment in our solo adventure series is a mini sandbox campaign that will give you anywhere up to 8 hours of solo adventuring enjoyment. Completionists and those who like to replay these adventures will get even more gametime. There are mysteries to be uncovered, items and sidekicks to be gained, codewords to unlock and villains to conquer! With lots of exploration, meaningful decisions, hard fights, and a variety of rewards and stories, Drums at Daggerford will continue to resonate with you long after solving the big mystery behind Krond Vikkurk’s malevolent plans.
This dungeon is a tower inhabited by a goblin tribe, who is performing a ritual to gain the aid of their god. This adventure is perfect for any adventuring group. It pushes adventurers to be more thoughtful about their decisions, especially before and during combat. It is perfect for a one-shot but is meant for a starting dungeon for the players to go from level 1 to level 2.

The final fate of Roslof Keep and the Company of the Ivory Scimitar hangs in the balance. With five levels conquered, the party must finally face the ultimate challenge of the sixth and final floor. Can the stalward adventures overcome the last defense of the Infernal Machine? Will Roslof Keep be freed from the violet corruption? What unforeseen plot twists still await those willing to brave the challenges presented in The Realms of Madness and Despair? This adventure is formatted to both 1E & 5E gaming rules. Also available in PDF.
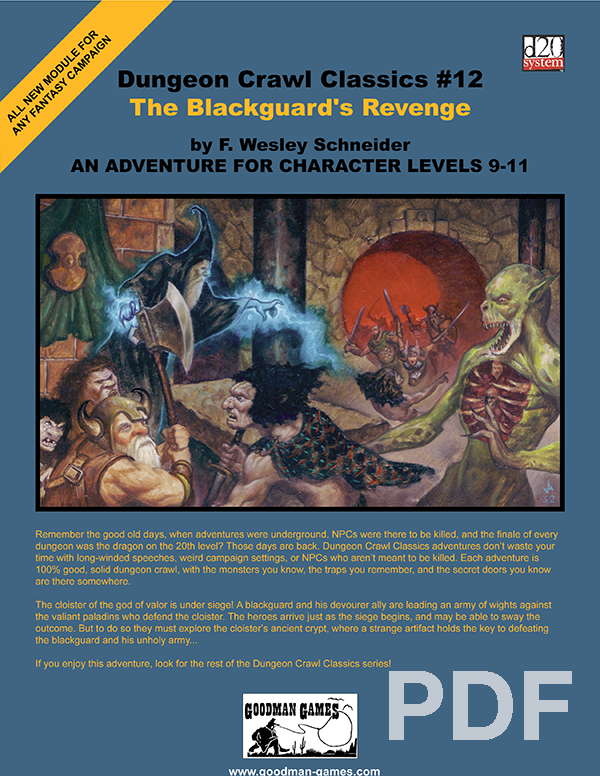
When the heroes come into town, word arrives that a nearby cloister of the god of valor is under siege by an army of undead. The adventurers travel to help defend the bastion of paladins, only to discover that these undead are actually ancient enemies of the paladins’ order. They have discovered a way to exact vengeance for slights committed centuries ago, but to finish their plan they must breach the cloister’s catacombs! Can the heroes battle them to the catacombs and defeat their horrific blackguard champion?

Something strange is afoot within the Quivering Forest. So much so that even the elves of Greenhall have left their homes to seek out help from their newfound neighbors. But, their tales of a strange beast are not earning them any favors; especially among the Vistani, whom the elves suspect are to blame for their ills. Return once more to the Quivering Forest and learn the terrifying truth! Part Two of Misty Fortunes and Absent Hearts.

Rumor has it that an evil temple resides in the forest as well as a mad mage who may or may not consume children. While these rumors abound speculation of the existence of such is frequently countered with the tenacity of the elves watching over the forest and how it would be unthinkable for them to allow such issues to occur. Note: This seems an incomplete adventure. While the evil temple is mentioned, there are no maps for it. Also the mad mage is given back ground, there are not stats for an encounter.

As a new adventurer, you haven’t been able to catch a break. Just as you empty your mug, a job opportunity presents itself! A crazy Gnome, (Guy Fieri) has gotten ahold of a Wand of Construct and is animating mundane objects that are causing problems! Can you stop the Gnome and gain the mantle of “Hero”?

The ship makes its way into the Corsair Mists, a region of the Halo Ocean said to devour ships and drive sailors mad. Somewhere in the oppressive fog, the White Ship awaits, but before the Adventurers can make it to their final desination, they must overcome the challenges of the mist. The fell necromancer Molo of the Thirteen Wives is still out there, still seeking to find his key to immortality and power that could jeopardize the entire Nameless Realms, and only the fearless crew can stop him. Join a sea elven ritual to hunt megalodon sharks, explore a long-cursed alchemist's tower made of blue crystal, and journey to the forge of Hyperion, Titan of Fire, himself. This adventure is formatted to both 1E & 5E gaming rules. Also available in PDF.
A Giant Ransom is a short adventure for four 11th-level characters. There are opportunities for diplomacy, stealth, and combat, based on the choices the PCs make, so any mix of classes is appropriate. The adventure can be set in any campaign world, in a frontier region near glacier-covered mountains. In the story thus far, the PCs have been tasked by Duke Ambrinigan, a local lord, to recover a stolen statue of a golden lion. The lion was stolen in transit by frost giant raiders, and was to be ransomed back to the Duke for 10,000 gp. The PCs were sent to perform the exchange. The giants, however, were attacked by the white dragon Whildenstrank, who stole the statue and retreated to his lair in the middle of a nearby glacier. The PCs encountered the remaining giants, and then set off westward toward the dragon's lair. They traveled across the flat part of the glacier, encountering the frost giant ranger Velg the Dragon Tamer, as well as some burrowing bulettes. Then they braved the hazards of frost worms and remorhaz in the Ice Canyons: a maze of twisting passageways surrounding the black spire of rock that the dragon calls home. The PCs now stand at the edge of an open space, looking at the towering edifice in front of them.

East of Beregost, nestled in the outskirts of the Wood of Sharp Teeth, Durlag’s Tower has intrigued and yet stymied adventurers for decades. Stuffed full of mechanical traps and arcane wards, and rumored to be inhabited by fiends, very few have managed to extract any REAL treasure from the former home of Durlag Trollkiller. However, a powerful item in the ancient fight against the giants is said to be housed there, and the cloud giant Baron Rajiram has committed significant resources toward recovering it. After a pleasant tea in her garden, SEER calls upon you to beat him there and put a stop to his efforts! Continued in Durlag's Tomb.

Terror grips the city of Sharn. A serial killer stalks the streets and catalogues his slaughter in the annals of the city’s newspaper, to the delight and horror of its readers. To catch this elusive criminal, the PCs must match wits with an old adversary. Even beaten, scarred, and imprisoned, Viktor Saint-Demain is determined to have the final word. This is a sequel to Dungeon Magazine issue #133’s adventure “Chimes at Midnight”.
When a petty thief named Hadge gets a lucky break and makes off with a powerful divination focus of the Pathfinder Society's masked leadership, you and your fellow Pathfinders set out to the sparsely populated Taldor frontier to find him and recover the focus. When the local governor tosses Hadge into the brutal Porthmos Prison for a minor crime, your mission suddenly becomes a jail break. Will you free Hadge and uncover the location of the focus before the gangs of Porthmos tear him apart?
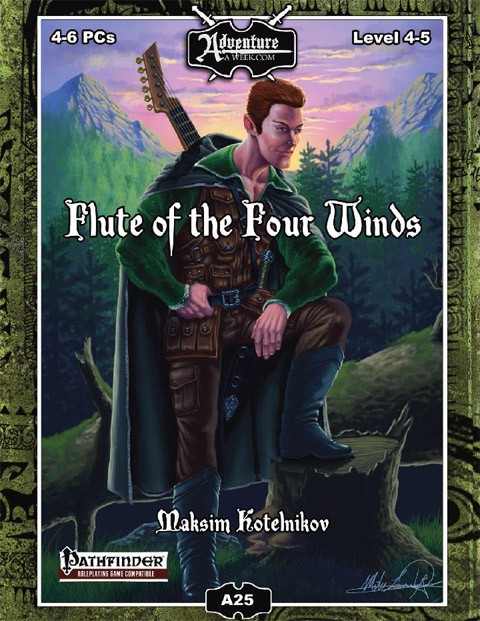
The majestic tree of the Four Winds grew in the forest west of the village of Rybalka, revered by the Vikmordere druids of the Snoqua tribe for its power to control the weather and hold balance with nature. When the Klavek Kingdom invaded the area, a powerful druid named Manahzo transferred the essence of the tree into a magical flute to keep its power safe from the threat of the militaristic Empire. Entrusted with the flute by the Snoqua, he and his wife sought to hide the flute from the reach of the invaders. As they fought the Klavek military they found themselves forced into an old cave system in the mountains of the Vikmordere Valley where they faced not only the Klavek soldiers, but ancient primal horrors. While Manahzo kept the flute out of the invaders hands, he lost his wife in the battle. Manahzo now seeks revenge on the Klavek Kingdom and its citizens located in the village of Rybalka. The PCs find themselves in the midst of an attack on Rybalka by Manahzo and a group of rogue Snoqua warriors. They must fight beside the citizens of Rybalka to repel the attack, and then seek out the Snoqua to find a means to deal with Manahzo and his rogue companions. In the forests outside Rybalka they will face a demonic wolf ally of Manahzo’s before finally engaging him in a direct battle as he executes a final attack on Rybalka. Even if the PCs succeed in defeating Manahzo, the threat does not end as his thirst for vengeance continues even after his passing in the form of haunt on the village. Directed by the Snoqua on how to end the haunt, the PCs must venture to the caves where Manahzo’s wife died to confront the ancient horrors that were responsible for her demise and recover her body in order to give her a proper burial to calm Manahzo’s vengeful spirit once and for all and bring peace to the village of Rybalka. Also included in “Flute of the Four Winds”: Roleplaying opportunities to interact with various NPCs in Rybalka, the heart of the Aventyr campaign setting Two new monsters – The hive-minded Tunnel Horrors and their carnivorous primal kin, the Anglers High resolution encounter maps in a new location, the coal mines north of Rybalka
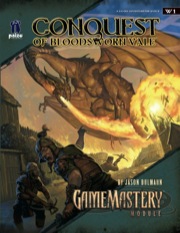
Fallow and abandoned for years, Bloodsworn Vale has long been a dangerous wood separating two kingdoms. A recent call-to-arms asks adventurers from around the world to establish a trade route through this dark and forboding forest.

"The adventure begins with the PCs lost in the streets of Sigil's Lower Ward." --from the module. The PCs are approached by a tiefling telling them about a job. The tiefling's employer wants the heroes to search for a child who is rumored to be some sort of chosen one from an ancient prophecy. Includes a map of Durkayle's Stronghold, a map of the Black Sail Tavern, a map of the Screaming Tower, and an isometric map of Zactar Cathedral.

The activities of the party have caused enough chaos to warrant their arrest. With the Felicity Triskelion confiscated, the adventurers await trial at a remote Azorius Arrester Station 13 in Precinct Four. Unfortunately, they are not alone in the holding cells. When a prominent figure of a brutal Gruul clan is also incarcerated, the Gruul lay siege to the Arrester Station. Other parties, interested in the power of the Felicity Triskelion, join the fray in hopes of making off with the relic. When chaos rises in Precinct Four, will the party survive?

Fresh off the adventure trail your party takes refuge at the small caravan stop at the Village of Tomore. There your party hears a bard tell the tale of “Tarlac Keep” which was laid siege to by two dragons and a horde of humanoids. While the mighty keep fell the subsequent military action was enough to quell further issues. By the end of the tale your group feels that a real estate deal may be in the making for you….
The Golem Master, creator of pricey artificial servants, hasn’t been seen around for some time. His house stands dark and silent. Dare you enter?

This area of adventure is a continuation from FV1 – Jeopardy Caverns and picks up where the party left off. If your party discovered the “back door” this is where it leads. It also offers an opening that flanks Jeopardy Caverns that has a perilous rope bridge to navigate! This area provides multiple smaller adventures and was utilized to get the party from different adventures. Portions of this adventure can be used as fillers in your own campaign. I hope you enjoy it as much as my players did!

How different things seem now from when you undertook the crushing of a few rebellious hill giants! What seemed a simple adventure has turned into a major expedition. Much time has passed since you discovered the conspiracy that led you to the frost giants, fire giants, and eventually to the long-forgotten Drow. Through your encounter with the dark elves, you have found the true source of the evil -- the demon queen Lolth! This module is the exciting conclusion of a series of seven AD&D modules. It may be played on its own or as the climax of the "Giant" series (G1-G3) and the 'Drow' series (D1-D3). The first of a new series of other-planar adventures, this module includes several new monsters, maps of the Demonweb and lair of Lolth, and notes on eight alternate worlds, suitable for expansion and addition to existing AD&D campaigns. TSR 9035