
The Pearl of Madness is a companion adventure made to go along with the events unfolding prior to the core adventure founding Folio #14 (WS1 ). It contains the information needed to run a side adventure that will help characters gain a degree of experience before setting out into the interior of the Isle of Jade. Thunder booms on the north of the isle and a dark rain falls on the inland swamps prompting the village chief to deny the characters canoes for their journey for another day. This respite offers the characters a chance to participate in a village tradition, the pearl dive. With whispers of great wealth at the bottom of a secluded cove, the players prepare for a dive that will provide more than the mundane. When the Isle of Jade begins to rumble, the islanders cancel the player's expedition to the inland. However, it is still a beautiful day for a pearl dive. Can the players find fortune in the tranquil waters of a hidden cove, or does something more sinister lurk there? This adventure is formatted to both 1E & 5E gaming rules.

An oblivious villain or a strange Fey for your party to interact with, The Conductor is a snail humiform who can be a hex feature in your West Marches Sandbox Hexcrawls.
You've just inherited a castle! And now for the bad news... All it needs is a good cleaning out. Pgs. 6-14 & 36

The party approaches the Dwarven Kingdom of Narol'Duun, where things are far different than in your typical dwarven empire. The first major difference is that Narol'Duun is split into three distinct categories of dwarven tribes based on the main type of ore that they mine and refine. The dwarves take on characteristics of these ores - the Cobalt Dwarves having a tinge of blue to their hair, the Copper Dwarves having tough skin and beards of shining reddish-brown, and the skin of the Iron Dwarves is a deep grey in color. These dwarves engage in trade and drink, but the one thing that they are sure to never do is breed outside of their respective tribes. To be found in a relationship with a dwarf of another tribe is to be exiled to the surface - a punishment worse than death for most of these dwarves. On this particular adventure, the party finds themselves caught up in a case of forbidden love between a royal member of the Cobalt Dwarf family - Nadom Glintstone - and a simple merchant woman from the Copper Dwarf tribe by the name of Lajeera Copperfist. They have been doing their best to keep their love a secret for they both know the risks, but the Cobalt King, Norgith Glintstone, has suspicions and is deeply afraid of the damage such a scandal could have on his family's reputation. He doesn't want to draw any attention to the situation, so it is difficult to find a dwarf of his own tribe that could look into it further, so when the party comes along he sees it as a perfect opportunity. He will hire the party to look into the situation with Nadom, offering grand rewards in exchange for the truth if they can provide proof. The party will be torn between multiple threads of possibility in this adventure – telling Norgith the truth about his son's affair with Lajeera, helping Lajeera to permanently change her form to that of a Cobalt Dwarf so they can be together, or perhaps even trying to end the tribalistic ways of the dwarven kingdoms all together. This is a heavily role-playing based adventure, perfect for those who would rather talk their way through a difficult situation than cut their way through it, but there is still some combat along the way depending on the party’s choices. This story will decide if love can win out against all odds or if the temptation of coin is greater than the happiness of others.
Long before the rise of Waterdeep... Biblius ruled the sword coast with an open hand full of love and knowledge, but even the purest of men can fall when they hear greed's sultry call. Explore Biblius' forgotten library and discover if his mystical history of the universe is more than just a tragic myth. 13 Monsters mutated by arcane radiation 21 Unique and powerful magic items 16 Ancient tomes filled with forgotten knowledge 4 Bizarre NPCs that have managed to make the library their home 11 Lost spells from a time before humanity 9 Full color maps A 4-10 hour adventure for 8th level characters.

This quest is for a party looking to resurrect a character whose corpse is missing body parts necessary for survival. Lower-level resurrection spells don’t work on a creature that is missing a head, heart, or other vital organ. To resurrect the body, the characters turn to Vaprak, patron deity of trolls, and attempt to earn the god’s assistance. However, a band of frost giant hunters intend to destroy Vaprak's temple along with everyone inside it. Includes a quest-related NPC that a player can control if they're waiting for their character to be resurrected.

In a distant dimension of existence, a collective of Modrons run experimental tests to find the answer to one question: What draws adventurers to places known as "Dungeons"? Hijacking the travel of adventuring parties, these Modrons subject them to a series of tests in their artificially created dungeon. Deadly combat, logic puzzles, "moral" challenges, and a plot about a kidnapped "Maiden" Modron by an "Evil Wizard Construct" can be found within. But not all is as it seems... Leading the experiment is a rogue Modron officer named the Creative Director, who has gone mad and morphed the tests into an elaborate death trap for adventurers. Seeking revenge against those it considers responsible for its “imprisonment”, it pits the adventurers against ever escalating challenges. Who will defeat the Creative Director and put an end the mad tests?

Built high on cliffs overlooking the confluence of two rivers, Gurthap Keep was a bastion of strength and a haven for the Cult of the Red God. Here, priests of old sacrificed over the tomb of long dead Kha M Thir, honoring him for his long service to the Red God. They added bastions to the keep, walls, a temple and barracks. From there they terrorized the surrounding country, raiding the villages of Alice, Greenbriar and Ends Meet until at last the rangers gathered against the Cult and overthrew it. They drove them from their walls and those they did not slay, fled into the Darkenfold to the south. The castle has sat thus ever since, a grim testament to the gods of the old world. The forest has consumed it and only the memories of men keep it alive. But within its abandoned walls lie the shadows of yesteryear. For the tomb of Kah M Thir was never found and the secrets of the priests of the Red God never fully revealed.
Set in the Age of Mortals, 80 years after the War of the Lance, adventurers seek the legendary sword Chaos Reaver, a magical weapon that can help defeat the incursion of chaos creatures left over after the Chaos War. The adventure brings the heroes from the misty isle of Cristyne into the otherworldy realm of the Gray and is designed with flexibility for 4-5 characters of levels 5 up to 9. The adventure also introduces chaos creatures such as the shadow wight and daemon warrior, as well as several other classic Dragonlance creatures new to 5th Edition - the wichtlin, artifact spirit, and white dragonspawn. Also includes full details on the magical sword Chaos Reaver and a variety of handouts that give clues to the characters as they seek the sword.

When huge stones fall out of the night sky, A deadly curse settles over Gravencross. Help the village exorcise the Demon Stones. “The sun had set an hour ago, and the rain lashed down and the wind howled on the dark moor. A storm this late in the season was unusual, but this one seemed different. The clouds were more menacing, tinged with anger, the rain colder and more biting than usual. Skerrill had to find the lost calf and get him back to the farm before his father came back from the city on business. He’d been looking for two hours now, and he was right in the middle of the moor when the storm hit. He knew he should have turned back as soon as darkness fell, but then he was never the brightest boy in the valley. If only he had remembered to lock the farm gate. The calf was now likely dead anyway having stumbled among the boulders and rocks, panicking in the dark, and then fallen in a floodwater stream and drowned. Either way, he was in more trouble than he could imagine. Suddenly, a bright flash of white light and a roaring peal of thunder were preceded by an explosion as a huge object fell from the sky and impacted the ground of the moor no more than a stone’s throw from him. Dirt, mud, water, and debris erupted from the impact site, flying high into the air and then covering the moor for hundreds of feet all around. Skerrill was knocked to the ground instantly and covered in the fallout from the blast. His ears rang and his head spun, but he staggered to his feet in a daze. He stumbled to where the blast had happened only moments before, and in a depression in the ground lay a huge stone glowing orange as if hot. Skerrill passed out. Two more thunderous explosions crashed in the distance.”

The first part of the Dreams of Red Wizards adventure path originally published for the D&D NEXT Playtest. Following the events Ghosts of Dragonspear Castle, a new set of adventurer's will see some of the repercussions of that adventure. This adventure is intended to be continued in the Dead in Thay adventure (Note that they Dead in Thay 5e adventure featured in Tales from the Yawning Portal is missing a significant portion of interlude that links Scourge of the Sword Coast to the events within the Doomvault). The adventurers arrive when Daggerford is crowded with refugees from outlying lands. Goblins, gnolls, and orcs have been raiding the countryside. Now, food is scarce and tension is high. Blame for a theft has fallen on the refugees, and the Duke of Daggerford has forbidden more of the displaced from coming into town. After overcoming difficulties to enter Daggerford, the characters learn more about the raids. As they fight against the humanoids and delve deeper in the darkness that encircles Daggerford, the characters learn of Bloodgate Keep. After a final fiendish ambush, they’re ready to confront the real threat to the area. DM Note: This adventure points the adventurers strongly towards Bloodgate Keep but that location does not appear until the Dead in Thay adventure; at several points the party may feel drawn to explore that location rather than continue their investigations around Daggerford. However, since Bloodgate Keep is only eluded to as a source of great evil power, it can serve to easily segue to an entirely different adventure path. As a NEXT Playtest adventure, Scourge of the Sword Coast uses milestone leveling and the included stat blocks for creatures do not necessarily match or even appear in the 5e Monster Manual, nor do they have XP values or challenge ratings. In some places it will reference rules used in the Playtest but dropped or changed in the 5e release, these are unlikely to substantially impact gampley with 5e rules.

The conclusion of the Filbar North series this adventure puts the party in front of a large and dangerous maze and home to the power of the Elementals! Each section has a riddle that the party must solve in order to obtain a key and continue to the center of the maze where the party will face off with a very special adversary. This adventure is not for those with little experience and will require the ability to solve riddles!

The Disappearance of Esme is a short adventure for four or five characters of 2nd to 4th level. It will take a party from an ancient forest to a magical island at the fringe of the Feywild to the Feywild itself. As a standalone one shot, it is possible to complete it within a session of six+ hours. However, it is ideally played over two or even three sessions so that the players have time to absorb all that is happening and make decisions with more care. It can be placed within any setting where travel to the Feywild is a possibility. Features A painstakingly crafted 25 page full-color and fully illustrated PDF, a printer friendly B&W version, and a tested for screen readers accessible version A customisable, standalone adventure with opportunities for exploration, skill challenges, NPC interactions and combat Multiple entry and exit points, suggested developments for many different pathways Well rounded, complex NPCs with old school portraits Tooth Fairies, Flying Monkeys and Foglings: custom monsters with stat blocks A colorful battle map with both DM and player versions and separate monster and environment art assets

As you begin your adventuring career you find that your stomach rules your initial steps. After finding the small community of Morgesh where word of a haunted/cursed/dangerous manor house is gained. As you find a few new associates, you opt to clear out this blight on the area. Hopefully the drunkards won’t cause you too much of a headache…

Arson, rioting, sabotage, murder - and no suspects. Watchmen are murdered, ships explode and sink in their berths, and savage monsters are summoned in the streets - but no one can catch the killers. The party must navigate the growing tensions between rival factions in the city. After following clues to a tavern, The Flying Hamhock, the party will need to defeat a powerful Hivemind which is behind the attacks. Pgs. 47-64

In this prelude to the full Princes of the Apocalypse campaign book, adventurers face off against the influence of Elemental Cultists in the hills and canyons of the Dessarin Valley. The four mini-adventures within are only tangentially related to each-other, and instead serve as starting points and hooks for the plots of the complete Princes of the Apocalypse Campaign. Players start in the well-described town of Red Larch; first investigating a local necromancer, then uncovering cult influences within the town, and finally heading off to infiltrate or do battle with two small elemental cultist strongholds. All parts of this adventure can serve as great places to seed hooks for other campaigns.
Provost Faurious has procured an Aethervane, an astrolabe-like instrument tied to Kythri that's used to navigate manifest zones. Unfortunately for the Provost, the Riedran ship that was carrying the Aethervane across the Sea of Rage to deliver it to their agent in Regalport fell victim to piracy. The player characters are dispatched to Regalport to meet up with the Provost’s agent there and petition High Prince Rygar for more information about the stolen cargo. When the characters dock in Regalport, they meet the Provost’s contact and are ushered into a meeting with High Prince Rygar. Wishing to show his intolerance for piracy, Rygar charters one of his own ships for the party’s use as they investigate the stolen cargo. Upon arriving at the crash site of the stolen cargo, the party is set upon by a fleet of pirates known as the Wind Whisperers. When things turn sour, a new surprise reveals itself as an unnatural storm rolls in, a stolen airship at its heart. The Wind Whisperers have found a way to convert the Aethervane to serve their own purposes. Seeking aid from Rygar and House Lyrandar, the heroes chase after the pirates by sail and airship. As they do, they are bedeviled by the Chaos Fleet—strange ships sailed by an even stranger crew that are drawn to the Aethervane and the chaos it brings. In a final airborne confrontation, the party boards the rogue airship and retrieves the sought-after artifact, with a chance to salvage or sink the stolen vessel in the process…

An unexpected envoy arrives in Sporedome and offers to give aid against the fire giants of Maerimydra, if you are willing to help his people with a small problem. A two-hour adventure for 5th through 10th level characters. Optimized for five 8th level characters.

After having one adventure under your belts you set sail to deliver a package across the open seas. A problem with nature causes their vessel to make an unscheduled stop on a small island that was home to a spice dealer for water. Problems ensue on the island and the party quickly discovers they aren’t “feeling themselves”. This item was played at WhosYerCon convention this past year in Indianapolis!
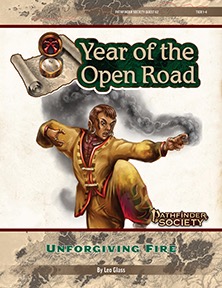
Venture-Captain Rashmivati Melipdra has called for a group of Pathfinders to travel to Jalmeray and assist her in retrieving a stolen relic. A former member of the Monastery of Unblinking Flame, Melipdra was in the process of negotiating with the monastery for custody of some of their most ancient and historically significant training devices. Before the deal could be completed, a rogue monk stole one of the relics and fled the monastery for the island of Veedesha. There, the monk seeks to use her training and the stolen devices to create a new competing monastery. As the PCs travel to a lawless island controlled by bandits and martial artists, they must find a way to retrieve the stolen goods from the new master of the Monastery of Unforgiving Fire.