
The town of Medeira was once a thriving and bountiful place. Over the last six months, what once appeared to be alive, is now slowly withering away into nothing. Crops are failing. Disease plagues the townsfolk. Nearby water sources are drying up. And everything traces back to the goddess that the town worships, a creature that most adventurers will recognize as… Medusa. Only she can return the town to its former glory. Or perhaps she’s destined to bring ruin. If only someone could get to her and find out.

"Ribbons of blood dance through the air, tracing wide crimson arcs before fraying into thousands upon thousands of bright red droplets. The cheerful tavern atmosphere evaporates in a moment, rent apart by screams and cries. A woman with grey hair stands near the bar, grasping at the dagger in her throat with fingers made slippery by blood. She sways and collapses. More screams. A man stands before her. He is holding the hilt of the dagger, but lets it slip from a gory hand as the woman falls. He freezes for a moment, then spins and sprints away, knocking aside people as he goes. A young, flaxen-haired woman at the back of the tavern cries out, “Stop him! Stop him!” as he approaches the entrance – the entrance where you and your comrades are standing. What do you do?" A lonely outsider murders a popular village local before a room full of witnesses. But could he be innocent? The Lurker Beneath Red Larch is a 4-6 hour adventure for characters of 3rd-4th level. It is full of roleplaying, problem solving and challenging combat encounters.
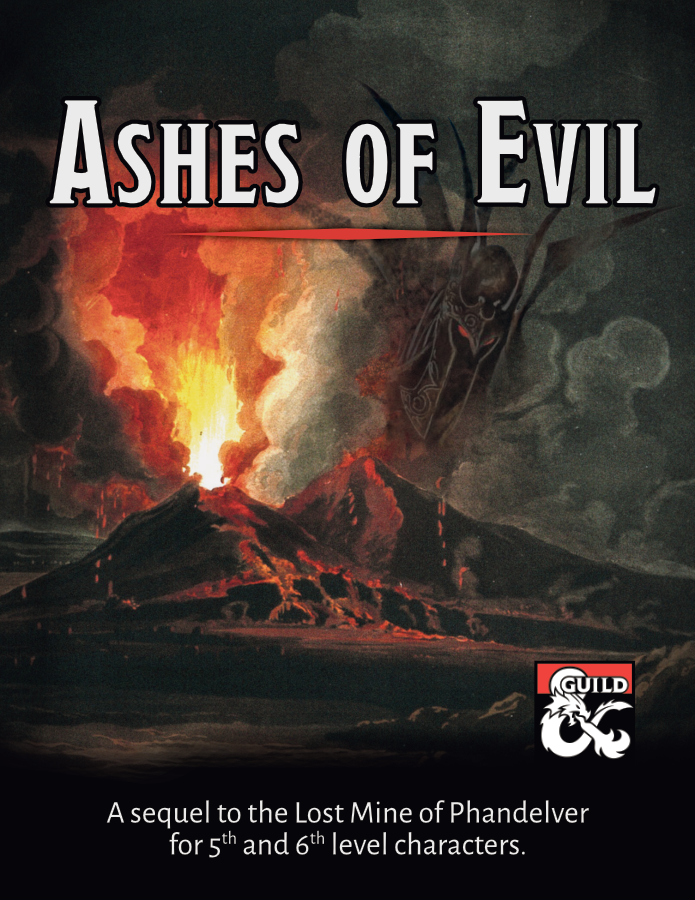
A sequel to the Lost Mine of Phandelver adventure for 5th and 6th level characters. An ancient forgotten evil threatens the Sword Coast once again! Our party of intrepid adventurers returns to Phandalin and Wave Echo Cave for what is at first glance a rescue and exploration mission. Prospectors for the Rockseeker mining concern have disappeared deep inside the flooded caverns that give the cave its name. The peril extends much deeper than mere lost explorers though, as the party stumbles upon an ancient, long-forgotten struggle between good and evil. Inexplicable cultists hide in ambush at every turn. A risky raft ride through treacherous underground waterways leads to an ominous discovery. Ancient ruins tell a story of the terrors of the night and a noble alliance sworn to fight them. A search for a powerful weapon of light leads the party on a mind-blowing, sky-high ascent into the unknown. Then, a whirlwind of danger: A rumbling volcano. Legions of undead. A desperate battle for the survival of the region. This adventure was designed as part of “The Next Adventure” Design Jam at the DMs Guild. It works best for a party that has just completed the Lost Mine of Phandelver adventure, but it can easily be inserted into any campaign. It is designed for a party of four to six 5th or 6th level characters and, based on playtesting, will take an average of about 3 sessions to complete.

The Thorn Hag, an ancient evil thought vanquished by the Elf Queen and her heroic companions many years ago, has arisen from the dead. A fey harp, created from the heart of the treant that perished in the battle, has gone missing from Satyrs' Glen and the Thorn Hag seems to be behind it. The PCs must track the missing harp through a warped and eerie wood and into an unseelie area of the Feywild to stop the Thorn Hag wreaking revenge upon the Elf Queen before it's too late - the clock is ticking. The Sylvan Harp is a D&D 5e adventure for 4-5 PCs of the 1st tier (Levels 1-4). The adventure has been designed with suitable alternatives to run the adventure for 1st, 2nd, 3rd or 4th-level characters, including advice for adapting creature numbers and/or powers to suit the level of your party. The adventure is estimated to take 8-12 hours to run. A timeline of events, and guidelines on how the actions of the PCs can affect those events, is included. The adventure includes nine new creatures: gwerthin, satyr bard, ash guardian, light guardian, treant spirit, pixie rot zombie, green dragon skeleton, thorn hag and thorn hag's hut. It also includes two new magical items: a powerful magical harp with a dark hidden secret and a crystal ball of clairvoyance. Also includes a player handout of the rhyming riddle of the fey, and maps of the area and a darkling tomb. Requires Volo's Guide to Monsters.

Player characters attacking the lair of monsters that have been menacing the local village is a common D&D trope. This adventure turns the trope on its head. In Goblin Defense, the players create goblin PCs, and have to fight off repeated attacks by adventurers who are stronger and better equipped than they are. Starting at level 1 and running until level 7, this module encompasses 16 battles against unique and typically themed groups of adventurers built using player character classes and rules. The module is designed for 3 players, each of whom takes on an individual role within the tribe, granting unique bonuses or options for actions outside of combat. Goblin Defense can also be played with 4 players, but is not recommended for 5 or more players without substantial revision. The players aren't alone. Each commands a squad of goblin minions who can help in combat... but goblins are fragile, and adventurers hit hard. Life as a goblin is often brief and violent. Many will die, but as long as some survive, the tribe will carry on. A simple ruleset is provided for managing actions during the downtime between each attack. During this time, players can work to train their minions to use better gear, hunt for food for their tribe, recruit replacement warriors, brew potions, and - most importantly - improve their lair and its defenses by adding walls, traps, tunnels, doors, alarms, and anything else their creative minds can come up with. As the exact layout and placement of defensive features is critical, this is designed to be played on a grid. A PDF is included with the map scaled to print on 24"x36" (Arch D) size paper, available at most print shops. DMs may enjoy the chance to briefly try out many different character class and subclass combinations as they attack and eventually fall to the goblin pests they're trying to eliminate. Page count: Information for the DM only 6 Information for the players 4 Adventurer statblocks 37

Slumber in the Sands – A Level 6 Adventure Beneath the shifting desert dunes lies an ancient ruin, home to a fanatical goblin tribe that worships a slumbering blue dragon as their god. Traps, puzzles, and hidden dangers fill the dungeon, all designed to protect the dragon’s hoard. Can your party navigate the treacherous ruins and escape with the treasure before they awaken the beast? This adventure includes: ✅ A sandbox-style dungeon crawl with multiple paths to success ✅ Dynamic encounters featuring goblin zealots, deadly traps, and a cunning Sand Druid ✅ A time-twisting magical artifact – the Hourglass of Stilled Time ✅ DM-friendly layout for easy reference and play Perfect for one-shots or as a drop-in adventure for your desert campaigns! Will your party slip away unseen, or will they awaken the dragon’s wrath?

Equinis Edwards, a cursed talking horse, has run afoul of a forest witch. He requires the aid of adventurers to convince the witch to reverse his curse and restore him to his original state, a unicorn! This adventure is: - setting agnostic - designed with combat-optional scenarios for younger players - all conflicts can be resolved with roleplay and creative thinking - written for a party of 2-3 adventurers of very low level (level 0-2 ) - easily scaled for small or large parties

𝐍𝐨𝐰 𝐰𝐢𝐭𝐡 𝐚𝐧 𝐢𝐥𝐥𝐮𝐬𝐭𝐫𝐚𝐭𝐢𝐨𝐧 𝐛𝐲 𝐂𝐇𝐑𝐈𝐒 𝐇𝐎𝐋𝐌𝐄𝐒 𝐚𝐧𝐝 𝐚 𝐏𝐑𝐈𝐍𝐓𝐄𝐑-𝐅𝐑𝐈𝐄𝐍𝐃𝐋𝐘 𝐃𝐔𝐍𝐆𝐄𝐎𝐍 𝐌𝐀𝐏! 𝐓𝐇𝐄 𝐑𝐔𝐈𝐍𝐄𝐃 𝐓𝐎𝐖𝐄𝐑 𝐎𝐅 𝐙𝐄𝐍𝐎𝐏𝐔𝐒 is a fifth edition (5E) conversion of the ground-breaking introductory adventure for Dungeons & Dragons that served as a DM aid in the first 𝐃&𝐃 𝐁𝐚𝐬𝐢𝐜 𝐒𝐞𝐭, released by TSR in 1977. This set included a 48-page rulebook covering the first three levels of play, and was skillfully edited by 𝐃𝐫. 𝐉. 𝐄𝐫𝐢𝐜 𝐇𝐨𝐥𝐦𝐞𝐬 from the original 1974 D&D rules written by 𝐆𝐚𝐫𝐲 𝐆𝐲𝐠𝐚𝐱 and 𝐃𝐚𝐯𝐞 𝐀𝐫𝐧𝐞𝐬𝐨𝐧. Holmes advanced the "Sample Dungeon" concept by writing a new thematic dungeon with a strong backstory, creating an adventure that has remained a fan favorite over the decades. Officially, its only title is "Sample Dungeon" but colloquially it goes by various names based on Zenopus, the doomed wizard who built the dungeon under his tower. An adventure for 1st to 2nd level characters; four pregenerated characters are included. Also includes ideas for using it as an adventure site in 𝐆𝐡𝐨𝐬𝐭𝐬 𝐨𝐟 𝐒𝐚𝐥𝐭𝐦𝐚𝐫𝐬𝐡. 𝐍𝐎𝐓𝐄: Using this conversion requires a copy of the original dungeon found in the (1977) Basic D&D rulebook. However, Wizards of the Coast has provided a free pdf of this dungeon since 2008 on their website, see the first page of the pdf for the link. 𝐂𝐎𝐍𝐓𝐄𝐍𝐓𝐒: Introduction, page 2 The Setting, page 3 About the Dungeon, page 4 Dungeon Master's Map, page 5 Areas of the Dungeon, pages 6-13 Appendix A: Further Reading, page 13 Appendix B: Dungeon Factions, page 14 Appendix C: Portown Rumors, pages 15-17 Appendix D: Use with Ghosts of Saltmarsh, pages 18-19 Appendix E: Pre-generated 1st level characters, page 20 𝐈𝐧𝐜𝐥𝐮𝐝𝐞𝐬 𝐭𝐡𝐞 𝐟𝐨𝐥𝐥𝐨𝐰𝐢𝐧𝐠 𝐧𝐞𝐰 𝐦𝐨𝐧𝐬𝐭𝐞𝐫𝐬, 𝐍𝐏𝐂𝐬, 𝐚𝐧𝐝 𝐌𝐚𝐠𝐢𝐜 𝐈𝐭𝐞𝐦𝐬 𝐟𝐨𝐫 𝟓𝐄: Cleaning Cube, Veteran Smuggler, Thaumaturgist, Monstrous Sand Crab, Lemunda, Monstrous Rat, Brazen Head of Zenopus, Verminslayer Longsword, Lesser Wand of Petrification, Scroll of Stone to Flesh The Ruined Tower of Zenopus was featured as part of the "D&D Classics" column in Issue #32 of Dragon+ magazine! Go to 𝐝𝐫𝐚𝐠𝐨𝐧𝐦𝐚𝐠.𝐜𝐨𝐦 or find the link on the Wikipeda page for Dragon magazine. 𝐂𝐑𝐄𝐃𝐈𝐓𝐒: Original Dungeon: J. Eric Holmes Conversion, Added Content & Cartography: Zach Howard Content Review & Editing: Scott McKinley Interior Art: Chris Holmes (“Octopus Attack”, page 9) Cover Art: “Italian Coast Scene with Ruined Tower” by Thomas Cole, 1838. Open Access Image from the National Gallery of Art at images.nga.gov Format: Derived from the “Adventure Template for Open Office/LibreOffice” by Dale Robbins on DMs Guild Dungeon Maps drawn using the application Gridmapper by Alex Schroeder

*THIS IS A D&D NEXT/5E PLAYTEST ADVENTURE* Imani, a Turmishan wizard and former adventurer, seeks the aid of heroes to infiltrate Dretchroyaster’s lair and recover the Diamond Staff of Chomylla—the key to powerful magic and wisdom locked away for thousands of years. In addition to his own sagely interest in the lore of lost Uvaeren, Imani recognizes the dangers of such powerful magic falling into evil hands. The dracolich has secured the staff in his lair’s cen- tral chamber, using ancient wards of protection that can be bypassed only by four artifact-idols once belong- ing to a cult of Bhaal. Each group of adventurers enters the dungeon through a different section of the dun- geon—a forgotten temple of Bhaal, a vast underground lake, a troglodyte village, or Dretchroyaster’s vaults. Dretchroyaster’s lair is no simple set of caverns and ancient ruins. It sits atop a source of great power and energy, which the dracolich and his Cult of the Dragon allies hope to use to unlock the secrets of the staff. Only by undertaking a unified assault against Dretchroyas- ter’s lair can the adventurers hope to recover the Diamond Staff and survive the dracolich’s fury. The adventurers must make their way through the lair and recover the Bhaalite idols that will help unlock the Diamond Staff, all the while dealing with the lair’s creatures and avoiding the dracolich as he pur- sues intruders. Entering the Chamber of the Diamond Staff, the heroes must overcome its magical wards and claim the staff before being slain by the dracolich and his servants.

When a priceless relic goes missing from the archives of an ancient monastery, only one party of stalwart adventurers has the determination and strength of character to go forth and recover it from a dangerous underground fortress. That party is yours.

Encounters in the Savage Wilderness contains 19 encounters / mini-adventures, a few new creatures and items, and downloadable maps. We've also added suggestions on how to use the encounters in Eberron.

Kalzok the Minotaur pirate discovered an old smuggler's hold on a tiny island in the Nelanther Isles, not far from Nemessor. The island sits amid a dangerous archipelago encircled with scores of hidden shoals that is avoided by all but the most daring or foolish navigators. The area's waters are notorious for claiming the ships of unwary sea captains who tried to steer through the gauntlet of hidden reefs. This offering includes an overview of Kalzok's island along with the details of Kalzok's hidden lair.

𝐓𝐡𝐢𝐬 𝐚𝐝𝐯𝐞𝐧𝐭𝐮𝐫𝐞 𝐢𝐬 𝐚 𝐜𝐨𝐧𝐭𝐢𝐧𝐮𝐚𝐭𝐢𝐨𝐧 𝐨𝐟 𝐭𝐡𝐞 𝐨𝐫𝐢𝐠𝐢𝐧𝐚𝐥 𝐬𝐚𝐦𝐩𝐥𝐞 𝐝𝐮𝐧𝐠𝐞𝐨𝐧 𝐟𝐨𝐮𝐧𝐝 𝐢𝐧 𝐭𝐡𝐞 𝟏𝟗𝟕𝟕 𝐁𝐚𝐬𝐢𝐜 𝐑𝐮𝐥𝐞𝐛𝐨𝐨𝐤, 𝐤𝐧𝐨𝐰𝐧 𝐚𝐬 𝐭𝐡𝐞 𝐓𝐨𝐰𝐞𝐫 𝐨𝐟 𝐙𝐞𝐧𝐨𝐩𝐮𝐬. It includes the hinted at, deeper dungeons and darker secrets of Zenopus. This adventure details the Tower of Zenopus located in the map found in Ghosts of Saltmarsh and is a quick side bar for adventurers level 1-3. It has been 50 years since anyone has seen or heard from Zenopus. Rumors abound concerning cultists and marshland creatures roaming near Portown. Could it be that Zenopus is behind it all? Return to the dungeon that started it all. Additional material based on Dr. J. Eric Holmes’ original sample dungeon. More levels, more monsters, more treasure await under the Tower of Zenopus! 4 new dungeon levels included!

This adventure is light and comedic and is indeed a heist adventure! It is designed as a one-off side quest for an established party but can be tweaked to work as an introductory adventure for characters meeting one another for the first time. This is ideal for a well-rounded party in which each player can show off and play a vital role in the mission’s success as they rob an evil potion master blind! Players can obtain potions of Heroism, Invisibility, Flying and Mind Reading. This adventure is perfect for DMs looking to fill a shorter session or injecting some light humor after an intense end-of-the-world campaign.

Undermountain: The Caverns of the Many-Legged is an adventure detailing a hidden mini-level for Dungeon of the Mad Mage for characters of levels 12-13. It uses some of the story and lore of that book, but it can be incorporated or dropped into any setting or homebrew campaign. In a hidden part of Undermountain, former slaves feed their fat, monstrous queen who is fixated on revenge. A broken drow house has finally found a place to call home – only to become abominations. And a massive beast slithers, hunting for anything to satiate its hunger and quell its madness. Welcome to the Caverns of the Many-Legged. Which side, if any, will adventurers choose as they explore this hidden mini-level for Dungeon of the Mad Mage? In this adventure, you will find: a mini-level that can be easily incorporated into Dungeon of the Mad Mage a vivid cast of unique monsters and NPCs, including chitine warriors, a choldrith queen, a spellcasting draegloth, a mad yuan-ti anathema, and others (stat blocks provided for all creatures not in the Monster Manual) locations that could be used or adapted elsewhere, such as a chitine colony and a drider-controlled drow fortress a combination of roleplay, exploration, and combat encounters

This adventure is designed as a side quest that can be inserted into an ongoing adventure or campaign. It involves a series of three linking scenes (and an optional fourth research scene between the others) that can be placed in between the action of whatever other event the party is undertaking. Ideally the scenes of this side adventure should be spread out and inserted into the game over several sessions of play.

The promises of glory and the chance of riches draws you to Blasingdell, a small village near the infamous Stone Tooth. Within the rocky mountain lay the dwarven stronghold Khundrukar and the fabled Forge of Fury, to which a chance encounter provides you with the location of a hither-to unknown entrance. Are you brave enough to explore this mystery? Will it lead you to wealth or to your doom?

Damnation! The Companion that once stood as a beacon of hope and goodness above the city of Elturel has been extinguished and the entire city—along with its denizens—have been drawn into Avernus, the first layer of the Nine Hells! While those fortunate enough to have been outside of the city’s walls during its departure have been spared that fate, but they’re not yet out of danger! The refugees formed a caravan bound for the nearby city of Baldur’s Gate. Can you keep them safe from devils, bandits, and one another until they reach safety? Four One-Hour Mini-Adventures for 1st to 2nd Characters. Optimized for APL 1.

“...when the floor trembled and the whole town shook, the people knew Mario had been found a couple of minutes later the dust settled again on the buildings and streets. Silence. The people’s wait to see who came out of the sewers, who would emerge victoriously was agonizing. The fate of the town swung on the outcome of the battle…” Extracts from The Witch Doomsday in Master Bard Blue Barry’s Tales of Silver. This adventure is designed for four to six 2nd- to 3rd level characters and is optimized for five characters. Designed to be a one-shot to play between four and six hours. A band of deep goblins settled in the sewers of Red Witch Cove and took the towns as hostages. They take what they want when they want it without regard for the people around them and their acts are bringing the doom of the town that the merchants were holding back. The package contains: -Color version. -Black and White version. -Maps and battle maps.

Mystery in the Moonsea! Disappearing shipments, missing alchemists—and proven musical acts whose rehearsals sound terrible! Instead of showing off Thentia to potential trading partners and giving the locals something to celebrate, the pall over this year’s Magic and Gold Festival threatens to drive business to Melvaunt and give the locals a reason to riot. Combat optional but possible. Role-playing opportunities abound.