
This adventure is light and comedic and is indeed a heist adventure! It is designed as a one-off side quest for an established party but can be tweaked to work as an introductory adventure for characters meeting one another for the first time. This is ideal for a well-rounded party in which each player can show off and play a vital role in the mission’s success as they rob an evil potion master blind! Players can obtain potions of Heroism, Invisibility, Flying and Mind Reading. This adventure is perfect for DMs looking to fill a shorter session or injecting some light humor after an intense end-of-the-world campaign.

Local villagers whisper of a mysterious place deep in the marsh - a place shrouded in mist and dotted with barrow mounds, ruined columns, and standing stones. The tomb-robbers who explore beneath the mounds - or rather the few who return - tell tales of labyrinthine passages, magnificent grave goods, and terrifying creatures waiting in the dark. Are you brave (or foolish) enough to enter Barrowmaze? Barrowmaze Complete (BMC) is a classic megadungeon for use with any old school fantasy role-playing game. BMC includes everything in Barrowmaze I and II in the same book in addition to new material, art, layout, and cover art by Ex-TSR artist Erol Otus. Barrowmaze Complete will keep your players on their toes and your campaign going strong. BMC is brought to you by the Old School Renaissance (so don’t forget your 10’ pole). This edition includes art by the aforementioned TSR artists Erol Otus, as well as Tim Truman, Jim Holloway. New old-school artists include Peter Pagano, Cory Hamel, Stefan Poag, Zhu Bajie, Stephan Thompson, and others.

Burial in Baldur's Gate is a 6-8 hour Dungeons & Dragons adventure for characters of levels 1-2, for use as an introduction to Baldur's Gate: Descent into Avernus or as a standalone module. A simple errand to help a friend reveals a mystery that will lead the characters to a grisly charnel house and the cults of the Dead Three. This is why you never do anybody a favor in Baldur's Gate. The adventure has everything you need to start a new campaign in Baldur's Gate, including: - a new adventure hook for Descent into Avernus - two short introductory dungeon crawls in the Lower City - notes for transitioning into Descent into Avernus - new motivations for characters to continue on to Avernus - four creature and NPC stat blocks, including the carrion crawler larva - a map pack with two maps by Dyson Logos Burial in Baldur's Gate also includes suggestions for combining this adventure with Escape from Elturel if you want to run a mixed party of characters from Baldur's Gate and Elturel.

A political wedding is threatening a major source of income for the Thieves Guild Ebonclad. Ebonclad would like to see the affair disrupted and the couple never wed. Such a job may be risky, and its outcome could very well start a war if done poorly or without subtlety. That’s why a team of promising agents has been assigned to handle it. The mission’s goal is to disrupt the upcoming wedding of Camilla Swain and Le’Nal Beshiin, to ensure Ebonclad keeps a revenue stream open that their marriage would surely close. The caveat is, neither the bride nor the groom are to be harmed. This will mean the party will have to come up with a method to disrupt the wedding as it’s happening, while avoiding suspicion. As a bonus, the party members can rob wealthy guests or steal wedding presents. The mission is open-ended, giving the players full reign to decide how they will work towards a successful outcome. It lets you work to guide player decisions based on the information presented here, or improvise results based on the players’ actions.

The Legend of the Black Monastery Two centuries have passed since the terrible events associated with the hideous cult known as the Black Brotherhood. Only scholars and story-tellers remember now how the kingdom was nearly laid to waste and the Black Monastery rose to grandeur and fell into haunted ruins. The Brothers first appeared as an order of benevolent priests and humble monks in black robes who followed a creed of kindness to the poor and service to the kingdom. Their rules called for humility and self denial. Other religious orders had no quarrel with their theology or their behavior. Their ranks grew as many commoners and nobles were drawn to the order by its good reputation. The first headquarters for the order was a campsite, located in a forest near the edge of the realm. The Brothers said that their poverty and dedication to service allowed them no resources for more grand accommodations. Members of the Black Brotherhood built chapels in caves or constructed small temples on common land near villages. They said that these rustic shrines allowed them to be near the people they served. Services held by the Brothers at these locations attracted large numbers of common people, who supported the Black Brotherhood with alms. Within 50 years of their first appearance, the Black Brotherhood had a number of larger temples and abbeys around the kingdom. Wealthy patrons endowed them with lands and buildings in order to buy favor and further the work of the Brothers. The lands they gained were slowly expanded as the order’s influence grew. Many merchants willed part of their fortunes to the Black Brotherhood, allowing the order to expand their work even further. The Brothers became bankers, loaning money and becoming partners in trade throughout the kingdom. Within 200 years of their founding, the order was wealthy and influential, with chapters throughout the kingdom and spreading into nearby realms. With their order well-established, the Black Brotherhood received royal permission to build a grand monastery in the hill country north of the kingdom’s center. Their abbot, a cousin of the king, asked for the royal grant of a specific hilltop called the Hill of Mornay. This hill was already crowned by ancient ruins that the monks proposed to clear away. Because it was land not wanted for agriculture, the king was happy to grant the request. He even donated money to build the monastery and encouraged others to contribute. With funds from around the realm, the Brothers completed their new monastery within a decade. It was a grand, sprawling edifice built of black stone and called the Black Monastery. From the very beginning, there were some who said that the Black Brotherhood was not what it seemed. There were always hints of corruption and moral lapses among the Brothers, but no more than any other religious order. There were some who told stories of greed, gluttony and depravity among the monks, but these tales did not weaken the order’s reputation during their early years. All of that changed with the construction of the Black Monastery. Within two decades of the Black Monastery’s completion, locals began to speak of troubling events there. Sometimes, Brothers made strange demands. They began to cheat farmers of their crops. They loaned money at ruinous rates, taking the property of anyone who could not pay. They pressured or even threatened wealthy patrons, extorting money in larger and larger amounts. Everywhere, the Black Brotherhood grew stronger, prouder and more aggressive. And there was more… People began to disappear. The farmers who worked the monastery lands reported that some people who went out at night, or who went off by themselves, did not return. It started with individuals…people without influential families…but soon the terror and loss spread to even to noble households. Some said that the people who disappeared had been taken into the Black Monastery, and the place slowly gained an evil reputation. Tenant farmers began moving away from the region, seeking safety at the loss of their fields. Slowly, even the king began to sense that the night was full of new terrors. Across the kingdom, reports began to come in telling of hauntings and the depredations of monsters. Flocks of dead birds fell from clear skies, onto villages and city streets. Fish died by thousands in their streams. Citizens reported stillborn babies and monstrous births. Crops failed. Fields were full of stunted plants. Crimes of all types grew common as incidents of madness spread everywhere. Word spread that the center of these dark portents was the Black Monastery, where many said the brothers practiced necromancy and human sacrifice. It was feared that the Black Brotherhood no longer worshipped gods of light and had turned to the service of the Dark God. These terrors came to a head when the Black Brotherhood dared to threaten the king himself. Realizing his peril, the king moved to dispossess and disband the Black Brother hood. He ordered their shrines, abbeys and lands seized. He had Brothers arrested for real and imagined crimes. He also ordered investigations into the Black Monastery and the order’s highest ranking members. The Black Brotherhood did not go quietly. Conflict between the order and the crown broke into violence when the Brothers incited their followers to riot across the kingdom. There were disturbances everywhere, including several attempts to assassinate the king by blades and by dark sorcery. It became clear to everyone that the Black Brotherhood was far more than just another religious order. Once knives were drawn, the conflict grew into open war between the crown and the Brothers. The Black Brotherhood had exceeded their grasp. Their followers were crushed in the streets by mounted knights. Brothers were rounded up and arrested. Many of them were executed. Armed supporters of the Black Brotherhood, backed by arcane and divine magic, were defeated and slaughtered. The Brothers were driven back to their final hilltop fortress – the Black Monastery. They were besieged by the king’s army, trapped and waiting for the king’s forces to break in and end the war. The final assault on the Black Monastery ended in victory and disaster. The king’s army took the hilltop, driving the last of the black-robed monks into the monastery itself. The soldiers were met by more than just men. There were monsters and fiends defending the monastery. There was a terrible slaughter on both sides. In many places the dead rose up to fight again. The battle continued from afternoon into night, lit by flames and magical energy. The Black Monastery was never actually taken. The king’s forces drove the last of their foul enemies back inside the monastery gates. Battering rams and war machines were hauled up the hill to crush their way inside. But before the king’s men could take the final stronghold, the Black Brotherhood immolated themselves in magical fire. Green flames roared up from the monastery, engulfing many of the king’s men as well. As survivors watched, the Black Monastery burned away, stones, gates, towers and all. There was a lurid green flare that lit the countryside. There was a scream of torment from a thousand human voices. There was a roar of falling masonry and splitting wood. Smoke and dust obscured the hilltop. The Black Monastery collapsed in upon itself and disappeared. Only ashes drifted down where the great structure had stood. All that was left of the Black Monastery was its foundations and debris-choked dungeons cut into the stones beneath. The war was over. The Black Brotherhood was destroyed. But the Black Monastery was not gone forever. Over nearly two centuries since its destruction, the Black Monastery has returned from time to time to haunt the Hill of Mornay. Impossible as it seems, there have been at least five incidents in which witnesses have reported finding the Hill of Mornay once again crowned with black walls and slate-roofed towers. In every case, the manifestation of this revenant of the Black Monastery has been accompanied by widespread reports of madness, crime and social unrest in the kingdom. Sometimes, the monastery has appeared only for a night. The last two times, the monastery reappeared atop the hill for as long as three months…each appearance longer than the first. There are tales of adventurers daring to enter the Black Monastery. Some went to look for treasure. Others went to battle whatever evil still lived inside. There are stories of lucky and brave explorers who have survived the horrors, returning with riches from the fabled hordes of the Black Brotherhood. It is enough to drive men mad with greed – enough to lure more each time to dare to enter the Black Monastery.
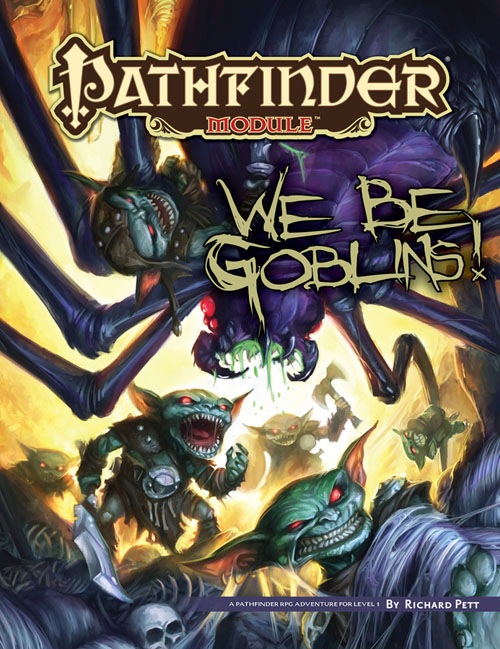
The Licktoad goblins of Brinestump Marsh have stumbled upon a great treasure—fireworks! Yet unfortunately for them, the tribe member responsible for the discovery has already been exiled for the abhorrent crime of writing (which every goblin knows steals words from your head). To remedy this situation, the Licktoads’ leader, His Mighty Girthness Chief Rendwattle Gutwad, has declared that the greatest heroes of the tribe must venture forth to retrieve the rest of the fireworks from a derelict ship stranded in the marsh. The PCs play as a group of freaking goblins! What more do you need to know? Part 1 of the We Be Goblins series.

Important: The adventure is 1e but it has monster conversion notes for D&D 4th edition The town of Highport, once a human community overlooking Wooly Bay from its perch on the northern coast of the Pomarj, fell prey to hordes of humanoids swarming out of the jungle-covered hills surrounding the settlement. Though the orcs, goblins, kobolds, ogres, and gnolls razed much of the place in their ferocious rampages, the smoldering ruins they left behind soon became a new kind of community, a place of trade between the humanoid “locals” and the unsavory human traders who have no compunction about doing business with them. Slaves are a commodity in ready supply in Highport’s market, since many pirates raid up and down the coast of the bay, putting fishing villages to the torch and filling their holds with captured refugees. Slavery has become a thriving business in the town, and rumors abound of a cartel of Slave Lords who run things from behind the scenes, filling their coffers in secret from the buying and selling of human chattel. The trade has become so prolific that the good folk to the north have grown tired of these depredations and decided to fight back. Forces of righteousness and honor have recently descended upon Highport, some openly and others in secret, in various attempts to destroy the machinations of the Slave Lords and abolish the abominable enterprise that has taken far too many loved ones from home and hearth. One such doughty servant of goodness is Mikaro Valasteen, a cleric of Trithereon. Mikaro slipped unnoticed past the crumbling walls of Highport with a single mission: to rescue and transport as many slaves to their freedom as possible. Mikaro and a handful of faithful assistants located a number of escaped slaves—as well as rescued a few more not sufficiently restrained and guarded—and shepherded them through the gates and beyond the reach of their humanoid tormentors, returning them to their lands and homes. This covert freedom brigade enjoyed remarkable success early on, since the servants of the Slave Lords were often lax in their vigilance and sloppy in their efforts to prevent loss of the “merchandise.” After one too many shipments never made its destination, the humanoids stepped up their security and the normal channels of escape from Highport closed to Mikaro and his team. He cannot risk exposure by smuggling the freed slaves through the gates as merchandise any longer, since shipments of goods are now regularly stopped and checked. No longer able to free the slaves in that manner, Mikaro began hiding his charges in an abandoned villa in a particularly rundown part of the town. Although they are safe for the moment, their numbers have grown unmanageable, and the priest fears it is only a matter of time before someone slips up and brings slavers to their doorstep. Ever more desperate to find a new means of escape from Highport, Mikaro has started work on a plan that is both daring and dangerous. He intends to use a series of old sewers coupled with natural caverns running beneath the town as an escape route to the sea beyond the walls. But he needs someone to clear out the creatures and pitfalls he knows lie within. Pgs. 2-27

𝐓𝐡𝐞 𝐭𝐡𝐢𝐫𝐝 𝐚𝐝𝐯𝐞𝐧𝐭𝐮𝐫𝐞 𝐢𝐧 𝐭𝐡𝐞 𝐔𝐩𝐫𝐢𝐬𝐢𝐧𝐠 𝐒𝐚𝐠𝐚. It would take a lot to force the PCs to ally with the very orcs that have been causing them so much trouble recently. But what have those damnable orcs stirred up in the abandoned copper mines? A four hour adventure for 4th level player characters.
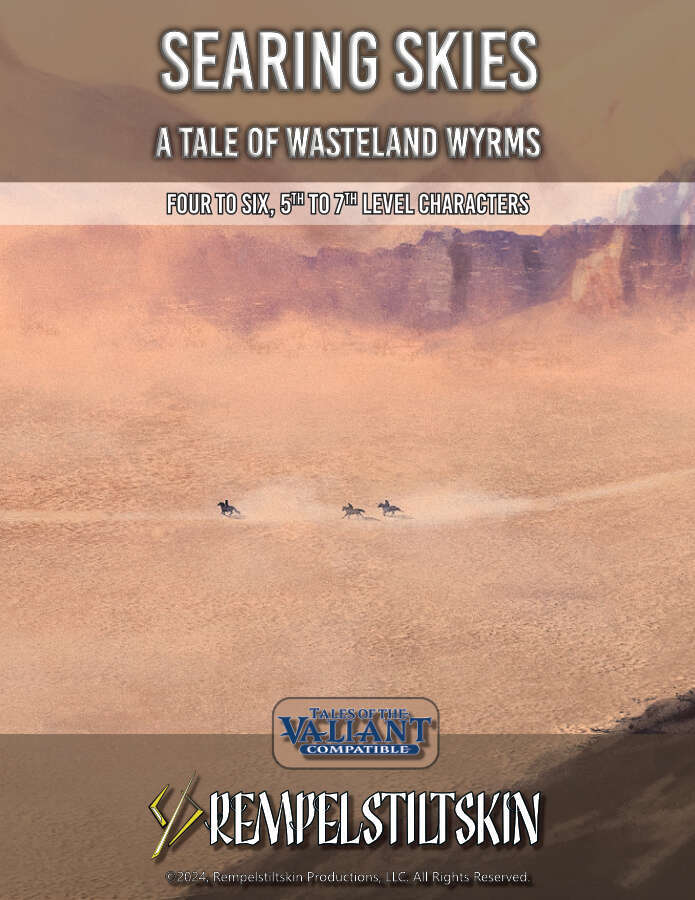
Draconic adventures in the scorching sands! In the desert, the Wyverns gather and move in prides. Their power is fearsome alone, but together almost unstoppable. Their eggs are valuable and sought after by thrill seekers, culinary connoisseurs, and purveyors of exotic pets and mounts. Two large groups—big game hunters looking for trophies and native desert nomads whose culture practices conservation of the Wyverns—are set to clash at a Wyvern Nest. A Sorceress wishes to stop all exploitation of the bestial dragons. These three groups require adventurers to succeed. But who will the adventurers side with? And what of the ruthless mercenary group The Furious Few? This Tales of the Valiant Compatible Adventure Module Toolkit Provides: • one regional map and four location maps to adventure in • Desert Wyvern Ecology and statblocks for various stages of development • Details of the three major factions vying for control of the eggs • A ruthless party of rivals for your players' characters • Over 60 NPC bios to help populate the desert and craft your tale. • Desert Environment rules and hazards

𝐍𝐨𝐰 𝐰𝐢𝐭𝐡 𝐚𝐧 𝐢𝐥𝐥𝐮𝐬𝐭𝐫𝐚𝐭𝐢𝐨𝐧 𝐛𝐲 𝐂𝐇𝐑𝐈𝐒 𝐇𝐎𝐋𝐌𝐄𝐒 𝐚𝐧𝐝 𝐚 𝐏𝐑𝐈𝐍𝐓𝐄𝐑-𝐅𝐑𝐈𝐄𝐍𝐃𝐋𝐘 𝐃𝐔𝐍𝐆𝐄𝐎𝐍 𝐌𝐀𝐏! 𝐓𝐇𝐄 𝐑𝐔𝐈𝐍𝐄𝐃 𝐓𝐎𝐖𝐄𝐑 𝐎𝐅 𝐙𝐄𝐍𝐎𝐏𝐔𝐒 is a fifth edition (5E) conversion of the ground-breaking introductory adventure for Dungeons & Dragons that served as a DM aid in the first 𝐃&𝐃 𝐁𝐚𝐬𝐢𝐜 𝐒𝐞𝐭, released by TSR in 1977. This set included a 48-page rulebook covering the first three levels of play, and was skillfully edited by 𝐃𝐫. 𝐉. 𝐄𝐫𝐢𝐜 𝐇𝐨𝐥𝐦𝐞𝐬 from the original 1974 D&D rules written by 𝐆𝐚𝐫𝐲 𝐆𝐲𝐠𝐚𝐱 and 𝐃𝐚𝐯𝐞 𝐀𝐫𝐧𝐞𝐬𝐨𝐧. Holmes advanced the "Sample Dungeon" concept by writing a new thematic dungeon with a strong backstory, creating an adventure that has remained a fan favorite over the decades. Officially, its only title is "Sample Dungeon" but colloquially it goes by various names based on Zenopus, the doomed wizard who built the dungeon under his tower. An adventure for 1st to 2nd level characters; four pregenerated characters are included. Also includes ideas for using it as an adventure site in 𝐆𝐡𝐨𝐬𝐭𝐬 𝐨𝐟 𝐒𝐚𝐥𝐭𝐦𝐚𝐫𝐬𝐡. 𝐍𝐎𝐓𝐄: Using this conversion requires a copy of the original dungeon found in the (1977) Basic D&D rulebook. However, Wizards of the Coast has provided a free pdf of this dungeon since 2008 on their website, see the first page of the pdf for the link. 𝐂𝐎𝐍𝐓𝐄𝐍𝐓𝐒: Introduction, page 2 The Setting, page 3 About the Dungeon, page 4 Dungeon Master's Map, page 5 Areas of the Dungeon, pages 6-13 Appendix A: Further Reading, page 13 Appendix B: Dungeon Factions, page 14 Appendix C: Portown Rumors, pages 15-17 Appendix D: Use with Ghosts of Saltmarsh, pages 18-19 Appendix E: Pre-generated 1st level characters, page 20 𝐈𝐧𝐜𝐥𝐮𝐝𝐞𝐬 𝐭𝐡𝐞 𝐟𝐨𝐥𝐥𝐨𝐰𝐢𝐧𝐠 𝐧𝐞𝐰 𝐦𝐨𝐧𝐬𝐭𝐞𝐫𝐬, 𝐍𝐏𝐂𝐬, 𝐚𝐧𝐝 𝐌𝐚𝐠𝐢𝐜 𝐈𝐭𝐞𝐦𝐬 𝐟𝐨𝐫 𝟓𝐄: Cleaning Cube, Veteran Smuggler, Thaumaturgist, Monstrous Sand Crab, Lemunda, Monstrous Rat, Brazen Head of Zenopus, Verminslayer Longsword, Lesser Wand of Petrification, Scroll of Stone to Flesh The Ruined Tower of Zenopus was featured as part of the "D&D Classics" column in Issue #32 of Dragon+ magazine! Go to 𝐝𝐫𝐚𝐠𝐨𝐧𝐦𝐚𝐠.𝐜𝐨𝐦 or find the link on the Wikipeda page for Dragon magazine. 𝐂𝐑𝐄𝐃𝐈𝐓𝐒: Original Dungeon: J. Eric Holmes Conversion, Added Content & Cartography: Zach Howard Content Review & Editing: Scott McKinley Interior Art: Chris Holmes (“Octopus Attack”, page 9) Cover Art: “Italian Coast Scene with Ruined Tower” by Thomas Cole, 1838. Open Access Image from the National Gallery of Art at images.nga.gov Format: Derived from the “Adventure Template for Open Office/LibreOffice” by Dale Robbins on DMs Guild Dungeon Maps drawn using the application Gridmapper by Alex Schroeder

Set in the world of Dragonlance (a popular setting that has appeared in numerous previous editions of DnD), this campaign book takes players from Levels 1 to 11 and finds them caught up in a devastating war between the forces of Krynn and an army lead by the ruthless dragon goddess Takhisis. The campaign book also includes new world info, subclasses, races and magic items.

Adventuring in the Principality of Lockerbie continues with Issue in the Canyon. Your party has enjoyed the advantages of being considered a hero but as the days’ progress, it is back to normal in Gormell. After having a bit of ale at the local tavern you notice a wagon caravan has arrived in town and the people are abuzz over their arrival. Noticing that some of employees are a little beat up, you find yourself in the sheriff’s office being told of a brazen, humanoid attack on the merchants. Looks like you just found a job opportunity!

Madness in Freeport, the final part of the Freeport Trilogy, details the final confrontation between the PCs, the Brotherhood of the Yellow Sign, and Sea Lord Milton Drac. In Part One, the Drac invites the PCs to the Grand Lighthouse Ball. Careful investigation can reveal the secret purpose of the lighthouse. In Parts Two and Three, the PCs must recover a powerful artifact to thwart the Brotherhood's plans. They must pass through an infamous pirate's hidden caves, then search a sunken temple of the serpent god Yig. In Part Four, the heroes must enter the Grand Lighthouse, AKA Milton's Folly, in a race against time to stop the Brotherhood's world-shaking master plan from coming to fruition. (Bibliographic note: This adventure was originally written for v.3.0, and later updated to the v.3.5 rules. The revised versions of Death, Terror, and Madness in Freeport were reprinted in an omnibus edition, along with two shorter filler adventures, as The Freeport Edition: Five Year Anniversary Edition.)

Six months ago, an adventuring group that calls itself the Company of the Shining Stone learned of an aged wizard’s tomb that lay in the rocky foothills of a prominent mountain range, and sought to plunder it. What they were not counting on was that a band of stone giants would move into the immediate area to make their lair. The giants have rebuffed the company’s attempts at getting past them and to their goal. Now is the time of the annual fair in Adurath, a small town located not far from the tomb, and thus, the giants. The giants have no interest in the town or the tomb, but are instead interested in a rare mineral found only in that region. A few of the townsfolk have seen the giants, but there has been no confrontation other than between the giants and the Company of the Shining Stone.

The party finds themselves in a town being plagued by goblins, but not ordinary goblins - these goblins are zombified. Many of them are missing limbs and dripping with rot, but they still march to town with powerful intent. The party must help track down the origin of this plague - a Necromancer whose Blight Stone has been stolen by a group of mischievous kids who thought it would be fun to mess with the strange old man out in the woods.

This adventure can be used as stand-alone or continuing the arc started by Death in Freeport. Terror in Freeport leads the PCs deeper into the intrigue they began to glimpse in Death in Freeport. The investigation takes them from the corridors of power to the bowels of the underworld, with terrifying insights into who really controls the city. They discover that the Brotherhood of the Yellow Sign has its claws in the town's power elite, but thanks to some clever camouflage by Sea Lord Drac. they may not find out just whom the serpents control until it's too late. As the adventure begins, the PCs are contacted once more by a very nervous Brother Egil. He tells them that while staying with Lucius one evening, he awoke to find a burglar in the roomstealing a scroll. Egil is certain that the Brotherhood have penetrated further into Freeport than anyone imagines. He wants the PCs to investigate Milos's other ties to the city and find out what's being done about the temple of the Unspeakable One. The PCs search the cultist's lodgings and discover it has been carefully gone over, and several possibly incriminating books are missing. But the burglars overlooked one thing: a Tome with a diagram of the Lighthouse of Drac sketched onto the back page, marked with the letter V. Upon leaving Milos's lodgings, the PCs come upon a gang of orcs beating up a hapless messenger. They lend a hand, only to discover they've been tricked - the messenger makes off with Milos's book! A chase through the back streets leads them to the boarded-up building the y discovered in Death What they find isn't encouraging. There is a guard posted out front, courtesy of "V"- -Verlaine. head of the Captains' Council. Meanwhile, down below, the cultists continue to have the run of the caverns-— in fact, they have been shipping their unholy relics to Verlaine's own home!

The fey hold sway over the forests of Cormanthor. Their presence has kept the goblinoids disorganized and warring amongst themselves. Now, a deadly enemy of the woods has laid claim to a Feywild glade. This foe is slaughtering the forest defenders and rallying goblinoid tribes in the name of vengeance. Can you stop them in time? The Ashen Scar premiered at Kublacon 2018. A D&D Adventurers League two-hour adventure for 1st-4th level characters.
One Night Strahd (ONS) delivers the spectacle and catastrophe of gothic horror as a consistent and fast-paced short campaign for D&D 5e. It condenses and remixes the 200+ hour campaign of Curse of Strahd into a replayable adventure weighing in at 525 pages with 150+ illustrations, 12 maps, 16 encounters, 27 new magic items, and 60+ quick-play charts. With careful attention to the design of exploration, combat, and role-playing opportunities, our goal has been to make something for every DM and every table. After three years of extensive testing, we're proud to share this explosive adventure with you.
When strange reports of misty undead spread through Absalom, you and your fellow Pathfinders are dispatched to the half-drowned district of Puddles. Notoriously rough, the drooling addicts, flesh panderers, and quick-handed knifers of Puddles are the least of your worries. The night's tide brings with it an ancient armada of some long-forgotten war and you are the only thing between their mist-shrouded ghost fleet and Absalom's utter oblivion.

Some monsters don't have any class. The quest for knowledge can be as dangerous as any other. The heroes investigate a library after one of the locals claims to have seen a librarian be attacked by a tentacled creature. In reality, a group of orcs found a secret entrance into the library and the "tentacle" is merely the whip that the leader wields. The party must make their way through a labyrinth hidden underneath the library and rescue the hostages. Pgs. 4-9