The characters are introduced to the coup occurring in Whitehorn and are tasked with warning a friend, whose family is involved, about it. (characters can choose one instrument as a reward)

The village near Oreclasp Keep has been reporting brutal owlbear attacks that have left people missing or dismembered. Lord Oreclasp has placed a bounty for every owlbear beak brought to Oreclasp Keep. The villagers don’t suspect the deeper problems brewing in the land.

Accused of impersonation and kidnapping, a pair of old sisters have found refuge in Abermoor. In their wake, they have left a trail of blood, and are pursued by a bounty hunter. Hired for their expertise, the adventurers have joined the pursuit. A Two-Hour Adventure for 1st-4th Level Characters Wretches is a stand-alone adventure that premiered at Kumoricon in Portland, Oregon in October of 2017

An Introductory Adventure for Storm King's Thunder. As evening approaches, you spot a wooden signpost next to a trail that heads north into the hills. Nailed to the post are three arrow-shaped signs. The two marked “Waterdeep” and “Daggerford” follow the High Road but point in opposite directions. The third, marked “Nightstone,” beckons you to follow the trail. If memory serves, Nightstone is roughly ten miles up the trail. This is Chapter 1 of the greater story available for free on the Dungeon Master's Guild.

This alternate starter campaign takes you to all the familiar locations of the Lost Mine of Phandelver adventure from the other side of the veil. Some places look the same, some very different. The entire plane is trying to strip you of your mind, your memory, and your motivation. Discover how the Forge of Spells was fueled. Learn the location of lost adventurers from the original Phandelver expedition. See what Cragmaw Castle looked like in its prime. All of this and more, as this takes you from level 1 to level 5 with well over 20 hours of play time. If you are looking to start a new campaign or just experience familiar locations in a new setting, this supplement accommodates. Inside you'll find: Maps: Nine encounter maps Cragmaw Castle rebuilt, including the upper floor, and underground level. Wave Echo Cave before it was tunneled. A very different looking Redbrant Hideout Ruins of a town similar to Phandalin A swamp and muck version of Cragmaw Hideout Plus new magic items, and more Monsters: 37 new creatures Lore Information on a shadowy Yuan-ti empire A new offshoot of the abyssal demonhive A cult using the stoic ways of stone to evade the Raven Queen's watchful eye and pilfering ways. New players vying for control of the Shadowfell Shadowfell Guide: Information on the plane, its inhabitants, and included with this supplement is the best selling Shadowfell Random Encounters appendix. Easter Eggs Hidden throughout the story are references to Lost Mine of Phandelver. Including references to other hard cover books as well.
:strip_icc()/pic4011255.jpg)
Janos Meer, the powerful underworld figure known as the Beggar King, has vanished. Gribbits - Meer’s right-hand goblin - has tasked a group of neophyte adventurers with getting to the bottom of where his boss has gone, and why. This is easier said than done, of course. The explosive destruction quite accidentally meted out by the Dragon Friends some months prior has made their city a dangerous place. It’s up to the adventurers to follow the clues through the urban chaos, unravel the mystery of the missing Meer, and maybe - just maybe - expose a conspiracy greater than any of them expected. The Gribbits Detective Agency is a Dungeons & Dragons adventure for four 1st-level characters.

The promises of glory and the chance of riches draws you to Blasingdell, a small village near the infamous Stone Tooth. Within the rocky mountain lay the dwarven stronghold Khundrukar and the fabled Forge of Fury, to which a chance encounter provides you with the location of a hither-to unknown entrance. Are you brave enough to explore this mystery? Will it lead you to wealth or to your doom?
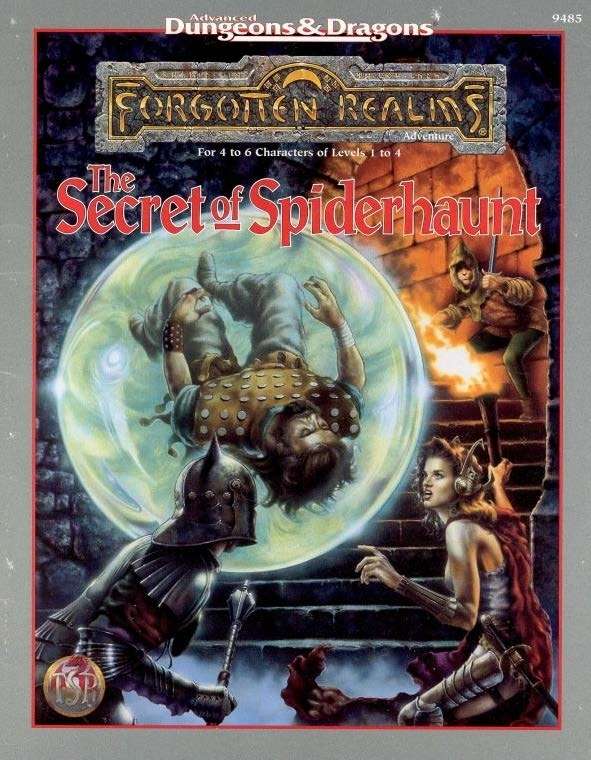
The infamous Sword of the Dales has always held a certain fascination in the eyes and hearts of the citizens of the Dalelands. Thus, it was no surprise when Randal Morn, rebel leader of Daggerdale, led an expedition into the crypt of a long-dead wizard to recover the weapon. Shaevyn the weapons-mage had created the Sword long ago, and it stood to reason that the blade would be waiting within his tomb. Perhaps the Sword of the Dales woulld allow Randal Morn to rule Daggerdale once again. But Randal Morn never returned from that fated party. Only tales of terror told by a lone survivor held any clues as to Randal's fate. A brave hand of heroes accomplished what Randal Morn's group failed to do in part one of this adventure trilogy, "The Sword of the Dales." Battling through the tomb's undead inhabitants, those heroes reached the burial crypt of Shraevyn. There, resting in the center of the coffin, was the Sword of the Dales, its azure glow filling the chamber. However, there was no sign of Randal Morn. Only a note signed by his hand held any clue as to his fate. "Seek me in Spiderhaunt," it proclaimed. "The fate of Daggerdale is in your hands." This is the second part of a trilogy of modules that began with "The Sword of the Dales." The saga concludes with "The Return of Randal Morn." TSR 9485

The Cloaks of Mulmaster have taken an interest in your progress, and may be looking to sponsor adventurers for future work. You’ve been offered an interview with one of their ranking members at the Theater of the Stars, but you never know what to expect in the City of Danger. A four-hour adventure for 1st-4th level characters.

"A hundred-year curse caused by a group of adventurers slowly turned a tower and the hills around it into a region touched by the very finger of death, where life is incapable of thriving. As the curse grows in power and reach, on its way lie the town of Beregost, whose population now suffer, sicken and die every day under these nefarious powers. The government and local clerics infrutiferously attempt to remedy the situation, while desperately seeking any who could help them." Tower of the Pale Lady is a 4-hour adventure for a group of 1st-4th level characters. It is set in the town of Beregost, at the southern edge of the Sword Coast, in Faerûn, in Toril, in the Forgotten Realms. However, with little modifications, you can run this adventure in whatever world you wish. This adventure includes NPCs related to the story and to the Forgotten Realms, which might bring your players to other different plots as they play through. New ways of using old spells and items, presented as introduction to reinforce creative possibilities throughout play.
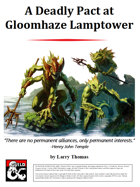
The shipping lanes south of Candlekeep have been disrupted. Unknown to anyone, an incredible alliance between a terran and a waterfolk tribe has caused the lamp at Gloomhaze Point lamptower to be extinguished. Merchant ships are being wrecked and plundered. The story unfolds in the nation of Amn. Adventurers will face a formidable kobold tribe that knows how to maximize its tactics, its smaller-than-human size tunnels, and an abundance of unique traps. The bloodthirsty sahaugin won’t be defeated without the adventurers taking a dive.

The young heroes are invited to Massie Littlefoot’s birthday party before she departs for wizarding school in Waterdeep. At the height of the party, Clonker, an ogre known to live nearby, steals Massie’s cake! The heroes must brave the forest and get Massie’s cake back before everyone goes home. This introductory adventure is designed for level 1-2 characters. What Is This Project? An Ogre and His Cake is an introductory 5th edition Dungeons & Dragons adventure built for and tested by kids. It is every parent or guardian's dream to share their passions with the young ones they love. We hope Clonker, the lovable ogre, opens these doors for you. We also want to support children and families who are unable embark on every adventure. All of our creator royalties (50% of what you pay, with the other 50% supporting the upkeep of the Dungeon Masters Guild and Wizards of the Coast) will be donated directly to Extra Life, a non-profit organization focused on supporting children's hospitals through communal gaming events.

𝐓𝐡𝐢𝐬 𝐢𝐬 𝐭𝐡𝐞 𝐭𝐡𝐫𝐢𝐥𝐥𝐢𝐧𝐠 𝐟𝐢𝐧𝐢𝐬𝐡 𝐭𝐨 𝐭𝐡𝐞 𝐓𝐨𝐰𝐞𝐫 𝐨𝐟 𝐁𝐨𝐧𝐝𝐚𝐠𝐞 𝐟𝐞𝐚𝐭𝐮𝐫𝐢𝐧𝐠: ● Eight deadly encounters ● More deadly traps ● The water maze ● and Aumvor himself! Will your PCs escape with their lives or stand and face Aunvor and put an end to his deadly game?

This adventure is designed for the D&D Adventures League Season 5 - Storm King’s Thunder campaign, and is meant to enhance your party’s connection to important events and NPCs. While it is intended for a party of around 6th level, the nature of the quest is such that it fits easily with a higher level as well. It will put your players in contact with Felgolos, the bronze dragon that is encountered in Chapter 9 of D&D Adventures League Season 5 - Storm King’s Thunder, as well as the ancient dragon Iymrith, who plays a prominent role in the main plot. Of course, you can also change names and locations to make this adventure fit into any other campaign world – as long as it has dragons and deserts. Enjoy!

Times are hard in the Hillsfar countryside, especially for those of non-human ancestry. Unscrupulous merchants in league with the hated Red Plumes bleed local farmers and artisans dry. Perhaps some of those loot-laden caravans coming and going from Hillsfar could use a bit of liberation? A four-hour adventure for 1st-4th level characters.

Scholars Square is a relatively quiet corner of Phlan, but a series of odd thefts have the headmasters of verious schools in the area concerned. The headmasters' pleas for help have gone unanswered by the Black Fist, and the Lord Sage of Phlan decided to reach out to you and your kind to bring those responsible to justice.
In 1492 DR, a group of adventurers are approached by a ghost in Candlekeep who urges them to investigate the unsolved, grisly murder of the Yellowcrest family in Waterdeep five years prior. The investigation leads the adventurers to the nearby village of Greenfast, which is plagued by a secretive cult.

"Night falls on the Border Kingdoms, a land rife with conflicts and schemes, where lords, counts, dukes, kings, and emperors rise, proclaim themselves, and are swept away with the speed and regularity of waves crashing upon a shore. As you settle in for the evening at a quaint little roadhouse by the name of Harker’s Cleaver, all seems quiet. Were the stories of this turbulent region just that, or have the Border Kingdoms yet to reveal their true nature?" A Two-Hour Adventure for 1st and 2ndLevel Characters The tavern the characters are staying at are attacked by skeletons. Where have they come from and why have they attacked?

Meaningful decisions, unexpected twists and memorable characters are the foundations of this dark 4-hour adventure for 5th to 10th level characters. A chance encounter on an unassuming road leads to a dangerous and lucrative opportunity. But what seems simple on the surface turns out to be much more below. Thrust into a world where every enemy has an enemy and everyone has their own dark motive, the only chance to survive is to ally with the right foe. Sometimes “doing the right thing” comes only in shades of black. Six Summoned Swords is a stand-alone adventure that begins on the side of the road leading to Phlan and can be easily accessed by any adventurers traveling through the Moonsea region. In addition to a world full of intrigue and complex character choices, purchasing this adventure includes: An Official Adventurers League magic item certificate Printable portrait cards with roleplaying tips for important NPCs Gridded reference maps for combat encounters Condition icons to help track character status Special Certificate Holder ideal for event play NEW: Season 8 Item Unlock Handout - prints 9 to a page, one for every player! * Looking for an adventure to run at your special game day or convention? This adventure includes a “certificate holder” that features specially created art of the adventure’s magic item. When printed in colour and on card stock, it perfectly frames the official AL magic item certificate from this adventure and makes for an unforgettable souvenir. About the Swords Below the Moonsea Saga The saga consists of three adventures, with this adventure serving as a stand-alone prelude. The series continues with Six Striking Swords and Six Swords Unbound, the two of which should be played in tandem.

"Ribbons of blood dance through the air, tracing wide crimson arcs before fraying into thousands upon thousands of bright red droplets. The cheerful tavern atmosphere evaporates in a moment, rent apart by screams and cries. A woman with grey hair stands near the bar, grasping at the dagger in her throat with fingers made slippery by blood. She sways and collapses. More screams. A man stands before her. He is holding the hilt of the dagger, but lets it slip from a gory hand as the woman falls. He freezes for a moment, then spins and sprints away, knocking aside people as he goes. A young, flaxen-haired woman at the back of the tavern cries out, “Stop him! Stop him!” as he approaches the entrance – the entrance where you and your comrades are standing. What do you do?" A lonely outsider murders a popular village local before a room full of witnesses. But could he be innocent? The Lurker Beneath Red Larch is a 4-6 hour adventure for characters of 3rd-4th level. It is full of roleplaying, problem solving and challenging combat encounters.