
The Free City: a shining gem in the crown of cultured civilization. Beneath the surface of this bustling metropolis is a rot, festering in the darkness, manipulating the lives of those unaware of its presence. Now a small adventuring band from out of town may be in over their heads. Their actions in Diamond Lake have attracted the wrath of one of the city’s hidden masters. A gang of infiltrators and an enigmatic mastermind plot their destruction, and only tracing the rot to the root can stop the onslaught. "The Hall of Harsh Reflections" is the fourth installment of the Age of Worms Adventure Path, a complete campaign consisting of 12 adventures, several "Backdrop" articles to help Dungeon masters run the series, and a handful of poster maps of key locations. For additional aid in running this campaign, check out Dragon's monthly "Worm Food" articles, a series that provides additional materials to help players survive this campaign. Check out issue #336 of Dragon for five attractions to tempt your PCs to spend some of their hard-earned loot. This issue of Dragon also features an Ecology of the Spawn of Kyuss, one of the central creatures featured in this campaign. Pgs. 34-60
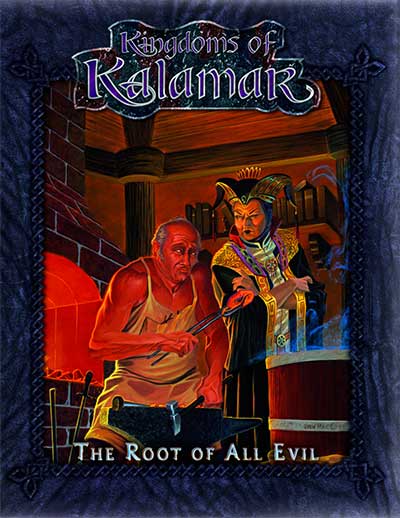
This was supposed to be a simple job! In the small town of Haanex on Reanaaria Bay, the wizard Veoden assembles the PCs to do a simple job: find the remnants of a meteor said to be made of the rare substance mithral. First they must find a map that local rumor tells is guarded by the spirits of the dead. Upon recovering the map and locating the crater, they uncover a plot to create a powerful magical item called the Coin of Power. This artifact is a tool for wickedness and the players soon find themselves on a quest to learn the means to destroy this evil item and its insidious master before she destroys them. Complicating matters is the fact that the one man who can help them was lost during an expedition to the Reelio Jungle months ago and is yet to return. Will the PCs be able to survive the rigors of the jungle and solve the riddle of the tribesmen who live there? The lives of innocents might depend on it! This accessory provides characters with an elaborate storyline and a chance for many varied types of adventure. You will take your PCs from the quiet village of Haanex in northern Reanaaria Bay to the Vry Naasu Headlands, the City-State of Zoa and finally the forlorn Reelio Jungle. The Root of All Evil fantasy game supplement is set in the popular Kingdoms of Kalamar Dungeons & Dragons campaign setting but can be adapated for use in any setting! This module can be used by itself, or as Part One of the Coin of Power trilogy (see also Forging Darkness and Coin’s End).

Up here in the mountains, the sun sets fast. The path has narrowed yet again as it diverts into this small slot valley. A gentle stream parallels the path; it’s pretty, but the smell of rotting vegetation dissuades from lingering long. In the lengthening shadows, birdsong seems oddly muted. As the forest clears a bit up ahead, a small manor upon a little pond comes into view. The birds have gone completely still. K1: Night at Fausen’s Manor is an investigative adventure designed for player characters around 3rd level. The players have been invited by the reclusive Lord Fausen to dine with him and discuss a job; Fausen is troubled by odd bumps and sounds in the night, something has been interfering with his mail, and recently his butler, Grimly, has disappeared. The players investigate during a night at the manor, where dark secrets lurk around every corner. Published by Coldlight Press
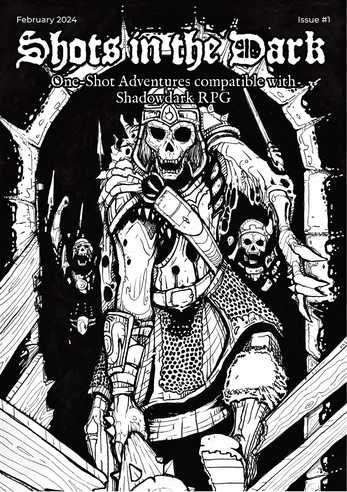
"The broken outline of Cear Ferros emerged on the horizon. Its ancient walls stand silent and looming as you approach them, casting long and eerie shadows across the land." An adventure through a cursed castle crawling with undead in search of missing merchants. For Shadowdark Published as part of the Shots in the Dark collection.

The Sea Witch is a short adventure for four 10th-level characters. The difficulty of the adventure can be adjusted by changing the level of main antagonist (Black Molly, the sea hag pirate) or by altering the number of her ogre servants. To tailor the encounter to groups of different levels, refer to table 4-1 in Chapter 4 of the DUNGEON MASTER’S GUIDE. The adventure is set off a lightly populated coastline known as Misty Bay, but adapts easily to any coastal region in existing campaigns. The sea hag known as Black Molly is a notorious pirate who has plagued the coastal cities for the better part of a decade. A successful Knowledge (local) check (DC 15) will reveal that Molly and her ogre crew have a filthy reputation as merciless killers who delight not only in plundering vessels for their riches, but also in destroying the ships themselves and sending all hands to the bottom of the sea. Now the villain and her followers have seized control of the Old Lighthouse of Misty Bay located off a lightly populated coastline. For generations the lighthouse beacon has protected the fishermen of this region, warning them of the dangerous rocks that lurk just below the level of the high tides. Recently, the hag has put out the beacon, darkening the lighthouse; misery and destruction are sure to follow as ships start to blunder into the rocks. Blackmail is apparently Black Molly’s aim in this venture: She conveyed a message to the nearest shore community, the fishing village of Poisson, demanding the princely sum of 50,000 gp. Until she receives this ransom, she intends to hold the lighthouse and its beacon hostage. The fate of the human keepers who tend the lighthouse is unknown to the seaside communities at this time, but they fear the worst. The Sea Witch is ostensibly a rescue mission: The PCs are pitted against the evil of Black Molly and the brawn of her savage ogre crew. It is the heroes’ task to retake the lighthouse and, if possible, free its captives from the clutches of their jailer. What neither the PCs nor the shore communities yet realize is that while she 1would be pleased to have the gold, Black Molly is in fact after bigger treasure. Molly has no intention of giving up the lighthouse — at least, not until she finds what her master sent her here for. Lying on the sea floor practically at the base of the rock on which the lighthouse sits is the wreck of the war galley Flying Cloud, which according to popular legend was captained by a cleric who wore around his neck an amulet of the planes. Black Molly wants this prize, but so far she hasn’t been able to find it. She’s scoured the wreck without finding any sign of the magic item. Now she’s trying to determine where to search next, for the item might well be somewhere near the wreck. If she can’t find it, she’ll start torturing her captives to find out if they have any useful knowledge about the amulet.
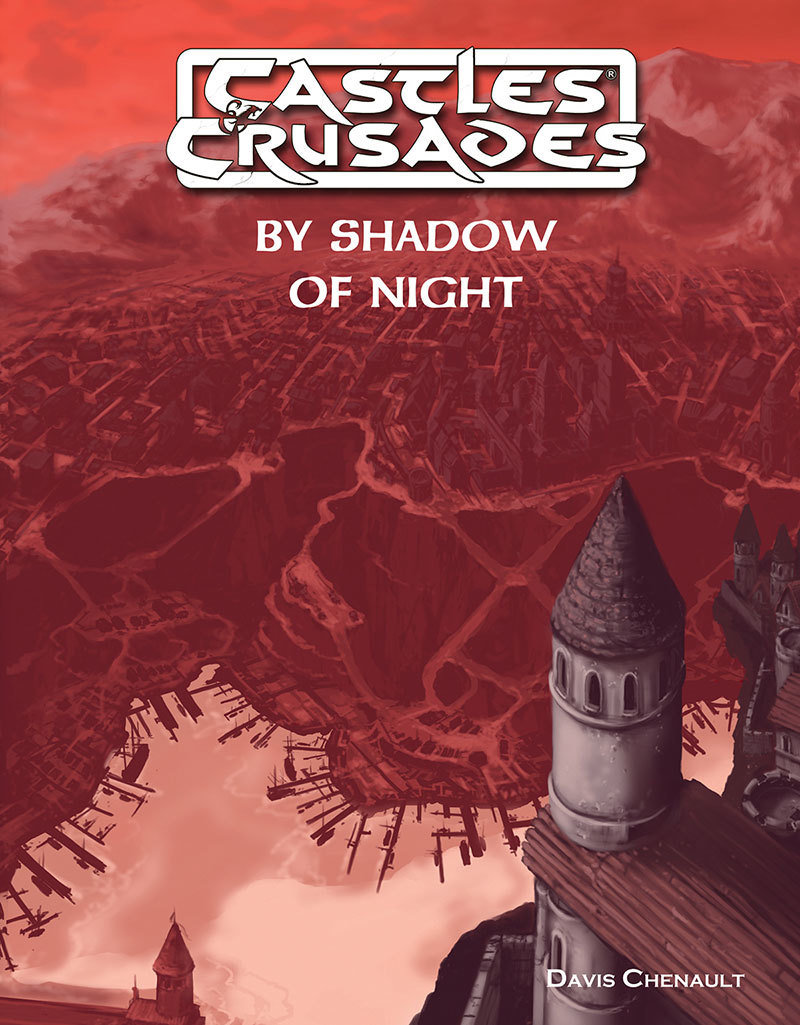
The City of Bergholt lies upon the southern shores of the Interzae. Her crumbling walls and ancient cobbled streets are little more than a backwater, controlled by powerful merchants and thieves. In these darkened streets and twisted alleys people claw their way to the top through violence and guile. In Bergholt, the fear lingers in every shadow. In By Shadow of Night you’ll find a complete detailed description of Bergholt, a rich cast of NPCs who all have their own plots and plans, over 20 encounter areas, including a small dungeon and a large fold-out map of the city. All this setting material comes to life in the dark and deadly adventure, also included within, that is By Shadow of Night. By Shadow of Night picks up after the Death in the Treklant series, available from Troll Lord Games, though it can be a stand-alone adventure if desired.
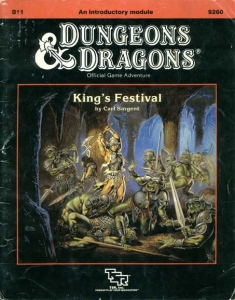
Someone has "borrowed" a cleric, and without him, the fabled King's Festival cannot go on. Unfortunately, it looks like the orcs have him, and your characters must rescue him. A great learning adventure, King's Festival provides players and DMs with a valuable introduction to fantasy role-playing in the land of Karameikos. Full of helpful hints for the players and the DM, this module also provides a full dose of excitement! Orcs, carrion crawlers, and villains challenge the characters' fighting skills, and a host of traps and puzzles confound their wits! TSR 9260
Goblins have taken over the town you live in. They are ransacking each and every building. You must either convince them to leave, or take them down.

Have you ever wondered what it would be like to actually encounter an area where someone has used Guards & Wards, Symbol, and other spells to actually fortify a location against casual intrusion and thievery? If you want to find out just how deadly a wizard's "getaway cabin" in the mountains can be when the owner isn't there to let you in, this is the adventure for you and your players. Suitable for a single session of play (unless characters get killed, forcing a retreat and later return), there's only one combat encounter, but the traps are deadly. Not recommended for parties below level 12. All of the defenses are based on actual PHB spells, although a couple are assumed to have been bound into items or interactions within the dungeon. This dungeon is originally from the "Against the Idol of the Sun" high-level hexcrawl campaign.
A Giant Ransom is a short adventure for four 11th-level characters. There are opportunities for diplomacy, stealth, and combat, based on the choices the PCs make, so any mix of classes is appropriate. The adventure can be set in any campaign world, in a frontier region near glacier-covered mountains. In the story thus far, the PCs have been tasked by Duke Ambrinigan, a local lord, to recover a stolen statue of a golden lion. The lion was stolen in transit by frost giant raiders, and was to be ransomed back to the Duke for 10,000 gp. The PCs were sent to perform the exchange. The giants, however, were attacked by the white dragon Whildenstrank, who stole the statue and retreated to his lair in the middle of a nearby glacier. The PCs encountered the remaining giants, and then set off westward toward the dragon's lair. They traveled across the flat part of the glacier, encountering the frost giant ranger Velg the Dragon Tamer, as well as some burrowing bulettes. Then they braved the hazards of frost worms and remorhaz in the Ice Canyons: a maze of twisting passageways surrounding the black spire of rock that the dragon calls home. The PCs now stand at the edge of an open space, looking at the towering edifice in front of them.
Freeport is a fantasy “free city” you can place in a fantastic setting. Its basic premise is a pirate city gone legit… at least on the surface. In truth, the pirate tradition is alive and well in Freeport, but camouflaged by a veneer of respectability. These days the city’s pirates are privateers, legalized pirates Freeport loans out to the highest bidder. You’ll learn more in the short history of the city that follows. This should help give you a taste of the flavor of Freeport before the adventure begins and the given background is all you need to run this adventure. It is an ideal starting place for a new campaign as the player characters find themselves stranded in Freeport after a deal goes sour. A seemingly simple job plunges them into the strange underside of the city, where they uncover secrets worth dying for. Death in Freeport is the first from the Freeport trilogy, together with Terror in Freeport and Madness in Freeport. Synopsis: Death in Freeport drops the player characters into the midst of political and magical intrigue, as the hidden Brotherhood of the Yellow Sign manipulates events to bring its dread god to the world. Freeport is still a bustling center of trade, but evil currents run beneath the surface. There are secrets here, and questions unanswered. The characters will undoubtedly learn there is more here than they expect in a simple seaport. The question is, will that knowledge kill them? As the adventure begins, the player characters (PCs) have just come to Freeport on a merchant ship. While on the docks, the PCs are attacked by a press gang, who mistake them for easy marks. The press gang is handily beaten off; since they are unused to real resistance. A bookish young man named Brother Egil then approaches the PCs. He says that he’s been looking for a group that can take of itself, and that he has a job for them if they are interested: finding a missing librarian. The missing man, Lucius, disappeared two days previously, and Egil is eager to find him. Egil gives the PCs some background on Lucius and his strange behavior. The PCs are then free to investigate: They are likely to visit Lucius’s home, the temple to the God of Knowledge, and an orc pirate ship. This should form a picture of Lucius as a man searching for his own past—who found something he wasn’t counting on. Following a trail of clues, the PCs learn about the Brotherhood of the Yellow Sign. With a little luck, the PCs can trail the cultists back to their hideout, penetrate the lair, and discover secret tunnels underneath it. Deep underground they find degenerate serpent people, and eventually Lucius himself. The librarian has been tortured badly and will die without aid. The PCs also have to deal with the leader of the cult, a man they may recognize from the temple. When the cult priest is slain, they are in for an even bigger surprise. He was not human at all, but a serpent man in disguise. What this means for Freeport only the gods can say.

This short adventure is set in the Forgotten Realms campaign setting; it may be run as a standalone adventure, or as a side trek for a larger module . Alternatively, this adventure could be inserted into any campaign setting. Trouble is brewing near the town of Red Larch; specifically, in the caves near Lance Rock. A few good adventurers are needed to investigate the increased orc and ogre sightings in the area.

5e Solo Gamebooks presents Citadel of the Raven, the third in our series of solo adventures. Citadel of the Raven is the sequel to Tyrant of Zhentil Keep, but is also playable as a standalone solo adventure. The first solo adventure in this series is titled The Death Knight’s Squire. At 589 entries, you can expect a lot of variety from this solo quest. There are several main paths your character could take, and numerous encounters and options on those paths (including short sub-threads designed for specific classes), making the number of possible adventures practically endless. Add to that the characteristics of your class, and the numerous variegated combat encounters, and it’s safe to say that no two run-throughs of Citadel of the Raven will be the same.

“Come! Sit! Be my guests. You will find that dinner is up to the highest standards, and I’ve even provided a show.” When the adventurers entered the manor of the old mayor they did not expect to fall into another plane of existence. It seems Archmage Lonore was ready for their arrival, and had arranged the finest entertainment... for herself. Can the adventurers survive Lonore’s death trap and capture the mad mage once and for all? This one-shot adventure is designed for characters of 6th level, and contains plenty of traps, encounters and misdirection. Adventure Synopsis Chasing the bounty on a murderous archmage, the characters find themselves plunged into an arcane deathtrap. Their quarry was prepared for their arrival, and had devised entertaining challenges (for herself) in this magnificent mansion demiplane. The characters will fight through various arcane hazards on their path to the inner sanctum of Archmage Lonore. As they get deeper and near the sanctum, the characters will meet the mage and her mother, possibly learn a bit about the relationship between them. This encounter leads to the final showdown in the archmage’s sanctum, where the orb of reality is located. The adventure includes a map for every encounter! (Print & VTT versions) Published by Beyond the Screen
Reavers of Harkenwold pits the heroes against the Iron Circle, a company of cruel mercenaries that has seized control of the small land of Harkenwold. In this adventure, the heroes become daring rebels and lead the folk of Harkenwold against their oppressors.

A mysterious clue has led you outside of the safety of the city’s walls and into the jungle beyond. You have been asked to venture into the jungle and seek out the wisdom of some of the native humanoids in the area—perhaps they will be able to shed some light on the situation and provide some insight on who is behind it all. Part Two of The Jungle Has Fangs Trilogy.

A museum of the Mad Archmage, it contains curiosities and treasures from all over the multiverse, and the challenges of the Watery Caves, which are a series of living caves connected by an underground river. This adventure can be used as an expansion to the Castle of the Mad Archmage mega-dungeon adventure, or as a stand-alone adventure. Published by BRW Games

A town in Falkovnia finds itself stuck in a time loop that repeats the final hour before it is overtaken by a legion of undead. Only the PCs and a mysterious crone are able to remember the events of each cycle. The heroes must find a way to prevent the destruction of the town and stop the cycle of death!
Provost Faurious has procured an Aethervane, an astrolabe-like instrument tied to Kythri that's used to navigate manifest zones. Unfortunately for the Provost, the Riedran ship that was carrying the Aethervane across the Sea of Rage to deliver it to their agent in Regalport fell victim to piracy. The player characters are dispatched to Regalport to meet up with the Provost’s agent there and petition High Prince Rygar for more information about the stolen cargo. When the characters dock in Regalport, they meet the Provost’s contact and are ushered into a meeting with High Prince Rygar. Wishing to show his intolerance for piracy, Rygar charters one of his own ships for the party’s use as they investigate the stolen cargo. Upon arriving at the crash site of the stolen cargo, the party is set upon by a fleet of pirates known as the Wind Whisperers. When things turn sour, a new surprise reveals itself as an unnatural storm rolls in, a stolen airship at its heart. The Wind Whisperers have found a way to convert the Aethervane to serve their own purposes. Seeking aid from Rygar and House Lyrandar, the heroes chase after the pirates by sail and airship. As they do, they are bedeviled by the Chaos Fleet—strange ships sailed by an even stranger crew that are drawn to the Aethervane and the chaos it brings. In a final airborne confrontation, the party boards the rogue airship and retrieves the sought-after artifact, with a chance to salvage or sink the stolen vessel in the process…
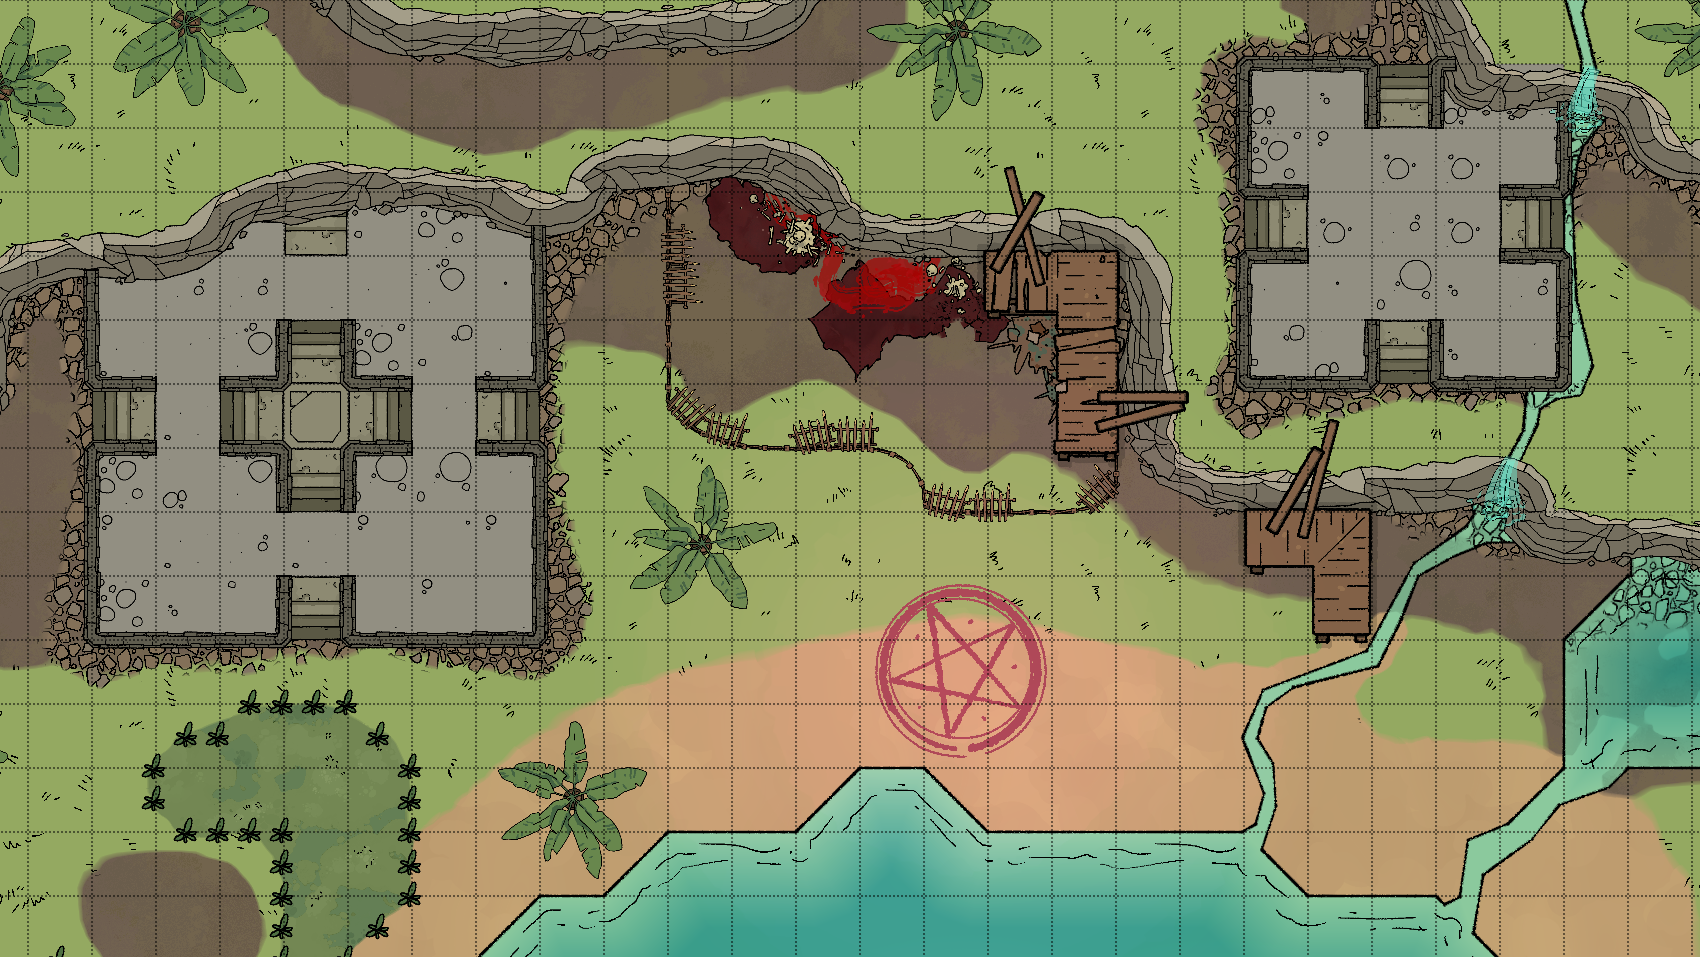
Fight on the Beaches is the second of a collection of plug-and-play combat encounters for your 1st-Echelon Draw Steel campaign. These encounters are not strictly contextualized in any narrative. They are not adventures themselves, nor are they carved from any over-arching adventure. They're adventure-agnostic, so that you can just plug them into your own adventures and PLAY! Two encounters are enclosed. Each encounter consists of: - A map ready for use in VTT - A reference map for the Director - Some number of victory point conditions and mechanics of the encounter - Three monster tables (one for each level) for parties of 2-6 heroes. - Tips for monster tactics at each level In This Set: 002A: Wash Out the Coastal Ruins - Fight above the waves in ancient ruins guarded by lizardfolk, bugbears and angulotls, or wode elves! Features a very dangerous new dynamic terrain object. 002B: Summon Goxomoc - Hold back hordes of demons while summoning the Protector of Ix! Multiple zones of control, waves of enemies, a very complex fight designed to take 5 rounds.