
The wizard Kavorquian is dead. But certain items belonging to his adopted son were in the wizard's keeping at the time of his demise. Now someone must venture into the silent vaults of Kavorquian's stronghold and recover the missing property. Queen's Harvest picks up its story where B11, King's Festival, left off. It can be played as a sequel to that adventure or as a complete adventure in itself. It is tailored for beginning Dungeon Masters and players and contains helpful hints on adventuring and the land of Karameikos. The story develops simply, but ultimately leads the player characters into the nether reaches of Penhaligon's politics to confront Ilyana Penhaligon, mad pretender to the throne! TSR 9261

When Volothamp Geddarm hires you to recover a missing key, you find yourself wrapped up in a series of murders in Lower Skullport. Can you find the killer before they find you? Part One of the Skullport Shakedown trilogy. A Two- to Four-Hour Adventure for Tier 2 Characters. Optimized For: APL 8
The brilliant (if somewhat eccentric) detective Viktor Saint-Demain has put more criminal masterminds behind bars than any three other inqusitives. But when the master sleuth fails to get the recogintion he deserves, he sets out to prove to Sharn that they can’t live without him. Pgs. 16-34

In Prisoners of the Drow, a band of adventurers storm a drow outpost, confront the drow mage in charge of it, and rescue prisoners held within. The heroes must bypass traps and devious defenses to reach their goal and accomplish their mission. The adventure is designed for a party of five adventurers between levels nine and twelve. It features: Encounters by Level - Varying types and quantities of creatures are suggested based on the party's actual level, allowing each encounter to present the appropriate challenge to the party. Encounter Notes - Suggestions for how to run combats are provided for game masters who place an emphasis on engaging, tactical battles. Inciting Action - Suggestions for ways to present the adventure to players are provided. Ease of Use - The format and style of the document allows the game master to find information quickly while running the game at the table. Detailed Maps - What's an adventure without maps? Not much else to say here. This adventure is designed as the first in a two-part series. The second adventure Into the City of Spiders takes the adventurers into a drow compound far from the surface. https://www.drivethrurpg.com/product/247674/Into-the-City-of-Spiders

In part one of the Randal Morn Trilogy, "The Sword of the Dales," the legendary leader of Daggerdale, Randal Morn, was captured by unknown assailants as he sought to regain the great weapon for which that adventure was named. A stalwart band of enthusiastic heroes was recruited to ride to his aid, yet all they recovered was the Sword itself and a message: "Seek me in Spiderhaunt Wood." In the second part of the trilogy, "The Secret of Spiderhaunt," those same adventurers found Randal and freed him briefly, yet he was almost as quickly torn from their grasp by an agent of the evil Zhentarim, seeking to end the threat of Randal Morn's return to power. In this final episode, the heroes must follow the kidnapper's trail and rescue Randal Morn again before the Zhentarim finish interrogating him and the axe falls upon his neck. Armed with the Sword of the Dales and aided by a powerful spirit that lives within the weapon, the heroes must march into the heart of Zhent-occupied Dagger Falls, free Randal Morn, and save the city from utter destruction. The job is dangerous - perhaps more than the heroes can handle - yet those who would live in songs and legends cannot concern themselves with living to a ripe old age! This is the final part of a trilogy of modules that began with "The Sword of the Dales" and "The Secret of Spiderhaunt." TSR 9488

Part of the First Quest Box Set TSR1105, this is an adventure designed to introduce new players and DMs to AD&D. The High Wizard Nethril asks the PCs to enter an old ruin and search it fro his missing apprentice. The ruin is not empty, though! Horrible things have moved in, so the search will be dangerous... First Quest Adventure Book Pgs. 7-17

High in the Stonecrown Mountains, a new source of dark magic stirs, wakes, and spreads its wings to shroud the land in shadows. The Warlock of the Stonecrowns, an awnshegh regent who is as evil as he is powerful, is draining other regents' sources of magical power, choking their ability to cast the most powerful form of magic of all - realm magic! If that isn't enough, the Warlock threatens to close the only pass connecting the trade-kingdom of Cariele to the rest of Anuire. An army of orogs and ogres is gathering to the Warlock's banner: Are your heroes equal to the challenge of the twisted magic of the Warlock of the Stonecrowns? This open-ended, "adjustable" BIRTHRIGHT adventure is suitable for use with either mid-level (4-6) or high-level (7-10) player characters. TSR 3110

An omnious encounter with a fortuneteller sends a party of adventurers on a 200-mile journey across the Lands of Intrigue. While traveling throught the towns and terrain (detailed here for the first time) that lie in their path, they hear rumors and obtain clues about their mission. Their ultimate destination is Castle Spulzeer, a once proud stronghold that has become a den of terror. When the heroes enter the haunted keep, they meet a terrifying trio of residents: a madman armed with stolen magical power, a liche whose secret laboratory houses untold horrors and treasure, and a furious ghost bent on revenge. These three ensnare the party in their fight over an ancient weapon. Each will stop at nothing to keep it from the other two. The heroes must choose with whom they will ally - and the wrong choice could lead to their doom. Castle Spulzeer is an adventure complete in itself. However, as a crossover story, it offers every Dungeon Master a choice between two endings. The first leaves the party in the Realms. The second transports the characters to the Demiplane of Dread, where the plot continues in the Ravenloft adventure The Forgotten Terror. For 4 to 6 Characters of Levels 8-12 This conversion guide allows DMs to run the original module with 5th Edition rules. To use this conversion guide you will need a copy of Castle Spulzeer, originally available in hard-copy and now for sale in digital format on the DMs Guild. Visit Classicmodulestoday.com for instructions on creating your own classic module conversions and selling them on the DMs Guild. Castle Spulzeer was originally scheduled for publication by TSR in June 1997. Then, near-bankruptcy caused a total failure of TSR's schedule, resulting in no books being published from February through the very end of July. Some books would be delayed for over a year, and others would disappear altogether, but Castle Spulzeer was relatively lucky: it was just delayed four months, until October 1997. The reason may well have been its theming, and its crossover with the Ravenloft line, which made Castle Spulzeer a great Halloween release. Castle Spulzeer has an even more far-reaching connection: its ending can lead players to the demiplane of Ravenloft and The Forgotten Terror adventure. This was probably intended as a bit of advertising for Domains of Dread (1997), the third edition of Ravenloft which was released in August 1997. In other words: in their last days, TSR was working very hard to cross-market their products, but they didn't live long enough to see the success of the Spulzeer-Intrigue-Dread connection.
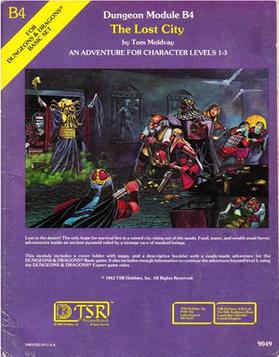
The Lost City is a low-level adventure, in which the only hope of the PCs' survival can be found in a ruined city slowly rising out of the sands. The adventure is set inside a huge step pyramid, with the lower pyramid only sketched out and the city itself described with a list of the major areas and a map. The adventure’s main villain is Zargon, a giant one-eyed monster and his minions. The entire double pyramid, not including the city, contains over 100 rooms. The module is designed to give novice Dungeon Masters experience fleshing out adventures and is only partially complete. Later TSR material hints that this adventure possibly takes place in Mystara, but the material is largely setting-neutral. TSR #9049

When a series of grisly murders and raids on farms and fishing boats come to light, accompanied by a strange fog, the people of Elmwood need heroes to investigate and stop the attacks. There is hardly anyone in the Moonsea who’s life hasn’t been touched by one of the tragedies over the past years, and these attacks may have deeper causes than anyone knows. Part of the Elmwood Adventures Series
Lord Falcon’s nest holds a new brood of evil. Falcon’s Peak is an AD&D® game adventure for 5-8 characters of 1st-3rd level. The party should include a thief and at least one experienced cleric; a ranger would also be of help. The use of stealth and silvered or magical weapons is advised.

The last of his line, Baron Paytro NeMoren has left his dark secret sealed for decades in the family's underground vault. Now, years after his death, a group of stalwart heroes has gathered according to the baron's final wishes. At last, the seal will be broken and the secrets of the vault revealed. Can all sins be forgiven? The adventure is designed to kick-off a campaign, as it provides for an interesting way to get the party together. Instead of meeting at a tavern or being recruited by the local militia, each party member starts with a key to the NeMoren's vault, a key that was handed down by a friend or given as a gift for some good deed peformed in the past. The executor of the estate has gathered together all of the key-holders so that they could claim the contents of the vault. The vault can only be opened with all of the keys in unison. The vault is protected by a number of minor traps and tricks, but it also became the final resting place for the Baron's ex-lover, Lisette, and her brothers--all three of whom had attempted to blackmail the Baron. They were buried alive and are now undead. To complicate matters, a young umber hulk made its way to the vault, leaving some crude tunnels that were later exploited by hobgoblins coming from another surface entrance. The party will need to deal with the hobgoblins, the undead, the traps, and possibly the young umber hulk. There is a side-plot of poisoned groundwater in the nearby town that the party can also resolve by clearing out the undead and properly disposing of the putrid corpses leaking into the groundwater from the vault. Produced by Fiery Dragon Productions

Indomitable it stood for centuries, a symbol of order in a world of chaos. Bastion of the pass through the Kamph Mountains, the very stones of the Keep of Adlerweg were the stuff of legends. What evil power had strength enough to take it? How were its defenses swept aside? Fell creatures now attend the battlements that overlook the only pass between Berghof and the sea. This is not a pretty problem to be solved by the militia of the local villages. These and more may be needed to withstand the mayhem stirred up by the fall of the keep. Indeed, if the Keep is not retaken, and retaken soon, the Hold of the Sea Princes itself may not be secure. Now is the time for heroic action. Aided by the Sentinel, former protector of the legendary Guardians of Adlerweg, have you the courage and the determination to rid the keep of its sinister occupants? UK3: "The Gauntlet" (1984), by Graeme Morris, is the third UK-series adventure and the second half of the two-part Adlerweg series. It was run as the final round of the GamesFair 1983 AD&D Open (and won by a RuneQuest fan!). It was then published in 1984. TSR 9111

In this scenario, the adventurers pass through magical portals into a series of interlinked chambers. The characters are encouraged by a young scholarly mage to voyage into the Sea of Pastures, to explore a mysterious island connected with a number of recent shipwrecks and disappearances. The island is grassy and windblasted, but eventually the characters discover a stone door leading into a subterranean complex. There, they discover 18 rooms linked by secret passages and magical portals. Most of these rooms have been ransacked by a variety of other survivors, human and monstrous. These survivors are likewise trapped within the labyrinth and are either eking out a miserable existence there or else desperately searching for a means of escape. Also within the building are a number of extraplanar creatures, collectively known as gingwatzim, who can shift between various forms: an energy form (glowing ball of light), an inanimate form (usually a magical weapon), and an animate form (an animal or monster). Eventually the characters may find the exit, and are once again deposited on the dreary islands to await rescue. TSR 9110

The characters, members of the Clifftop Adventurers’ Guild, have been tasked with acquiring the Chains of Mur’taal, an artifact tied to Thelanis, by their guild handler, Lhara. This artifact is the latest in a series that Provost Nigel Faurious has commissioned the Clifftop guild to retrieve for him. The adventure starts when the characters arrive in Rhukaan Draal via Orien caravan. They’re given a chance to explore a small portion of the city before they head to a local bar to meet their contact provided by Lhara. Accompanied by a local guide, they make their way to the Seawall Mountains, where they’ll have to follow clues and their intuition to find the Valley of the Hero, which conceals the artifact that they’ve been hired to obtain. In order to earn the artifact, characters must first pass three tests laid before them by the Story: The Test of Courage, the Challenge of Wisdom, and the Trial of Honor. Once they finish the tests and collect the artifact, the party heads back toward Rhukaan Draal. But there are Marguul forces in the area, and they don’t intend to let the heroes escape with a priceless piece of their folklore…
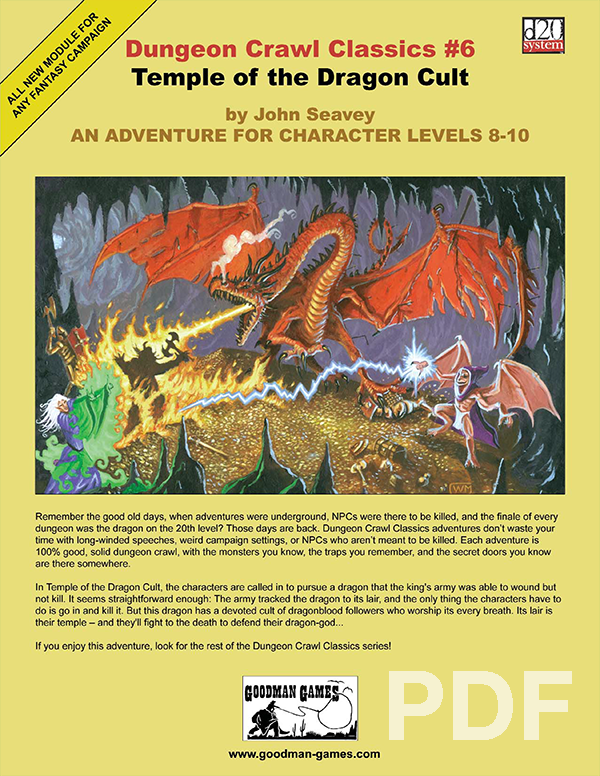
In Temple of the Dragon Cult, the characters are called in to pursue a dragon that the king’s army was able to wound but not kill. It seems straightforward enough: the army tracked the dragon to its lair, and all the characters have to do is go in and kill it. But this dragon has a devoted cult of dragonblood followers who worship its every breath. Its lair is their temple — and they’ll fight to the death to defend their dragon-god…

The battle against the slavers continues! You end your fellow adventurers have defeated the slavers of Highport, but you have learned of the existence of another slaver stronghold, and you have decided to continue the attack. But beware! Only the most fearless of adventurers could challenge the slavers on their own ground, and live to tell of It! Second part of Scourge of the Slavelords (A1-4) TSR 9040

Seer has learned of an attempt to intimidate Gralm, an ettin, and his followers into joining Bad Fruul’s army. Hsing comes forth to communicate that she wants you to see if you can find some way to either insure Gralm remains neutral, or to encourage the creature to challenge Bad Fruul to single combat in the hopes that he might wrest control of the hill giant’s forces and turn them back from Parnast.

Many Cannith creation forges were lost on the Day of Mourning, but a rogue artificer has uncovered one of those that pursued some of the most experimental and dangerous research during the Last War. But while seeking the forbidden knowledge in the forge, this explorer awakened a dark power that was more than she could handle, and that now threatens the region. Pgs. 4-34

Years ago the valley was green, and animals ran free through golden fields of grain. The princess Argenta ruled over this peaceful land and the people were secure and happy. Then one day a warrior riding a red dragon appeared in the skies over the princess’ castle and almost overnight the tiny kingdom fell into ruin. Now only ruins and rumors remain, and what legends there are tell of a fabulous ruby still buried somewhere within the Palace of the Silver Princess TSR 9044