
The land lies under a curse. Fruit drops to the ground, its pulp black and rotten. Leaves curl and wither on the branches. Animals flee the parched vale, or starve. Long ago, the Downs prospered under the care of Druids, but the priests of nature have retreated deep into the woods and rarely show themselves. One old man claims that the Druids have the power to save the valley, if only someone could find their Oracle to seek help. Will you reach the Forest Oracle of the Druids in time? And if you do, can they really lift the curse? Or does the answer lie elsewhere? Only the most daring and cunning adventurers will save the Downs. N2: "The Forest Oracle" (1984), by Carl Smith, is the second AD&D adventure in the novice (N-) series. Unlike its predecessor, it is not intended for 1st-level adventurers, but instead for 2nd level and up. This conversion guide allows DMs to run the original module with 5th Edition rules and provides a reference sheet for encounters. Also contains suggestions for placement in the Forgotten Realms. To use this conversion guide you will need a copy of The Forest Oracle, originally available in hard-copy and now for sale in Digital format on the DMs Guild. Visit Classicmodulestoday.com to find out how you can create your own classic module conversions and sell them on the DMs Guild.

A shadow from the past, the Ghost Tower of Inverness has loomed ever larger in the mind of the great Seer of Urnst, Now he has convinced the Duke that an expedition should be organized to go to the ancient keep and recover its greatest treasure — the fabled Soul Gem. TSR 9038

Strange tales of a mad queen and a hoard of legendary treasure have driven adventurers into the jungles of the great trade road between Tiefon and Nextyaria for a generation, but now new information has come to light. A travelling bard has uncovered certain keys to the location of the lost queen's mysterious volcanic home, and the secret that may thwart her seeing immortality and invulnerability. Once again, the Barrens takes center stage as characters must via for a chance to grow rich and expand their legend among the heroes of the Nameless Realms! The Infamous Black Label series continues with this second part to the Barrens trilogy as characters must dodge the marauding forces of bandit lords, discover a wayward bard, and then journey to the caldera fortress of the Hall of the Spider Queen. What secrets does that dark sanctuary hold? Only time, dice, and the comradery of the gaming table will tell. This adventure is formatted to both 1E & 5E gaming rules.

The Sea Witch is a short adventure for four 10th-level characters. The difficulty of the adventure can be adjusted by changing the level of main antagonist (Black Molly, the sea hag pirate) or by altering the number of her ogre servants. To tailor the encounter to groups of different levels, refer to table 4-1 in Chapter 4 of the DUNGEON MASTER’S GUIDE. The adventure is set off a lightly populated coastline known as Misty Bay, but adapts easily to any coastal region in existing campaigns. The sea hag known as Black Molly is a notorious pirate who has plagued the coastal cities for the better part of a decade. A successful Knowledge (local) check (DC 15) will reveal that Molly and her ogre crew have a filthy reputation as merciless killers who delight not only in plundering vessels for their riches, but also in destroying the ships themselves and sending all hands to the bottom of the sea. Now the villain and her followers have seized control of the Old Lighthouse of Misty Bay located off a lightly populated coastline. For generations the lighthouse beacon has protected the fishermen of this region, warning them of the dangerous rocks that lurk just below the level of the high tides. Recently, the hag has put out the beacon, darkening the lighthouse; misery and destruction are sure to follow as ships start to blunder into the rocks. Blackmail is apparently Black Molly’s aim in this venture: She conveyed a message to the nearest shore community, the fishing village of Poisson, demanding the princely sum of 50,000 gp. Until she receives this ransom, she intends to hold the lighthouse and its beacon hostage. The fate of the human keepers who tend the lighthouse is unknown to the seaside communities at this time, but they fear the worst. The Sea Witch is ostensibly a rescue mission: The PCs are pitted against the evil of Black Molly and the brawn of her savage ogre crew. It is the heroes’ task to retake the lighthouse and, if possible, free its captives from the clutches of their jailer. What neither the PCs nor the shore communities yet realize is that while she 1would be pleased to have the gold, Black Molly is in fact after bigger treasure. Molly has no intention of giving up the lighthouse — at least, not until she finds what her master sent her here for. Lying on the sea floor practically at the base of the rock on which the lighthouse sits is the wreck of the war galley Flying Cloud, which according to popular legend was captained by a cleric who wore around his neck an amulet of the planes. Black Molly wants this prize, but so far she hasn’t been able to find it. She’s scoured the wreck without finding any sign of the magic item. Now she’s trying to determine where to search next, for the item might well be somewhere near the wreck. If she can’t find it, she’ll start torturing her captives to find out if they have any useful knowledge about the amulet.

The frost giants of the Ice Mountains have long held to the belief that a great Jarl will one day step forward to unite the families as Konung (king). With the Ordning shattered, Jarl Ryndölg believes that if he can locate Hartkiller’s Horn, a legendary artifact among giant-kind, he could be the one. He may very well have found what he is looking for. A great clarion call has echoed across the Hartsvale for two days, and the giants are all marching north, has Ryndölg done just that? A Four-Hour Adventure for 5th-10th Level Characters This adventure consists of three Parts, as follows: Part 1. The adventure begins with the characters having already arrived in Stagwick (whether sent by their faction or by their own, individual search for adventure and wealth) and have been briefed before preparing for an important journey to the north Part 2. From Stagwick, the players discover their guide has been killed and must make their way through the deadly cold fingers of the Ice Spires alone—either by skill or luck. Part 3. Once at Ise Festing, the group discovers it’s been inhabited by a troupe of Shatterblood Ogres whom they must defeat to gain access to the redoubt’s observation deck.

A vast, sprawling mega-dungeon beneath the ruins of a nearby castle. Reports have surfaced of stockpiles of wealth within the passages. Regions previously devoid of monsters are reported to teem with renewed activity. Magical and mundane traps have brought foolhardy explorers to their doom. Changes within the passages and chambers have rendered old maps and knowledge dangerously unreliable if not outright useless. To the bold and daring, only one message needs to be heard: the castle and its dungeons are once more ripe for exploration, and new legends are ready to be made. Note: This adventure requires three books for it to be complete (sold as a package): Adventure Book, Map Book, and Illustration Book. Published by BRW Games

Baron Rajiram’s forces have secured the Nelanther Isles and have scoured the Sword Coast for treasures. Now they have begun to explore a mysterious island that recently just popped into existence nearby. SEER seems to believe that an aboleth artifact is their goal. It is up to the adventurers, in competition with the baron, as well as aboleths, the Kraken Society, and the mysterious caretaker of the island, to locate the Eye of Xxiphu and avert catastrophic disaster.

The Dwarven clans are in chaos, and a powerful host of goblins stand poised to sweep over the land in a wave of death and terror. Only the Axe of the Dwarvish Lords- one of the most powerful weapons ever created by the dwarven race- holds the key to ultimate victory against the massing humanoids. Can the PCs brave the labyrinth of an abandoned dwarven stronghold to find the Axe? TSR 11347
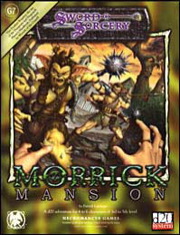
A Deadly Curse is Spreading! Morrick Mansion and the surrounding vineyards were deserted years ago when a terrible curse twisted every living thing on the property into a mockery of its prior form. Once whispered about and avoided, fear now grips the land. The curse spreads and someone needs to stop it. Can you find its source and cure it forever, or will the very curse you are investigating touch you with madness? Hatred, Death, and Danger! Morrick Mansion challenges adventurers to battle strange, mutant creatures in an effort to solve a mystery and stop an insidious curse. Do your players dare enter the mysterious mansion and can they survive long enough to discover the source of the curse?

A strangely delivered advertisement has led you to a sage named Demetrios. He needs a rare component to complete a desperately needed potion. The journey to retrieve it will take you through a large, unexplored swamp to a ruined keep, the former headquarters of a vile cult that once claimed the lives of many innocent youths. You cautiously accept the mission... To solve the mysteries of "Baltron's Beacon," the characters must excel in handling wilderness, building ruins, traps, puzzles, and new monsters. This adventure, originally designed for tournament use, is now available for your own campaign. TSR 9152

This adventure takes place in the Moonsea of Faerûn. The players have been brought to Melvaunt to search for the missing scions of the city's great families. To the north, in Thar the orc tribes converge on the ruined fortress of Xul-Jarak, flocking to the banner of a charismatic warlord. There, he intends to sacrifice the scions of the great families of Melvaunt in a bloodritual to Gruumsh. The players will escape Melvaunt, search along the wilderness of Thar for the Fortress of Xul-Jarak, and then explore the dungeons of the ruined fortress and hopefully rescue the scions before they are sacrificed. There also is a Web Enhancement by Eric Cagle on the archives of wizards of the coast's website designed to scale the adventure to level 8. For example, it replaces the Owlbear with a Tyrannosaurus. This is an easy to scale adventure with much of the player's difficulty coming from intelligently avoiding problems, choosing how to approach each floor in the most tactical way, and quickly adjusting when something goes wrong. The adventure has sidebars including common orc battle cries (In Orc!), ready to use orc names, weather and random encounter table in Thar, a description of what happens if the party fails or partially succeeds, and suggested minis for each of the encounters. There is even an extended description of the bloodspear ritual, an event the party is not meant to encounter in a normal run. The appendix is detailed for all the humanoid characters including the scions and their equipment, the named villains, and variety of unnamed orcs the party will encounter. The fortress also offers an opportunity to introduce the players to the Underdark and the Zhentil Keep. There is a passage to the Underdark the players can accidentally explore, and return to later. Emissaries from Zhentil Keep have come to watch the ritual and have their own motivations. These npcs provide an opportunity for exposition and role playing at a point which otherwise might be combat heavy, acting as a valve for the first floor - helping or hurting the party with subtle magic should the difficulty be off.

The mining town of Glister has a problem. The latest caravan only arrived with a part of its supplies. Orcs waylaid them, took much needed goods, and are now making demands that the town return an artifact that is theirs, but the town is unfamiliar with. Help track down information about this artifact and possibly defend the city from an orc invasion! A 4-hour Adventure for 1st-4th Level Characters Part 2 of Kossuth's Kiss

This was supposed to be a simple job! In the small town of Haanex on Reanaaria Bay, the wizard Veoden assembles the PCs to do a simple job: find the remnants of a meteor said to be made of the rare substance mithral. First they must find a map that local rumor tells is guarded by the spirits of the dead. Upon recovering the map and locating the crater, they uncover a plot to create a powerful magical item called the Coin of Power. This artifact is a tool for wickedness and the players soon find themselves on a quest to learn the means to destroy this evil item and its insidious master before she destroys them. Complicating matters is the fact that the one man who can help them was lost during an expedition to the Reelio Jungle months ago and is yet to return. Will the PCs be able to survive the rigors of the jungle and solve the riddle of the tribesmen who live there? The lives of innocents might depend on it! This accessory provides characters with an elaborate storyline and a chance for many varied types of adventure. You will take your PCs from the quiet village of Haanex in northern Reanaaria Bay to the Vry Naasu Headlands, the City-State of Zoa and finally the forlorn Reelio Jungle. The Root of All Evil fantasy game supplement is set in the popular Kingdoms of Kalamar Dungeons & Dragons campaign setting but can be adapated for use in any setting! This module can be used by itself, or as Part One of the Coin of Power trilogy (see also Forging Darkness and Coin’s End).

The Blacktooth Ridge, fabled for its string of long abandoned fortreses, treasure houses, temples, and underground mansions lies far to the north and east of the civilized lands. Dangerous journeys and the promise of treasure invite many an adventurer to the wilds along the Ridge. There they sek fame and fortune. But it is an altogether dangerous place, tainted with the evil of the Horned God, there in hidden caves and darkened temples some linger stioll who call him their master. Of late these creatures have issued forth to plague the few people who call the ridge home, the toen of Botkinburg most of all. Now, raids and plundering confound the settlements near the Blacktooth Ridge. Rumors of Rottenkip the Goblin King and his fearless warriors taking up residence in the Blacktooth Ridge are circulating. Ogres and Trolls are raiding villages and looting caravans. Few are coming to the aid of those beset by the depredations and the evil denizens of the Blacktooth Ridge continue to spill out ever further across the lands. The call has gone out, the mustering of militias is at hand, and the Blacktooth Ridge beckons to any and all willing to come to their aid and discover what is calling forth these foul creatures. Also available for 5E

Important: The adventure is 1e but it has monster conversion notes for D&D 4th edition The town of Highport, once a human community overlooking Wooly Bay from its perch on the northern coast of the Pomarj, fell prey to hordes of humanoids swarming out of the jungle-covered hills surrounding the settlement. Though the orcs, goblins, kobolds, ogres, and gnolls razed much of the place in their ferocious rampages, the smoldering ruins they left behind soon became a new kind of community, a place of trade between the humanoid “locals” and the unsavory human traders who have no compunction about doing business with them. Slaves are a commodity in ready supply in Highport’s market, since many pirates raid up and down the coast of the bay, putting fishing villages to the torch and filling their holds with captured refugees. Slavery has become a thriving business in the town, and rumors abound of a cartel of Slave Lords who run things from behind the scenes, filling their coffers in secret from the buying and selling of human chattel. The trade has become so prolific that the good folk to the north have grown tired of these depredations and decided to fight back. Forces of righteousness and honor have recently descended upon Highport, some openly and others in secret, in various attempts to destroy the machinations of the Slave Lords and abolish the abominable enterprise that has taken far too many loved ones from home and hearth. One such doughty servant of goodness is Mikaro Valasteen, a cleric of Trithereon. Mikaro slipped unnoticed past the crumbling walls of Highport with a single mission: to rescue and transport as many slaves to their freedom as possible. Mikaro and a handful of faithful assistants located a number of escaped slaves—as well as rescued a few more not sufficiently restrained and guarded—and shepherded them through the gates and beyond the reach of their humanoid tormentors, returning them to their lands and homes. This covert freedom brigade enjoyed remarkable success early on, since the servants of the Slave Lords were often lax in their vigilance and sloppy in their efforts to prevent loss of the “merchandise.” After one too many shipments never made its destination, the humanoids stepped up their security and the normal channels of escape from Highport closed to Mikaro and his team. He cannot risk exposure by smuggling the freed slaves through the gates as merchandise any longer, since shipments of goods are now regularly stopped and checked. No longer able to free the slaves in that manner, Mikaro began hiding his charges in an abandoned villa in a particularly rundown part of the town. Although they are safe for the moment, their numbers have grown unmanageable, and the priest fears it is only a matter of time before someone slips up and brings slavers to their doorstep. Ever more desperate to find a new means of escape from Highport, Mikaro has started work on a plan that is both daring and dangerous. He intends to use a series of old sewers coupled with natural caverns running beneath the town as an escape route to the sea beyond the walls. But he needs someone to clear out the creatures and pitfalls he knows lie within. Pgs. 2-27

Surviving the shipwreck is easy; living through the wizardly bet afterward is not. Their game could mean your lives. A storm caused the PCs' vessel to sink and is now forcing them to seek shelter in the keep on the remote isle. Their goal is to locate a boat or some other means of transportation to return to the mainland after the storm has passed. But first, they must survive the tests and traps the island's inhabitants have set for them. Pgs. 45-64
Run silently; the Midnight Stalkers are after you. Escape from the Tower of Midnight is an AD&D* game module for 2-6 thieves of 2nd-4th level. The Dungeon Master may change the names of the thieves’ guilds, countries, deities, and so forth to fit the individual campaign. Note that all player characters are assumed to have been imprisoned at the start of the adventure; little or no equipment will be available at first. This module is well suited for tournament use. Adventure Background It must be assumed, for the sake of the adventure to follow, that the PCs have no way of avoiding capture by the Midnight Stalkers. However, the DM may find a way to play out this adventure and have some or all of the PCs captured, allowing any who escape to attempt to rescue their comrades.

Indomitable it stood for centuries, a symbol of order in a world of chaos. Bastion of the pass through the Kamph Mountains, the very stones of the Keep of Adlerweg were the stuff of legends. What evil power had strength enough to take it? How were its defenses swept aside? Fell creatures now attend the battlements that overlook the only pass between Berghof and the sea. This is not a pretty problem to be solved by the militia of the local villages. These and more may be needed to withstand the mayhem stirred up by the fall of the keep. Indeed, if the Keep is not retaken, and retaken soon, the Hold of the Sea Princes itself may not be secure. Now is the time for heroic action. Aided by the Sentinel, former protector of the legendary Guardians of Adlerweg, have you the courage and the determination to rid the keep of its sinister occupants? UK3: "The Gauntlet" (1984), by Graeme Morris, is the third UK-series adventure and the second half of the two-part Adlerweg series. It was run as the final round of the GamesFair 1983 AD&D Open (and won by a RuneQuest fan!). It was then published in 1984. TSR 9111

What began as a subtle sickness has now spread into a full-blown contagion of magical origins around Roslof Keep! Although protected from the outbreak by their Mithel Standard, the Company of the Ivory Scimitar is now challenged with not only continuing their quest to defeat the Dungeon but also saving the town that they have grown to love. With unlikely allies forming from the other Mithel Companies, as well as unforeseen help within the labyrinth itself, the Ivory Scimitar must now take on the perilous task of curing the Violet Corruption while trying to discern the nature of its cause from somewhere deep within Mithelvanr's mad dungeon of self-propagating monstrosities! This adventure is formatted to both 1E & 5E gaming rules. Also available in PDF.

Some dozens of leagues to the north and west of the STEADING OF THE HILL GIANT CHIEF (Module G1 of this series), amidst the tallest mountain peaks, is the stronghold of Grugnur, Lord of Frost Giants. As frost giants have been amongst those who have been in the reaving bands, the party is to deal with them as the hill giants have been dealt with. Death and destruction are to be meted out to the frost giants in the same measure they gave to the peoples below. This module contains background information, referee's notes, two level maps, and exploration matrix keys. It provides a complete module for play of ADVANCED DUNGEONS & DRAGONS, and it can be used alone or as the second of a three-part expedition adventure which also employs DUNGEON MODULE G1 (STEADING OF THE HILL GIANT CHIEF) and DUNGEON MODULE G3 (HALL OF THE FIRE GIANT KING). TSR 9017