An ettin has begun terrorizing the hamlet of Newkeep, stealing cattle and smashing homes—and flattening anyone who tries to stop him. Meanwhile, a mysterious riddle has appeared on the walls of the local shrine—a riddle which may hold the key to vanquishing the ettin.

"Blood Money" is a caper adventure in which the adventurers work outside the law to pull off a major robbery. Good planning is essential, and the characters need to stay cool under pressure.

A gang of ogres is raiding a farming community, stealing crops and livestock, and advancing closer and closer to the town, and the townsfolk need your help!
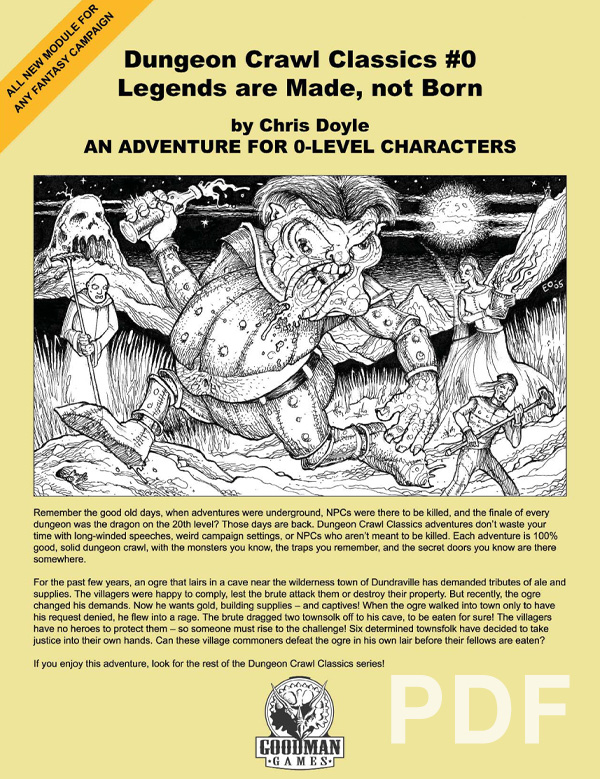
An Adventure for 0-Level Characters Remember the good old days, when adventures were underground, NPCs were there to be killed, and the finale of every dungeon was the dragon on the 20th level? Those days are back. Dungeon Crawl Classics don’t waste your time with long-winded speeches, weird campaign settings, or NPCs who aren’t meant to be killed. Each adventure is 100% good, solid dungeon crawl, with the monsters you know, the traps you fear, and the secret doors you know are there somewhere. For the past few years, an ogre that lairs in a cave near the wilderness town of Dundraville has demanded tributes of ale and supplies. The villagers were happy to comply, lest the brute attack them or destroy their property. But recently, the ogre changed his demands. Now he wants gold, building supplies — and captives! When the ogre walked into town only to have his request denied, he flew into a rage. The brute dragged two townsfolk off to his cave, to be eaten for sure! The villagers have no heroes to protect them — so someone must rise to the challenge! Six determined townsfolk have taken justice into their own hands. Can these village commoners defeat the ogre in his own lair before their fellows are eaten?

Important: The adventure is 1e but it has monster conversion notes for D&D 4th edition The town of Highport, once a human community overlooking Wooly Bay from its perch on the northern coast of the Pomarj, fell prey to hordes of humanoids swarming out of the jungle-covered hills surrounding the settlement. Though the orcs, goblins, kobolds, ogres, and gnolls razed much of the place in their ferocious rampages, the smoldering ruins they left behind soon became a new kind of community, a place of trade between the humanoid “locals” and the unsavory human traders who have no compunction about doing business with them. Slaves are a commodity in ready supply in Highport’s market, since many pirates raid up and down the coast of the bay, putting fishing villages to the torch and filling their holds with captured refugees. Slavery has become a thriving business in the town, and rumors abound of a cartel of Slave Lords who run things from behind the scenes, filling their coffers in secret from the buying and selling of human chattel. The trade has become so prolific that the good folk to the north have grown tired of these depredations and decided to fight back. Forces of righteousness and honor have recently descended upon Highport, some openly and others in secret, in various attempts to destroy the machinations of the Slave Lords and abolish the abominable enterprise that has taken far too many loved ones from home and hearth. One such doughty servant of goodness is Mikaro Valasteen, a cleric of Trithereon. Mikaro slipped unnoticed past the crumbling walls of Highport with a single mission: to rescue and transport as many slaves to their freedom as possible. Mikaro and a handful of faithful assistants located a number of escaped slaves—as well as rescued a few more not sufficiently restrained and guarded—and shepherded them through the gates and beyond the reach of their humanoid tormentors, returning them to their lands and homes. This covert freedom brigade enjoyed remarkable success early on, since the servants of the Slave Lords were often lax in their vigilance and sloppy in their efforts to prevent loss of the “merchandise.” After one too many shipments never made its destination, the humanoids stepped up their security and the normal channels of escape from Highport closed to Mikaro and his team. He cannot risk exposure by smuggling the freed slaves through the gates as merchandise any longer, since shipments of goods are now regularly stopped and checked. No longer able to free the slaves in that manner, Mikaro began hiding his charges in an abandoned villa in a particularly rundown part of the town. Although they are safe for the moment, their numbers have grown unmanageable, and the priest fears it is only a matter of time before someone slips up and brings slavers to their doorstep. Ever more desperate to find a new means of escape from Highport, Mikaro has started work on a plan that is both daring and dangerous. He intends to use a series of old sewers coupled with natural caverns running beneath the town as an escape route to the sea beyond the walls. But he needs someone to clear out the creatures and pitfalls he knows lie within. Pgs. 2-27

You are Erystelle of Dorneryll, famed elfin champion and magic-user. After years of adventuring, you have come home to the Emerlas - the hauntingly beautiful elfin woodland at the tip of Canolbarth forest. A place of legends and of peace. The journey has been long, but soon the winding forest track will bring you to Dorneryll, the majestic oak tree home of your childhood. Ahead, you glimpse a plume of smoke curling lazily into the sky. Dorneyll is close, and your mind floods with thoughts of home. Suddenly, your reverie is shattered! The thin plume of smoke is gone, an in its place a column of red flame leaps high among the trees. Dorneryll is under attack! Gripping your lance, you urge your mount into a gallop. Starbow surges forward; your war dogs close on her heels... Blade of Vengeance is an adventure for one player and one dungeon master, featuring a lone elf against the forces of evil. Can you save the Emerlas from destruction? The answer waits inside. TSR 9108
The party is enlisted to assist the Righteous Host, an army formed as a last resort to defend the world against the monsters of Elemental Evil. The host is greatly outnumbered. Its leaders send the party on a series of missions, each of which will give the Righteous Host an edge in the great battle to come. This epic adventure ends with the final push against the forces of Elemental Evil in the Meadows, and the outcome is informed by how effective the party is in their missions... and whether they are willing to risk putting themselves in the front lines. If the Righteous Host loses, players may decide to travel to Hommlet or other nearby towns to defend them. Whether the host is successful or not, players can decide to follow many different plot threads: exploring the Temple of Elemental Evil, finding the lich Kell the Eldest's lair and destroying his phylactory, or following the will of Bitbaern's Shield and discovering historical sites that were previously lost. Pgs. 44-69

The trees part before you, revealing the crumbling walls of the ruined keep. Only hours ago, you set off after the marauding orc band responsible for the destruction of the temple of Freya and the theft of its sacred crucible. But something else waits for you within the ruined walls. Something darker and far more sinister. Something that has hidden from the light for ages.

Only True Heroes Can Find Honor Among Thieves … They lurk in the Ralferst Forest, striking out at all who pass through, robbing traders, assaulting farmers, even killing with impunity. Working from a secret base deep in the forest, a band of thieves has struck fear into the heart of Brandon's Bridge, the little village at the crossing of the Azure River. But now a band of heroes has come, seeking glory and adventure - heroes that might just be up to the challenge of driving away the Thieves in the Forest. Thieves in the Forest is a beginner-friendly, introductory OGL adventure. It features: A wilderness adventure segment featuring the Ralferst Forest, a dense wood crisscrossed with paths and fraught with perils. The nature of the forest and paths makes it easy for less experienced players and GMs to deal with this non-dungeon environment. A double-sided, fold-out poster map (17" x 22") of the thieves' hideout - an ancient ruined temple - suitable for tabletop use with miniatures or counters, for easier handling of tactical combat. Maps created in Profantasy Software's Campaign Cartographer 2, and available for download on the Atlas Games website. GMs can customize and manipulate these maps themelves, if they own CC2, and integrate them into their own game worlds. Published by Atlas Games & Truant Spiele

Part 1 of an Expert-level quest into a hostile wilderness. This adventure takes place in the Known World of the D&D game, as outlined throughout the D&D game rule books and modules. The DM may find it useful to consult the Companion and Masters Sets, as well as most of the X-series of Expert Set modules. D&D Expert Set module X9, The Savage Coast, would be especially helpful, as Tortles of the Purple Sage could easily serve and continue that module's direction and plot like, adding a previously undescribed area (the Great Northway) to the Known World. The DM may also place the areas and events of this adventure within an existing campaign setting, as long as the geographical areas of the campaign match those set forth here. Pgs. 40-62

Haedirn Lastlight is a respected elven wizard and sage. After the death of his lover Lyonthel, the elf has been overcome with grief and has locked himself away in his study- a small manor on the cliffs of Wailing Crag. Haedirn has not been seen for over a year now, and those that knew him are beginning to worry. Worse still, a band of ogres has been terrorizing the nearby town, slaughtering the town folk and haughtily boasting the elf wizard is dead. The PCs must put a stop to the ogres' attacks, make way to Wailing Crag to root out the rest of their gang, and lay Haedirn Lastlight's tortured remains to rest.
Two thieves' guilds fight to the death - with you in the middle. Run silently; the Midnight Stalkers are after you. Escape from the Tower of Midnight is an AD&D* game module for 2-6 thieves of 2nd-4th level. The Dungeon Master may change the names of the thieves’ guilds, countries, deities, and so forth to fit the individual campaign. Note that all player characters are assumed to have been imprisoned at the start of the adventure; little or no equipment will be available at first. This module is well suited for tournament use. Adventure Background It must be assumed, for the sake of the adventure to follow, that the PCs have no way of avoiding capture by the Midnight Stalkers. However, the DM may find a way to play out this adventure and have some or all of the PCs captured, allowing any who escape to attempt to rescue their comrades. Pgs. 16-27
Built into what was thought to be an inactive volcano, the Halls of Beoll-Dur were created as an isolated training ground for dwarven clerics. However, upon their mountain shaking itself awake the dwarves discovered that they shared the mountain with something far more sinister. Few escaped to tell of the massacre as an horde of salamanders rising from the fiery depths, claiming the halls for their king. Now the temple sits desecrated, waiting for the day that hero's will purify it of the evils within. Pgs. M1-M16

One of the original D&D classics, "The Isle of Dread" is a hex crawl wilderness adventure. It focuses on surviving primitive beasts, dinosaurs, and pirates while uncovering the mystery of the island's inland city, where a great treasure awaits. From the cover: "This module contains maps and background material for the Isle, fifteen new monsters, and suggestions for further adventures. In addition, The Isle of Dread contains a map and background information for a large continent, and eleven smaller maps for encounters on the island itself. In this module, players will push their way through dark jungles and treacherous swamps to discover the lost plateau, and the final secrets of - the Isle of Dread!" TSR 9043

30 Ravenloft adventures inspired by various domains of dread, including Gothic Earth, that can be played as a single campaign! Dreams of Solitude is a collection of thirty exciting adventures that can either be played as a campaign, run as a one-shot, or have pieces taken out to supplement your current home game! You'll meet your match against Atarte, the evil master of dreams, who will task you to defend ancient fortresses from the undead, explore a terrifying maze, fight in the trenches of world war 1 or even a karaoke contest with werewolves! It's SO much fun, and you'll be able to go back for more adventures, again and again! Adventures summary: Demon's Isle: Explore a watery cave and find your way to the Pirate Demon Zekel! Airic's Forest: Survive a forest ruled by werewolves while you try to find the cure for lycanthropy! Fractured City: Enter a glitchy uncompleted illusory town and try to find the "Butcher" that roams the dark alleys. The Heinfroth Heist: Enter Dr. Heinfroth's asylum and steal his journal without becoming his test subject! Tomb of the Hentempet the Red Queen: Face Hentempet the red queen inside her Pharaoh tomb! Graveyard Of invitation: Enter a cursed graveyard and follow the clues to find the reason why the undead have risen! Fey Blood Merchant: Help the Vistani child escape his Rakshasha master before he returns! Horrors in Chateaufaux: Play the role of the Gendarmerie guards and find out who creates chaos in the roads of Dementlieu! On the Run: Explore an ancient tomb and escape the curse that you have unleashed! Vampire Escort Child: Can you help this poor child leave this jail meant for monsters? Defend the Keep!: Command your own military force to defend a keep against waves of undead! Lena's Pets: Explore the heidius laboratory of Frantisek Markov's student and escape before you become body parts for her next experiment! Lava trip: Who would want to be inside an ACTIVE VOLCANO? RUN! Escape Rooms: Find the way to escape before time runs out! How investigative are you? Singing Showdown: Karaoke competition with werewolves??? Labyrinthine Horror: Can you escape the labyrinth before the Vampiric Minotaur catches you? Teety's Hunt for Lulo: Find Teety's elusive love in an enchanted forest of pain! Monster Lab: Create your own Flesh Golem and make sure you are a good parent! Through fire and steel: Run through the No-man's-land while enemy planes and tanks bombard you and assassinate the enemy general! Don't forget to dodge the bullets! Drowning in Filth: Will you manage to escape before you drown in filth? Wilted Roses: Explore the forests of Sithicus and find the Black Rose Effigy! Shyclin’s Circus: An encounter inspired by the Carnival. The joke's on you! Among Us: Can you find shelter in a small cabin found in the woods? The Free Trader, Mist Runner: Avoid the enemy pirate ship at all cost while trying to reach the port with your own ship! The Curious Case of the Man Who Drowned in Air: Solve a detective's case in Victorian era London! Night at the Museum: Protect the museum's artifacts from invisible adversaries! Raid the Shadow: Lay siege on a castle controlled by the undead! Who could be its ruler? Journey to the Center: Control a mechanical worm of Kwalish and drill to the center of the earth to mine mithril! Journey Through Barovia: Visit Barovia's most famous places while trying to solve riddles or die trying! Choose Nothing: Solve a Death Slaad's riddle or get mad! The Final Dream: Tackle Atarte and their illusions in an environment that continiously alters between all of the dream-adventures! Only few can take on a Darklord and live to tell the tale! Published by Mistfactor Press
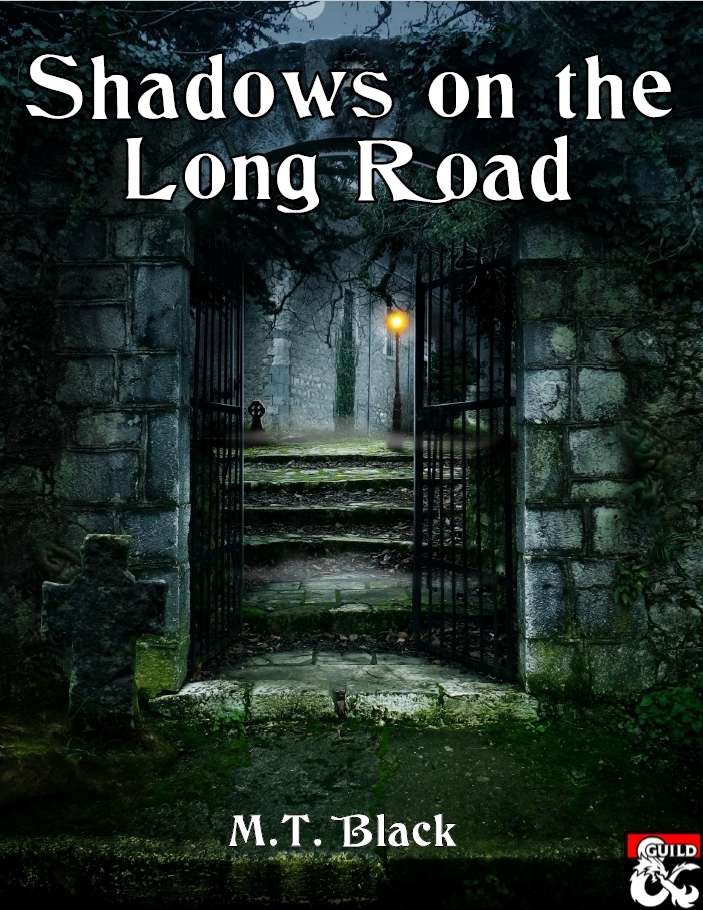
Travellers are going missing on the Long Road, on the 100 mile stretch between Triboar and Longsaddle. Our heroes investigate and discover a haunted mansion with a dark history and a gruesome secret. Their quest brings them to the very gates of hell itself, where an infernal abomination presents them with their greatest challenge yet... Inspired by a Clark Ashton Smith story.

The pearl divers of Shoalbury are in trouble. A band of birdlike kenku and ogres have been ambushing and plundering outgoing shipments of pearls, and the villagers are growing desperate. And why are the bandits stealing eyes from the bodies of their victims? A single guard survived the most recent ambush with one eye intact, and his testimony may just be enough to lead a brave band of adventurers to the bandit lair, and to the sinister cult they serve.

Giants have emerged from their strongholds to threaten civilization as never before. Hill giants are stealing all the grain and livestock they can, while stone giants have been scouring settlements that have been around forever. Fire giants are press-ganging the small folk into the desert, while frost giant longships have been pillaging along the Sword Coast. Even the elusive cloud giants have been witnessed, their wondrous floating cities appearing above Waterdeep and Baldur’s Gate. Where is the storm giant King Hekaton, who is tasked with keeping order among the giants? The humans, dwarves, elves, and other small folk of the Sword Coast will be crushed underfoot from the onslaught of these giant foes. The only chance at survival is for the small folk to work together to investigate this invasion and harness the power of rune magic, the giants’ weapon against their ancient enemy the dragons. The only way the people of Faerun can restore order is to use the giants’ own power against them.

The characters are summoned by the Norse gods to track down two dwarves, one of whom has made a weapon for the giants to use against the gods. The mission takes the characters to Jotunheim, on the plane of Gladsheim, to take the god-slaying weapon from the giants.

The Sea Witch is a short adventure for four 10th-level characters. The difficulty of the adventure can be adjusted by changing the level of main antagonist (Black Molly, the sea hag pirate) or by altering the number of her ogre servants. To tailor the encounter to groups of different levels, refer to table 4-1 in Chapter 4 of the DUNGEON MASTER’S GUIDE. The adventure is set off a lightly populated coastline known as Misty Bay, but adapts easily to any coastal region in existing campaigns. The sea hag known as Black Molly is a notorious pirate who has plagued the coastal cities for the better part of a decade. A successful Knowledge (local) check (DC 15) will reveal that Molly and her ogre crew have a filthy reputation as merciless killers who delight not only in plundering vessels for their riches, but also in destroying the ships themselves and sending all hands to the bottom of the sea. Now the villain and her followers have seized control of the Old Lighthouse of Misty Bay located off a lightly populated coastline. For generations the lighthouse beacon has protected the fishermen of this region, warning them of the dangerous rocks that lurk just below the level of the high tides. Recently, the hag has put out the beacon, darkening the lighthouse; misery and destruction are sure to follow as ships start to blunder into the rocks. Blackmail is apparently Black Molly’s aim in this venture: She conveyed a message to the nearest shore community, the fishing village of Poisson, demanding the princely sum of 50,000 gp. Until she receives this ransom, she intends to hold the lighthouse and its beacon hostage. The fate of the human keepers who tend the lighthouse is unknown to the seaside communities at this time, but they fear the worst. The Sea Witch is ostensibly a rescue mission: The PCs are pitted against the evil of Black Molly and the brawn of her savage ogre crew. It is the heroes’ task to retake the lighthouse and, if possible, free its captives from the clutches of their jailer. What neither the PCs nor the shore communities yet realize is that while she 1would be pleased to have the gold, Black Molly is in fact after bigger treasure. Molly has no intention of giving up the lighthouse — at least, not until she finds what her master sent her here for. Lying on the sea floor practically at the base of the rock on which the lighthouse sits is the wreck of the war galley Flying Cloud, which according to popular legend was captained by a cleric who wore around his neck an amulet of the planes. Black Molly wants this prize, but so far she hasn’t been able to find it. She’s scoured the wreck without finding any sign of the magic item. Now she’s trying to determine where to search next, for the item might well be somewhere near the wreck. If she can’t find it, she’ll start torturing her captives to find out if they have any useful knowledge about the amulet.