Launching the Unlock the Vault-series, this first installment sees the party search the royal crypt in the ruins of Wellsing for the fabled Shield of Ralfour - An artifact that, initially unknown to the party, also acts as one of the eight keys to break the seal on Aizendore's Vault of Tragic Treasure.

Devastated in a war with a nearby wizards' school, the Fighters' Academy has since been surrounded by a foul and dank swamp - the Gloomfens. Since the climatctic battle between the wizards and fighters, the tower has decayed. The spirit of the head of the academy haunts the building, eternally plotting his revenge on the wizards who killed him. his loyal sutdents remain faithful to him even in death. Other foul undead have made their home in the rotting, spacious academy. From their lair, they make forays into farmsteads near the swamp in search of victims to feed their unspeakable appetites. The Problem of these terrible attacks by the savage undead will not stop until the evil that has found a home at the tower is burned from the face of the land forever. Will your party heed the call and help the town of Melinir? Will they be able to clear the former Academy of its undead? The Fighters' Academy is the first in a three part adventure, The Haunted Tower. Or, it can be ran as a stand alone adventure. The choice is up to you. Part of TSR 1081 The Haunted Tower
The Lantanese have lost their magical ship, but they aren't willing to fight for it. That's where your heroes come in. She's expecting you. A party of adventures has gone missing, and the inhabitants of a local town have been acting strangely it is up to the party to figure out what is going on and stop whatever force are at work on the towns people Pgs. 8-23 & 47

A terrible plague has swept through the city of Cairdus, and despite the local clergy’s best efforts, they have been unable to control the spread of the disease. Even those who seem cured often contract the disease again. The only thing that is making any headway are the special blessings given by the powerful Baron Velstaf, but he only grants these blessings for a price that few can afford. The Star of Olindor is an adventure designed for 7th-level rogue, or other character of similar abilities. The obstacles in the adventure are set up to encourage the use of stealth and trickery, and many rely on classic rogue skills. The adventure takes place in the city of Cairdus, the details of which have been intentionally left imprecise, so that it can be easily slipped into an existing campaign, or better yet the adventure can be altered to take place in any existing city. Part 1 of the Olindor Trilogy.

A hunt for a missing key leads the heroes from the streets of the city of Greyhawk to the Tomb of Blood Everflowing in the treacherous Cairn Hills. Pgs. 18-20, 22 & 24-39

An ancient cave, defended by ancient death traps and weird arcane seals conceals the antediluvian vault of an archlich whose reign predates recorded history. Undisturbed for untold eons, the vault now stirs thanks to the machinations of cultists who have meddled with secrets best left undisturbed... This module sends the heroes to an ancient cave occupied by cultists dedicated to the Mists of Madness. Defended by ancient death traps and weird arcane seals, the caves conceal an antediluvian vault, the resting place of an archlich whose reign predates recorded history in the Known Realms. Undisturbed for untold eons, now the machinations of the cultists and their eladrin master threaten to awaken the archlich, to dire ends that none can predict.

It is time to put a stop to the marauders! For years the coastal towns have been burned and looted by the forces of evil. You and your fellow adventurers have been recruited to root out and destroy the source of these raids. But beware, hundreds of good men and women have been taken by the slavers and have never been seen or heard from again! First part of Scourge of the Slave Lords (A1–4) TSR 9039
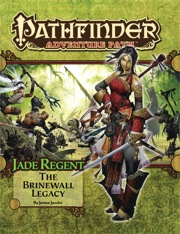
The town of Sandpoint, Varisia, Inner Sea Region has put out a bounty on the nearby tribe of Licktoad Goblins in retribution for the goblins raiding traders and travelers near the quiet town. The party takes up the bounty and ventures into the swamp; eventually finding the goblin village in ruins and it's inhabitants scared in it's burned huts. The party finds out; either through investigation of the ruins or the goblins themselves; that a group of skeletons with eastern arms and armor had ransacked the village and took a stash of fireworks that the goblins stole from an old shipwreck. The party then makes it to this cave and finds it empty except for a half dozen skeletons. Further in past the skeletons is their leader, a skeletal samurai who fights the party in an attempt to defend his treasure. The treasure turns out to be a letter that reveals that secrets of the Kaijitsu family; the same family their good friend Ameiko who runs the Rusty Dragon inn belongs to; that lies in wait in the abandoned town of Brinewall to the northern boarder of Varisia. Ameiko along with several other important NPCs with a caravan north. It's recommended that GMs create encounters for the caravan trip north as it's essentially 3 weeks of travel with nothing in it. It's also recommended that GMs completely ignore caravan rules; they're not flushed out and they're not fun to run. The party and the caravan reaches the abandoned town of Brinewall where their friend Ameiko becomes possessed and is thrown into a coma; where the other NPCs agree to take care of her while the party explores the town and castle. The castle is a three floor behemoth of a dungeon populated by Dire Corbies, Troglodytes, and various other monsters all under the leadership of Kikonu, an Yamabushi Tengu Oni. The goal of exploring Brinewall Castle is to find the two keys to the vault; one of which is on the Yamabushi Tengu while the other is on a Half-Fiend Decapus that lives in the basement of Brinewall. Once the PCs enter the vault they find the Amatatsu Seal; one of the seals that cement authority to one of the ruling houses in Minkai of Tian Xia; as well as several visions that show that Ameiko Kaijitsu is the rightful heir to be ruler of Minkai and that they'll need to travel north to do so. Such ends the first book of six.

Ages ago, a religious order known as the Druun practiced rituals from inside sacred oak groves, ceremonial pools, and stone henges. In time, the Church of Law and Order suppressed the Druunic teachings, and the ancient holy sites were lost, forgotten, or converted to other uses. One such former site is located in the capital city of Dolmvay in the center of a small neighborhood known as Whiteoak Square. This neighborhood has recently been experiencing a strange phenomenon: At night, small dancing lights have been seen floating throughout the neighborhood. The residents were afraid of this sorcery at first, however, the lights seem to exude a feeling of peace and contentment, and the locals have grown used to them. How it Started: A few weeks ago, a butcher named Walton Brand was clearing out his cellar when he stumbled upon a secret underground passage that led to an ancient Druun hall. This hall was filled with lost relics, arcane lore, and forgotten treasures of the Druun. Walton told his friends, Loomis the Baker and the chandler Stefan of Walsbury, and the three men began sneaking away from their wives at night to dress in Druun finery and pretend to be men of wealth. A harlot named Red Kirsten was hired to attend them as they drank, feasted, and cavorted in the sacred hall. Unbeknownst to the revelers, the Druun hall still retained some of its magical powers and their merriment awakened the ancient guardian spirits of the grove. These creatures, known as faerlings, are the lights that have been seen dancing throughout the neighborhood. The faerlings were given life by the revelers' glee, and they project that joy and happiness onto the other residents of the neighborhood. This glee, however, is about to turn to horror. . . Oak Grove Whispers is a Labyrinth Lord™ adventure designed for 3-6 characters of 1st-3rd levels (about 10 levels total). The adventure is broken up into three chapters that take place in a small neighborhood located in the capital city of Dolmvay (the Labyrinth Lord is free to substitute any medium- to large-sized city from his own campaign world). Oak Grove Whispers involves a mixture of roleplaying, investigation, and dungeon crawling, so a diverse range of classes is recommended. As the adventure is set in a civilized city, the characters must also be careful their interaction with NPCs does not land them on the wrong side of the law. Published by Small Niche Games

Something evil is devouring the souls of the living in Chult, but before the characters take on the horrors in Tomb of Annihilation, they must first uncover the death curse’s origin by braving a lich’s tower in the Cloakwood. This introductory adventure is designed for a party of four to six 1st-level characters, who should advance to 2nd level by the adventurer’s conclusion. It is a prelude to Tomb of Annihilation that should take about 2 to 3 hours. This product includes Fantasy Grounds files for the adventure. What Inspired Cellar of Death? The introduction of Tomb of Annihilation states Syndra Silvane learned about the Soulmonger from the Harpers, who “received their intelligence from a lich.” This adventure is the story of how the Harpers gathered that information. Cellar of Death has a second purpose: to give characters a greater stake in the outcome of Tomb of Annihilation by creating an NPC they love. The death curse kills this NPC, giving the characters a personal reason to go to Chult.

Retrieve the bones of a dracolich to save the life of a paladin. The epic conclusion of the Mere of Dead Men series. Set in the Mere of Dead Men region of the Forgotten Realms.

What begins as a simple expedition to settle a new village in the ruins of the mysterious Castle Inverness sets off a chain of events that could threaten every living being from Winterhaven to Hammerfast. Not everyone in the Nentir Vale is happy to see civilization brought to Inverness, particularly the ghost of Salazar Vladistone, who commands the spectral legion called the Phantom Brigade. "March of the Phantom Brigade" is an adventure designed for season 4 of the Dungeons & Dragons Encounters official play program. It includes the information the Dungeon Master needs to run the adventure, thirteen ready-to-play encounters (each intended for one session of play), and full-color foldout battle maps depicting the various encounter locations.
Hezzrack the imp escaped a prison of stone only by entering a prison of words. His only chance now is for a helpful group of adventurers to rescue him from certain servitude as a goblin adept's familiar. When his wizardly master's tower collapsed ages ago, the imp Hezzrack found himself trapped in the basement for a long, long time. After spending many years playing chess with himself and arranging macabre passion plays with the animated skeletons that survived the collapse, he finally found a way to escape. Unfortunately, that escape required signing a contract with a particularly unpleasant goblin adept; Hezzrack had managed to escape his prison of stone by leaping into a prison of servitude. If only a group of adventurers were to come along and take care of the goblin and release him completely! Pgs. 18-28

Nearly 100 years ago, Lord Eriador wrested the lands from the hands of evil and began a reign of unsurpassed courage, wisdom, and might that lasted over three centuries. One day this great man of valor was called onward to continue his battle for freedom and goodness on a higher plane of existence. Leaving the responsibilities of rulership to his faithful overseer, he donned his magical shield, helm, and sword and traveled to the Holy Maountain of Anduin to meet his destiny. Eriador left the overseer with this solemn promise: if there ever arose a time of great need, he would answer a summons from the Mountain of Anduin to come back to vanquish any evil that dared to oppress his people. It is now the reign of the third overseer. For years now, an evil mage has been plaguing the land by sending forth hordes of evil humanoid minions to oppress the people. The overseer has been forced to pay tribute to the mage to protect his people. Life has become nearly unbearable for his subjects. It has been over five years since the mage desecrated the holy mountain by placing foul creatures in its depths to guard against the possibility of the people seeking help from their nearly forgotten champion. A fortnight ago, your party was gathered in a secret council chamber to meet with the overseer himself. You felt a spark of hope for the people of this land as the overseer told the legendary tale of Eriador. He gave you the equipment you need and charged your party with the task of venturing into the heart of the now monster-infested Mountain of Anduin to call back the people's great hero, Eriador the Paladin. Although the three parties sent before you had not returned, ridding the of the land of the mage seemed worth any risk, and you eagerly set out on your quest. Now, standing before the defiled mountain, you wonder if perhaps you were too hasty.

Sent on a desperate mission into an unknown land, you must seek out the one called "the Master" and his Temple of Death. There is little time to waste, as you must act before the Master's armies destroy your homelands. But to complete your task, you must battle fearsome guardians, travel through a hostile kingdom, and discover the secret of the master. Can you survive his defenses and win? This module contains referee's notes, background, maps and detailed keys. It is the second adventure in the two-part Desert Nomads series begun in X4, Master of the Desert Nomads, but it can stand on its own as a seperate adventure. Wheter you play Temple of Death by itself or as part of a series, the adventure will offer you hours of excitement and fun! TSR 9069

A prequel adventure for Xumoria Megadungeon. “The famed archaeologist Jonas “Greytooth” Walker discovered a strange pit upon an expedition to the Dead City. A spiral staircase descended into this pit, leading to a series of rooms carved from the rock. Each room lay behind a closed door and their mysteries have not been unveiled. The entrance is marked by a large portal made of black basalt. There is a belief that this underground complex may hide information about the mythical city of Xumoria, which is rumored to be located on the Isle of the Ancients. There are inscriptions at this site indicating the presence of an ancient wizard named Arne “Sacre” Nissen, a well-known Xumorian scholar and great explorer of Artrusia. Adventurers seeking the entrance got and haven’t returned yet. Exploratory expeditions are leaving Crimsonwater, heading for The Dead City. Dare you go down into The Pit?" About Our Adventure Voxelhouse and Elevated Pachyderm are proud to present The Pit, a prequel to our forthcoming Xumoria Megadungeon. The Pit will give you an introduction to our gameworld of Artrusia and the powerful sorcerer, Berdolock. Our goal is to get you acquainted with our game material, and bring a whole bunch of new stuff to your OSR table. This adventure is fully compatible with OSE, BX, BECMI, and with minor adaptations, DCC. In The Pit, your character will explore a small dungeon, in search of the map that will lead them to fabled Xumoria. This is an introductory adventure for players who want to explore our Megadungeon. Details of what you can expect in Xumoria are coming soon, but for now we hope that you’ll have fun with our module.

Local villagers whisper of a mysterious place deep in the marsh - a place shrouded in mist and dotted with barrow mounds, ruined columns, and standing stones. The tomb-robbers who explore beneath the mounds - or rather the few who return - tell tales of labyrinthine passages, magnificent grave goods, and terrifying creatures waiting in the dark. Are you brave (or foolish) enough to enter Barrowmaze? Barrowmaze Complete (BMC) is a classic megadungeon for use with any old school fantasy role-playing game. BMC includes everything in Barrowmaze I and II in the same book in addition to new material, art, layout, and cover art by Ex-TSR artist Erol Otus. Barrowmaze Complete will keep your players on their toes and your campaign going strong. BMC is brought to you by the Old School Renaissance (so don’t forget your 10’ pole). This edition includes art by the aforementioned TSR artists Erol Otus, as well as Tim Truman, Jim Holloway. New old-school artists include Peter Pagano, Cory Hamel, Stefan Poag, Zhu Bajie, Stephan Thompson, and others.

A mad necromancer imprisoned in a sanitarium has died. Now he has come back as a powerful undead wizard. His lunacy was only increased by his death and he has turned all the other inmates into his undead servants. Now the sanitarium is under his control. A traveling group of adventures must put a stop to the necromancer before his evil madness spreads.

Hurry! Hurry! Hurry! Step right up, ladies and gentlemen, and behold the greatest circus in the land! Behold the skilled mummers performing at The Stage; you’ll literally feel like you’re part of the play! Thrill to the death-defying acts (and audience) in the two rings under the Big Top! Laugh at the antics of the baleful buffoons, harmful harlequins, and malevolent merrymakers of Clown Alley! Gaze in wonder at the wild beasts of the Menagerie, (just make sure you know which side of the bars you’re on)! All this and more, for the small price of a single admission, to Bitterbark’s Magnificent Circus! The circus is in town! But there’s something not quite right about it. There are rumors of missing children, evil plots, and more. Can you discover the secrets hidden inside Bitterbark’s Magnificent Circus? Intended as a stand-alone adventure, but there are notes on how to include it as part of the Castle of the Mad Archmage mega-dungeon adventure. Published by BRW Games

This heist adventure that takes place almost entirely at Fort Bones. It is split into five scenes: Karrnathi Opening. The characters meet Vedim ir’Durna, a noble from the region who is willing to help the player characters infiltrate the Fort. Guild Handler Lhara introduces their prize: a necromantic artifact called the Queen of Night, tied to the plane of Mabar. Valenar Gambit. Whether by wit or stealth, the characters find their way inside the walls of Fort Bones. They might use the incoming Valenar attack as a distraction, find a secret entrance, or plant themselves on a visiting dignitary’s staff. Castling. Safely inside, the characters must figure out when the artifact is unguarded, and find their way into the castle’s inner sanctum. Check. The characters must navigate their way past a magical vault door, then descend into the crypts. The Queen of Night is guarded by a terrifying construct. Endgame. With the artifact in their hands, will the characters be able to escape with their lives?