The party arrives at an abandoned outpost in a frozen landscape. The outpost appears to have suffered some strange attack. A halfmad scholar from a distant city hides in the outpost; he is drawn to the region by his visions of a breach in the ice nearby—a breach he believes leads to the realms beyond the stars. Heading east, the party finds that the breach is no simple chasm in the ice, and its scaled guardian does not appreciate its work being interrupted. In this frozen and otherworldly adventure the party must overcome rimy insects, a void dragon wyrmling, and the pull of the breach itself.

When huge stones fall out of the night sky, A deadly curse settles over Gravencross. Help the village exorcise the Demon Stones. “The sun had set an hour ago, and the rain lashed down and the wind howled on the dark moor. A storm this late in the season was unusual, but this one seemed different. The clouds were more menacing, tinged with anger, the rain colder and more biting than usual. Skerrill had to find the lost calf and get him back to the farm before his father came back from the city on business. He’d been looking for two hours now, and he was right in the middle of the moor when the storm hit. He knew he should have turned back as soon as darkness fell, but then he was never the brightest boy in the valley. If only he had remembered to lock the farm gate. The calf was now likely dead anyway having stumbled among the boulders and rocks, panicking in the dark, and then fallen in a floodwater stream and drowned. Either way, he was in more trouble than he could imagine. Suddenly, a bright flash of white light and a roaring peal of thunder were preceded by an explosion as a huge object fell from the sky and impacted the ground of the moor no more than a stone’s throw from him. Dirt, mud, water, and debris erupted from the impact site, flying high into the air and then covering the moor for hundreds of feet all around. Skerrill was knocked to the ground instantly and covered in the fallout from the blast. His ears rang and his head spun, but he staggered to his feet in a daze. He stumbled to where the blast had happened only moments before, and in a depression in the ground lay a huge stone glowing orange as if hot. Skerrill passed out. Two more thunderous explosions crashed in the distance.”
A shadow goblin lair suitable for four or five 4th-level characters. A growing band of goblins led by a powerful shadow goblin named Hurkl are demanding a toll to travelers on the Dancing Shadow Path. When the heroes are chasing a fugitive through the area and come across the toll...what will they do?

Our heroes are approached by Tristan Harpell, an entitled young mage and heir to a suite of rooms in Ivy Mansion, the ancestral home of the Harpell wizard dynasty. His inheritance is “infested” with the wacky experiments of his dead great-uncle, Siegfried Harpell, and Tristan needs the party to clean things up. The party will have many wild and bizarre encounters while digging through Siegfried Harpell’s derelict magical concoctions - and along the way they might even discover the astonishing truth behind Siegfried's disappearance! Into Ivy Mansion is a Dungeons and Dragons one-shot adventure for a 3rd-4th level party. It features exploration, role-playing and thrilling combat encounters...

The adventurers are called to the village of Pinecrest where all but one of the children have gone missing. Can they find the lost babes in the wood before the children meet their grisly fate?
An introductory adventure for both new players and Old-School veterans alike. Explore an insect-haunted thieves guild secreted beneath a lighthouse. Claim the loot but beware the Skitterlord! 25 keyed locations Written for the Old-School Essentials (OSE) rule system

The Frozen Necromancer is a three-part adventure for Fifth Edition that takes player characters from levels 1 to 4. This adventure is the first in a storyline of four modules called The Demonplague that can be used as an entire campaign that takes characters from level 1 to 20. The entire adventure (or just pieces, characters, or encounters from The Frozen Necromancer) can be dropped into any fantasy setting with minimal changes
The town of Devil's Glade is under attack! Swarming insects have driven the residents out of their homes and businesses, and giant insects patrol the town square. Who or what has brought these creepy-crawlies to Devil's Glade? What's their motive? Are your heroes brave enough to put an end to the infestation? Infestation at Devil's Glade is a 2- to 4-hour adventure designed for four to five characters of 1st to 4th level, and is optimized for 2nd level characters. Scaling Suggestions are included, allowing you to play this adventure with characters of 5th to 6th level. Infestation at Devil's Glade isn't just a short adventure. We provide you with a location to which your heroes can return, or even use as a home base. The Supplement Includes: Adventure. The main adventure focuses on the heroes cleaning the town of the infesting insects and the villains who brought them. Beginning at The Fork (a tavern where many of the residents have made camp), the characters learn about the infestation of Devil's Glade, and are hired to look into the matter. NPCs. The adventure is filled with fun and engaging NPCs. During the characters' time at The Fork, they have the opportunity to talk with NPCs, help them, and learn more about the infestation. After the heroes return Devil's Glade to normal, the merchants and residents return, giving your characters unique shops to explore and quests to complete. Cursed Mask. The crux of the problem - a cursed mask that slowly transforms the attuned creature into a giant, insect monstrosity, and gives them power over insects. To end the infestation, the adventurers must confront the partially transformed person wearing the mask. Shops & Services. Devil's Glade contains shops and services the characters can explore, including therapeutic mud baths, a diner specializing in eggs, a trinket shop, a candle maker, and a dentist. Side Quests. We provide several side quests for before and after the main adventure, allowing you to increase the main adventure's run-time, and provide you with material for after the main adventure. Maps. The adventure contains maps for the main locations and major side quests. Each map is hand-drawn by Jean Lorber. Art. NO AI! The book is filled with fantastic, original artwork by Matt Morrow Art. Also Included: Map Files. Both grid and non-grid maps are included and available to download. Special VTT Tokens and Assets. Several custom tokens and art assets are included for VTT play.

Special Basic/Expert Transition Module Barely one day's march from Kelven, the uncharted tracts of the Dymrak forest conceal horrors enough to freeze the blood of civilized folk. Those who have ventured there tell how death comes quick to the unwary - for the woods at night are far worse than any dungeon. But you are adventurers, veterans of many battles, and the call of the wild is strong. Will you answer the call, or are you afraid of the dark terrors of the night? The campaign adventure is for characters just beginning Expert play (levels 2-4) and hurls them into the exciting outdoor world which awaits in the Expert rulebook. With a 64 page booklet, 2 double-panel covers, a double-sided, fold-out mapsheet and 120 die-cut counters, this super module provides all you need for epic wilderness and dungeon adventuring. Journey across the Grand Duchy of Karameikos in a desperate race against time and the forces of evil. This adventure is for use with the Dungeons & Dragons Expert Set, which continues and expands the D&D Basic Rules. This adventure cannot be played without the D&D Basic and Expert rules produced by TSR inc. TSR 9149

A handful of would-be adventurers gathers to explore an ancient tomb, eager to trade their discoveries for a ticket to a better life. What they find within presages the advent of the Age of Worms, an era of darkness, decay, and writhing doom. "The Whispering Cairn" is the first installment of the Age of Worms Adventure Path, a complete campaign consisting of 12 adventures, several "Backdrop" articles to help Dungeon masters run the series, and a handful of poster maps of key locations. For additional aid in running this campaign, check out Dragon's monthly "Worm Food" articles, a series that provides additional materials to help players survive this campaign. Pgs. 14-47

Far below the Fields of Petrichor is a vast cavern containing the skeletal remains of a long-dead Sonorous Titan, a whale-like beast that once floated through the skies of a lost age. Amongst the bones are ravines and grottos home to bizarre creatures and lost treasures that are as beautiful and valuable as they are deadly. Ghostly shapes swim through the air. Glowing mushroom groves hide frightened creatures. And the Titan’s bones sing sadly as an ambitious wizard and his weary hirelings dig for its precious marrow... ADVENTURE TYPE: Small Sandbox Dungeon DESIGN NOTES: This adventure is intended for characters levels 5 to 8. It includes several wilderness areas, a ruined village and a mining camp to explore. Each area contains various encounters and unique magical items.There are many opportunities for combat, but it is possible for players to explore most areas and complete many interactions without any combat at all, depending on their choices. INCLUDES: Story hooks, dialogue prompts, creature stat blocks, original creatures and treasures, and dungeon overview map. KEYWORDS: Grave, skeleton, ghost, undead, wizard, miner, puzzle, mushroom, myconid, hag, witch, social, curse, mutation, mutant, soul, insect, termite, scorpion, bat, monk, beetle, chicken
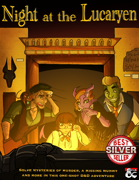
An exclusive party at an illustrious antiquities museum. A missing benefactor and host who turns up dead. A missing mummy, the crown jewel of a new exhibit, and a hardboiled detective trying to make sense of it all. And a party of adventurers caught right in the middle! Welcome to the Lucaryen Museum of Antiquities, enjoy your visit. We recommend for your safety not to wander the halls at night; some of our exhibits have a habit of coming alive and attacking the unwary. Not to mention other guests who may have something damming to hide, and a loose set of morals. Don’t worry - I’m sure you’ll be fine! In this pulp thriller mystery one-shot, your players will be thrust into the role of Occult Detectives, investigating the murder of the museum’s namesake and searching the premises by night to uncover clues and the whereabouts of a missing mummy. Inspired by films such as Night at the Museum, The Mummy, and classic ‘Whodunnit’ murder mystery tales, your players are sure to have a killer time! Featuring: 15 pages of content, comprising 4-8 hours of play A full-scale, two story museum for your players to explore Shady NPC suspects and unlikely allies, complete with unique stat blocks Myriad potential encounters and one epic final Boss Fight, with 46 unique creatures from the Monster Manual, Volo’s Guide to Monsters, and Mordenkainen’s Tome of Foes Helpful tips for newer DMs

Just when you thought it was safe to take a long rest. She's Back! The terrifying SEQUEL to the PLATINUM bestselling, and Dragon+ Magazine featured horror adventure: The Haunt. The Haunt 2 is both a one-shot, and a sequel that can be run as either. Long, long ago St. Greycastle’s Hospital served the city through the years, mainly treating the wounded and sick among the militia. Over time, the lower basement was converted into a sanatorium, housing those who became maddened from enduring the violent, brutal orcs raids which plagued the region during that time. This was the place where Gertrude, the night hag, tormented patients, and created her masterpiece, the Evil Doll. Now, after all of these years, Montarthas Manor has finally fallen, and the Evil Doll has been wounded. She has returned to the only familiar and safe place she remembers, to lick her wounds and plot her next move. Her presence in the hospital awakens the evil inside, creating a nightmarish charnel house of terror. In addition, the hospital itself feeds on fear. Do your players have what it takes to enter the haunted and evil hospital, to finally end the haunt and terror of the Evil Doll?! Published by P.B. Publishing.

Chapter 2: The Sinister Secret of Saltmarsh In this version of the adventure, the characters find navigational charts and logs aboard the Sea Ghost that implicate its crew as slavers. Ned Shakeshaft is a Scarlet Brotherhood agent. He makes an attempt to foil the characters, but his true intent is to surrender and implicate Gellan Primewater as a key villain. The distraction afforded by the lizardfolk and the looming sahuagin threat gives the Scarlet Brotherhood the opportunity to bring more agents into town. posing as mercenaries brought in by Anders to protect the town. If Gellan can be removed from the council, Solmor might ask one of the characters to take his place.

Forest in Twilight is a four- to six-hour adventure for 1st-2nd level characters, designed for Dungeons & Dragons 5th Edition, with a forest wilderness theme, blights, druids, and a trek through the woods to find the origin of the blights. The level of guidance is for newer DMs but without being training wheels. Set in the Neverwinter Woods north of Phandalin, blights are leaving the woods and attacking settlers and travelers along the roads in the area. A group of druids wants to keep the people and forest safe, but one druid in particular is only concerned about the forest. The PCs will have to determine which side to back, if any, in finding out more about the blights and stopping the threat. This adventure can also be used as a standalone adventure, or slotted into the early quests in the Dragon of Icespire Peak or Lost Mine of Phandelver campaigns. Included with this adventure are: + 4 combat encounters and multiple opportunities for exploration and social encounters + Multiple NPCs with stated personality traits and goals, including roleplaying tips for the major ones + Hazards and diseases the characters encounter in the woods + Madness effects + 4 maps of important locations + Some guidance on how you might continue the story

Player's are transported to strange new plan of madness. The have a role playing encounter with the woman imprisoned there. They explore a wizard laboratory and kill the evil inside. A short well explain one shot or adventure for when the whole group doesn't show up. Pgs. 12-26 Published by Fail Squad Games

"The Hive" is a spawn of Arbeyach lair, also featuring giant termites and termite swarms, for five 6th-level characters. This adventure can be finished in one session. Several mounds in the Forsaken Hills are the dens of voracious termites that have added flesh to their diet to supplement dwindling wood supplies. At night, swarms of termites hunt and devour prey. They swarm over victims in wooden carts and wagons, and bring the dismantled wood back to their mounds. Three spawn of Arbeyach, searching for a location to summon Ia'Affrat, Arbeyach's herald, discovered a mound filled with particularity nasty termites and used their vermin empathy to gain acceptance. They dug out a cavern beneath the mound, and now use the termites to protect themselves and gather food while they complete a difficult ritual involving dozens of sacrifices. The final sacrifice is prepared and the spawn are finishing their ritual when the party arrives.

The promises of glory and the chance of riches draws you to Blasingdell, a small village near the infamous Stone Tooth. Within the rocky mountain lay the dwarven stronghold Khundrukar and the fabled Forge of Fury, to which a chance encounter provides you with the location of a hither-to unknown entrance. Are you brave enough to explore this mystery? Will it lead you to wealth or to your doom?

A fallen clock tower holds components from an ancient artifact. Upon discovery of the components, competing agents look to launch expeditions to uncover additional components scattered across distant places—and times. The now-lost Temple of Moloch and the construction site of the legendary Tomb of Horrors are two of those locations. However great the risks, finding the components demands the effort, for whoever does so can reassemble the fabled Infernal Machine of Lum the Mad!

Something evil is devouring the souls of the living in Chult, but before the characters take on the horrors in Tomb of Annihilation, they must first uncover the death curse’s origin by braving a lich’s tower in the Cloakwood. This introductory adventure is designed for a party of four to six 1st-level characters, who should advance to 2nd level by the adventurer’s conclusion. It is a prelude to Tomb of Annihilation that should take about 2 to 3 hours. This product includes Fantasy Grounds files for the adventure. What Inspired Cellar of Death? The introduction of Tomb of Annihilation states Syndra Silvane learned about the Soulmonger from the Harpers, who “received their intelligence from a lich.” This adventure is the story of how the Harpers gathered that information. Cellar of Death has a second purpose: to give characters a greater stake in the outcome of Tomb of Annihilation by creating an NPC they love. The death curse kills this NPC, giving the characters a personal reason to go to Chult.