
Revenge of the Pale Master plunges the adventurers into the rusted heart of the industrial city of Kizaki on the eve of a great evil’s reawakening. At its heart lies a mystery, and GMs running this module are encouraged to build tension and an aura of danger as the PCs uncover the secret history that casts a long shadow upon the future of this settlement in Gekido Prefecture. Part of the adventure’s tension is based upon the ticking clock—the party arrives as night falls on the eve before the Festival of Falling Hawks, giving them less than 24 hours to uncover the truth and take action against those they believe to be the villains of the story. What's inside Revenge of the Pale Master: The story of the Pale Master and his most recent machinations in the eastern fantasy noir steampunk lands of Soburin The continental map of Soburin by Michael McCarthy Information about Gekido Prefecture where the adventure takes place Rules for the dangerous Mists of Akuma and the new misted condition, as well as the Haitoku and Dignity attributes Dozens of NPCs and oni that play a part in the adventure (as well as several that don't so the GM can insert their own stories and subplots) Lots and lots of maps: the city of Kizaki, the Oyami Tea House, Graveyard of the Damned, and more
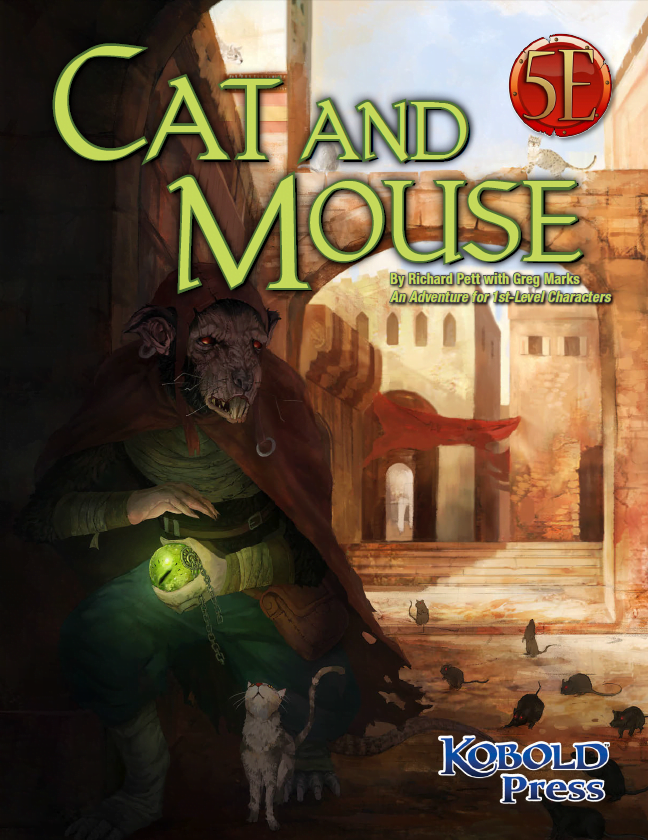
Who Do You Trust? In the cool streets and blazing bazaars, the word is out: a great treasure has gone missing in the Everlasting City of the Cat, and some very ambitious people have set their sights on it. Many paws and claws are out, and everyone is sniffing around for something rich and strange. It’s an odd time for a catfolk thief and a gnoll merchant to make very tempting offers to strangers in town. Or, perhaps it’s not odd at all. Get caught up in the hunt with Cat and Mouse by Richard Pett and Greg Marks! A perfect introduction to the Southlands campaign setting, and it fits neatly into any desert city where cats are sacred and rats are cautious and sly.
/pic4510372.jpg)
It begins in the marketplace or main square of a town when the calm, peaceful day is interrupted by a hulking golem trouncing through town, smashing objects, and attacking townsfolk. The party witnessing this should intervene and stop the rampaging golem with combat or by luring it into a nearby warehouse to trap it so it can be damaged and, eventually, destroyed by the town guards. When the party examines the golem’s remains, they find bones encased in the metal armor and the name 'Quartztoil' written in gnomish script. The town guard explain that this is the eighth construct they have encountered in the area in the past six months. The party can then go on to investigate the name 'Quartztoil', leading them to learn of an old, gnomish, aspiring artificer, Penaral Quartztoil, who had a lab and workshop in a tower in the nearby mountains, but who has not been heard from for close to a century. Published by Nord Games

"Bloodwood of the Cruor Circle" is an alseid and blood hag lair suitable for four or five 10th-level characters. This adventure can be completed in a single session. The Cruor Circle, a coven of dark druids led by a blood hag, has taken over control of the local alseid herd with the power of the blood. Within the forest, those who do not make proper sacrifices are stalked by the alseids and taken to the Bloodwood. Within the Bloodwood, captives become blood sacrifices, empowering the creation of sap demons, blood ponds, and other twisted products of the dark druids.

Mare Vinceret has kept the underwater city of Conatha thriving for centuries. Deep within the Greyspace lurks a force so strong that it could impede their progress toward peace. It dwells in a place beyond where they would ever choose to go, filled with dark aquatic life and a menacing presence that no one could match. Juliya Alastor, the leader of Mare Vinceret, sends her best to dispose of the threat known only as Biandra, the Hag of Conatha (sea hag). The Hag of Conatha seeks to fix what Mare Vinceret has done to the beautiful land that she sees as corruption in disguise, then live in peace. Biandra has taken their forgotten structure and made it her own. She sits within a threedomed greenhouse with walls blanketed by vines of kelp and seaweed and swimming with deadly aquatic creatures. Within the dark, polluted lair, Juliya's team falls into madness. One by one, Biandra's hallucinatory tricks destroy them, leaving each of them within her grasp. Believing all is lost, Juliya finds a glimmer of hope in a crackled communication one of the members of the party must be alive. She must send out one more group of brave adventurers to bring down Biandra for good and reclaim the underwater dome. Will the adventurers find the lost orc rogue, fight their way in, and investigate through the biodome maze? Or will they be confined to the underwater maze of Conatha in madness, trapped with the Hag of Conatha herself? Pgs. 35-41

This adventure is written with the intent that it takes place in the subterranean world called the Underdark in the world of Forgotten Realms, although it may be placed in other settings. Within the Underdark, Cyrog's lair can be placed anywhere though it is stated to be thousands of miles east of Gravenhollow. If you are running Out of the Abyss, you may want to have your players see the vision Cyrog Lives! Hail Orcus! (OOTA, 158). Additionally, it is recommended that this adventure be used for a party of 4 to 6 players, level 9 to 12. While merely hinted at through visions in Out of the Abyss, Orcus is roaming the Underdark unchallenged with an army of mind flayers at his disposal. Cyrog, the elder brain of a mind flayer colony in the Underdark has died. The demon lord Orcus has reanimated and taken control of it. The hive of mind flayers is now bent to Orcus's will through Cyrog as he strives to make all life in the multiverse into a vast undead horde under his control. The adventurers are contacted by a patron who gives them a special item (such as brain worms) to suppress their brain waves and make it possible to infiltrate the Cyrog's Lair without immediate detection. The adventurers must defeat or otherwise subdue mind flayers and a few guards, override the elder brain's mechanical defense system, and slay Cyrog.

After undead start appearing near the local town of Angstadt, the Burgomaster and Father become worried. What could be causing these foul creatures to rise? After conducting research, the clergy discover that the throne room of a celestial avatar is located only a few days away from the town. Perhaps this holy site could hold a relic capable of turning the undead?
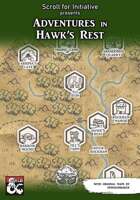
Adventures in Hawk's Rest is a love letter to low-level D&D: Studio Ghibli meets the Shire meets Lost Mine of Phandelver. An open-world hexcrawl for characters of 1st to 2nd level, Hawk's Rest is intended as a prologue to a longer campaign, with seven keyed adventure sites and fantastic maps by Dungeon Baker (How to Defend Your Lair, The Lazy DM's Companion). Hawk's Rest is written for new and veteran players alike but avoids the usual pitfalls associated with 1st-level adventures: not only are encounters balanced to avoid character death, but most combats can be avoided entirely with clever roleplaying.

Operating as secret agents for the Lords of Waterdeep, a promising lead takes you deep into the world of the Xanathar, but what will it take for you to return?

First the bandits attacked then the Roc carried away the guide. Since then you have blindly followed the camels hoping that their instincts would lead you to water or help of some kind. You and your friends are lost in a sea of sand. Plodding along in the shadow of the camels and doing your best to stay alert. Ahead the heat shimmers take shape. This time it is a castle. Blinking away the dryness in your eyes you realize that the tower is not a mirage but it is broken.

The druids of the Feyindir Forest and the villagers of Spiralle have always maintained a peaceful, if uneasy, relationship. But now trouble is brewing. Villagers are going missing in the forest, and druids are being murdered in response. The terms of peace between the two parties has been shattered, and now the druids are threatening to unleash one of the most fearsome manifestations of druidic vengeance known. Can the PCs step in to restore peace to the land? Includes 5th edition write ups of the assassin vine, quickwood, dragonne, and wicker man along with the woodling creature template.
"Ambush at Boxcar Rocks" is a two hour adventure for character level 1-3 (3-6 players) but is easily adapted to challenge higher level PCs by adjusting the spawn rate and the spawn limit. It features one hand-drawn, color map. It can be run as a brutal oneshot gauntlet or a quick side quest to pad the players purses. Deep within the labyrinth of massive, glacier deposited rocks there is a natural cave once used for interring the dead. Now the bones of the pit within stir because of a foolish neophyte. A listless, blood thirsty horde tramples toward daylight and nothing will remain in their wake...

Strange events are occurring near the town of Yûlash—ground tremors originating from an old mind flayer hive. Our heroes are asked to investigate the old hive and determine the cause of the seismic activity, but another pressing matter is revealed to them, too. This Adventurers League legal adventure set in a small town near Yûlash. This module first premiered at TotalCon 2018. Contents include: PDF of the adventure PDF of the Adventurer’s League certificate High resolution maps

An anticipated rematch between the Reghed Nomads and the Goliaths of Wyrmdoom Crag is interrupted by disaster as one thing after another goes wrong! It falls upon the party to pick up the ball when others have let it drop! A DungeonCraft adventure using the "Goat-Ball!" seed. A Four-Hour Adventure for Tier Two characters (levels 5-10). Optimized for APL 8. Somebody Dropped the Goat-Ball originally debuted at DungeonCraft World Tour on May 2021. Included are VTT-friendly maps and handouts in separate files to help with running your games virtually. I also have a printer friendly version included of several of those maps for those that prefer their works to be printed on the flesh of dead trees.
Captain Brunswick’s Manor is a dark, dream-infused adventure where players unravel the mysteries of a haunted noble estate. As they navigate twisted corridors, confront eerie foes like the Dreamborne Wyvern and Auntie Sol, and face mind-bending trials in a nightmare-filled dream realm, the party must find a way to free Captain Brunswick and his daughter from their cursed slumber. With multiple routes through the manor and unique magical rewards, this adventure offers both intense combat and chilling roleplay. Boss Fights: Engage in memorable battles against Captain Brunswick, the Dreamborne Wyvern, and the malevolent Auntie Sol. Puzzle Encounters: Solve challenging trials that mix dream and reality, testing both wit and strength. Legendary Weapon: Unlock Tulva, the Tide Bringer, a powerful magic weapon that evolves with its wielder.

On a nameless, featureless demi-plane the Tarrasque rages across an all-encompassing nothingness. Last seen on Faerun a century ago during the cataclysm of Odobaz, the battle mage order of the Eldritch Storm sacrificed itself to banish the mighty titan to its demi-plane prison. Now a foul power emerges in the High Ice and nightmare visions of the Tarrasque trampling cities wrack the minds of the living—can your adventurers defeat the Horror Under the Mountain?

After carving out quite the reputation, you and your associates have been summoned to meet with the local regent. As you wait in the audience chamber you notice that the furnishings appear to be in the middle of an upgrade. After being introduced to the slovenly king, his vizier explains the task ahead of you. Apparently the monarch wants to decorate his throne room and wants a Giant Ape as the showpiece. As luck would have it, rumors point to a nearby island in the Jarteach Mere…

Who knows why adventurers are drawn together? The lust for gold, a common foe, or the whimsy of fate? Pull up a stool, stoke the hearth, and let YOUR story begin! A Four-Hour Adventure for Tier 1 Characters. Optimized for APL 1.
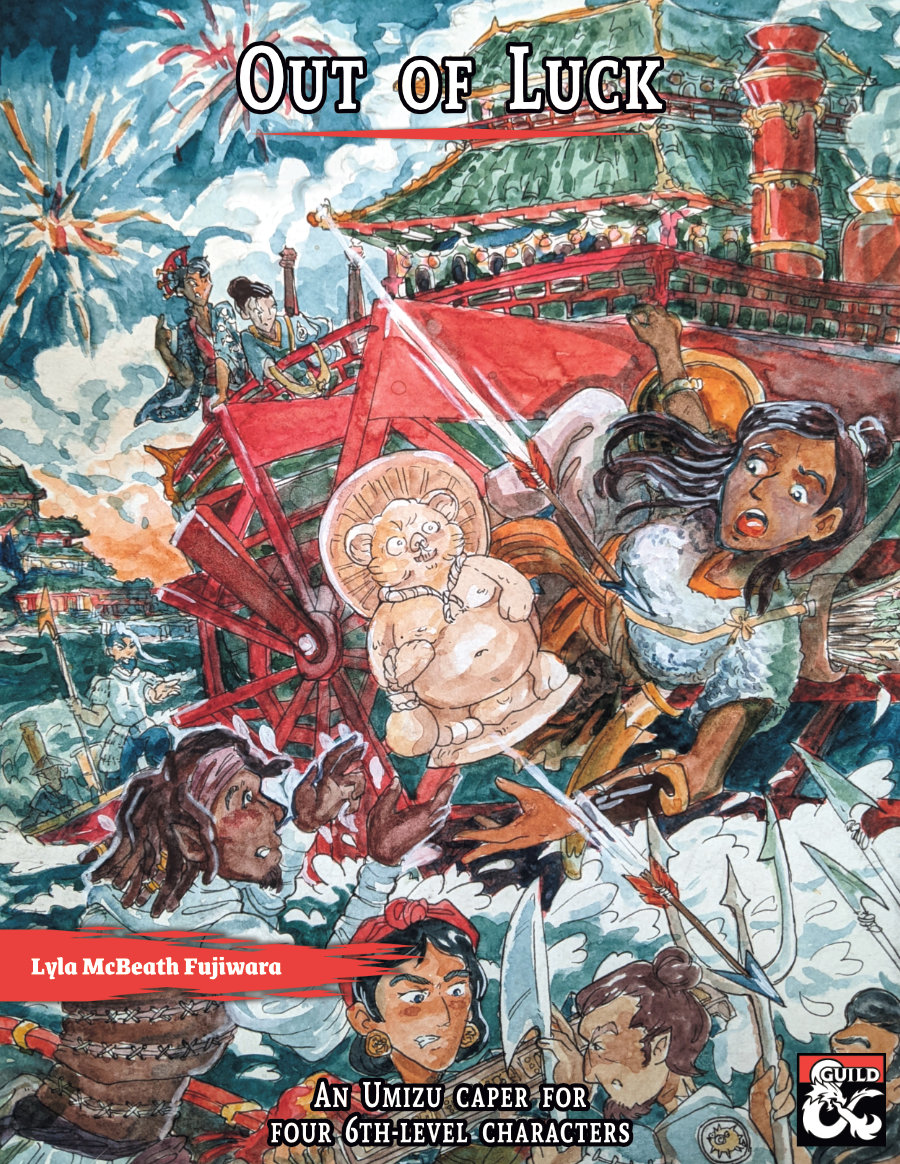
Take down a brutal crime boss in this one-shot heist with hijinx and heart. Explore Umizu, a seedy coastal steampunk city-state inspired by pre-modern Japan. Umizu is a Radiant Citadel locale that never got a full adventure--until now! Out of Luck features a cursed tanuki statue, a baby’s birthday party, and a steamboat fireworks battle! This one-shot includes everything you need to run a memorable caper: - Full-Color VTT-compatible steamboat bathhouse maps (DM and Player versions) - 8 Hand-drawn portraits and tokens for monsters and NPCs - Player handouts, a suspicion tracker, and three new stat blocks - Compatible with the Radiant Citadel or the Golden Vault; run as a one-shot or as part of a campaign - Thoroughly playtested and reviewed; over 30 players and DMs have gone through the adventure - A printer-friendly version Synopsis The Independent Merchants of Bright Moon Pier are sick of the Safe Oceans Society’s protection racket. After negotiations turn violent, the merchants opt for subterfuge. They hire the characters to infiltrate Boss Yashima’s birthday for her infant daughter and trick Yashima into accepting a cursed artifact, the Idol of Misfortune. Will this be a clean caper, or will the characters find themselves out of luck?

*THIS IS A D&D NEXT/5E PLAYTEST ADVENTURE* Imani, a Turmishan wizard and former adventurer, seeks the aid of heroes to infiltrate Dretchroyaster’s lair and recover the Diamond Staff of Chomylla—the key to powerful magic and wisdom locked away for thousands of years. In addition to his own sagely interest in the lore of lost Uvaeren, Imani recognizes the dangers of such powerful magic falling into evil hands. The dracolich has secured the staff in his lair’s cen- tral chamber, using ancient wards of protection that can be bypassed only by four artifact-idols once belong- ing to a cult of Bhaal. Each group of adventurers enters the dungeon through a different section of the dun- geon—a forgotten temple of Bhaal, a vast underground lake, a troglodyte village, or Dretchroyaster’s vaults. Dretchroyaster’s lair is no simple set of caverns and ancient ruins. It sits atop a source of great power and energy, which the dracolich and his Cult of the Dragon allies hope to use to unlock the secrets of the staff. Only by undertaking a unified assault against Dretchroyas- ter’s lair can the adventurers hope to recover the Diamond Staff and survive the dracolich’s fury. The adventurers must make their way through the lair and recover the Bhaalite idols that will help unlock the Diamond Staff, all the while dealing with the lair’s creatures and avoiding the dracolich as he pur- sues intruders. Entering the Chamber of the Diamond Staff, the heroes must overcome its magical wards and claim the staff before being slain by the dracolich and his servants.