
Word has reached your ears that a relic weapon is nearby and at the ruins of Linthar Keep. Once a bastion of humanity the remains of this fortress is now home to roving bands humanoids that have been attacking nearby communities. Can your young adventurer brave the dungeon of the old keep and find the riches others have been unable to…..the famed SKULLCLEAVER blade!

Tired and sore, you struggle over the burning sands toward the long-forgotten city. Will you reach the place in time to save yourselves from the evil efreeti? The sun beats down, making your wounds stiff and worsening the constant thirst that plagues anyone who travels these waterless wastes. But there is hope - are those the ruins over there? In the midst of broken columns and bits of rubble stands a huge statue. This is the place! You've found it at last. Gratefully, you sink onto the sand. But there is no time to lose. You must hurry. So with a quavering voice you say the magic words. And then you wait... A hush falls over the ruins, making the back of your neck prickle. Then, out of the east, a wind rises, gentle at first but quickly growing stronger and wilder, until it tears at your clothes and nearly lifts you off your feet. The once clear sky is choked with white and grey clouds that clash and boil. As the clouds blacken day turns to night. Lightning flashes followed by a menacing growl of thunder. You are beginning to wonder if you should seek shelter, when all of a sudden there is a blinding crash and a bolt of lightning reduces the statue to dust. For a moment, silence. The, out of the statue's remains, soars a blue flame. Its roar deafens you as higher and higher it climbs, until it seems about to reach the clouds. Just when you think it can grow no larger, its shape begins to change. The edges billow and soften, their roar lessens, and before your eyes materializes a gigantic blue man. This adventure can be played alone or as the second part of the Desert of Desolation series. For characters level 6-8. TSR 9053

This material was originally published as two separate adventures, D1: "Descent into the Depths of the Earth" and D2: "Shrine of the Kuo-Toa." Contained herein are referee notes, background information, maps, and exploration keys intended for use with the Advanced Dungeons & Dragons rules. The adventure can be used alone or as part of an extended adventure that begins with G1-3: "Against the Giants" and continues with D3: "The Vault of the Drow" and Q1: "Queen of the Demonweb Pits." TSR 9059
a baron recruits the party to find a set of magical swords as well as explore a mine shaft that connects to the under dark

The king summons the heroes to investigate the death of a knight, and the final fate of the king's long-missing son. The knight and his entire order was killed by a Dragon! Yay we get to fight a dragon in the first issue of Dungeon Magazine! Much travel over many different terrain types featuring avalanches, volcanoes spewing lava, and many random encounters (not detailed here) before the heroes reach their real goal: A lake with a ruined wizard's tower and dragon's cave. Opens with a particularly byzantine Background section for the DM involving a prince you never meet, pirates you never meet, knights you never meet, and deep gnomes you never meet. See Out of the Ashes in Dungeon #17 for sequel to this adventure. Pgs. 42-60

Set to the west of Crystal Shores this old tomb is said to hold riches of untold value. Some say a magical healing item may be located within the secret rooms of the lost sanctuary!

An army has appeared from the desert wastes led by a sorcerer said to be immortal. Fearing imminent attack, the Border Kingdoms have sent assassins to slay this so called Ravager and find this terrible rumor is true. You are tasked with discovering the secret to the sorcerer's immortality, hidden amidst an ancient crypt.
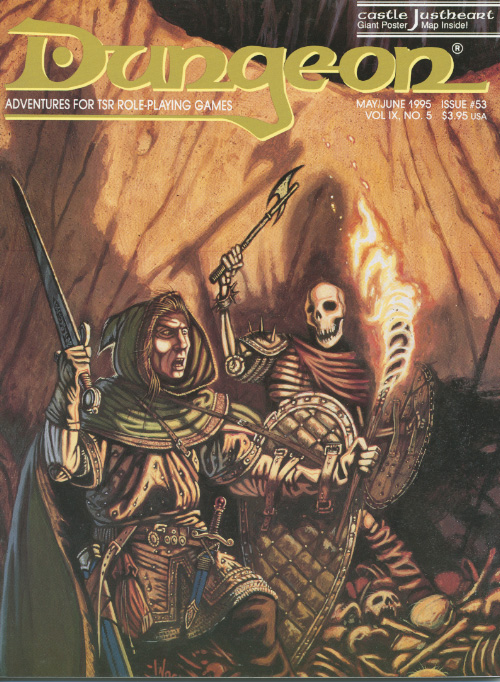
"While staying in the quant rual town of Keswig, the PCs are approached by a troubled young woman named Elexa Justheart. Elexa has just returned from the Galhanor Crusades--a war fought against giants and humanoids in the distant Galhanor Mountains. After serving six months as a cleric in a series of major battles, she recently arrived home to find her uncle's castle occupied by evil brigands." -- from the module. Includes overland maps and maps of the tower and castle.

On a storm-blasted mountain lives an immortal Arch-Mage with a foul temper. The townspeople want you to talk to him - and kill him, if necessary. Is immortality worth the price? An Arch-Mage's magics threaten a small village. To protect it the party must brave a dangerous climb, and survive the Mage's warded lair. Pgs. 43-64

The followers of the many gods of Kara-Tur have always fought, to prove the superiority of their martial discipline and the greater wisdom of their deities. The strict hierarchy of the gods is now threatened by the sudden prominence of the followers of the Dragon Claw, a new and deadly school of martial arts that threatens to destroy all other schools. The players, recruited by a mysterious old monk with a bizarre fighting style, must find out what's behind the emergence of the Dragon Claw and put a stop to it. Mad Money vs. The Dragon Claw will take players across the entire country of T'u Lung, from the mouth of the great river Fenghsintzu to its headquarters, where they must deal with the legendary Cult of the Black Leopard - all in the name of the Mad Monkey. Mad Monkey vs. The Dragon Claw is a scenario for the ORIENTAL ADVENTURES supplement to the AD&D game. It is set in KARA-TUR, the oriental world in the Forgotten Realms. Mad Monkey vs. The Dragon Claw is designed for five to eight characters of Levels 6-9. TSR 9242

Somewhere under a lost and lonely hill of grim and foreboding aspect lies a labyrinthine crypt. It is filled with terrible traps and not a few strange and ferocious monsters to slay the unwary. It is filled with rich treasures both precious and magical, but in addition to the aforementioned guardians, there is said to be a demilich who still wards his final haunt (Be warned that tales told have it that this being possesses powers which make him nearly undefeatable). Accounts relate that it is quite unlikely that any adventurers will ever find the chamber where the demilich Acererak lingers, for the passages and rooms of the Tomb are fraught with terrible traps, poison gases, and magical protections. Furthermore, the demi-lich has so well hidden his lair, that even those who avoid the pitfalls will not be likely to locale their true goal. In the far reaches of the world, under a lost and lonely hill, lies the sinister TOMB OF HORRORS. This Labyrinthine crypt is filled with terrible traps, strange and ferocious monsters, rich and magical treasures, and somewhere within rests the evil Demi-Lich. TSR 9022

This setting was used in the FN series and like the others in the FA series, it was used as an area for multiple adventure opportunities as well as a semi-safe haven. The main community in the area is the Village of Tomore. This community is offered as a free download! With a multitude of side adventures this area helps mid-level adventurers increase their experience point base. Close to this area is the previously published Sunken Temple of Bulu and the Ruins of Tarlac Keep.

After hiring a group of brave adventurers to help him "acquire" a beholder specimen, the mage Velinax disappears! Rumors blame an insidious thieves' guild called the Unblinking Eye for this turn of events. Why would the Unblinking Eye wish to "take care" of the mage? Why does the guild want to speak to anyone involved with Velinax? Finally, what dark goal does the guild truly intend to accomplish? Finding out the answers to these questions will lead doughty adventurers straight through the shadows of a crafty thieves' guild and onto the threshold of an even deeper and more dangerous darkness. "Eye of Doom" is the second of three adventures featuring the nightmarish beholder. It can be played as an individual mission or as part of the series that began with "Eye of Pain" and concludes in "Eye to Eye." TSR 9530

A madman stalks the fog-shrouded streets of Paridon, killing with gruesome precision - and always at midnight. A party of brave adventurers witnesses the most recent of these brutal murders. Now that they've seen the killer's face, they're sure to be his next targets. Who can be trusted in this city where the residents are not what they appear to be? Those who dare to track the killer will find strange allies - and even stranger enemies. The adventurers must investigate the ancient mystery behind the murders that take place when the clock strikes the "Hour of the Knife." This 64-page adventure includes a full-color poster-sized map of Paridon. The adventure is based on the popular RPGA Network tournament by Bruce Nesmith. TSR 9456

Some dozens of leagues to the north and west of the STEADING OF THE HILL GIANT CHIEF (Module G1 of this series), amidst the tallest mountain peaks, is the stronghold of Grugnur, Lord of Frost Giants. As frost giants have been amongst those who have been in the reaving bands, the party is to deal with them as the hill giants have been dealt with. Death and destruction are to be meted out to the frost giants in the same measure they gave to the peoples below. This module contains background information, referee's notes, two level maps, and exploration matrix keys. It provides a complete module for play of ADVANCED DUNGEONS & DRAGONS, and it can be used alone or as the second of a three-part expedition adventure which also employs DUNGEON MODULE G1 (STEADING OF THE HILL GIANT CHIEF) and DUNGEON MODULE G3 (HALL OF THE FIRE GIANT KING). TSR 9017

The fourth installment of the Filbar Dual (FD) series is The Hunt for Charon and picks up where the FD3 - Crisis at Marstan left off. Your pair of intrepid adventurers is off to find out who orchestrated the attack at Marstan. When the previous adventure concluded they discovered a note mentioning a “Charon” as behind the attack and the humanoid raiders. This adventure will see if the pair can find and defeat this person/humanoid and protect the area once and for all.

"The southlands of Eor are being despoiled. Merchants will no longer run their caravans on the main highway past the quiet village of Waycombe. The peasants are fleeing their lands, and all are demanding protection from the powerful Count of Eor. The goodly count has sent a troop of his trusted fighters to exterminate the brigands believed responsible for these outrages, but weeks have passed, and still there is no word from this force. Now John Brunis, Count of Eor, has turned to you for aid. After taking counsel with the High Priest of Eor, he believes that a small party of cunning, bold adventurers may succeed where armed might has failed. You find yourselves faced with many mysteries! Why has robbery suddenly erupted in the peaceful southlands? How could mere brigands be as powerful as the foes described to you by their numerous victims? Is this really mere robbery? Or is there some truth to the rumors, told only in hushed whispers, about the beginnings of a hideous plot being hatched by an ancient, vile, and evil foe of all mankind?" Eor is beset by marauders and lizardmen of a boldness not seen in years. Hired by the Count of Eor, the party is tasked with tracing the source of these foes and eliminating them for the safety of the realm. After a set piece combat in Count Brunis's castle, the party must trek across Eor's wilderness, eventually coming to the Great Southern Swamp beyond the village of Waycombe. With further exploration they can locate the Ancient Temple which serves as the tomb and stronghold of Sakathas, the vampiric LIZARD KING! TSR 9055

Something's rotten in Restenford! A plague of giant rats is the least of Restenford's worries. The adventure is set in the town of Restenford but with a little work can be adapted to fit almost any setting that features pirates (or once did). Pgs. 10-29

Red for love, white for purity, black for death. He was thoughtful, obedient, and trustworthy - the epitome of a traitor. All he needed were some heroes. A powerful undead knight, Agrovale, wants to be released from a necromancer named Talakara. He sets in motion an elaborate plan to get the players involved in overthrowing Talakara in her bid to become a goddess. He frames the necromancer for a kidnapping and murder and leaves a trail of clues to lead the players to her stronghold. The party travels through an extensive stronghold filled with many different monsters, finishing with a fight with the demigod Talakara and subsequently the freedom-seeking Agrovale. Pgs. 38-63

In the Yatil Mountains south of Perrenland there is rumored to be a magical hoard of unsurpassed value, a treasure of such fame that scores of adventurers have perished in search of it. Find the perilous Lost Caverns of Tsojanth and you may gain the hidden wealth of the long-dead arch-mage-- if you live. Module S4, this contains a brief wilderness journey to the caverns, but the bulk is underground. The caverns are noted as a previous lair of the Arch-mage Iggwilv- though she is long gone, her Demonomicon remains. This module marks the first appearance of several monsters and items that would later appear in the Monster Manual 2 and Unearthed Arcana. A labyrinth features in the caves. TSR 9061