
The infamous Scorpion Prince ruled his domain centuries ago, but the lands are still desolate, a testament to his poisonous influence. His terrified subjects rejoiced in his death but also feared he would return if not interred properly. To ensure the prince's happiness in the afterlife and his tomb's security, his people erected a great monument and created trap-filled chambers to house and protect his body and his wealth.

What is the Lost Lands? The Lost Lands is the home campaign world of Necromancer Game's and Frog God Game's own Bill Webb. This campaign has been continuously running since 1977. Many of the adventures published by Necromancer Games and Frog God Games are directly inspired by this campaign. They have evolved over the decades, and more material continues to flow from it as the dice keep rolling. Sages and wizards of legend speak of the Lost Lands—many of the players who have lived and died in Bill's campaign over the years now have a place in history (in the books). Frac Cher the dwarf, Flail the Great, Bannor the Paladin, Speigle the Mage, and Helman the Halfling are well known to the fans of Bill's work. This is the game world, and these are the adventures in which the players of these famous characters lived and died. Hundreds of players over the past 35 years have experienced the thrills and terrors of this world. The Sword of Air is the centerpiece of the Lost Lands. Currently, this epic tome consists of several parts: 1. The Hel’s Temple Dungeon—kind of like Tomb of Horrors on crack. This six-level, trap-and-puzzle infested dungeon formed the basis of Bill's game through his high school and college years. Clark Peterson’s very own Bannor the Paladin spent several real life months in the place, and, sadly, finished the objective. This is where the fragments of the fabled Sword of Air can be found…perhaps. 2. The Wilderness of the Lost Lands extending to the humanoid-infested Deepfells Mountains and providing detail about the nearby Wizard’s Wall. This so-called “wall” was raised by the archmages Margon and Alycthron harnessing the Spirit of the Stoneheart Mountains to raise the land itself, creating a massive escarpment to block invaders from the Haunted Steppes. These archmages are actual player characters from the early 1980s who live on in the legends of the Lost Lands. Over 70 unique encounter areas are detailed, and each one is a mini-adventure in itself. New wilderness areas may be added based on bonus goals described below! 3. The Ruined City of Tsen. Legend has it the city was destroyed by a falling meteor. This place forms an aboveground dungeon area the size of a city, with over 100 detailed encounter areas. It’s a very dark place…even at noon. 4. The Wizard’s Feud—This campaign-style adventure pits the players in a long-running series of intrigues and battles between two archmages. Which side will they take? Their actions all play into the overall quest, and could well determine which side wins. Law and Chaos are not always what they seem, and if the wrong decisions are made, the entire ordeal could fail. Remember, one of the wizards WANTS Tsathogga to win. 5. New monsters, new demons, new spells, and new rules for various aspects of play. 6. The Tower of Bells. This dungeon is the result of the workshop Bill ran at PaizoCon 2013, where the participants assisted him in building an old-school dungeon. Visit the tower and discover the secrets of the “artist” within. Beware: those entering may never come out!

"The screams became overpowered by the sound of the terrible falling star--a black orb of malign energy hurled from the firmament in the dead of night. In that instant, the village of Rhale was utterly destroyed, reduced to a hollow crater of flaming decay. Now, frightened talk of a dark presence descended from above has taken root, though none can put name to the faceless fear that might reside within this terrible orb." While traveling the countryside, the player characters witness an explosive event - the falling of a meteor into a distant hillside. Soon thereafter, they encounter several mercenaries menacing some refugees. From them, the PCs can learn, that a group of dragon worshippers called the Black Covenant are in the area and intend to use the fallen star for their own nefarious purposes. Upon arriving at the crater, the PCs find that the falling star is in fact a massive sphere of iron with an opening in its side. They enter the sphere to find a small complex of rooms protected by numerous traps and guardians. They also battle several members of the Black Covenant, until they make their way to the heart of the complex, where they discover the source of the Covenant's interest in the Black Egg, they try to use it to create a half-fiend red dragon. The PCs must succeed if they wish to prevent the creation of an army of fiendish dragons. Lot's of monstrous NPCs with class levels and templates for enemies (half-black dragon orc warriors level 7, for example) are used in this adventure. Pgs. 57-78

With a bit of experience under your belts, you roll into the small town of Windomere with the hopes of catching a ferry to the larger community of Sepopolis. Your initial greeting lacked a warm glow and you quickly discover why. Apparently a river pirate with the moniker of ‘Slippery Peat’ and his cronies have been causing quite a stir in the area. You have a bit of a layover…ready to do the region a favor?

A Four to Six Hour Adventure for 11th-16th Level Characters in Dungeons and Dragons 5E The Adult Green Dragon Valturnax has attacked the nearby village of Hartsvale, threatening to destroy them completely if they do not submit to his rule by nightfall. To save the town, adventurers must ascend the mountain by climbing through the caves housing the dragon’s minions and face him in his lair – and they need to do so before the sun sets. This adventure is meant to be quite challenging. Enemies know the adventurers are coming and have had time to prepare, and they do so intelligently. This adventure draws some inspiration from Tucker's kobolds. As an added bonus, this adventure is available completely for free.

Seductive vampires, hungry werewolves, sinister drug dealers, trouble in the sewers, and an undead beholder? Just another day in Waterdeep! The first adventure in the Vampires of Waterdeep Campaign Arc. Pgs. 62-77

The first part of the Dreams of Red Wizards adventure path originally published for the D&D NEXT Playtest. Following the events Ghosts of Dragonspear Castle, a new set of adventurer's will see some of the repercussions of that adventure. This adventure is intended to be continued in the Dead in Thay adventure (Note that they Dead in Thay 5e adventure featured in Tales from the Yawning Portal is missing a significant portion of interlude that links Scourge of the Sword Coast to the events within the Doomvault). The adventurers arrive when Daggerford is crowded with refugees from outlying lands. Goblins, gnolls, and orcs have been raiding the countryside. Now, food is scarce and tension is high. Blame for a theft has fallen on the refugees, and the Duke of Daggerford has forbidden more of the displaced from coming into town. After overcoming difficulties to enter Daggerford, the characters learn more about the raids. As they fight against the humanoids and delve deeper in the darkness that encircles Daggerford, the characters learn of Bloodgate Keep. After a final fiendish ambush, they’re ready to confront the real threat to the area. DM Note: This adventure points the adventurers strongly towards Bloodgate Keep but that location does not appear until the Dead in Thay adventure; at several points the party may feel drawn to explore that location rather than continue their investigations around Daggerford. However, since Bloodgate Keep is only eluded to as a source of great evil power, it can serve to easily segue to an entirely different adventure path. As a NEXT Playtest adventure, Scourge of the Sword Coast uses milestone leveling and the included stat blocks for creatures do not necessarily match or even appear in the 5e Monster Manual, nor do they have XP values or challenge ratings. In some places it will reference rules used in the Playtest but dropped or changed in the 5e release, these are unlikely to substantially impact gampley with 5e rules.

The Raiders’ Hideout is a series of underground chambers (or perhaps the interior of a pyramid) that serves as a base of operations for a band of gnoll desert raiders. The PCs have come to exact a measure of justice for recent brutal caravan raids. They’ve tracked the gnolls to their lair, where they intend to end the threat to desert trade once and for all. Pgs. 30-35

A duergar mining expedition has led to a curious find - the entrance to the mythical Forge of Creation, where the first dwarves supposedly created the tools that brought civilization to the world. Their discovery has not gone unnoticed though, as their toiling within the forge has activated a portal to the Elemental Plane of Fire, drawing the attention of the efreeti Camus, Eyes of Midnight. The PCs are caught in a clash between the efreeti sultan and the meddlesome duergar, and must survive threats from each faction and the dangers that lurk within the forge itself!

The party has been tasked with bringing the head of the fire giant king Snurre Ironbelly to the storm giant lord Krombaalt, as well as capturing the dwarven traitor Obmi Ironwhisper. Delving into Snurre's stronghold, they will also discover the sinister drow manipulating the giants. The adventure is part of the "Against the Giants" series originally by Gary Gygax, hence the writing credit.

If the PCs are to avert the Age of Worms, they must invade the heartland of Kyuss' power, the Wormcrawl Fissure, and destroy one of the world's most powerful dracoliches before the Wormgod awakens. "Into the Wormcrawl Fissure" is the eleventh installment of the Age of Worms Adventure Path, a complete campaign consisting of 12 adventures, several "Backdrop" articles to help Dungeon masters run the series, and a handful of poster maps of key locations. For additional aid in running this campaign, check out Dragon's monthly "Worm Food" articles, a series that provides additional materials to help players survive this campaign. Issue #343 of Dragon presents statistics for some extraplanar entities the PCs may wish to call upon to aid them in the Wormcrawl Fissure. Pgs. 54-89
As the story goes, worshipers of Bahamut and worshipers of Gruumsh spent years warring. As the dead piled up, a Bahamut faithful crafted a weapon of devastating power. Most of the inventor’s peers balked at its use, but some felt it was justified. Those few who used the weapon were twisted into mad, dark beings by its corrupting power. The rest of Bahamut’s flock locked them and the weapon away in a dungeon prison. The dungeon and its terrible secret were long forgotten—until a group of rakshasas happened across the ancient tale. Now they seek the weapon for their own designs. Pgs. 132-137

"For Blibdoolpoolp!!" "The power of the mind and belief are wonderous, often leading us to manifest things that aren’t real. For the kuo-toa, this power is heightened, allowing their collective belief to manifest gods." Two tendays ago, a paladin of Torm was kidnapped by kuo-toa. In a strange turn of events, she was mistaken for a kuo-toa god, and whisked off to their underground lair. Barria has managed to pose as the god and now shakily leads a small faction of kuo-toa while trapped underground. With her influence being increasingly scrutinized, and with the different kuo-toa sects on the brink of civil war, it’s a dangerous time, even for a ‘god’… The heroes’ mission — rescue the paladin from the kuo-toa oceanic lair before she’s transformed into a kuo-toa god. The kuo-toa are an Underdark-dwelling race of fishlike humanoids. Different sects worship different god-like beings, each god manifested through the strength of a sect’s collective zeal. Such “gods” feature prominently in this adventure. Product Overview ♦ 4 to 8 hours for four to five characters. ♦ Scalable for 3rd-6th level. ♦ High-resolution maps of the Kuo-Toa lair. ♦ 9 new statblocks, including Dire Barnacles and Hypno-Cuddlefish! ♦ Includes plot hooks, handouts, rules for faction combat, and more!

A bandit leader known only as "The Ravager" brings ruin to the Border Kingdoms. The characters must destroy the source of his power and defeat him before he can complete his evil plans. Pgs. 11-21
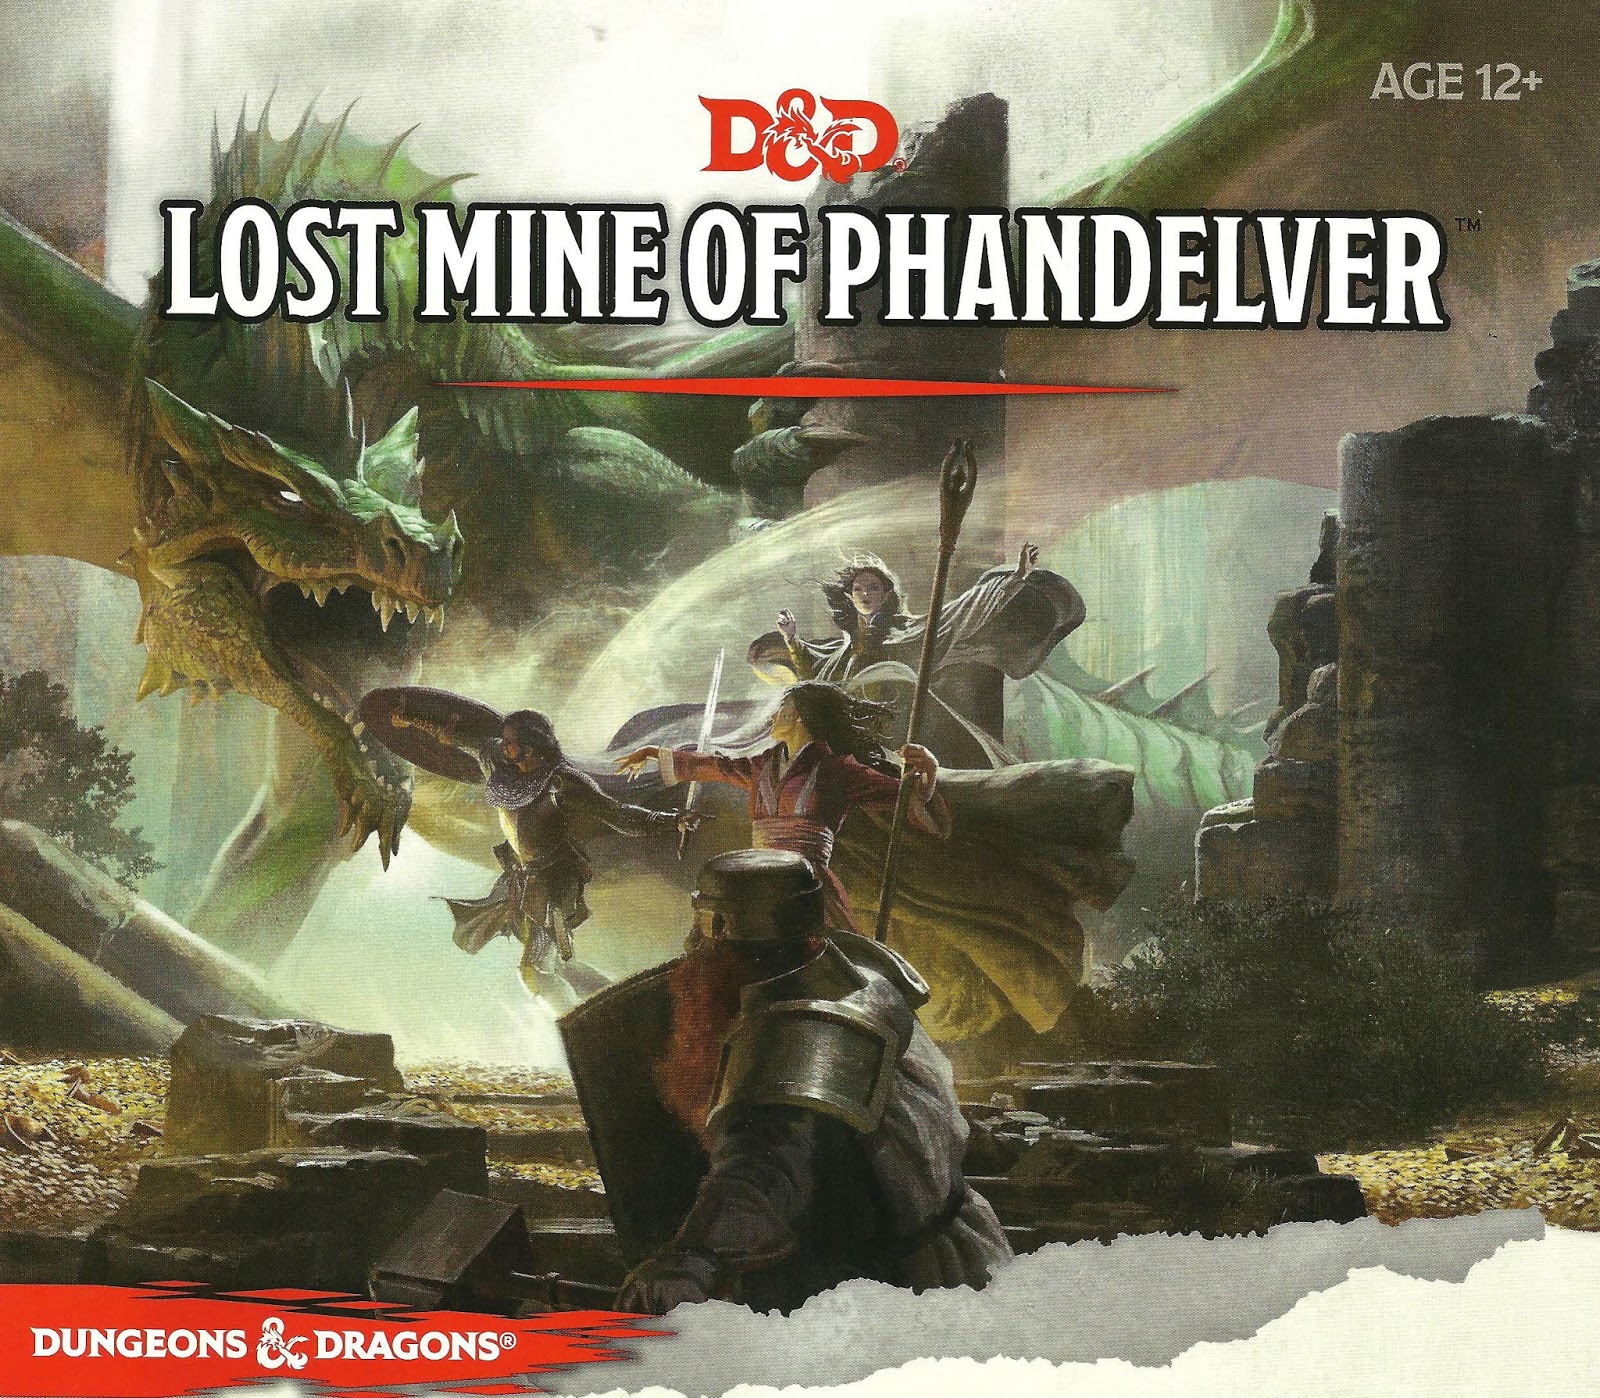
"More than five hundred years ago, clans of dwarves and gnomes made an agreement known as the Phandelver’s Pact, by which they would share a rich mine in a wondrous cavern known as Wave Echo Cave. In addition to its mineral wealth, the mine contained great magical power. Human spellcasters allied themselves with the dwarves and gnomes to channel and bind that energy into a great forge (called the Forge of Spells), where magic items could be crafted. Times were good, and the nearby human town of Phandalin (pronounced fan-duh-lin) prospered as well. But then disaster struck when orcs swept through the North and laid waste to all in their path. A powerful force of orcs reinforced by evil mercenary wizards attacked wave echo cave to seize its riches and magic treasures. Human wizards fought alongside their dwarf and gnome allies to defend the Forge of Spells, and the ensuing spell battle destroyed much of the cavern. Few survived the cave-ins and tremors, and the location of Wave Echo Cave was lost. For centuries, rumours of buried riches have attracted treasure seekers and opportunists to the area around Phandalin, but no one has ever succeeded in locating the lost mine. In recent years, people have resettled the area. Phandalin is now a rough-and-tumble frontier town. More important, the Rockseeker brothers - a trio of dwarves - have discovered the entrance to Wave Echo Cave, and they intend to reopen the mines. Unfortunately for the Rockseekers, they are not the only ones interested in Wave Echo Cave. A mysterious villain known as the Black Spider controls a network of bandit gangs and goblin tribes in the area, and his agents have followed the Rockseekers to their prize. Now the Black Spider wants Wave Echo Cave for himself, and he is taking steps to make sure no one else knows where it is." Extra Info from AL.com users: by @marcellarius. "There are a variety of locations in this adventure: the town of Phandalin, a gang hideout, a ruined keep in the forest, a destroyed village, and Wave Echo Cave (a dungeon crawl). The adventure is written in a sandbox style and relies on the players to choose their path. Phandalin offers several side-quests which could serve as hooks for continuing adventures. The premade characters have ties in their backgrounds to NPCs and locations. If you're not using these you'll need to consider other ways to introduce key NPCs."
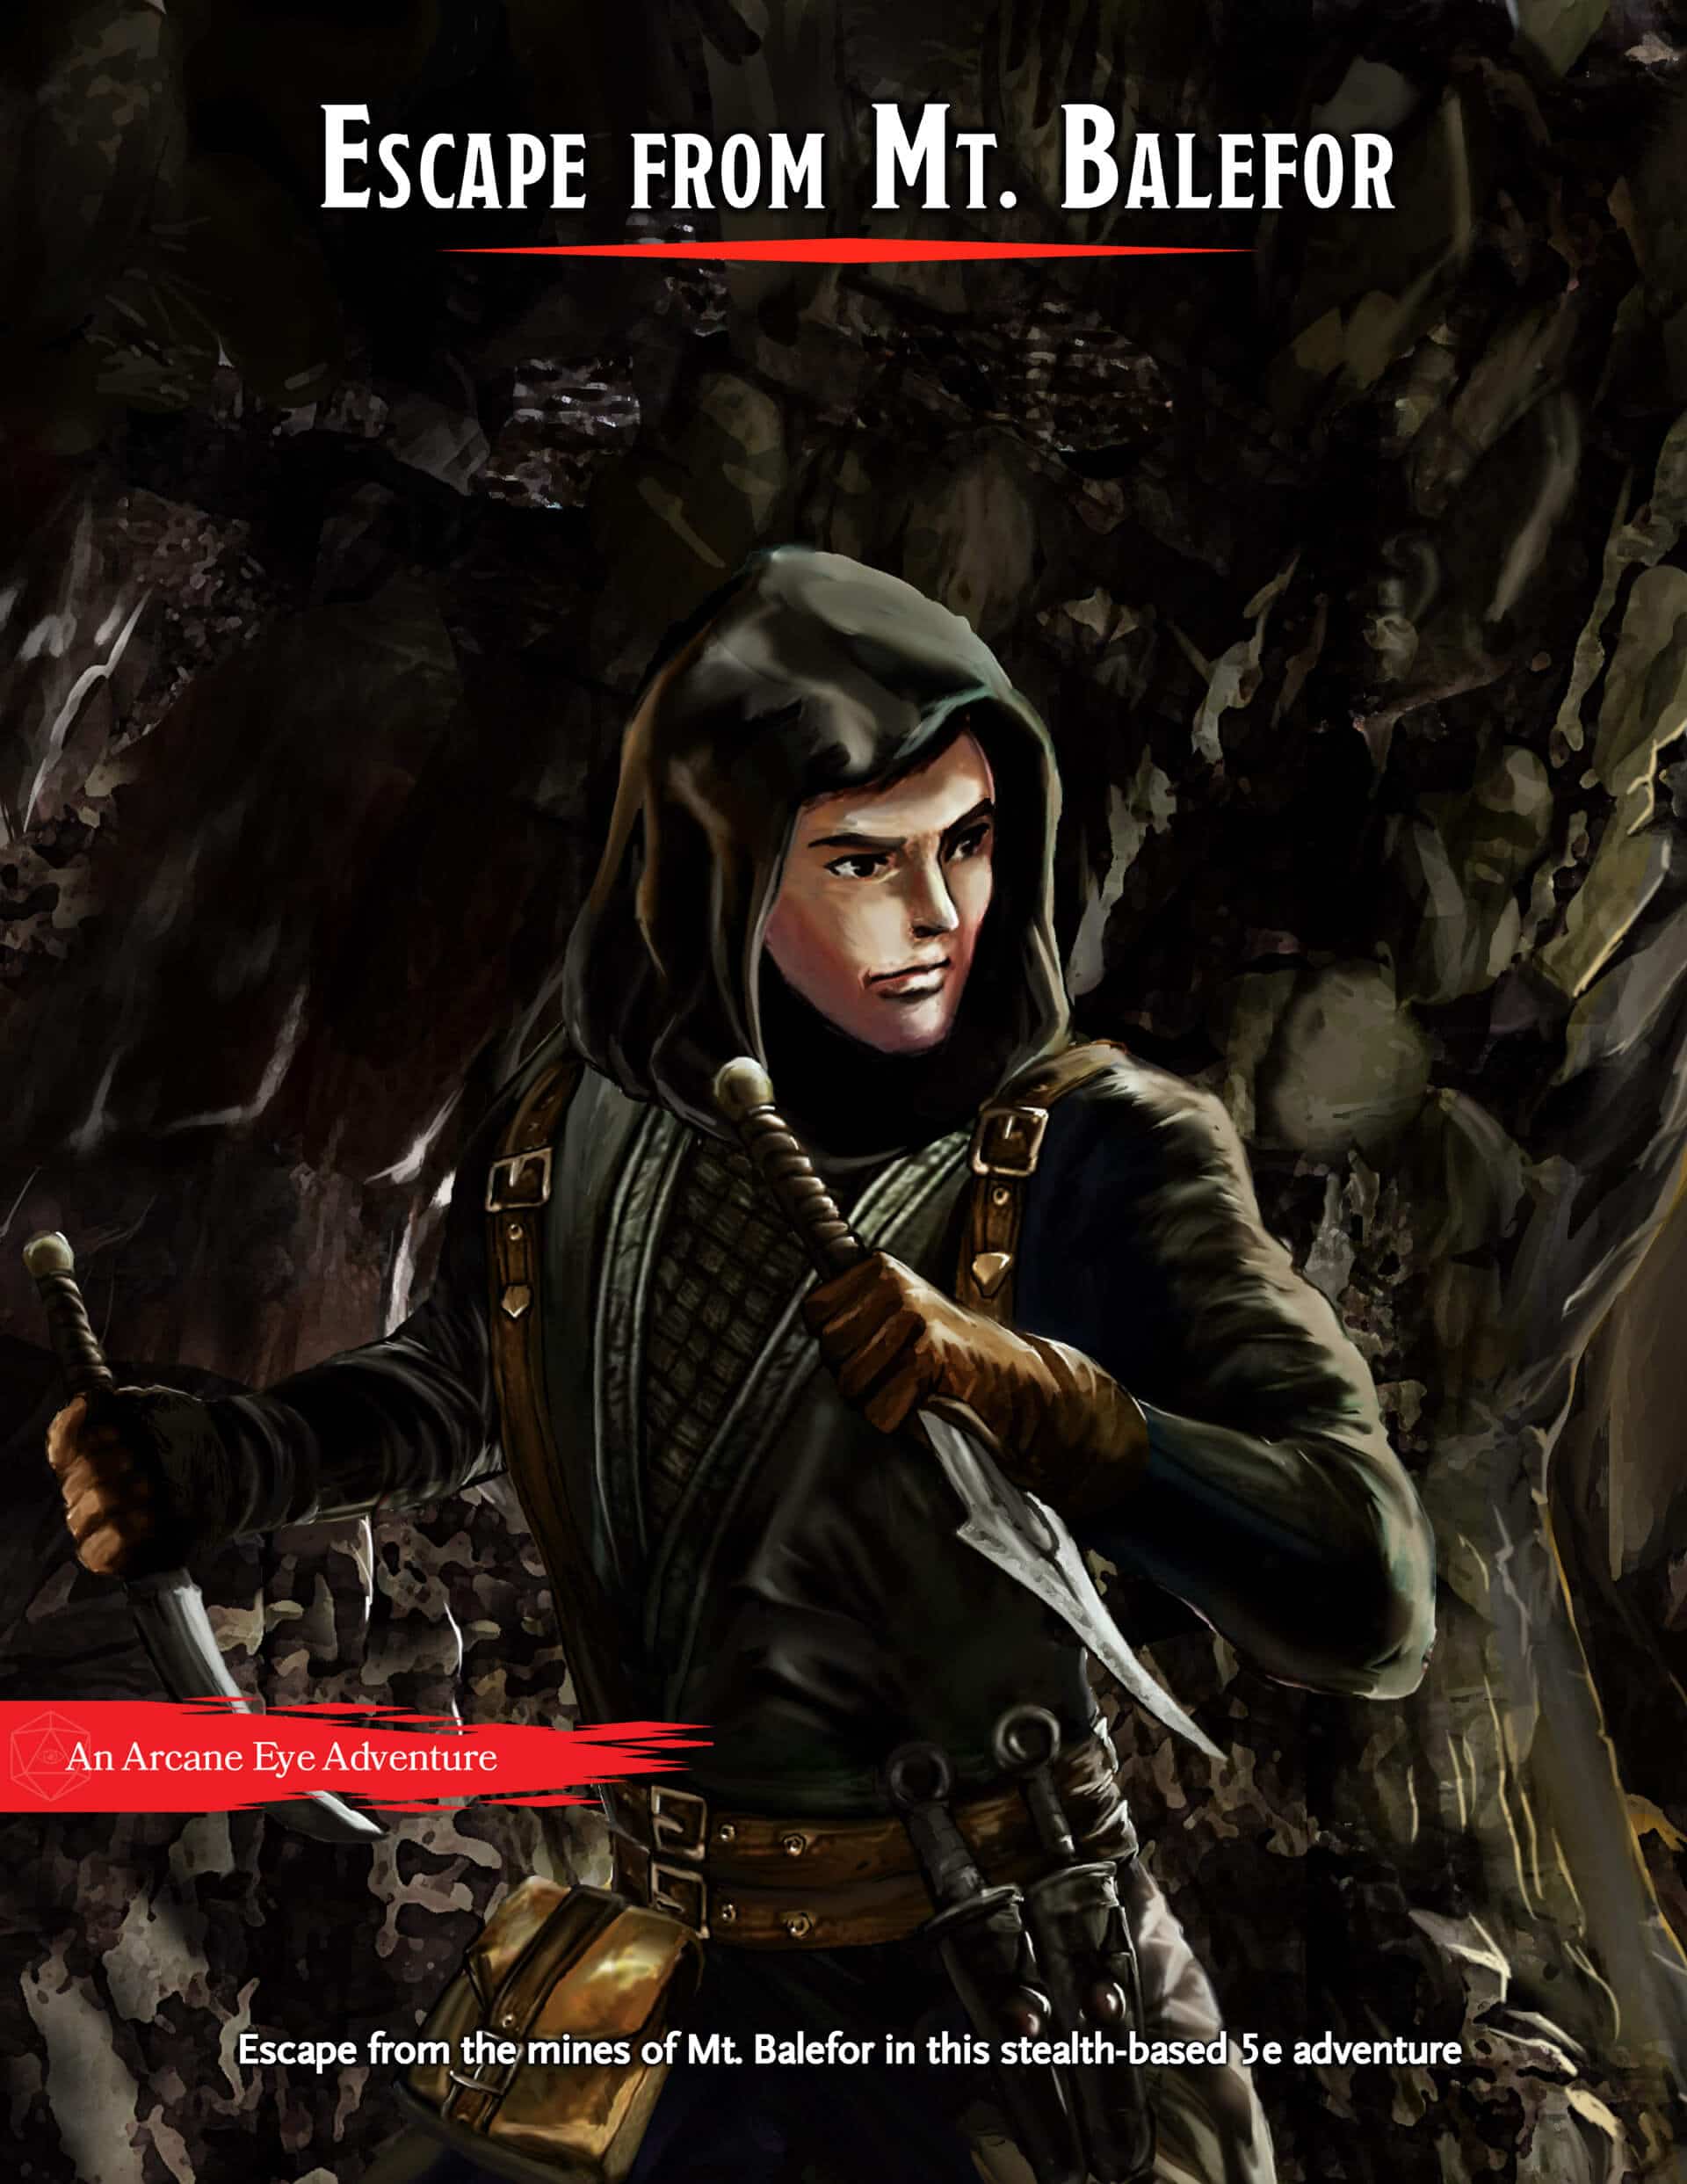
What’s Included Escape from Mt. Balefor is a self-contained 8-10 hour adventure for three to five 5th level characters. This premium module contains a full three-part story, battle maps, and NPC stat blocks. Your Mission Your party of Wood Elves will start in the mines and have to sneak and backstab their way to freedom. There are a number of chances to choose your path, whether you plan to avoid fighting or want to kill every last High Elf in the mines. There will also be a number of ways to affect the world around you if you choose to continue the story after the party escapes from the mines.

A group of adventurers find themselves drawn to Axeholme, a small, desolate village with a rash of disappearances. An ancient burial mound nearby has been opened, its stone door found shattered, and, if the villagers are to be believed, the disappearances are the work of a wizard’s curse. But things are not always what they seem.

Azaketh, a sly and industrious devil, prepares his revenge against his bitter enemy Zirkex. Naturally, the mortals affected by his schemes are mere pawns to further his goals. It is up to the heroes to stop Azaketh in his tracks before he takes control of a powerful weapon – Logrimm’s Tower Golem. The Tower Golem is an adventure designed for 3-7 2nd to 4th level characters and is optimized for five characters with an average party level (APL) of 3. It's the second and final chapter of the saga about Logrimm’s Tower Golem. The first chapter The Soulmonger isn't necessary to play The Tower Golem but it sets up the villian Azaketh and introduces NPCs that can help the characters conquer the Tower. The focus of The Tower Golem is set on roleplaying and interesting fights. In theory, the Tower is an infinite web of rooms and portals that the characters may never escape. However, eventually, the characters reach the end for one final encounter. You can change, interweave, or exchange the different parts as you see fit. There are several proposals and fully fleshed out levels in this document, but you may add your own adventures to the list!
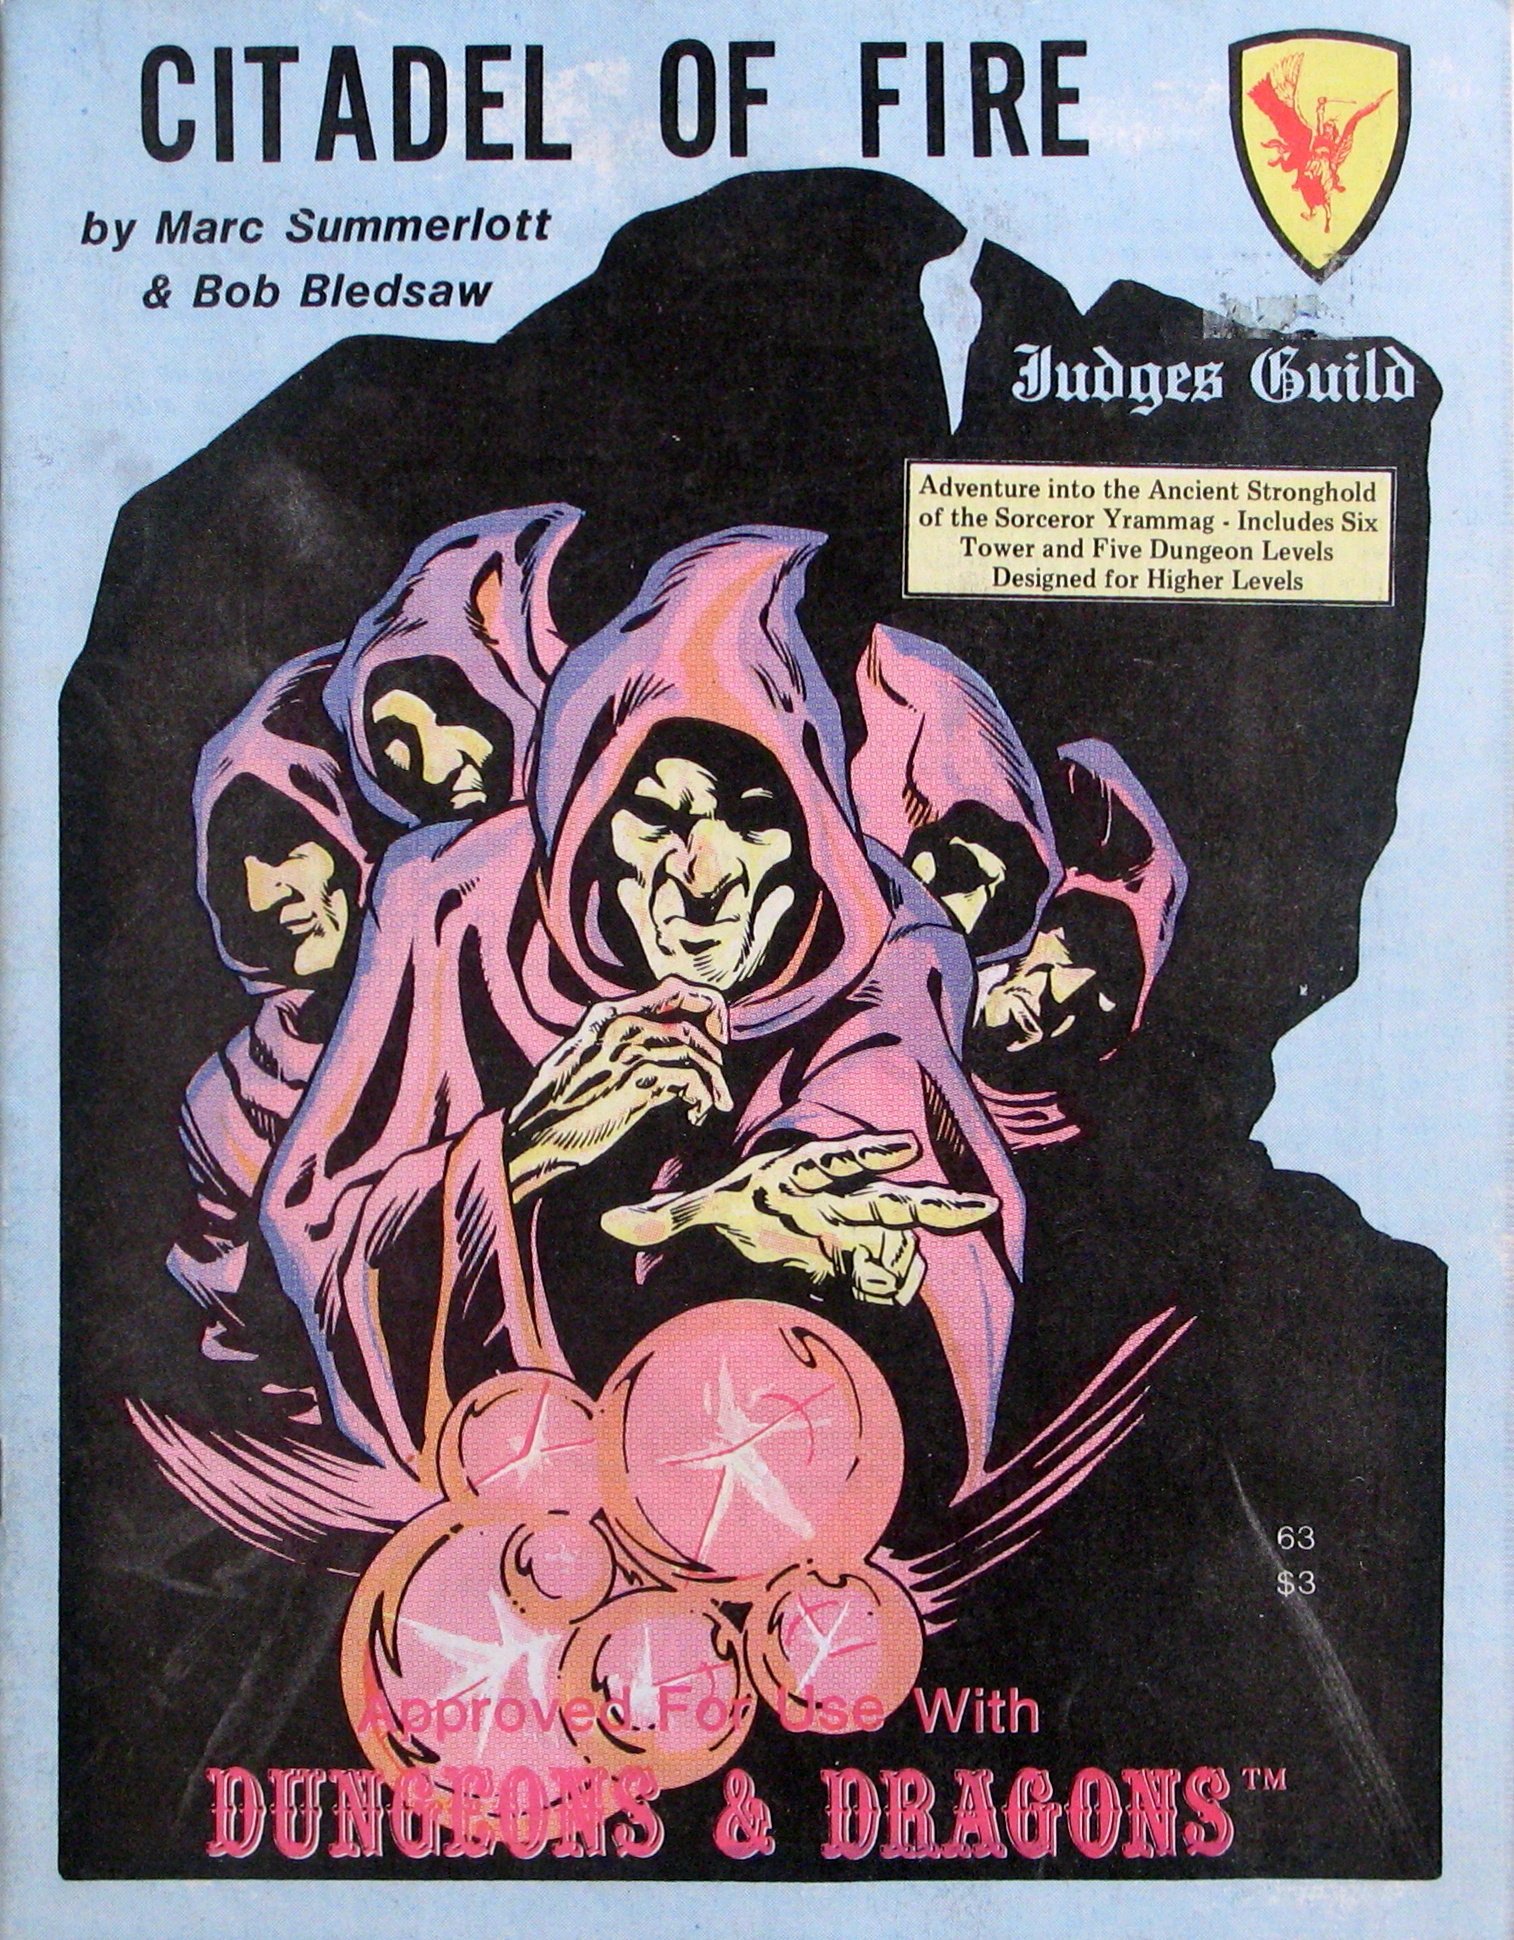
Adventure into the Ancient Stronghold of the Sorcerer Yrammag. Includes six story tower and five dungeon levels. Designed for high-level characters and filled with wizard apprentices, their creations and undead. Please note: The link for this adventure on Amazon is for a reprint of the original.
Most adventurers like to think that when their number is finally up, their colleagues will bring them home, either to be raised or at least returned to their families for a proper burial. But how far will the PCs go in order to do right by a fallen adventurer? And will they draw the line at hauling his coffin out of the Underdark? Pgs. 20-40