Pursued by wolves and worse, the party must fight a running battle to take refuge at the relative safety of the Bittermoon Inn, a decrepit old inn high in the mountains. But night is falling, can they uncover the secrets of the inn and use them to survive the night? This adventure can be played as a stand alone one-shot, or can be used as a drop-in side quest to almost any campaign. It is suitable for a party of about 5 characters at the First Tier (Levels 1-4). The players must fight a running battle with wolves to reach Bittermoon, then they must discover the secrets of the inn before escaping through a smuggler's tunnel. Finally they must face off against their unseen opponent at Skull Cavern. There are four encounter maps included with this title.

A hunt for a missing key leads the heroes from the streets of the city of Greyhawk to the Tomb of Blood Everflowing in the treacherous Cairn Hills. Pgs. 18-20, 22 & 24-39

The adventures in Dalentown continue in The Darkness Beneath Dalentown. Workers in the town’s sewers have stumbled upon the long abandoned halls of the dwarves that once settled beneath this region. What they’ve found is a haunted library. What they’ve woken is something far more sinister! The Darkness Beneath Dalentown features hordes of oozes, undead, and demons festering for years in an ancient dwarven mining stronghold. Now, they are slowly working their way to the surface, and the folk of Dalentown are in dire peril!

Continue the adventure inside the Dwarven Forge world of Mythras with the second part of this new gaming trilogy, The Hidden Valoria Campaign. Now entrenched in the tapestry of The Patina Court, the players must begin unraveling an even greater mystery that lies beneath the streets. Taking the adventure to the sewers, get ready to explore some of the locations that have made Valoria so famous among its players over the years This adventure is formatted to both 1E & 5E gaming rules. Also available in PDF.
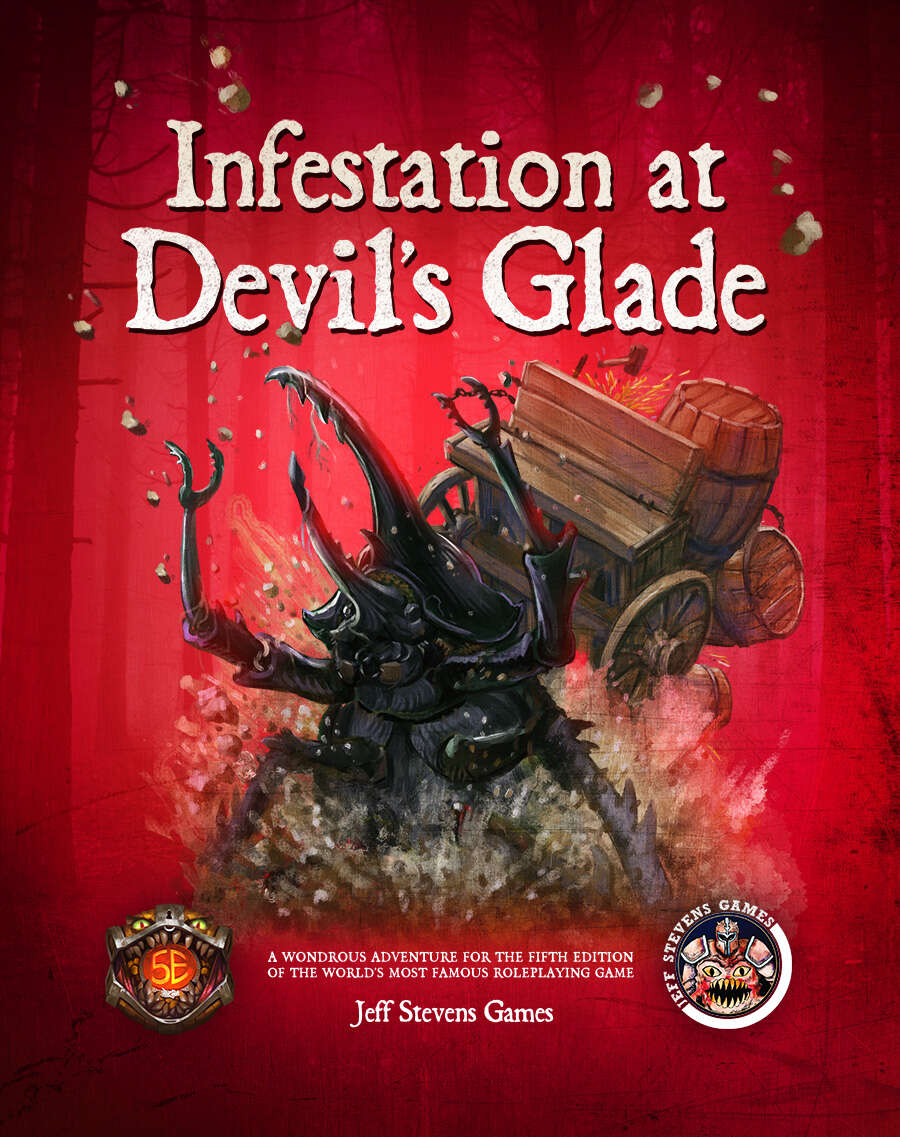
The town of Devil's Glade is under attack! Swarming insects have driven the residents out of their homes and businesses, and giant insects patrol the town square. Who or what has brought these creepy-crawlies to Devil's Glade? What's their motive? Are your heroes brave enough to put an end to the infestation? Infestation at Devil's Glade is a 2- to 4-hour adventure designed for four to five characters of 1st to 4th level, and is optimized for 2nd level characters. Scaling Suggestions are included, allowing you to play this adventure with characters of 5th to 6th level. Infestation at Devil's Glade isn't just a short adventure. We provide you with a location to which your heroes can return, or even use as a home base. The Supplement Includes: Adventure. The main adventure focuses on the heroes cleaning the town of the infesting insects and the villains who brought them. Beginning at The Fork (a tavern where many of the residents have made camp), the characters learn about the infestation of Devil's Glade, and are hired to look into the matter. NPCs. The adventure is filled with fun and engaging NPCs. During the characters' time at The Fork, they have the opportunity to talk with NPCs, help them, and learn more about the infestation. After the heroes return Devil's Glade to normal, the merchants and residents return, giving your characters unique shops to explore and quests to complete. Cursed Mask. The crux of the problem - a cursed mask that slowly transforms the attuned creature into a giant, insect monstrosity, and gives them power over insects. To end the infestation, the adventurers must confront the partially transformed person wearing the mask. Shops & Services. Devil's Glade contains shops and services the characters can explore, including therapeutic mud baths, a diner specializing in eggs, a trinket shop, a candle maker, and a dentist. Side Quests. We provide several side quests for before and after the main adventure, allowing you to increase the main adventure's run-time, and provide you with material for after the main adventure. Maps. The adventure contains maps for the main locations and major side quests. Each map is hand-drawn by Jean Lorber. Art. NO AI! The book is filled with fantastic, original artwork by Matt Morrow Art. Also Included: Map Files. Both grid and non-grid maps are included and available to download. Special VTT Tokens and Assets. Several custom tokens and art assets are included for VTT play.

*THIS IS A D&D NEXT/5E PLAYTEST ADVENTURE* Imani, a Turmishan wizard and former adventurer, seeks the aid of heroes to infiltrate Dretchroyaster’s lair and recover the Diamond Staff of Chomylla—the key to powerful magic and wisdom locked away for thousands of years. In addition to his own sagely interest in the lore of lost Uvaeren, Imani recognizes the dangers of such powerful magic falling into evil hands. The dracolich has secured the staff in his lair’s cen- tral chamber, using ancient wards of protection that can be bypassed only by four artifact-idols once belong- ing to a cult of Bhaal. Each group of adventurers enters the dungeon through a different section of the dun- geon—a forgotten temple of Bhaal, a vast underground lake, a troglodyte village, or Dretchroyaster’s vaults. Dretchroyaster’s lair is no simple set of caverns and ancient ruins. It sits atop a source of great power and energy, which the dracolich and his Cult of the Dragon allies hope to use to unlock the secrets of the staff. Only by undertaking a unified assault against Dretchroyas- ter’s lair can the adventurers hope to recover the Diamond Staff and survive the dracolich’s fury. The adventurers must make their way through the lair and recover the Bhaalite idols that will help unlock the Diamond Staff, all the while dealing with the lair’s creatures and avoiding the dracolich as he pur- sues intruders. Entering the Chamber of the Diamond Staff, the heroes must overcome its magical wards and claim the staff before being slain by the dracolich and his servants.

Many centuries ago, the dwarven kingdom of Sarphil stretched out across the Galena Mountains east of the Moonsea. They dug for the precious metals hidden beneath the rocky terrain, and they established numerous cities and settlements to aid in their excavation and manufacturing efforts. This was during the early days of Myth Drannor, the elven kingdom in the forest of Cormanthor, and the dwarves and elves initially clashed as each sought resources and expanded their territories. Myth Drannor and Sarphil eventually settled their differences, and many dwarves moved into the elven city to offer their services and expand their knowledge. In the Galena Mountains, Sarphil continued to flourish. Unfortunately, these days of prosperity did not last long. The last great king of Sarphil was lost in the dwarven city of Mount Throndor, beneath the mountain peak of the same name, and Sarphil withered under bitter clan disputes since no single family could claim legitimate lineage over the fragmented kingdom. What happened under Mount Throndor has been a mystery for thousands of years. Many attempts have been made to reclaim the lost riches and legacy of the last Sarphilan king, but powerful wards have prevented intrusion under the mountain, wards erected by the dwarves of Sarphil. Were the wards built to keep outsiders from intruding – or to keep something inside from escaping? An enterprising dwarven leader wants to find out, but she is going to need some help from a band of heroes. Horrors of Mount Throndor is a Dungeons & Dragons adventure of exploration, darkness, and terror featuring a lost dwarven city overrun by forces from the Far Realm and the journey to cleanse it once and for all. The adventure is designed for a group of 11th-level characters, and successful completion of the adventure should put the characters at 16th level. Here There Be Monsters Mount Throndor has become infested with madness from the Far Realm. During their journey to penetrate the ward and through the city itself, the characters are going to face gibbering horrors, unpredictable slaadi, fanatic stone giant cultists, degenerate star spawn horrors, mutant derro, undead dwarves, and countless golems. The ancient breweries of Mount Throndor have produced alementals who slither in the darkness, and a great dwarven war juggernaut named Big Hans stomps through the city. Legendary Villains and Epic Moments Though it has been sealed, Mount Throndor is not empty. The characters have opportunities to meet, interact with, and (likely at least) combat against powerful foes within the legendary dwarf city. A dwarf lich, a Far Realm spider goddess, an iron-encased demilich, and a melted flesh derro warlock monstrosity all await, along with a mind-bending force - Great Cthulhu! The characters have a chance to face an avatar of Great Cthulhu in the dwarven depths in the final confrontation of the adventure to free Mount Throndor and rid Faerun of a Far Realm invasion! An Adventure of Exploration Mount Throndor is a big, sprawling complex, a dwarven city with two major strongholds, a bridge system spanning a massive underground lake, and a deep mining complex. The scale is difficult to grasp and convey. Previous examples of adventures featuring these elements have included maps - usually lots of them, great spawling maps connected at ends to make huge subterranean dungeons. It is the classic image of a D&D dungeon crawl, and the map is a key component to its visualization. However, in this adventure, the maps are handled differently. There are certain areas, ususally outside the dwarven city itself, that include maps that are suitable for use at the game table, either in theater of the mind style or grid-and-miniatures. Mount Throndor itself is presented with an abstract map, and exploring it utilizes the exploration procedure outlined in Appendix A. Characters traverse the huge subterranean system using this abstract system, and during their travels they are going to run into random encounters and sites with more interesting and complex encounters.

A Villain with a Vison A stolen jewel leads to the heart of the swamp, where one man’s thirst for vengeance threatens to destroy an entire town. Pgs. 68-92

A noble scion and his retinue from Baldur’s Gate left on an adventure amid much fanfare. That was two weeks ago. Rumours in the taverns suggest only a single soldier returned, bearing grievous wounds and a ransom demand. Is this a simple case of misadventure, or are darker conspiracies afoot? Can you locate and rescue the nobleman, or will you fall victim to the malevolent powers stirring deep within the Temple of the Opal Goddess?

Adventures from the Potbellied Kobold provides you with fifteen unique adventures to use as one-shots, additions to your current campaign, or inspiration for a new campaign. We've even included a way to link several of the adventures, allowing you to run a short and quick campaign. The adventures use basic 5E creatures, custom creatures, and several Kobold Press creatures. Each adventure is written for a specific party level, but we've also included suggestions on how to adjust each adventure for a weaker or stronger adventuring party. In addition to fun adventures, you'll also find a few new magic items and NPCs to add to your game.
The town of Somber Hill is a quiet settlement in the foothills of a mountain range. A few days travel from the nearest city, the people of Somber Hill are a humble and self-reliant bunch. Unbeknownst to its people, the small town hides a sinister secret, some of the residents of Somber Hill belong to a cult that worships a long dead entity. Known only as The Dark One by their followers, this ancient being once called Old Somber Hill home. Their dark master is entombed in the catacombs beneath the town, and the cult hopes to resurrect their master with a blood sacrifice. The Crypt of Somber Hill is a Setting Neutral adventure and thus can be easily included in any existing story-line with minor alterations and adjustments or outright slotted into any existing campaign setting.

All of the Treasure, None of the Traps is an adventure that includes a single gauntlet of traps that contains twelve traps; meaning that it has either one or twelve encounters. The adventure consists of a long, twisting corridor with all of the traps set off, but these traps are reset by the PCs when they reach the center of the area. Pgs. 32-34

You have been sent to be an envoy for your country to a desert nation recently created. The area is known as a bandit haven and the new ruler ascended due to his overthrow of the others. As you open dialogue, Frito, the new leader, is willing to accept a trade agreement if the party resolves a few renegade issues for him. Designed for four, fourth level PCs!

Deep within a forgotten temple lies the Storm's Eye, a powerful sapphire coveted by the monstrous Behir, Krykzor. In The Storm's Eye, adventurers must navigate deadly traps, confront ghostly knights and phase spider minions, and solve a lightning-powered puzzle, all while racing against time to escape a collapsing temple. Designed for a party of levels 6-7, this one-shot adventure offers thrilling combat, intricate puzzles, and dynamic challenges as players face the storm and claim the treasure—or risk being lost forever.
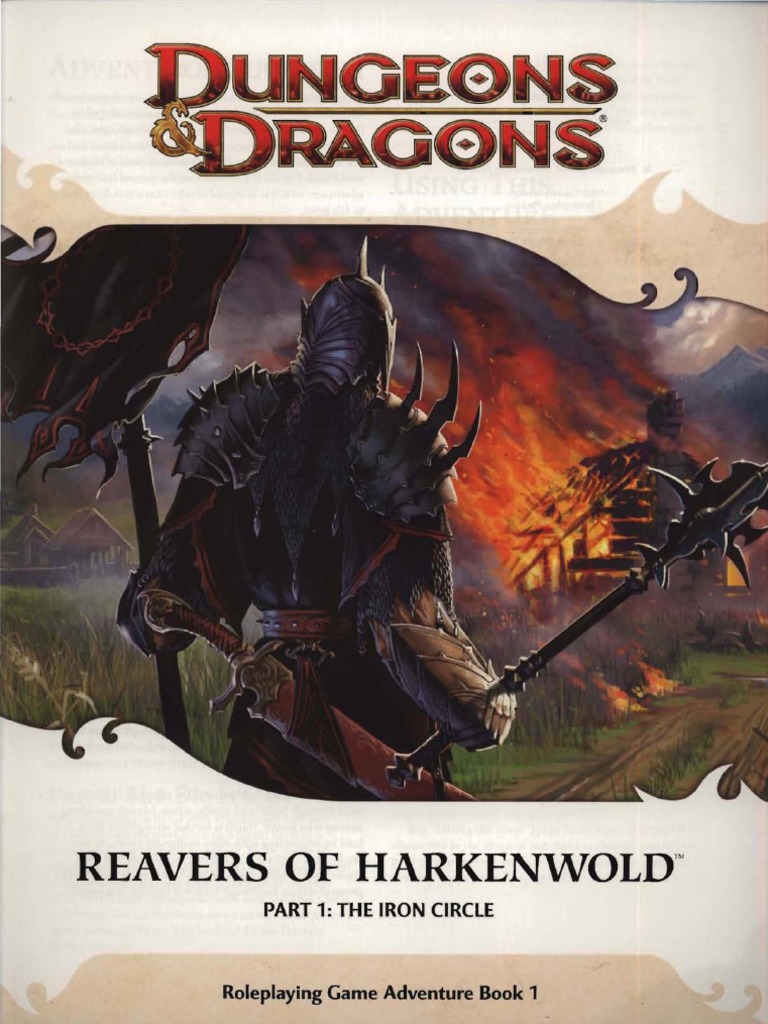
Reavers of Harkenwold pits the heroes against the Iron Circle, a company of cruel mercenaries that has seized control of the small land of Harkenwold. In this adventure, the heroes become daring rebels and lead the folk of Harkenwold against their oppressors.

The Dread tunnels of Ruxbar were created by a cult of a lesser evil deity of the giant pantheon, known as Jargain to serve as a planar gate in hope of bringing chaos and destruction to the natural order of the world and power to the one who would control the gate. Ruxabar was the high cultist who completed the ritual but to his surprise nothing of what he expected came through the gate. Plague creatures, toxic gases and vapors, diseases of all kinds and decay lay quick waste to him and his cult. For some time the gate remained open and the settlements nearby were afflicted with diseases never seen before. The nearby town of Stagwood was quickly abandoned due to the plague. Rumor has it that the gods have weakened the gate and the cult has been destroyed. The remaining villages that managed to somewhat resist the plague are now hiring brave adventurers to venture into the tunnels and close the planar gate for good! Are you capable enough of surviving the horrors that reside in the Dreaded Tunnels of Ruxabar? Published by Mistfactor Press

A horrific drug has seized the population of the strange city of Exag, yet confronting its source only reveals the true extent of a dire new threat. Part one of the Seeds of Sehan campaign arc, this is a D&D adventure for 8th-level characters.

The ruined manor now known as Kobold Hall was once a minor lord's proud holding, a walled keep overlooking the old King's Road. That was years ago, and the lord's name and glories he earned are long forgotten. Today, the place is called Kobold Hall after the malicious humanoids that invest the place. Pgs. 210-219

‘The Secrets of the Twisting Colossus’ is a tale of alchemy and transformation. The heroes are the material components in the creation of an addictive potion. The heroes are lured into the experiment by the alchemist Paricalus, and once the heroes understand the true purpose it will be too late. The only escape is to understand the subtle clues around them and to keep moving forward. At the end of the experiment lies salvation but also the grand finale. If the heroes escape the experiment, they can confront their tormentor. In this 5E module (suitable for level 4-6 & adaptable to any setting), you will find: • 40-page module. • 3 colored maps and downloadable options for FG, Roll20. • 3 Appendices covering NPCs, magic items, and alternative chambers. • Handouts containing visual depiction to entice players. • 2-3 sessions of gameplay. • A dynamic dungeon where chambers change position. • Rules for miniaturized game play. • Old-school play-style suggestions. • Possibilities to use the module as a springboard to planar adventures. If you enjoy this module please let me know. Any feedback is greatly appreciated. Have fun!
Do you want to run or play an adventure where characters start at level 13 instead of ending at level 13, and actually get to progress to 20 like the rules say they should? Do your players like to travel far and wide, exploring a huge unknown area? Do your players like to change their plans on a whim, and travel somewhere other than where they told you they planned to go last session? Do your players feel like fighting against an empire at odds of 20,000 to 1? Do your players want to commit occasional acts of sky piracy? Do you want an adventure that is designed to handle players using Scrying, Transport Via Plants, and Teleportation on a daily basis? If you answered yes to some of these questions, this adventure may be for you. Check out the detailed preview packet, which includes a campaign log showing how this adventure has actually played out. WARNING: FULL OF SPOILERS; VERY LONG. Against the Idol of the Sun is an epic hexcrawl campaign designed for high-level play. Adventuring parties should start at about level 13, and will likely end the campaign at level 20 with multiple Epic Boons. As a hexcrawl, there is no set adventure path that the party must follow. There is only one encounter that's even close to plot-mandatory aside from the climactic battle. Anything else can be skipped or handled in any order. The players are free to move about the map in any direction at any time, limited only by the risk of enemy action and encounters. The DM, meanwhile, is encouraged to have foes react to and actively hunt the PCs once they become a threat. Along the way, they may find and explore a number of dungeons, including a millenia-old laboratory in the grips of a time distortion, several mines that were abandoned for good reason yet may hold wealth within, and other challenges appropriate for high-level characters. This module is heavy on Exploration and Combat, but the Social aspect of D&D also is necessary as the player characters meet new peoples, work to convince them that they can make a difference, motivate them to action, and create overall plans for the NPCs and factions to follow off-screen to support the players in their main assaults. The key set piece encounters, which are optional but highly probable, involve attacking well-defended temples in the centers of enemy cities. Planning for these attacks will require paying attention to reconnaissance, timing, the use of allies, how to enter, and how to exit and break contact succesfully when dealing with enemies that fly faster than most player characters can walk. The adventure does not include artwork, and the maps are basic.