
Two centuries ago, the last king of the celtic kingdom of Pellham was deposed in favor of a High Council. Now, however, things are going badly, and a restless populace longs for the days of the ancient kingship. The High Council is floundering - and the political situation is turning ugly. It was then that the Brothers of Brie, and obscure monastic order, discovered a long-forgotten prophecy. In Pellham's time of greatest need, a long-dead king will rise to restore order. You have been chosen to prove that this is the time of the prophecy. You will take the first steps toward returning the lost king to the throne. This adventure contains the first four rounds of the AD&D OPEN Tournament that was originally run at GEN CON XVI Convention. It includes a tournament scoring system and a team of 10 characters of levels 4-7. This adventure can be played alone or as the first part of the two-part PROPHECY OF BRIE series. TSR 9107

The rough ground on the outskirts of the village of Col Fen once served as a graveyard for an evil temple destroyed long ago. A recent disturbance released some of the ancient evil buried here, and now the dead in this graveyard are beginning to walk. Several villagers have already vanished and more will die if the undead are not put to rest. Pgs. 56-63

"And they bade their slaves, 'Build unto us tombs to rival the palaces of the gods, for there shall we live or lives and sleep our deaths in splendor.' And the people of Maru-Qet wore their fingers down, broke their backs, burst their hearts to obey. Indeed they raised up great tombs to rival the palaces of the gods. And their masters were well pleased, for it was as gods they saw themselves." The brown dragon Urum-Shar lurks in a strange tomb, plotting schemes only a wyrm of incredible power could understand. Expanding on content from Draconomicon: Chromatic Dragons, this adventure takes the heroes into Urum-Shar’s dark and trap-filled lair, where they will eventually face the powerful dragon herself. The dungeon heavily employs the use of traps, with fewer monsters. The upper tomb consists of a great puzzle of twelve rooms, and the lower tomb contains the dreaded Urum-Shar, an ancient brown dragon and heir to the lost draconic empire of Maru-Qet. The dungeon has special protections against scrying and other divinations, as well as teleportation. Pgs. 55-90

Start your own duet campaign! Teleport your way out of the confines of a castle to an ancient mountainside cavern with a secret waiting just for you... First Blush is the inaugural adventure of D&D Duet, bringing you high quality, ready to play material focused on supporting adventuring parties of 1 Player and 1 DM. This adventure is written for a first-level character in a one-on-one 5th edition D&D campaign. It encourages collaborative storytelling between the DM and the player and takes the PC through low-stakes social and combat encounters, culminating in a high-stakes combat far from home. You’ll find everything you need to jump-start your own two-person game. This product includes: 2-4 hour introductory adventure adaptable to any setting and spanning 2 parts All necessary stat blocks for monsters and NPCs 3 print and play battle maps 3 ready to go player sheets complete with background information and personality traits This adventure is perfect for a first-timer or an experienced player looking to explore the hobby in a fresh (sans traditional group) way. This would also make for a great session zero or breakout adventure for a player before the character joins a larger party. Published by D&D Duet.
Something is killing people in Palebank Village, and if the party does not stop it they could be next.

The Ivory Scimitar now has a choice, continue on into the azure glow that leads to Mithelvarn's Dungeon or retrace their steps and investigate the source of the sounds they heard on the way in. Inside the unknown region is a massive forge, home to mad Kin who has been crafting weapons and armor that are delivered to his 'god', although in reality they are transported into Mithelvarn's Dungeon. This adventure is formatted to both 1E & 5E gaming rules.

The fabled mines of Dhol Kuldhir once showered the Dalelands, Cormyr, and points beyond with precious gems and expertly crafted jewels. Operating from a hidden complex in the Thunder Peaks, their exquisite craftsmanship was said to rival that of even Thunderholme. Almost as quickly as it rose to prominence it vanished, along with all of the dwarven miners, crafters, and untold riches. Some speculate that the mine ran dry, and the inhabitants abandoned it for a more plentiful location. Others believe that they probably fell victim to one of the many goblin tribes plaguing the area. The truth, however, is much more grave. Centuries later, the nearby town of Keen is beset upon by unlikely thieves, the local innkeeper charges a small band of unlikely allies to investigate the string of burglaries. What they uncover leads them to the long-lost dwarven mine. In the darkness, they will have to brave insidious traps, cunning monsters, and the dreaded new lord of Dhol Kuldhir.

Having now realized that they require 4 Mithel Standards at the same time, the Ivory Scimitar will be faced with actually taking a Banner from another Mithel Company. This scenario pits the characters against the waning might of Men of Iron, and should allow them to claim the Banner for House Aldenmier, thus guaranteeing that they can clear the final level of Mithelvanr's Labyrinth. This adventure is formatted to both 1E & 5E gaming rules.

While at times cliché there are few adventures better than an old fashioned trek into the ruins of a deserted castle. This adventure pits a new adventurer against the decades old remains of a hilltop castle that is “haunted”. The old keep was the site of a mighty battle years before that swayed the power in the area but now it is the crumbling remains of the once powerful Baron Sancrist. While the old fortress is supposed to be deserted the area farmers and villagers swear they have seen the dead walk the parapets in the moonlight. Well you wanted adventure….here it comes!

Numerous towns sit in the shadow of Rak’Sarn, a mountain of flames and death. Each day near sunset, the volcano lets loose a blast of molten rock and ash, and the ancient red dragon Dal’Sarnquin swoops down the mountainside. By the time dawn breaks, another settlement has been burned to the ground. The PCs must track the dragon to his lair and defeat him before more towns are destroyed. Pgs. 196-191

You wake up in a dark room with a group of friends. You don't know how you got here and your thoughts seem distant, echoing in your mind. The note you find reminds you your mission: retrieve the flower of oshadis and escape this temple alive. Culitsts and traps stand between you and freedom.

Bring your chilling campaign to life with this companion supplement for Icewind Dale: Rime of the Frostmaiden! Tales from the Frozen North presents 10 handcrafted encounters between 15 to 90 minutes in length for your adventures across the frozen wasteland. They are specifically written around the themes of paranoia, isolation and secrecy, with a particular focus on exploration.
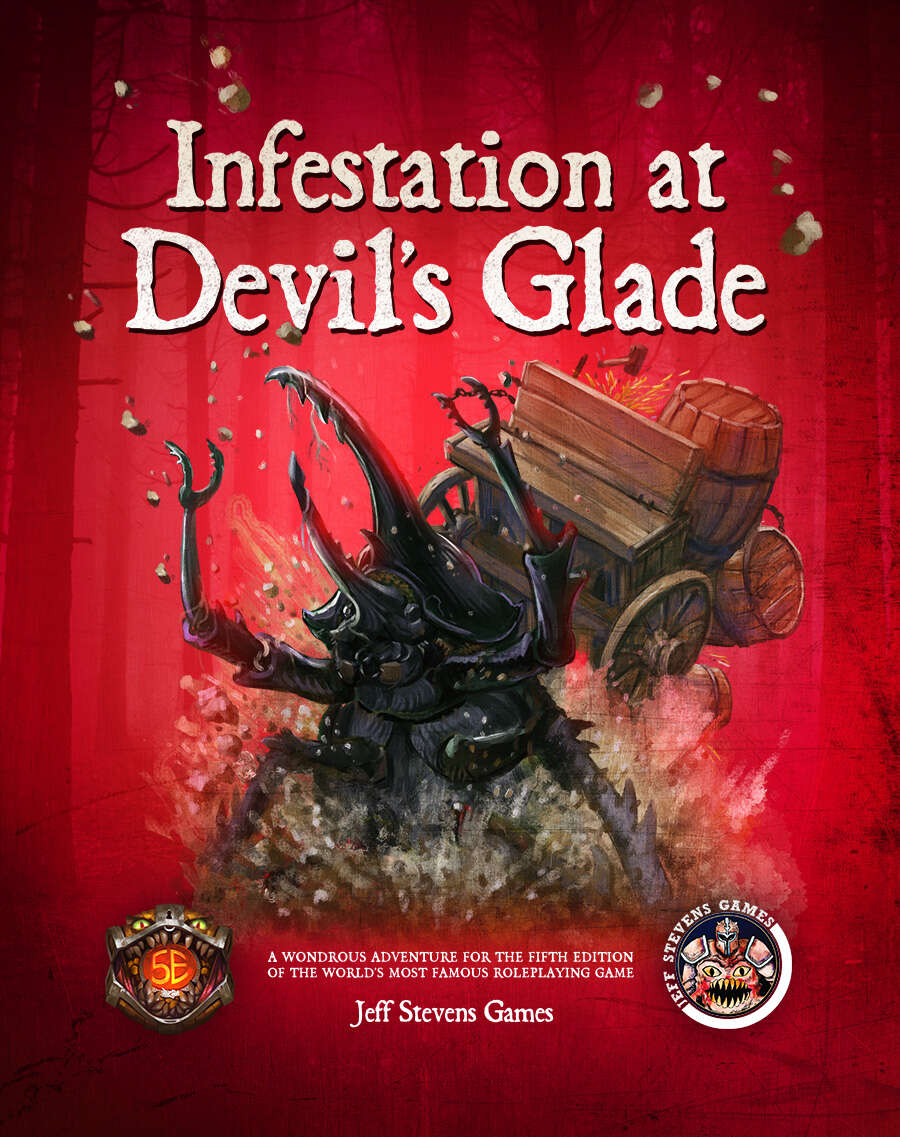
The town of Devil's Glade is under attack! Swarming insects have driven the residents out of their homes and businesses, and giant insects patrol the town square. Who or what has brought these creepy-crawlies to Devil's Glade? What's their motive? Are your heroes brave enough to put an end to the infestation? Infestation at Devil's Glade is a 2- to 4-hour adventure designed for four to five characters of 1st to 4th level, and is optimized for 2nd level characters. Scaling Suggestions are included, allowing you to play this adventure with characters of 5th to 6th level. Infestation at Devil's Glade isn't just a short adventure. We provide you with a location to which your heroes can return, or even use as a home base. The Supplement Includes: Adventure. The main adventure focuses on the heroes cleaning the town of the infesting insects and the villains who brought them. Beginning at The Fork (a tavern where many of the residents have made camp), the characters learn about the infestation of Devil's Glade, and are hired to look into the matter. NPCs. The adventure is filled with fun and engaging NPCs. During the characters' time at The Fork, they have the opportunity to talk with NPCs, help them, and learn more about the infestation. After the heroes return Devil's Glade to normal, the merchants and residents return, giving your characters unique shops to explore and quests to complete. Cursed Mask. The crux of the problem - a cursed mask that slowly transforms the attuned creature into a giant, insect monstrosity, and gives them power over insects. To end the infestation, the adventurers must confront the partially transformed person wearing the mask. Shops & Services. Devil's Glade contains shops and services the characters can explore, including therapeutic mud baths, a diner specializing in eggs, a trinket shop, a candle maker, and a dentist. Side Quests. We provide several side quests for before and after the main adventure, allowing you to increase the main adventure's run-time, and provide you with material for after the main adventure. Maps. The adventure contains maps for the main locations and major side quests. Each map is hand-drawn by Jean Lorber. Art. NO AI! The book is filled with fantastic, original artwork by Matt Morrow Art. Also Included: Map Files. Both grid and non-grid maps are included and available to download. Special VTT Tokens and Assets. Several custom tokens and art assets are included for VTT play.

Your sleek cloudskate skims across the Skysea. It is midnight. All day long, the glass sea soaked up the scorching desert sunlight. Now, that heat lifts your ship a few inches off the glass and fills its sails. The only sound you hear is the soft swish of the diamond-edged rudder as it cuts a path across the Skysea. One thousand years ago, the wizard Martek knew that you would come to find his Sphere of Power. Now, one of his glowing Star Gems shows you the way. The starlight, reflected in the glass beneath you, flickers peacefully. Suddenly, the Skysea before you bursts up into a thousand shards of splintered glass, showering into the moonlight! A horrible creature is silhouetted against the moon. You strain against the rudder to keep your ship upright. Too late! Your cloudskate tips onto one runner, and then tumbles over, skidding to a stop on the glass. As your companions struggle to right the ship, you turn and face the monster. You must hold the creature back to give them time. Without the ship, none of you can get off the glass before the sun rises in the morning. Martek's prophecy spoke of heroes, tests, and dangers. Are you the heroes? What are the tests? What dangers and riches lie ahead? This adventure can be played by itself, or as the third and final part of the Desert of Desolation series. For character levels 7-9. TSR 9054

This week’s Filbar offering is an introductory level adventure pitting fresh adventurers against a variety of opponents. As they head out to make a name for themselves the young group will first need to pass by the Horn of Delmar. This mountain landmark was once home to a mighty fortress felled centuries before hand. While many have adventured to the top they have returned ravaged with injuries and reports of strange and foul creatures. This adventure features an old tower, bandits, undead, and an old dungeon complex for those who search hard enough.

The sewers beneath Mulmaster have always been dangerous, with countless stories of brigands, murderers, and worse that lurk beneath the streets of the City of Danger. But those stories pale in comparison to a new threat under Mulmaster, one brought to light by a strange and disturbing corpse recently found. It is up to you to learn the terrifying truth of what lurks below.
The entity known as Oreiax is a gruesome, stunted monstrosity born of ancient death. Rescued from an eternity of petrification by Doresain the Ghoul King, Oreiax immediately pledged itself to the Ghoul King's service, and thus indirectly, into Orcus's service. Oreiax, born of stone and death, seeks to glorify Doresain by petrifying the world. Pgs. 112-119

A fiend lurks among the Black Blade goblins. A shapeshifting barghest fashioned by the General of Gehenna to exact revenge on all goblin-kind. It’s aim: to kill as many goblin leaders as possible… A masked goblin approaches the party asking for help. Two tribe leaders are dead. But a rival for chief has control of the crime scene. Will the party discover the barghest among the goblin ranks? Can they stop this imposter before it strikes again? Adventure Overview The adventure’s story is spread over 4 parts and takes approximately 4 hours to play. The adventure begins with a Call to Action scene. Part 1: Goblin Politics. Krill sends his emissaries to implore help from any strong intermediary. The party is asked to investigate the murder of Thrawn in Dringly’s lair. This is Story Objective A. Part 2: The Opposition. Gain entry into Dringly’s lair and investigate the murder of Thrawn. Gather enough evidence to find the killer. This is Story Objective B. Part 3: To The Lair! Now that the players have determined the barghest (Yeep) is to blame, they need to get to Krill’s lair quickly as he is in imminent danger. This is Story Objective C. Part 4: The Barghest.When the players arrive at the lair, they need to get to Krill and expose and defeat the barghest. This is Story Objective D. Adventure Background A barghest named Yeep has begun its onslaught of attacks against the Black Blade goblins. Starting with Chief Gnar, then his second in command Thrawn, the barghest is moving methodically down the line of command. Krill is now chief. But he has some problems: Two leaders of the Black Blades are dead. Who killed them and why? Is he next? Dringly, the next in command, has decided to take his lair for himself, declaring himself Chief of the Black Blades. Who are the Black Blades? The Black Blades are a tribe of goblins in the local area. They are known for dipping their blades in a dark black substance. It is rumored these blades are poisonous. The Black Blades regularly attack passersby on the road to rob them. The Black Blades have two lairs, one run by a chief who leads the whole tribe, and another overseen by a boss lieutenant. The Black Blades have a well-established pecking order which is how Krill stands to become chief. The next in line is Dringly, who has also declared himself chief and wants Krill dead. Krill suspects that there is something suspicious about two leaders being killed within a day of each other, but he has already burned Gnar’s body without any investigation. He needs to investigate the body of Thrawn, but it is in Dringly’s lair. Krill wishes to avoid direct confrontation with Dringly at the present for three reasons: 1) Any violence would only kill his own tribe members and further divide the lairs. 2) He believes there is still hope for negotiation to reunite the Black Blades. 3) He believes that if he were to attempt negotiations himself, Dringly would kill him. This adventure features: Two maps. Ready for your favorite Virtual Tabletop. A full color pdf. A black and white pdf. One custom monster, a reprint of barghest, all others available in the Monster Manual. Four hours of entertainment involving: roll playing a goblin bard, investigating a murder scene, tracking down a barghest before it strikes again. Applicable to any setting.
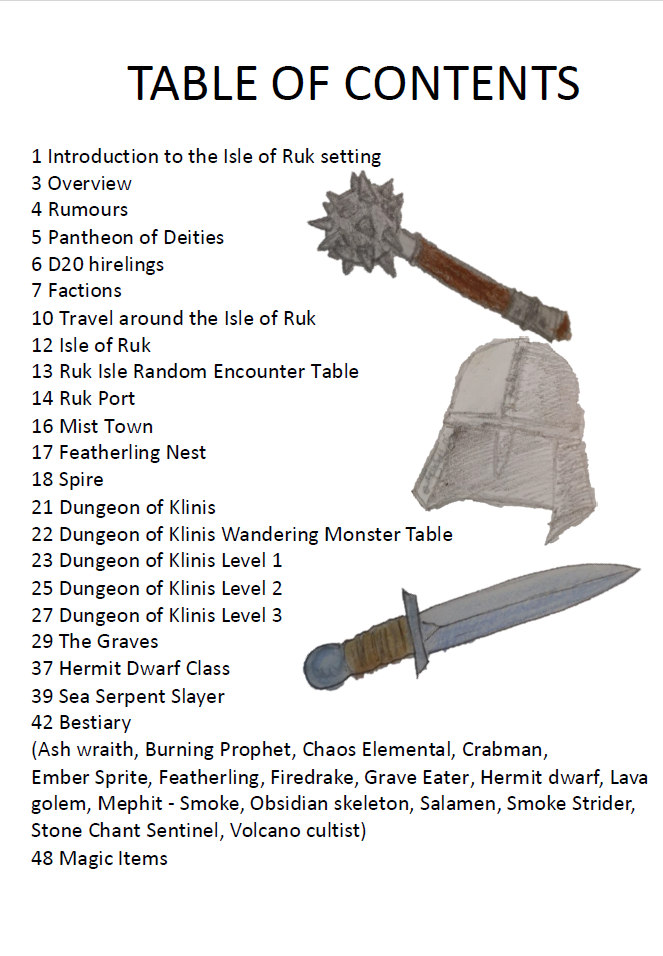
The Isle of Ruk and the Dungeon of Klinis A sandbox adventure module and mini‑setting for classic fantasy play. Explore the bustling port town filled with factions and intrigue, wander the wilds where strange creatures stalk, and delve into the dungeons. New monsters, magic items, and two new character classes bring fresh flavour without adding rules. At the island’s heart stands the Dungeon of Klinis a three‑level ruin carved deep into the mountain, filled with traps, factions, and long‑buried treasures waiting to be uncovered. Whether your table prefers exploration, intrigue, or old‑school dungeon delving, Ruk offers a flexible foundation for emergent play. Inside you’ll find: A lively port town packed with NPCs, factions, rumours, and adventure hooks A hex‑crawl wilderness full of oddities, encounters, and strange phenomena The Dungeon of Klinis, a multi‑level adventure site designed for classic play New monsters and magic items that add flavour without adding rules Two new character classes to drop straight into your campaign A setting built to be hacked, expanded, or used as a launchpad for your own stories Design Inspirations This project draws on the spirit of Gary Gygax’s classic article “How to Set up Your Dungeons & Dragons Campaign – and Be Stuck Refereeing It Seven Days per Week until the Wee Hours of the Morning!” and the practical creativity of Ray Otus’s workbook approach to worldbuilding. The map were drawn with inspiration from Niklas Wistedt (Paths Peculiar) how to draw basic dungeon maps. The Graves design aided by James Holloway's The Tome of Tombs. The earliest seeds of the Isle of Ruk emerged while designing a character class for the OSE Class Jam, eventually growing into a full mini‑setting and adventure module,

This deluxe adventure takes heroes into the ruins of Gardmore Abbey, a monastery that was once the base of a militant order of paladins devoted to Bahamut. According to legend, the paladins brought a dark artifact back from a far crusade and stored it in their abbey for safekeeping, and evil forces gathered to assault the abbey and take it back. What the legends don’t tell is that this artifact was actually the Deck of Many Things, a force of pure Chaos. This adventure brings characters into the extensive dungeons beneath the ruins - dungeons that are warped and twisted with the raw forces of Chaos surrounding the cards of the deck.