
Centuries ago, the glitterdoom came to the dwarves of Steelhand Clan! This divine curse transformed the dwarves into hellish forms with an insatiable greed for gold. Now, a chance encounter breaks open long-sealed gates to unleash the glitterdoom again. Can your adventurers delve into the forgotten halls to confront the subterranean menace? Work together to clear the abandoned mine of it's undead hosts and retrieve what gold and treasures you can.

"For the past sixty-seven years Wheatwinter Farm, a small farm outside the village of Longbranch, has produced an essential survival tool for the town — a unique strain of wheat that can survive the harsh winters of the region. However, for the past few weeks something has been terrorizing the livestock at Wheatwinter and the surrounding farms. Markus Wheatwinter has defended his farm from goblins time and time again, but this time something is different and he has put out a call for aid." When ankhegs assault Wheatwinter farm, the party is called upon to exterminate them and rescue the farmer in this adventure loosely inspired by Starship Troopers. Published by Green Feather Games

A job has come up for your party straight from the leader of Phoenix! A trade deal is desired with the leader of an island chain known for Ioun Stones. The Zephyr has requested that your party go and use your skills to negotiate the deal. Upon arrival, your talents serve you well but King Homa requires that your talents serve him...

Giants have been raiding the lands of men in large bands, with giants of different sorts in these marauding groups. Death and destruction have been laid heavily upon every place these monsters have visited. This has caused great anger in high places, for life and property loss means failure of the vows of noble rulers to protect the life and goods of each and every subject -- and possible lean times for the rulers as well as the ruled. Therefore, a party of the bravest and most powerful adventurers has been assembled and given the charge to punish the miscreant giants. This module contains background information, referee's notes, two level maps, and exploration matrix keys. It provides a complete module for play of ADVANCED DUNGEONS & DRAGONS, and it can be used alone or as the first of a three-part expedition adventure which also employs DUNGEON MODULE G2 (GLACIAL RIFT OF THE FROST GIANT JARL) and DUNGEON MODULE G3 (HALL OF THE FIRE GIANT KING). TSR 9016
A wizard's hideous transformation spells trouble for the kingdom of Nyrond. A D&D adventure for 5th-level PCs but adaptable for levels 2-8.
A Heart in Mourning is a dungeon crawl and survival adventure that takes the party through the mists into the strange and dangerous Mournland, where they encounter threats both environmental and living. The party has been given a map with the task of retrieving the Steelheart from Ash Tower, where the Provost’s research has led them under direction by Guild Handler Lhara. Their destination lies in the middle of a manifest zone of Shavarath. Once there, the party will have to survive a tower climb filled with fiends, demons, and more in order to retrieve the Steelheart, a powerful artifact guarded by a powerful guardian.

Randal Morn certainly has his hands full! The temple of Lathander, which burned to the ground eight years ago, seems to be the source of a curse affecting the entire town. People are taking ill, animals are dying overnight, crops are failing. All this seems to have started after Eragyn, priestess of Cyric, disappeared from Daggerdale. Shortly before that, a forgotten mage-lord's crypt was discovered and opened, and things just haven't been the same since. Constable Tren is displeased with the situation, what with suspicion being cast in the Zhentarim's direction as well as toward Cyric's priesthood. He's undoubtedly making the Dalesfolk's lives more difficult than usual because of this upheaval. Randal has sent out the call for aid to all who are interested and able to help; his freedom riders have their hands full already. A missing evil priestess, a mage-lord's crypt-curse, a plague, and possible Zhentarim involvement: all the elements of a rousing adventure in one place! Where do your characters sign up? Step right this way, won't you? TSR 9391

The king requests your presence in the honorable kingdom of Norwold. If you're worthy, you may be appointed lord of a dominion filled with friendly villages, sturdy fortresses, and raging band of monsters. Raging bands of monsters? Well, yes, and you may have to lead your forces into a war or two. But you'll be ready for the challenge. You'll be ready for treacherous spies who conspire to steal you land. You'll be ready for a foul band of giants that raids your dominions. And you'll be ready for the inevitable clash of empires, the outcome of which may alter the fate of millions. You'll be ready! Won't you? Test of the Warlords includes a complete campaign setting, several new NPCs, and dungeon and wilderness encounters, and guidelines for running a war between empires. TSR 9117

Bandits have kidnapped the eldest child of one of Timbertown’s prominent citizens, who is secretly being manipulated by shadowy forces. You are tasked to get her back. But there are questions. Is she his real daughter? Does she want to be found? Who is behind the kidnapping in the first place? If you bring Evi home alive, your rewards will be great, and your standing in the town will increase. But if you fail, or if the demon worshippers of the Fraternity of Tharos gain a further foothold for their secret society, Timbertown's future may be in jeopardy. This adventure can be played in any frontier campaign area, but is set in the author's home campaign setting of Timbertown, a barony in Impiltur, a kingdom on the Sea of Fallen Stars in the Forgotten Realms, also available from the Guild.
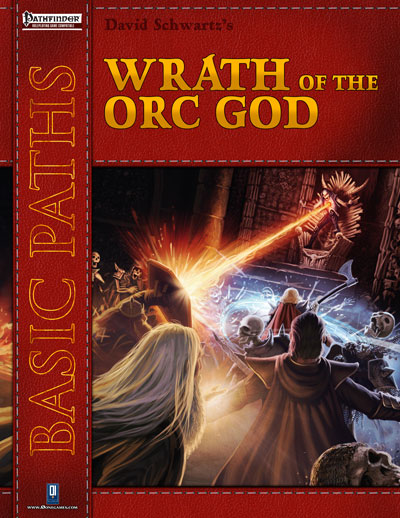
In the town of Gafolweed, the market is in disarray: toppled barrows and collapsed tents spill their contents onto the muddy ground. Merchants and locals flee the scene as you arrive. In the midst of the destruction stands a muscular, green-skinned humanoid—an orc! Three bodies lie near his feet, the victims of his bloody axe. He turns to you, a vivid red tattoo of a bleeding eye prominent on his brow. The orcs are gathering in numbers unseen in many generations and make war upon the people of the Borderlands. The cause of this deadly conflict is entwined with the history of the unholy mark that all the orcs now bear. Will your fellowship of budding heroes be able to quell the Wrath of the Orc God?

A dungeon of tricky puzzles, ancient magical secrets, and more than a few lingering mysteries, designed to be played as a standalone adventure and not incorporated into another campaign. Six adventurers descend into the Temple of Mysteries to find a mystical artifact called the Strand of Tears. Seems straightforward enough, except that some of the party may not be who they say they are. In fact, none of the party may be who they say they are. Not only that, but they might not be who they don't say they are, either! Worst of all, they're trapped in the ruins of an underground temple specifically designed to keep people from proceeding unless they're proficient in puzzle-solving...and there may be doppelgangers on the loose.

In your last adventure you discovered a strange, and somewhat sinister looking, key. After a long wait it appears you have found an answer to what it opens. The good news is that it leads to great wealth, the bad news is that it opens a tomb. Oh yea, there may, also, be some…individuals that want the key too…

Bugbear Fight Pit is a mini-adventure with a single main encounter that follow the Bugbear Jeeshank tricking the players into a trap with the challenge of single combat to stop his activities. If the players fall for it, they will be faced with a large number of ranged attacks, and additional clever tactics and use of the terrain. Pgs. 15-17
A mechanical man discovers his ancestral fortress has fallen to a lunatic derro, but something worse than mad derro haunts the Clockwork Fortress' gears. This adventure is a sequel to Dungeon Issue #115's "Raiders of the Black Ice," although you need not have run that adventure to enjoy "The Clockwork Fortress." Pgs. 42-61

Figgy Puddin' Steals Christmas is a short adventure Designed for use with Shadowdark RPG. The adventure is designed for three to six characters of low to mid experience. The anticipated run-time is 2- to 4-hours. There's a bit of roleplay in this adventure, which may extend the playtime. Adventure Background A traveling jester known as Figgy Puddin’ and her Coal Smudge Gang have stolen Christmas presents and now hold them for ransom. While safe and secure in her lair, she awaits either a payment of an outrageous ransom, or a crew of heroes to claim the presents after they navigate her not-so-festive lair. What's the Adventure? After you introduce the hook, the adventure occurs in Figgy Puddin's lair - a refurbished kobold bunker consisting of eight rooms. As the characters explore the linear dungeon, they encounter new creatures, complete challenges, and are tested about their Christmas knowledge. However, the final confrontation with the naughty Figgy Puddin' could make for a very Unhappy and Unmerry Christmas for our heroes, the children of Thistleton, and their parents. Who Is Figgy Puddin’? Figgy Puddin’ was once a happy jester who loved Christmas. For years she traveled the realm, bringing fun and festive cheer to villages and children while preparing the way for Santa. However, times have become tough, and entertainment doesn’t always pay as well as one would like. As Figgy prepares for retirement, she’s learned she doesn’t have enough gold to last. During this time, she’s also decided that Santa doesn’t know who she is, let alone appreciate the work she puts in every year. Using her savings, extortion, blackmail, and other nefarious means, she’s convinced several mechanical geniuses and arcane specialists to help her refurbish her underground bunker with wondrous effects, creatures, and tests.

The Sword of the Dales, an icon of the Dalelands symbolizing the unity and strength of the people, has reappeared! Created by Shraevyn the weapons-mage hundreds of years ago, the lost Sword had become nothing more than a fantastic children's tale - until now. A group of warriors led by Randal Morn, rightful ruler of Daggerdale, rushed to the Sword's resting place to recover it, but dark forces awaited them, and Randal and his men fell to an ambush. Only one man escaped, yet he brought with him the hope that Randal Morn yet lives. Resolved to rescue his leader, that lone survivor turned to the great Elminster of Shadowdale for aid. But Elminster is gone, off plane-hopping while the fate of Daggerbale hangs in the balance. Hence, it is up to Lhaeo, scribe to the old mage, to find a group of heroes who have mettle enough to face down the menace which claimed Randal Morn and his hearty followers... This is the first of three adventures that grant player characters the opportunity to determine the fate of Daggerdale. The saga continues with "The Secret of Spiderhaunt" and concludes with "The Return of Randal Morn." TSR 9484
Mimic Madness is a psudeo-adventure with four interesting mimic encounters. These four encounters are structured in a way that they can be used together as one adventure, or each individually dropped into any adventure from EL4 to 7. The encounters vary the mimic's tactics significantly, such as by having them we a weapon rack that wields the weapon it holds, pretending to be animated furniture using its ability to speak, and pretending to be a floor covering a pit; none of them rely on the typical chest or door mimics. Pgs. 24-25

A fiend lurks among the Black Blade goblins. A shapeshifting barghest fashioned by the General of Gehenna to exact revenge on all goblin-kind. It’s aim: to kill as many goblin leaders as possible… A masked goblin approaches the party asking for help. Two tribe leaders are dead. But a rival for chief has control of the crime scene. Will the party discover the barghest among the goblin ranks? Can they stop this imposter before it strikes again? Adventure Overview The adventure’s story is spread over 4 parts and takes approximately 4 hours to play. The adventure begins with a Call to Action scene. Part 1: Goblin Politics. Krill sends his emissaries to implore help from any strong intermediary. The party is asked to investigate the murder of Thrawn in Dringly’s lair. This is Story Objective A. Part 2: The Opposition. Gain entry into Dringly’s lair and investigate the murder of Thrawn. Gather enough evidence to find the killer. This is Story Objective B. Part 3: To The Lair! Now that the players have determined the barghest (Yeep) is to blame, they need to get to Krill’s lair quickly as he is in imminent danger. This is Story Objective C. Part 4: The Barghest.When the players arrive at the lair, they need to get to Krill and expose and defeat the barghest. This is Story Objective D. Adventure Background A barghest named Yeep has begun its onslaught of attacks against the Black Blade goblins. Starting with Chief Gnar, then his second in command Thrawn, the barghest is moving methodically down the line of command. Krill is now chief. But he has some problems: Two leaders of the Black Blades are dead. Who killed them and why? Is he next? Dringly, the next in command, has decided to take his lair for himself, declaring himself Chief of the Black Blades. Who are the Black Blades? The Black Blades are a tribe of goblins in the local area. They are known for dipping their blades in a dark black substance. It is rumored these blades are poisonous. The Black Blades regularly attack passersby on the road to rob them. The Black Blades have two lairs, one run by a chief who leads the whole tribe, and another overseen by a boss lieutenant. The Black Blades have a well-established pecking order which is how Krill stands to become chief. The next in line is Dringly, who has also declared himself chief and wants Krill dead. Krill suspects that there is something suspicious about two leaders being killed within a day of each other, but he has already burned Gnar’s body without any investigation. He needs to investigate the body of Thrawn, but it is in Dringly’s lair. Krill wishes to avoid direct confrontation with Dringly at the present for three reasons: 1) Any violence would only kill his own tribe members and further divide the lairs. 2) He believes there is still hope for negotiation to reunite the Black Blades. 3) He believes that if he were to attempt negotiations himself, Dringly would kill him. This adventure features: Two maps. Ready for your favorite Virtual Tabletop. A full color pdf. A black and white pdf. One custom monster, a reprint of barghest, all others available in the Monster Manual. Four hours of entertainment involving: roll playing a goblin bard, investigating a murder scene, tracking down a barghest before it strikes again. Applicable to any setting.

The characters arrive in Fallcrest just as a blizzard starts from the gloomy black clouds. the villagers gather to discuss how to survive the untimely and unusual blizzard. Suddenly between the roar of the wind and thunder, a ship descends filled with undead with one message: Return the ice scepter!. Afterwards, the characters must decide, find and return this relic to the Winter King, or bluff and plan to dethrone him. As they reach the tops of the mountains, possibly injured, the whole of the Winter King's inner domain stands before them. If they fail, winter will claim the Nentir Vale forever. Group of 4-6 players.
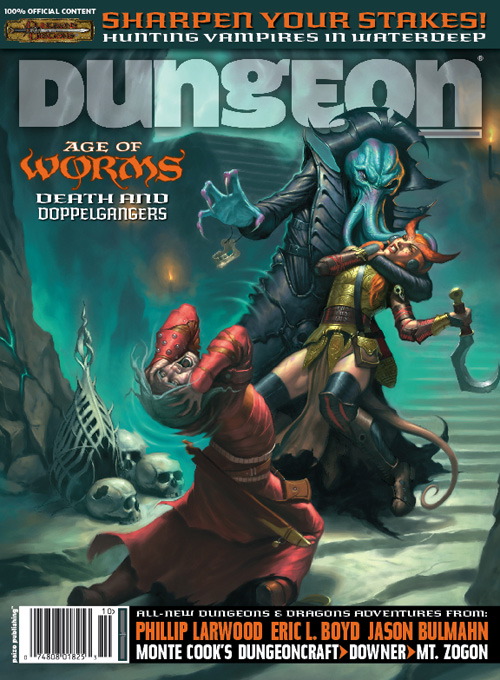
The Free City: a shining gem in the crown of cultured civilization. Beneath the surface of this bustling metropolis is a rot, festering in the darkness, manipulating the lives of those unaware of its presence. Now a small adventuring band from out of town may be in over their heads. Their actions in Diamond Lake have attracted the wrath of one of the city’s hidden masters. A gang of infiltrators and an enigmatic mastermind plot their destruction, and only tracing the rot to the root can stop the onslaught. "The Hall of Harsh Reflections" is the fourth installment of the Age of Worms Adventure Path, a complete campaign consisting of 12 adventures, several "Backdrop" articles to help Dungeon masters run the series, and a handful of poster maps of key locations. For additional aid in running this campaign, check out Dragon's monthly "Worm Food" articles, a series that provides additional materials to help players survive this campaign. Check out issue #336 of Dragon for five attractions to tempt your PCs to spend some of their hard-earned loot. This issue of Dragon also features an Ecology of the Spawn of Kyuss, one of the central creatures featured in this campaign. Pgs. 34-60