"Orcs have returned to the once quiet border province of Blackmarch. The Bleak Tower and its meager garrison are all that stand against the tide. Their only hope lies in a ragtag band of adventurers willing to venture into the perilous maw of Ironwood Gorge..." "Ironwood Gorge is a fantasy role-playing adventure for 4-8 characters of levels 2-5, designed for older editions of the world's most popular fantasy role-playing game and its clones such as Labyrinth Lord and OSRIC. The material is also easily adaptable to any other class and level based fantasy role-playing game. Ironwood Gorge serves as part two in the Blackmarch sequence of adventures, but is built to function just as well as a one-off adventure, a drop-in-a-hex location for sandbox games, or as a kick start to a new campaign. The module includes keyed maps detailing both the Bleak Tower: a living, breathing refuge for adventurers; and Ironwood Gorge: a cave complex with over 100 keyed areas of traps, monsters and mayhem. The module is illustrated throughout with original artwork and includes appendices detailing new monsters, magic items, and spells. Whether you are looking for an out-sized adventure to usher the hardiest characters to the intermediate levels, or a fully-realized location to plunder for maps and ideas, Ironwood Gorge is a treasure from the old-school of gaming..." An alternative to B2 - Keep on the Borderlands

"It was already a freezing morning when you set out for the legendary Castle of Madness – the mysterious castle that is said to emerge from blizzards once every seven winters. " In this short treasure hunt for one 2nd level player, you'll brave an frigid mountain, an icy cave, and a haunted castle to bring home a pile of loot. Written as a digital gamebook, you will keep track of your character's hit points, spells, and inventory on your character sheet, and keep track of enemies using your own scratch paper. The game will play GM and all enemies.

Since time immemorial, you and your people have toiled in the shadow of the cyclopean ruins. Of mysterious origins and the source of many a superstition, they have always been considered a secret best left unknown by folk of your hamlet. But now something stirs beneath the crumbling blocks. Beastmen howl in the night and your fellow villagers are snatched from their beds. With no heroes to defend you, who will rise to stand against the encircling darkness? The secret of Chaos are yours to unearth but at what cost to sanity or soul? An introductory adventure for the Dungeon Crawl Classics Role Playing Game, Sailors on the Starless Sea pits a mob of 0-level adventurers against legacy of the Chaos Lords and their corrupted hordes. Delving beneath the crumbling ruins, the characters discover ancient crypts, a starless sea, and an ancient ziggurat, where death and treasure await in equal measure!
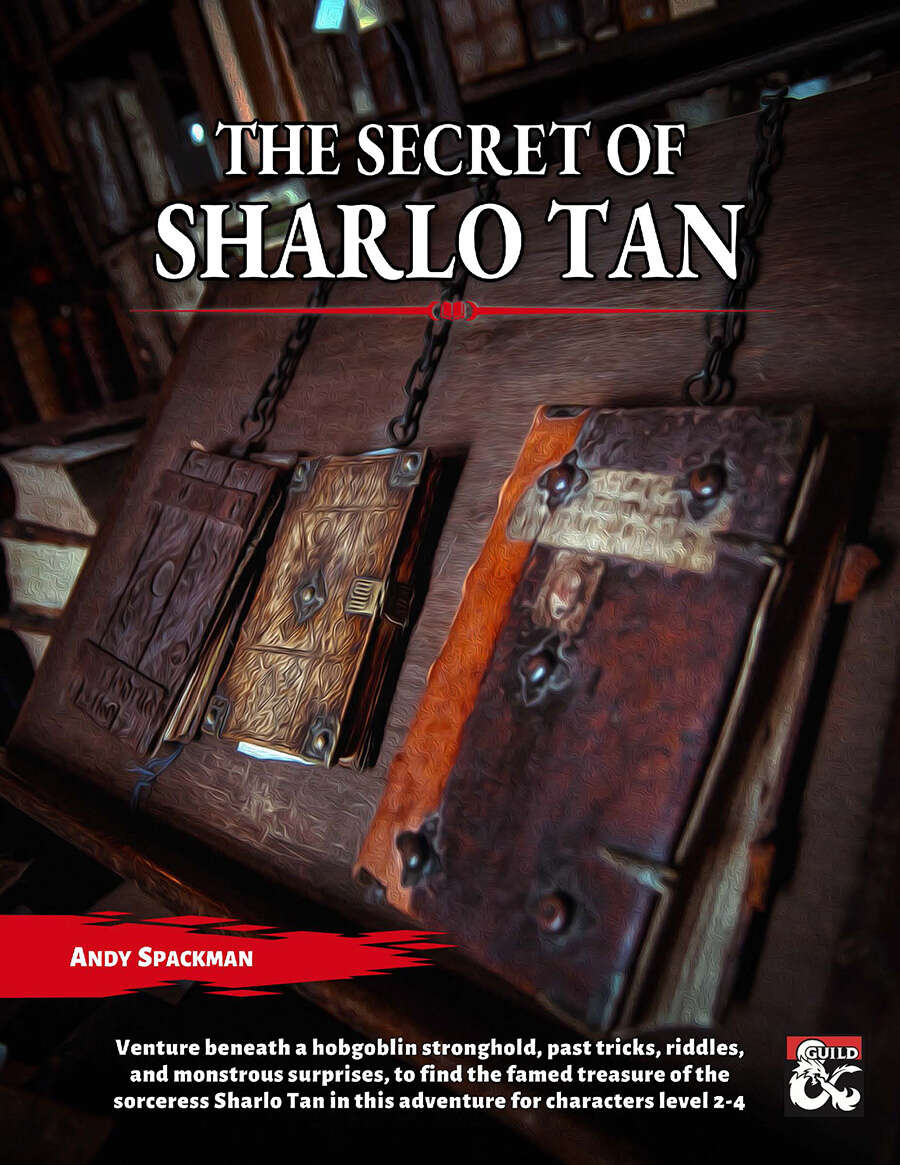
Sharlo Tan was a sorceress. She was a scholar. She was a spy. And she left behind a legendary trove of treasure, guarded by riddles, secrets, and the passage of time. But it isn’t an ancient rumor that has the people of Rivesby on edge. The hobgoblins of the Lamellar Banner have encamped less than a day’s march away, and no one knows what has brought them out of their stronghold. In this richly detailed adventure, players can choose whether to play peacemaker or treasure hunter, explorer or exterminator. But they won’t be the only ones playing games, as they encounter creatures and NPCs who have their own conflicts and motivations. The Secret of Sharlo Tan is a mid-length adventure for levels 2-4 that easily plugs into any 5e campaign. It’s particularly suited to those who love witty books, solveable riddles, and nuanced interactions, but it readily accommodates smash-mouthed impatience as well. Depending on playstyle, it can fill 2-4 play sessions of 3-4 hours. The adventure includes: * 40-page fully illustrated PDF with player handouts * 3 stat blocks * 4 dungeon maps in DM and unmarked versions * 11 all-new magic items
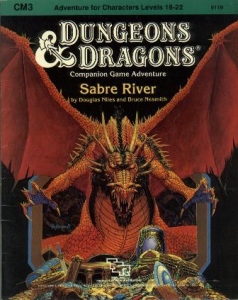
You are the guest of the count, one of your allies and the strongest man in the region. Your sojourn has been pleasant, a nice change after weeks of battle. Suddenly the courtyard below your window is filled with the noise of galloping horses. More Guests? You yawn as you look out. But these people arriving look more like tax collectors than guests. You decide to give your attention to something more interesting, like dinner. Relax while you can, friend, because these new arrivals are about to lead you to a crimson sailor, a cozy Tower of Terror, and a river with an aching heart. Sabre River includes a complete campaign setting, new NPCs, dungeon and wilderness encounters, and a mysterious story. TSR 9119

In the frontier stronghold of Purdey’s Rest, rumors of mysterious lost ruins lead a group of young adventurers into the wilderness — and the forgotten dungeons of a legendary dark mage. Facing off against evil bandits, foul undead, and ravenous monsters, the characters seek the rewards of wealth and fame. But before they can claim either, they must survive all the deadly threats of Hazakor’s lost halls. The Hidden Halls of Hazakor is a starter adventure for fifth edition fantasy roleplaying, written with a special focus on young, beginning Gamemasters of ages twelve and up. In a friendly and straightforward fashion, this adventure explores some of the ways a good fantasy RPG dungeon crawl can be put together. It offers advice on how to just let things happen during a game session, and how to not be overwhelmed by all the directions in which an adventure can go. It talks about how to bring nonplayer characters to life, how to have fun running monsters, and how to challenge the other players and their characters alike. The Hidden Halls of Hazakor is for any player who’s ready to sit in the GM’s chair for the first time — and who is ready to learn some of the tricks and techniques that help all GMs run great games. The PDF download also includes untagged maps for Purdey's Rest and the Hidden Halls of Hazakor dungeon, making it easy to run the adventure in a virtual tabletop setup. These maps are missing the number key and any features that should initially be known only to the GM (including traps and secret doors). The publisher's website offers free pregenerated characters for the adventure, but they are not included in the adventure. The website also has a free GM Guide as well. Insane Angel Studios

A ruined monument to folly and ego, the Shadowed Keep stands atop an isolated bluff deep in a mist-wreathed forest. Sacked by marauding goblins decades ago the place was thought abandoned, but shadows now creep among the forest's great boles and footprints have appeared on the single, overgrown track leading to the keep. Travellers have begun to disappear with alarming regularity from the nearby road and the local folk fear some slumbering evil has claimed the ruin as its own. Dare you brave the terrors of the Shadowed Keep to crush that which lurks within or will darkness shroud the surrounding lands? Designed to be easily inserted into a GM's home campaign, Shadowed Keep on the Borderlands is an excellent starting locale to test the mettle of neophyte adventurers. Shadowed Keep on the Borderlands is designed for the medium advancement track. 1st-level PCs completing all the challenges of the place can expect to reach 3rd-level by the time they have exhausted all the keep has to offer.

When Treason Walks the Land... Trouble stirs in Dunador! The King lies dead of a wound received during a hunting expedition. His brother, Lord Edrin, challenges the rightful Crown Prince, a half-trained young man named Edmund, for possession of the throne while Edmund travels on a pilgrimage to the holy shrine of Nevron. Forces throughout the kingdom vie for control of the realm. Can the player characters find the Crown Prince and protect him from the treacherous forces at large in Dunador? N3: "Destiny of Kings" (1986), by Stephen Bourne, is the third adventure in the novice series for AD&D. It's up at the upper end of what could be considered "novice" play, though, with the pre-rolled characters being 3rd and 4th level. It was released in February 1986. Like N2: "The Forest Oracle" (1984), this adventure is offered as a generic adventure, not specifically based in any existing AD&D setting. Suggestions are given in the conversion guide to place the adventure in the Forgotten Realms. Out of the Dungeons. One of the most impressive elements of N3 is its complete lack of dungeons. Instead - as was increasingly the case by the mid 80s - the players are heavily embroiled in a plot. They must find the prince of Dunador and return him home safely. Elements of investigation and intrigue thus find their way into the game. There is also some opportunity for wilderness adventure - a quality that was also becoming more common in AD&D by the mid-80s. Future History. A decade after its original publication, Wizards of the Coast updated "Destiny of Kings" to 2nd edition AD&D and reprinted it (1998). It was one of the few classic adventures to receive this treatment. This conversion guide allows DMs to run the original module with 5th Edition rules and provides a reference sheet for encounters. To use this conversion guide you will need a copy of Destiny of Kings, originally available in hard-copy and now for sale in digital format at the DMs Guild.

On the border between Anuire and the land of the Khinasi, the Three Brother Mages fight an ancient and immortal awnshegh, the Chimera. The game of cat and mouse has recently begun to draw regents from the entire region. Rumors say that the blade of the last Anuirean emperor, the Sword of Roele, has been tracked to the Chimera's domain, the Chimaeron. The fact that the Gorgon's armies are mustering in Kiergard seems to support the rumor. But choosing sides between the Chimera and the Three Brothers is not easy matter. If the chimera drives the Brothers out, the trade routes through the Chimaeron may be sealed, leaving the seas free for the Khinasi to monopolize trade. If the Brothers drive the Chimera from the magical sources that give her strength, they may establish a beachhead for the Khinasi traders, who are slowly gobbling up the lands of Anuire just as their own lands were once annexed by the empire long ago. Who will you and your comrades ally yourselves with? Who is the true enemy? Can you recover the Sword of Roele before anyone else does, and lay claim to the Iron Throne? This Birthright adventure is suitable for use with any party of three to six characters of levels 5-8, including at least one regent. You must have a copy of the AD&D game rules, the Birthright campaign setting, and the Cities of the Sun campaign expansion to play. TSR 3118

An original Valentine's Day-themed one-shot adventure designed for level 4-5 characters. SUMMARY The city of St. Valentine is home to Dante's Casa di Dolci, a world-renowned bakery — and tucked within the bakery is the entrance to a secret labyrinth, created by a mischievous, merciless god. Every February, an unsuspecting resident from St. Valentine is pulled into the maze. Some return after years spent in the labyrinth, but most do not. When Dante's beloved wife, Simonetta, is pulled into the labyrinth, he must enlist the help of adventurers to get her back. The journey that follows is one of strange doors, riddles, and dangerous creatures that lurk among the hedges... DETAILS 2-4 hour session for 3-6 players Play-tested material Original NPCs and locations Diagrams and NPC stats 19-page campaign guide Enjoy the adventure? Share your experiences with me! Hashtag: #LabyrinthOfThorns

This adventure focuses on a Zhentarim attempt to spread terror in Mistledale, although it is suitable for almost any lightly settled area northwest of the Sea of Fallen Stars. "The Raiders of Galath's Roost" is suitable for four 1st-level characters, but PCs should be at least 2nd level before tackling the adventure's second half, the Zhentarim Citadel. Even in the first half of the adventure, many of the encounters are quite formidable for 1st-level characters, and the PCs might find it necessary to withdraw and recover one or more times before completely exploring the ruins.

With the Heart of Light secured, the adventurers now pursue the Ebon Stone, hidden in a remote keep. Part 2 of 2. Part 1 titled The Heart of Light. Pgs. 43-52

The Legend of the Black Monastery Two centuries have passed since the terrible events associated with the hideous cult known as the Black Brotherhood. Only scholars and story-tellers remember now how the kingdom was nearly laid to waste and the Black Monastery rose to grandeur and fell into haunted ruins. The Brothers first appeared as an order of benevolent priests and humble monks in black robes who followed a creed of kindness to the poor and service to the kingdom. Their rules called for humility and self denial. Other religious orders had no quarrel with their theology or their behavior. Their ranks grew as many commoners and nobles were drawn to the order by its good reputation. The first headquarters for the order was a campsite, located in a forest near the edge of the realm. The Brothers said that their poverty and dedication to service allowed them no resources for more grand accommodations. Members of the Black Brotherhood built chapels in caves or constructed small temples on common land near villages. They said that these rustic shrines allowed them to be near the people they served. Services held by the Brothers at these locations attracted large numbers of common people, who supported the Black Brotherhood with alms. Within 50 years of their first appearance, the Black Brotherhood had a number of larger temples and abbeys around the kingdom. Wealthy patrons endowed them with lands and buildings in order to buy favor and further the work of the Brothers. The lands they gained were slowly expanded as the order’s influence grew. Many merchants willed part of their fortunes to the Black Brotherhood, allowing the order to expand their work even further. The Brothers became bankers, loaning money and becoming partners in trade throughout the kingdom. Within 200 years of their founding, the order was wealthy and influential, with chapters throughout the kingdom and spreading into nearby realms. With their order well-established, the Black Brotherhood received royal permission to build a grand monastery in the hill country north of the kingdom’s center. Their abbot, a cousin of the king, asked for the royal grant of a specific hilltop called the Hill of Mornay. This hill was already crowned by ancient ruins that the monks proposed to clear away. Because it was land not wanted for agriculture, the king was happy to grant the request. He even donated money to build the monastery and encouraged others to contribute. With funds from around the realm, the Brothers completed their new monastery within a decade. It was a grand, sprawling edifice built of black stone and called the Black Monastery. From the very beginning, there were some who said that the Black Brotherhood was not what it seemed. There were always hints of corruption and moral lapses among the Brothers, but no more than any other religious order. There were some who told stories of greed, gluttony and depravity among the monks, but these tales did not weaken the order’s reputation during their early years. All of that changed with the construction of the Black Monastery. Within two decades of the Black Monastery’s completion, locals began to speak of troubling events there. Sometimes, Brothers made strange demands. They began to cheat farmers of their crops. They loaned money at ruinous rates, taking the property of anyone who could not pay. They pressured or even threatened wealthy patrons, extorting money in larger and larger amounts. Everywhere, the Black Brotherhood grew stronger, prouder and more aggressive. And there was more… People began to disappear. The farmers who worked the monastery lands reported that some people who went out at night, or who went off by themselves, did not return. It started with individuals…people without influential families…but soon the terror and loss spread to even to noble households. Some said that the people who disappeared had been taken into the Black Monastery, and the place slowly gained an evil reputation. Tenant farmers began moving away from the region, seeking safety at the loss of their fields. Slowly, even the king began to sense that the night was full of new terrors. Across the kingdom, reports began to come in telling of hauntings and the depredations of monsters. Flocks of dead birds fell from clear skies, onto villages and city streets. Fish died by thousands in their streams. Citizens reported stillborn babies and monstrous births. Crops failed. Fields were full of stunted plants. Crimes of all types grew common as incidents of madness spread everywhere. Word spread that the center of these dark portents was the Black Monastery, where many said the brothers practiced necromancy and human sacrifice. It was feared that the Black Brotherhood no longer worshipped gods of light and had turned to the service of the Dark God. These terrors came to a head when the Black Brotherhood dared to threaten the king himself. Realizing his peril, the king moved to dispossess and disband the Black Brother hood. He ordered their shrines, abbeys and lands seized. He had Brothers arrested for real and imagined crimes. He also ordered investigations into the Black Monastery and the order’s highest ranking members. The Black Brotherhood did not go quietly. Conflict between the order and the crown broke into violence when the Brothers incited their followers to riot across the kingdom. There were disturbances everywhere, including several attempts to assassinate the king by blades and by dark sorcery. It became clear to everyone that the Black Brotherhood was far more than just another religious order. Once knives were drawn, the conflict grew into open war between the crown and the Brothers. The Black Brotherhood had exceeded their grasp. Their followers were crushed in the streets by mounted knights. Brothers were rounded up and arrested. Many of them were executed. Armed supporters of the Black Brotherhood, backed by arcane and divine magic, were defeated and slaughtered. The Brothers were driven back to their final hilltop fortress – the Black Monastery. They were besieged by the king’s army, trapped and waiting for the king’s forces to break in and end the war. The final assault on the Black Monastery ended in victory and disaster. The king’s army took the hilltop, driving the last of the black-robed monks into the monastery itself. The soldiers were met by more than just men. There were monsters and fiends defending the monastery. There was a terrible slaughter on both sides. In many places the dead rose up to fight again. The battle continued from afternoon into night, lit by flames and magical energy. The Black Monastery was never actually taken. The king’s forces drove the last of their foul enemies back inside the monastery gates. Battering rams and war machines were hauled up the hill to crush their way inside. But before the king’s men could take the final stronghold, the Black Brotherhood immolated themselves in magical fire. Green flames roared up from the monastery, engulfing many of the king’s men as well. As survivors watched, the Black Monastery burned away, stones, gates, towers and all. There was a lurid green flare that lit the countryside. There was a scream of torment from a thousand human voices. There was a roar of falling masonry and splitting wood. Smoke and dust obscured the hilltop. The Black Monastery collapsed in upon itself and disappeared. Only ashes drifted down where the great structure had stood. All that was left of the Black Monastery was its foundations and debris-choked dungeons cut into the stones beneath. The war was over. The Black Brotherhood was destroyed. But the Black Monastery was not gone forever. Over nearly two centuries since its destruction, the Black Monastery has returned from time to time to haunt the Hill of Mornay. Impossible as it seems, there have been at least five incidents in which witnesses have reported finding the Hill of Mornay once again crowned with black walls and slate-roofed towers. In every case, the manifestation of this revenant of the Black Monastery has been accompanied by widespread reports of madness, crime and social unrest in the kingdom. Sometimes, the monastery has appeared only for a night. The last two times, the monastery reappeared atop the hill for as long as three months…each appearance longer than the first. There are tales of adventurers daring to enter the Black Monastery. Some went to look for treasure. Others went to battle whatever evil still lived inside. There are stories of lucky and brave explorers who have survived the horrors, returning with riches from the fabled hordes of the Black Brotherhood. It is enough to drive men mad with greed – enough to lure more each time to dare to enter the Black Monastery.
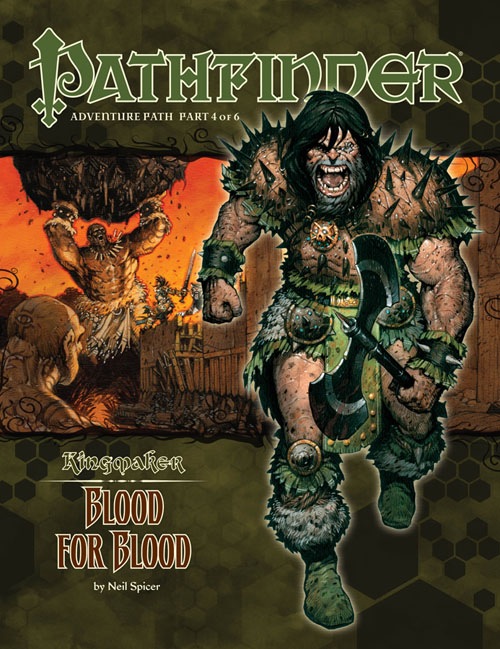
A Pathfinder Roleplaying Game adventure for 10th-level characters, this volume of Pathfinder Adventure Path is part 4 of 6 of the Kingmaker Adventure Path, in which the heroes win and defend a small kingdom from threats foreign and domestic. PCs should advance to 13th level by the end of this adventure. “Blood for Blood” begins with the PCs having returned home from solving the mystery of the Varnhold Vanishing. Shortly after their arrival, they learn that new problems have developed during their absence—there are rumors of an army marching toward their nation!The PCs race to the village of Tatzlford, where they help defend the village from an attack by a small but earnest force of bandits, barbarians, and several lumbering trolls after being warned in advance by a troubled woman who has fled from Fort Drelev to the west. Following the skirmish, she pleads with the PCs to save her father and sister from peril.From there, the PCs strike out into the swamplands of the Slough to the west, exploring new lands and finding opportunities to make new allies and eliminate long-term threats to the region. Their initial goal, though, should be infiltrating Fort Drelev, where they’ll have a chance to confront the traitor Drelev with his crimes and rescue the Fort’s beleaguered settlers. During this time, the PCs learn where Armag’s tribe has been holding the daughters of Drelev’s senior officers hostage. Arriving at the ancient site, the PCs attack Armag’s barbarian encampment and overcome the sinister powers of the Black Sisters to free the girls. Then, entering the tomb, they face deadly traps, ancient undead horrors from a war-torn age, and the trials of the tomb’s immortal, divine guardian. In the final chamber, the PCs encounter Armag himself, armed with the ancient sword of his namesake.

None know from where the Heresiarch first came, but all remember the night that it did. It rode down from the bleeding stars on a great serpent, hurling bolts of obsidian lightning that shattered the monuments and capitols of every nation. Its infernal army swept aside the defenses of the mortal empires in a single hour, decimating legions once thought to be the invincible fist of humanity's god-kings. Faceless priests - each bearing the symbol of the trident - drifted through the fallen cities and scorched villages on a frigid wind, and when they rose to greet the huddled men and women ringed by their festering, bloated dead, they spoke a single, simple offer: worship the Heresiarch or die. Thousands of crusaders fell tonight so that you might be given this chance. In a last stand that, for the first time, united all of the empires of humanity as brothers and sisters, a way was cleared into an infernal stronghold said to contain a gate to the Heresiarch’s fane. All is silent save for the clangor of distant battle. Surrounded by grim-faced knights and teary-eyed peasants – their hands clasped in desperate hope – you step through the glowing, churning doorway, knowing there will be no help and likely no return. Published by Defy Danger and Save Versus Death
Small town merchants, frustrated after being continually conned with counterfeit coinage, want help capturing or defeating a magical thief. This 18 page adventure takes the party into the wilderness to storm a previously abandoned tower and capture a mischievous gang of bandits. The party must be quick and stop the gang before the criminals escape in the safety of the clubhouse they built in the branches of their awakened tree ally. This one shot adventure is balanced for four 3rd level characters. It should take between 3-5 hours to complete. It can also serve as a difficult challenge for 2nd level characters or a fun, but easier session for 4th level characters. It takes place in the Forbidden Realms with no set location. It can be easily run as a standalone adventure or fit into an existing campaign that takes place anywhere near forest, such Neverwinter Wood.

The door slams open so hard that the wall shakes and the hinges groan. To everyone’s astonishment, a goblin staggers in. He is badly wounded, with dried blood covering about half of his body. Only a moment before the air was full of the rattle of dice, the slap of cards, and cries of victory and defeat. Now the Gambling Golem is dead silent. The goblin lurches toward your table then collapses right in front of you. “Help me,” he croaks, looking up at you with bloodshot eyes. “I’ll make you rich!”

This adventure takes place in the Moonsea of Faerûn. The players have been brought to Melvaunt to search for the missing scions of the city's great families. To the north, in Thar the orc tribes converge on the ruined fortress of Xul-Jarak, flocking to the banner of a charismatic warlord. There, he intends to sacrifice the scions of the great families of Melvaunt in a bloodritual to Gruumsh. The players will escape Melvaunt, search along the wilderness of Thar for the Fortress of Xul-Jarak, and then explore the dungeons of the ruined fortress and hopefully rescue the scions before they are sacrificed. There also is a Web Enhancement by Eric Cagle on the archives of wizards of the coast's website designed to scale the adventure to level 8. For example, it replaces the Owlbear with a Tyrannosaurus. This is an easy to scale adventure with much of the player's difficulty coming from intelligently avoiding problems, choosing how to approach each floor in the most tactical way, and quickly adjusting when something goes wrong. The adventure has sidebars including common orc battle cries (In Orc!), ready to use orc names, weather and random encounter table in Thar, a description of what happens if the party fails or partially succeeds, and suggested minis for each of the encounters. There is even an extended description of the bloodspear ritual, an event the party is not meant to encounter in a normal run. The appendix is detailed for all the humanoid characters including the scions and their equipment, the named villains, and variety of unnamed orcs the party will encounter. The fortress also offers an opportunity to introduce the players to the Underdark and the Zhentil Keep. There is a passage to the Underdark the players can accidentally explore, and return to later. Emissaries from Zhentil Keep have come to watch the ritual and have their own motivations. These npcs provide an opportunity for exposition and role playing at a point which otherwise might be combat heavy, acting as a valve for the first floor - helping or hurting the party with subtle magic should the difficulty be off.

A mad necromancer imprisoned in a sanitarium has died. Now he has come back as a powerful undead wizard. His lunacy was only increased by his death and he has turned all the other inmates into his undead servants. Now the sanitarium is under his control. A traveling group of adventures must put a stop to the necromancer before his evil madness spreads.

Madness in Freeport, the final part of the Freeport Trilogy, details the final confrontation between the PCs, the Brotherhood of the Yellow Sign, and Sea Lord Milton Drac. In Part One, the Drac invites the PCs to the Grand Lighthouse Ball. Careful investigation can reveal the secret purpose of the lighthouse. In Parts Two and Three, the PCs must recover a powerful artifact to thwart the Brotherhood's plans. They must pass through an infamous pirate's hidden caves, then search a sunken temple of the serpent god Yig. In Part Four, the heroes must enter the Grand Lighthouse, AKA Milton's Folly, in a race against time to stop the Brotherhood's world-shaking master plan from coming to fruition. (Bibliographic note: This adventure was originally written for v.3.0, and later updated to the v.3.5 rules. The revised versions of Death, Terror, and Madness in Freeport were reprinted in an omnibus edition, along with two shorter filler adventures, as The Freeport Edition: Five Year Anniversary Edition.)