
While doing due diligence going over some dusty tomes you have discovered a scrap giving you a clue about some magical items in a strange obelisk somewhere in the vicinity. The adventure takes the PCs across the Torgoth’s Causeway into the frontier. A few coins to a local sage and you will have a better idea on where to go…or so it would seem.
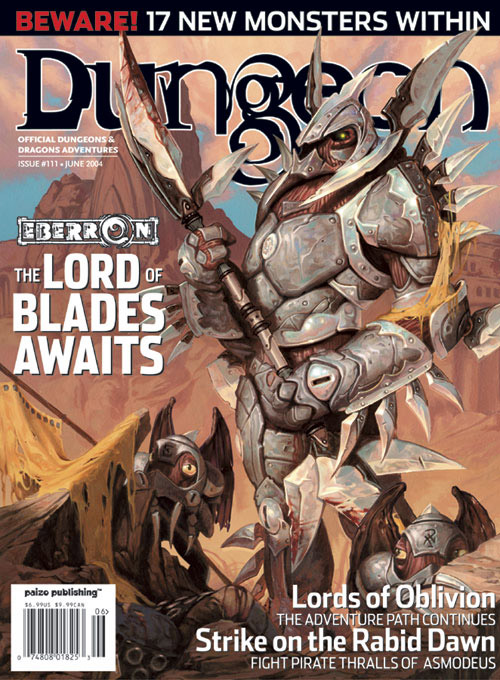
A terrible thunderstorm batters a seaside port, yet thunder and lightning are nothing compared to what is about to be unleashed by the diabolic crew of the Rabid Dawn. Casters with access to control water, control weather, or control winds will prove especially valuable, as will characters with strong Swim skills. The adventure is best suited to a predominantly good or neutral aligned party of PC's. Strike on the Rabid Dawn takes place in the port city of Hardby (Dungeon #109). As most of the action takes place within a lighthouse and on a ship at sea, however, any suitable port from your campaign makes an appropriate substitution for Hardby. Pgs. 12-32

You have no friends here What can you do when the Mists deposit you in the city of Lekar? The militia is no better than a gang of sadistic bullies, the citizens are more contagious than a fleet of plague ships, and every foot of public space is covered with corpses of criminals who committed no crime greater than struggling to survive in the oppressive domain of Falkovnia. Danger haunts your every move A secret society of assassins, known only as the Ebon Fold, has been hunting down visitors to Lekar and killing them in a most grisly fashion; all that remains of the victims are desiccated husks that crumble to ash when touched... and you are their next targets. There is no escape When everyone who has befriended you is either dead or hunted by the authorities, you have no choice but to fight back. But the Ebon Fold is a numberless horde whose leader holds sway over death. How can you defeat enemies that won't stay in the grave? They strike from the depths of darkness and steal your life... one dagger stroke at a time. This 64-page adventure can be played independently, or as the opening challenge in the Grim Harvest series that continues with Death Ascendant and concludes with Requiem. Inside the package is a poster map that fully details asll 10 levels of the chilling complex known as the Well of Bones. TSR 9523

Utopian Tower is a solo adventure which brings a new PC/player to the small Halfling village of Phebus on their way to a job opportunity. While the PC has time to spare they learn of a haunted tower that has the villagers on edge and is asked to investigate for a reward! While in town the PC meets a bard also headed to a job opportunity leading to a potential fellowship…if they survive! An excellent setting to teach a player new to the game on the basic mechanics. The adventure ties in roleplaying in a town environment, overland and dungeon movement, as well as combat encounters!
"While staying in the quant rual town of Keswig, the PCs are approached by a troubled young woman named Elexa Justheart. Elexa has just returned from the Galhanor Crusades--a war fought against giants and humanoids in the distant Galhanor Mountains. After serving six months as a cleric in a series of major battles, she recently arrived home to find her uncle's castle occupied by evil brigands." -- from the module. Includes overland maps and maps of the tower and castle.

𝐀𝐥𝐚𝐛𝐚𝐬𝐭𝐞𝐫 𝐏𝐚𝐥𝐚𝐜𝐞 𝐨𝐟 𝐭𝐡𝐞 𝐃𝐚𝐨 𝐓𝐡𝐞 𝐅𝐢𝐫𝐬𝐭 𝐢𝐧 𝐚 𝐒𝐞𝐫𝐢𝐞𝐬 𝐨𝐟 𝐉𝐞𝐰𝐞𝐥 𝐇𝐞𝐢𝐬𝐭𝐬 𝐚𝐭 𝐭𝐡𝐞 𝐄𝐧𝐝 𝐨𝐟 𝐭𝐡𝐞 𝐌𝐮𝐥𝐭𝐢𝐯𝐞𝐫𝐬𝐞 Wherein our adventurers seek out the Topaz of Earthly Perfection, reputed to be held within an extraplanar mountainside genie retreat. 𝐀 𝐃&𝐃 𝟓𝐄 𝐚𝐝𝐯𝐞𝐧𝐭𝐮𝐫𝐞 𝐟𝐨𝐫 𝟒-𝟕 𝐜𝐡𝐚𝐫𝐚𝐜𝐭𝐞𝐫𝐬 𝐨𝐟 𝟏𝟏𝐭𝐡-𝟏𝟒𝐭𝐡 𝐥𝐞𝐯𝐞𝐥. 𝟑𝟔 𝐩𝐚𝐠𝐞𝐬.

The tournament of the bloody stones has come to Taux, and the streets are said to run red with the blood of the combatants. Now, amid the crackdowns of the Sturgeons and the secret duels of the three great fencing schools, the heroes must once and for all solve the mystery of the House Vash blood feud. Taking on the guise of foreign swashbucklers, all must brave bloody single combat, pirates, ravenous cursed lowl, and evne magical reverberations from distant Roslof Keep! Complete the Adventures of the Emperald Serpent trilogy with this module. This adventure is formatted to both 1E & 5E gaming rules. Also available in PDF.

After a restful time in Queen’s Point you begin to hear rumors of some “lost city” being discovered. After speaking with some of the locals and visiting the library you become intrigued. Apparently Harvick was abandoned during the plague years and its riches were never recovered. Along with the regular valuables one would find in an abandoned city, it is rumored that an ancient artifact or two may also be present. Sounds like it’s time to strap on the adventuring gear and take a look around.

Lore of Aetherra: The Lost Druid is an award-winning 5th Edition adventure designed to bring characters from level one to five, and is the first in an expansive 4-book saga of science-fantasy adventures that will take your players to level 20. Fano. Things here haven't always been so grim. Time and chance have conspired to transform this once magnificent city upon the lake into a run-down sanctum for the destitute and depraved alike. Those who would see Fano renewed seek a lost druid who brings with him the hope to restore the city to its former glory and awaken the ancient technology hidden deep within its constructs. Could Fano's awakening usher in a new era of peace and prosperity, or will it unearth a conspiracy lurking in the shadows? Lore of Aetherra: The Lost Druid is a 5th Edition adventure designed to bring characters from level one to five, and is the first in an expansive 4-book saga of science-fantasy adventures that will take your players to level 20. A uniquely immersive RPG experience, The Lost Druid employs a myriad of digital content that can be experienced using the Alchemy RPG platform. Enjoy a cinematic storytelling structure, breaking chapters into scenes supplemented by expansive soundscapes, dynamic musical scores, voice-acted flavor text, and environmental motion graphics. 2023 IPPY Awards Winner: GOLD in Reference Product Contents: Over 250 Pages Over 2 hours of Audio Content 5 Premade Player Characters 6 Side Quests 7 Tavern Mini Games 35 New NPCs and Monsters Maps: 8 area, 1 city, and 1 region New Backgrounds, Spells, and Magic Items Over 60 NPC Profile Blocks AI Combat Tactics for Every Encounter Published by HITPOINT Press
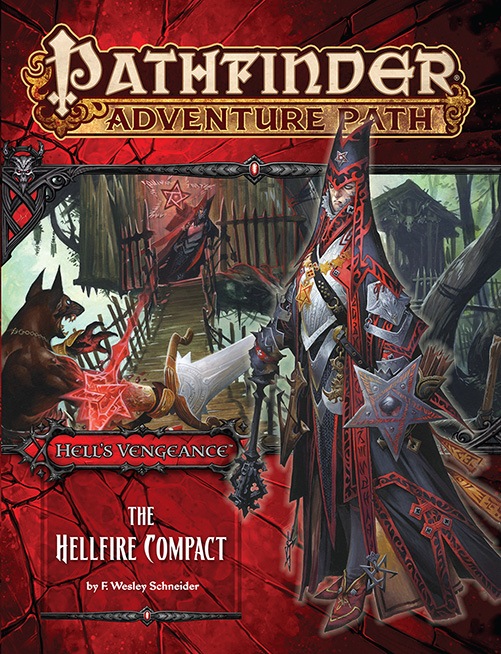
The Hell's Vengeance Adventure Path begins with "The Hellfire Compact," an exciting new adventure in which the players take the roles of evil characters in the diabolical empire of Cheliax! A paladin of Iomedae and knight-errant of the Glorious Reclamation comes to the town of Longacre, inspiring the citizens to join the uprising against the Thrice-Damned House of Thrune. First as amoral mercenaries, then as retainers of the wicked archbaron of Longacre, the evil adventurers must move quickly to put down the insurgency and keep the town from falling to the knight's rebellion.

The Ghost Tower is a companion adventure made to go along with the events unfolding in Folio #19 (WS6 Duel on The White Ship). It contains the information needed to run a side adventure that will help characters get to the White Ship temple Complex. The deck of the White Ship is filled with peril, and the stamina of the characters has already been worn down just getting to it. However, a single tower, and its now crumbling bridge, might allow the characters to skirt the bulk of the wandering monsters on the deck and get to the temple complex intact, but only if the tower proves less deadly... This adventure is formatted to both 1E & 5E gaming rules.
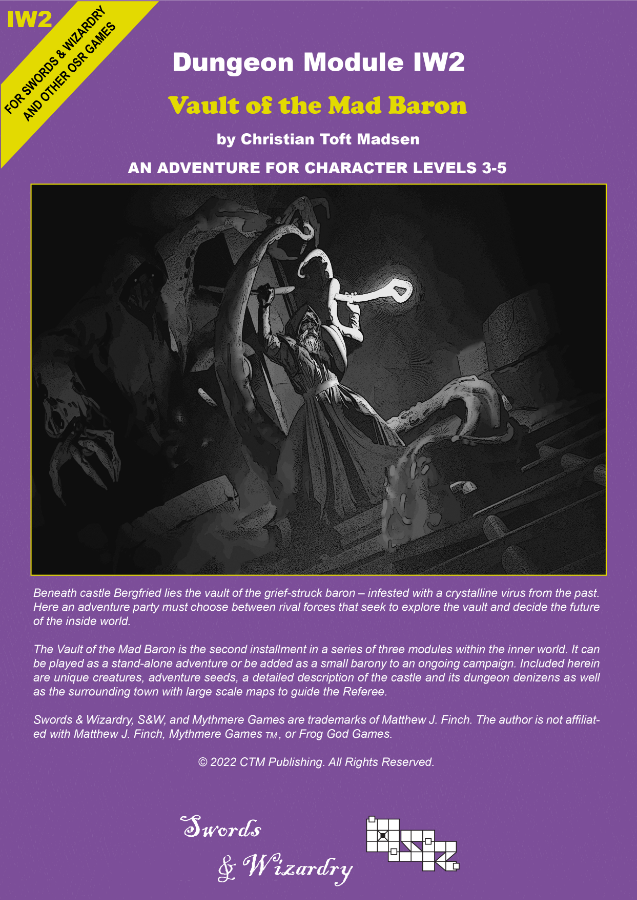
Beneath Castle Bergfried lies the vault of the grief-struck Baron – heavily infested with a crystalline virus from the past. Here an adventure party must choose between rival forces that seek to explore the vault and decide the future of the Inside World. ‘Vault of the Mad Baron’ is the second installment in a series of three modules in the Inner World. It can be played as a stand-alone adventure or be added as a small barony to an ongoing campaign. The scenario can be used with Swords & Wizardry or any other early variant of game rules and is suitable for PCs level 2-5. Inside you will find: A 60+ page old-school module with a layout optimized for fast and easy interfacing. An adaptable barony complete with town, castle and dungeon. Unique districts with encounters and sights. 6 major factions fully detailed with headquarter, plans, and missions for the PCs. Detailed description of a castle and associated dungeon levels. Downloadable maps for both players and the Referee. Locations allowing the PCs to travel to another era within the setting. Unique new creatures and magic items.

The Legend of the Black Monastery Two centuries have passed since the terrible events associated with the hideous cult known as the Black Brotherhood. Only scholars and story-tellers remember now how the kingdom was nearly laid to waste and the Black Monastery rose to grandeur and fell into haunted ruins. The Brothers first appeared as an order of benevolent priests and humble monks in black robes who followed a creed of kindness to the poor and service to the kingdom. Their rules called for humility and self denial. Other religious orders had no quarrel with their theology or their behavior. Their ranks grew as many commoners and nobles were drawn to the order by its good reputation. The first headquarters for the order was a campsite, located in a forest near the edge of the realm. The Brothers said that their poverty and dedication to service allowed them no resources for more grand accommodations. Members of the Black Brotherhood built chapels in caves or constructed small temples on common land near villages. They said that these rustic shrines allowed them to be near the people they served. Services held by the Brothers at these locations attracted large numbers of common people, who supported the Black Brotherhood with alms. Within 50 years of their first appearance, the Black Brotherhood had a number of larger temples and abbeys around the kingdom. Wealthy patrons endowed them with lands and buildings in order to buy favor and further the work of the Brothers. The lands they gained were slowly expanded as the order’s influence grew. Many merchants willed part of their fortunes to the Black Brotherhood, allowing the order to expand their work even further. The Brothers became bankers, loaning money and becoming partners in trade throughout the kingdom. Within 200 years of their founding, the order was wealthy and influential, with chapters throughout the kingdom and spreading into nearby realms. With their order well-established, the Black Brotherhood received royal permission to build a grand monastery in the hill country north of the kingdom’s center. Their abbot, a cousin of the king, asked for the royal grant of a specific hilltop called the Hill of Mornay. This hill was already crowned by ancient ruins that the monks proposed to clear away. Because it was land not wanted for agriculture, the king was happy to grant the request. He even donated money to build the monastery and encouraged others to contribute. With funds from around the realm, the Brothers completed their new monastery within a decade. It was a grand, sprawling edifice built of black stone and called the Black Monastery. From the very beginning, there were some who said that the Black Brotherhood was not what it seemed. There were always hints of corruption and moral lapses among the Brothers, but no more than any other religious order. There were some who told stories of greed, gluttony and depravity among the monks, but these tales did not weaken the order’s reputation during their early years. All of that changed with the construction of the Black Monastery. Within two decades of the Black Monastery’s completion, locals began to speak of troubling events there. Sometimes, Brothers made strange demands. They began to cheat farmers of their crops. They loaned money at ruinous rates, taking the property of anyone who could not pay. They pressured or even threatened wealthy patrons, extorting money in larger and larger amounts. Everywhere, the Black Brotherhood grew stronger, prouder and more aggressive. And there was more… People began to disappear. The farmers who worked the monastery lands reported that some people who went out at night, or who went off by themselves, did not return. It started with individuals…people without influential families…but soon the terror and loss spread to even to noble households. Some said that the people who disappeared had been taken into the Black Monastery, and the place slowly gained an evil reputation. Tenant farmers began moving away from the region, seeking safety at the loss of their fields. Slowly, even the king began to sense that the night was full of new terrors. Across the kingdom, reports began to come in telling of hauntings and the depredations of monsters. Flocks of dead birds fell from clear skies, onto villages and city streets. Fish died by thousands in their streams. Citizens reported stillborn babies and monstrous births. Crops failed. Fields were full of stunted plants. Crimes of all types grew common as incidents of madness spread everywhere. Word spread that the center of these dark portents was the Black Monastery, where many said the brothers practiced necromancy and human sacrifice. It was feared that the Black Brotherhood no longer worshipped gods of light and had turned to the service of the Dark God. These terrors came to a head when the Black Brotherhood dared to threaten the king himself. Realizing his peril, the king moved to dispossess and disband the Black Brother hood. He ordered their shrines, abbeys and lands seized. He had Brothers arrested for real and imagined crimes. He also ordered investigations into the Black Monastery and the order’s highest ranking members. The Black Brotherhood did not go quietly. Conflict between the order and the crown broke into violence when the Brothers incited their followers to riot across the kingdom. There were disturbances everywhere, including several attempts to assassinate the king by blades and by dark sorcery. It became clear to everyone that the Black Brotherhood was far more than just another religious order. Once knives were drawn, the conflict grew into open war between the crown and the Brothers. The Black Brotherhood had exceeded their grasp. Their followers were crushed in the streets by mounted knights. Brothers were rounded up and arrested. Many of them were executed. Armed supporters of the Black Brotherhood, backed by arcane and divine magic, were defeated and slaughtered. The Brothers were driven back to their final hilltop fortress – the Black Monastery. They were besieged by the king’s army, trapped and waiting for the king’s forces to break in and end the war. The final assault on the Black Monastery ended in victory and disaster. The king’s army took the hilltop, driving the last of the black-robed monks into the monastery itself. The soldiers were met by more than just men. There were monsters and fiends defending the monastery. There was a terrible slaughter on both sides. In many places the dead rose up to fight again. The battle continued from afternoon into night, lit by flames and magical energy. The Black Monastery was never actually taken. The king’s forces drove the last of their foul enemies back inside the monastery gates. Battering rams and war machines were hauled up the hill to crush their way inside. But before the king’s men could take the final stronghold, the Black Brotherhood immolated themselves in magical fire. Green flames roared up from the monastery, engulfing many of the king’s men as well. As survivors watched, the Black Monastery burned away, stones, gates, towers and all. There was a lurid green flare that lit the countryside. There was a scream of torment from a thousand human voices. There was a roar of falling masonry and splitting wood. Smoke and dust obscured the hilltop. The Black Monastery collapsed in upon itself and disappeared. Only ashes drifted down where the great structure had stood. All that was left of the Black Monastery was its foundations and debris-choked dungeons cut into the stones beneath. The war was over. The Black Brotherhood was destroyed. But the Black Monastery was not gone forever. Over nearly two centuries since its destruction, the Black Monastery has returned from time to time to haunt the Hill of Mornay. Impossible as it seems, there have been at least five incidents in which witnesses have reported finding the Hill of Mornay once again crowned with black walls and slate-roofed towers. In every case, the manifestation of this revenant of the Black Monastery has been accompanied by widespread reports of madness, crime and social unrest in the kingdom. Sometimes, the monastery has appeared only for a night. The last two times, the monastery reappeared atop the hill for as long as three months…each appearance longer than the first. There are tales of adventurers daring to enter the Black Monastery. Some went to look for treasure. Others went to battle whatever evil still lived inside. There are stories of lucky and brave explorers who have survived the horrors, returning with riches from the fabled hordes of the Black Brotherhood. It is enough to drive men mad with greed – enough to lure more each time to dare to enter the Black Monastery.

Buried in fire, but hardly dead. Only the Keep survived the destruction of Koralgesh, but few adventurers will survive the terrors that now stalk the lost Keep's halls. Players hear rumours of the Keep at Koralgesh and then traverse it to acquire the treasure within. Pgs. 45-64

The Frozen Necromancer is a three-part adventure for Fifth Edition that takes player characters from levels 1 to 4. This adventure is the first in a storyline of four modules called The Demonplague that can be used as an entire campaign that takes characters from level 1 to 20. The entire adventure (or just pieces, characters, or encounters from The Frozen Necromancer) can be dropped into any fantasy setting with minimal changes
Come on up for a bite. Sometimes the adventure comes to you. The local inhabitants of a large town have been disappearing and its up to find what is causing and bring back the people that have disappeared. Pgs. 48-59

THRESHOLD! The northernmost town in the Duchy - and your last stop before your adventures begin. Threshold, the gateway to mysterious castles, lost temples, deadly caves and caverns. You have heard the stories and legends, now you wish to see for yourself. This product provides a complete campaign adventure that will take beginning characters from 1st all the way to 3rd level and possibly beyond, drawn from the first nine modules of the B-series adventures. See individual adventure entries for Boss, Common Monster and Items lists. TSR 9190

The Sea Witch is a short adventure for four 10th-level characters. The difficulty of the adventure can be adjusted by changing the level of main antagonist (Black Molly, the sea hag pirate) or by altering the number of her ogre servants. To tailor the encounter to groups of different levels, refer to table 4-1 in Chapter 4 of the DUNGEON MASTER’S GUIDE. The adventure is set off a lightly populated coastline known as Misty Bay, but adapts easily to any coastal region in existing campaigns. The sea hag known as Black Molly is a notorious pirate who has plagued the coastal cities for the better part of a decade. A successful Knowledge (local) check (DC 15) will reveal that Molly and her ogre crew have a filthy reputation as merciless killers who delight not only in plundering vessels for their riches, but also in destroying the ships themselves and sending all hands to the bottom of the sea. Now the villain and her followers have seized control of the Old Lighthouse of Misty Bay located off a lightly populated coastline. For generations the lighthouse beacon has protected the fishermen of this region, warning them of the dangerous rocks that lurk just below the level of the high tides. Recently, the hag has put out the beacon, darkening the lighthouse; misery and destruction are sure to follow as ships start to blunder into the rocks. Blackmail is apparently Black Molly’s aim in this venture: She conveyed a message to the nearest shore community, the fishing village of Poisson, demanding the princely sum of 50,000 gp. Until she receives this ransom, she intends to hold the lighthouse and its beacon hostage. The fate of the human keepers who tend the lighthouse is unknown to the seaside communities at this time, but they fear the worst. The Sea Witch is ostensibly a rescue mission: The PCs are pitted against the evil of Black Molly and the brawn of her savage ogre crew. It is the heroes’ task to retake the lighthouse and, if possible, free its captives from the clutches of their jailer. What neither the PCs nor the shore communities yet realize is that while she 1would be pleased to have the gold, Black Molly is in fact after bigger treasure. Molly has no intention of giving up the lighthouse — at least, not until she finds what her master sent her here for. Lying on the sea floor practically at the base of the rock on which the lighthouse sits is the wreck of the war galley Flying Cloud, which according to popular legend was captained by a cleric who wore around his neck an amulet of the planes. Black Molly wants this prize, but so far she hasn’t been able to find it. She’s scoured the wreck without finding any sign of the magic item. Now she’s trying to determine where to search next, for the item might well be somewhere near the wreck. If she can’t find it, she’ll start torturing her captives to find out if they have any useful knowledge about the amulet.

Madness in Freeport, the final part of the Freeport Trilogy, details the final confrontation between the PCs, the Brotherhood of the Yellow Sign, and Sea Lord Milton Drac. In Part One, the Drac invites the PCs to the Grand Lighthouse Ball. Careful investigation can reveal the secret purpose of the lighthouse. In Parts Two and Three, the PCs must recover a powerful artifact to thwart the Brotherhood's plans. They must pass through an infamous pirate's hidden caves, then search a sunken temple of the serpent god Yig. In Part Four, the heroes must enter the Grand Lighthouse, AKA Milton's Folly, in a race against time to stop the Brotherhood's world-shaking master plan from coming to fruition. (Bibliographic note: This adventure was originally written for v.3.0, and later updated to the v.3.5 rules. The revised versions of Death, Terror, and Madness in Freeport were reprinted in an omnibus edition, along with two shorter filler adventures, as The Freeport Edition: Five Year Anniversary Edition.)

Long ago, a small but mighty humanoid kingdom existed in what is now the local wilderness. Bugbear and ogre warriors fought brutal wars of expansion, earning great fame and amassing considerable fortunes from their predations. Those who died in battle were buried in large tomb complexes dug into hillsides and honored as patrons of the living. Among these tombs was the large tor known as Hightower. Though it was neither the largest nor the most famous of the kingdom's tombs, Hightower did represent a typical example of this kind of structure. As happens to all such nations, the cruel humanoid kingdom eventually fell to a more powerful foe that razed all its cities and outlying fortifications. Of the tombs, only Hightower escaped destruction -- largely because it was an unimportant monument in a remote location. A few tribes of humanoids that survived the devastation tried to use it as a fortress, but the humans with whom they clashed defeated them soundly and sealed the entrance with a huge, round stone to ensure that the tor could no longer be used as a base. Since then, Hightower has served as a landmark for travellers in the know, but it has otherwise been largely forgotten. But the electrical storms that have plagued the area in recent days have been quite severe, and a few weeks ago, a stray lightning bolt broke open the stone seal. Tonight, yet another terrible storm is sweeping through the wilderness, driving all creatures to take shelter where they can find it. Hightower looms on the horizon, and its door is no longer blocked. Will the PCs dare to enter its silent halls?