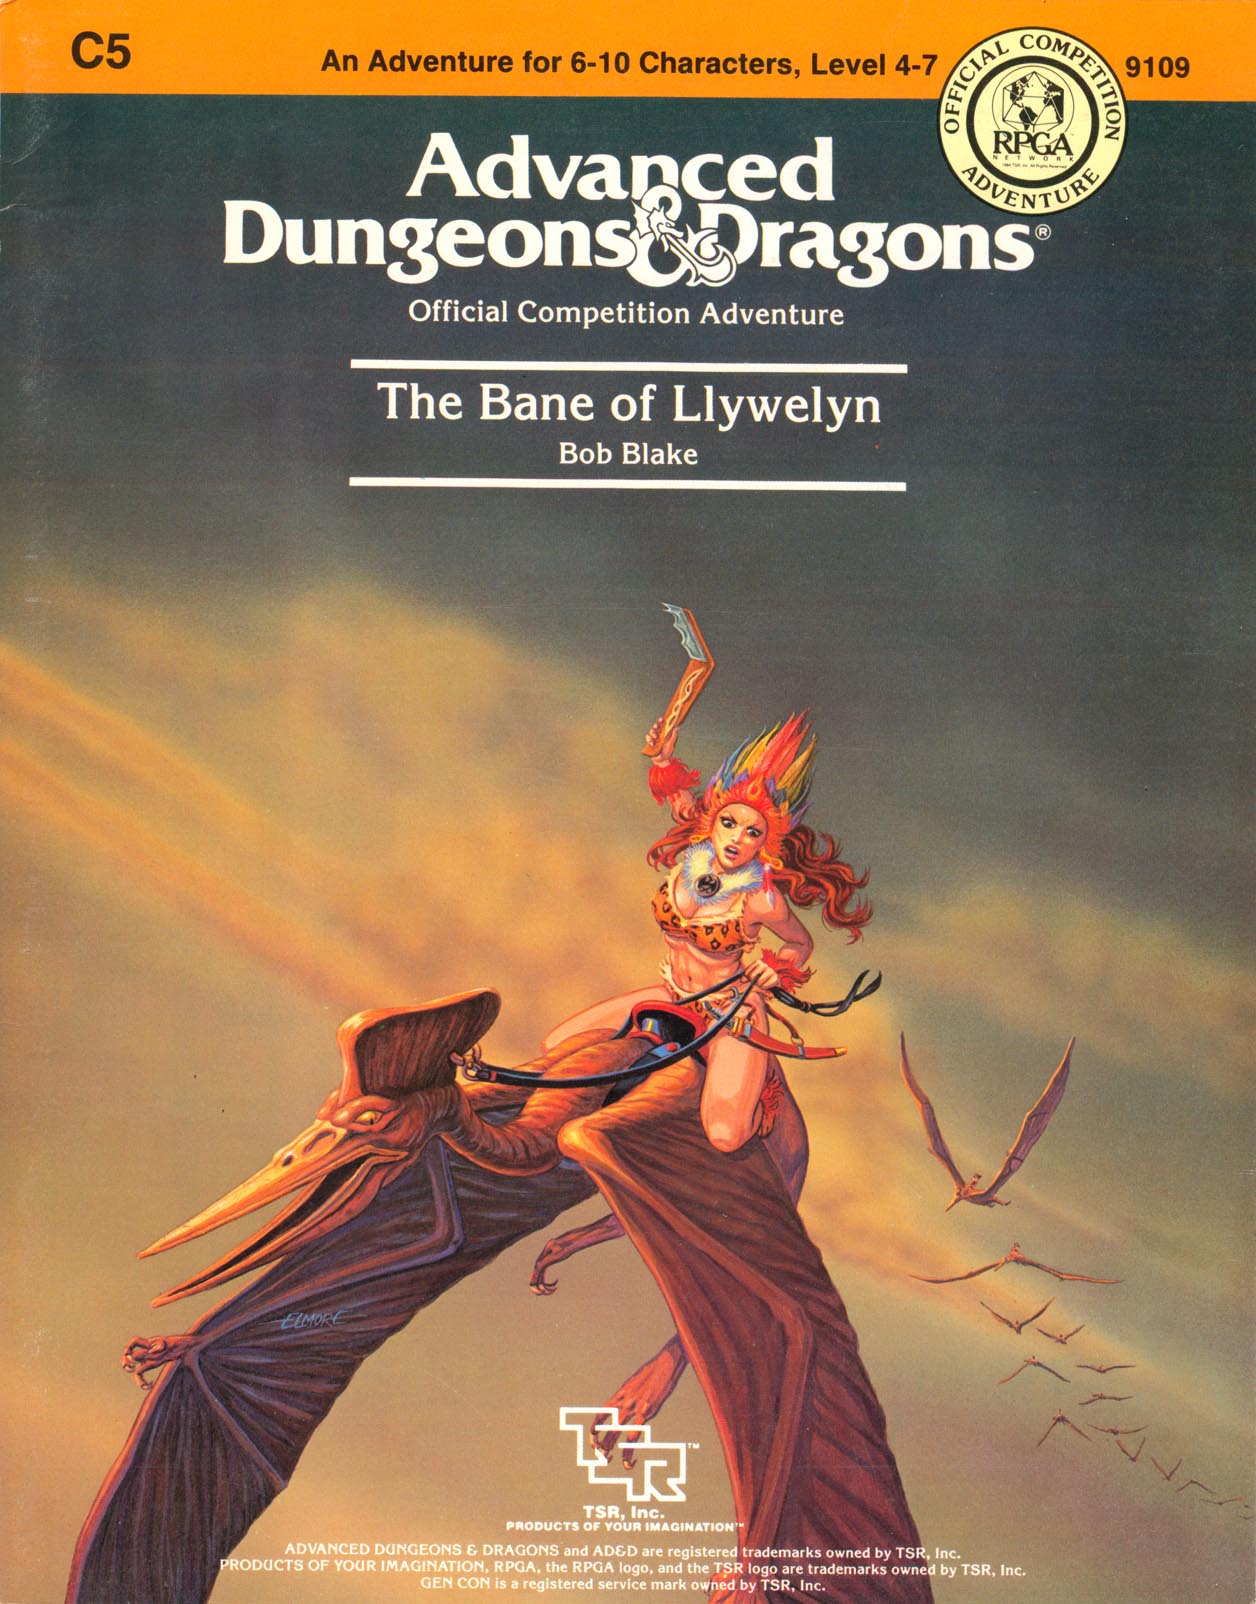
Excitement and unrest grip the land of Pellham. Two hundred years ago, the royal line of kings was deposed and replaced by a High Council. The current council is well-meaning but hopelessly incompetent. Everyone agrees that a drastic change is needed for the kingdom to survive. The ancient Prophecy of Brie foretells that in Pellham's darkest hour, a king from the past will return to restore the kingdom. The time of the prophecy is now. All is in readiness: the symbols of the ancient kings have been recovered, the keys to the royal tomb are in hand, powerful magics to revive the long-dead king have been secured at great cost. Only one problem remains... no one knows where the king is buried! The Bane of Llywelyn concludes the epic adventure of the Prophecy of Brie -- can YOU insure that the quest will be a success? The adventure can be played as a separate adventure or as the second part of the Prophecy of Brie series. TSR 9109

To a wizard, knowledge is power, and the wizard Lirdrium Arkayz wants to know the mysterious secret of The Rock. Many have tried to discover it - but The Rock keeps its secret well. The wizard offers a rich reward to anyone bold enough to solve this dark mystery. But the road to The Rock leads to danger and hidden peril - dangers that have claimed the lives of many brave adventurers. Rashness and folly will lead to quick death, but riches await the clever and brave. Have you the wits, courage and skill to survive the Journey to The rock? TSR 9106

Welcome to Cirria’s Gambit, a four- to six-hour adventure for 2nd-4th level characters, designed for Dungeons & Dragons 5th Edition! This adventure invites you and your players to a fiendishly fun party with revengeful devils, a succubus who just wants to go back to hell, snobbish nobles, intoxicated socialites and one really irritated banshee! Cirria wants to go to hell! There is only one tiny problem: her mistress Glasya, archdevil of the sixth layer, has banished her for insubordination. So, what’s a succubus to do in Cirria’s place? Take over a local noble family and organize a grand feast like this boring plane has never seen before to channel the emotional energy of her guests into a ritual to open a portal, of course! Isn’t it obvious? Cirria’s plan only had one tiny unaccounted for issue: Lady Kaera, matron of the noble house Cirria targeted, is a banshee. Cirria found a momentary solution – but that will only hold so long as no intrepid group of adventurers disrupts it… This adventure can be run as a one-shot or inserted into an on-going campaign. The theme fits Baldur’s Gate: Descent into Avernus particularly well!

X11 Saga of the Shadow Lord consists of two linked adventures as a mini-campaign: In the first adventure called Elvenstar, PCs try to steal a magic item from the Shadow Lord to thwart his planned invasion of a peaceful neighboring kingdom. Encounters in this adventure include a village populated by adventurers, and a cloud giant living in a small castle, before the party reaches the Shadow Lord's lair for the final encounter. In the second adventure, also enclosed in module X11, The Halls of Drax Tallen, the Shadow Lord returns more powerful than ever. His undead minions are searching for another magical item to give him immense power and the PCs must find this item before he does. Player characters must get past the undead army of the Shadow Lord and infiltrate his haunted fortress to retrieve the magical Elvenstar. TSR 9165

For 1000 years, the Pyramid of Amun-re has lain undisturbed. Now the ghost of the once-great Pharaoh pleads with adventurers to venture into his tomb, foil the devious traps within, and free his soul. A classic dungeon crawl, with mazes and quality lore. No one has ever returned from the tomb of Amun-re: his Star Gem must still lie unclaimed! You will need all your cunning, imagination, strength and magic -- just to survive! TSR 9052
![Cover of D&D Encounters Season 03 - Keep on the Borderlands: A Season of Serpents [Chapter 1-5]](https://www.drivethrurpg.com/images/44/121468.jpg)
At Restwell Keep, you've heard that fortune and glory await those bold enough to brave the dangers of the Chaos Scar, a valley carved ages ago by a fallen star. The same tales warn that this Chaos Scar draws wickedness to it. Perhaps you can help stem this tide... and gain treasure along the way. While the location is a different keep, this adventure is an homage to B2 Keep on the Borderlands(https://adventurelookup.com/adventures/b2-keep-on-the-borderlands)

This material was originally published as two separate adventures, D1: "Descent into the Depths of the Earth" and D2: "Shrine of the Kuo-Toa." Contained herein are referee notes, background information, maps, and exploration keys intended for use with the Advanced Dungeons & Dragons rules. The adventure can be used alone or as part of an extended adventure that begins with G1-3: "Against the Giants" and continues with D3: "The Vault of the Drow" and Q1: "Queen of the Demonweb Pits." TSR 9059
:strip_icc()/pic2633966.jpg)
Heroes and blackguards of every stripe will find peril on the Purple Planet, but none more than 0-level PCs. Cast across the cosmos, surrounded by hordes of baying man-beasts, and marched into mass gladiatorial combat, the PCs' death waits with bated breath. Their sole hope for escape lies – not in pitched combat against endless hordes – but by braving the unknown and pressing into the darkness beneath the Purple Planet.

Blinsky's Toyshop is our take on what happens to Blinsky and Piccolo during, or after the Curse of Strahd campaign. Blinsky, the toymaker in Vallaki with the cute monkey wearing a pink tutu, received a large inheritance from a long-time client. The client, Obtavius Swat, a retired adventurer and avid collector of toys, left his entire estate to Blinsky. The estate included coin, precious gems, art, and his collection of toys, some made by Blinsky and others he acquired during his travels. Blinsky used the fortune to pay a wizard to create a small island in the middle of Lake Zarovich, located just outside of Vallaki. He then paid masons and workers to build a fantastic new toyshop, which he designed to be an experience for both the young and old alike. Though the number of children in Barovia was increasing, mostly imparted to the devil Strahd’s downfall, Blinsky wanted to touch the inner child of the adults in the city. He wanted happiness. He wanted smiles. He named the castle Blinsky’s Toyshop of Marvels. One of the toys, a small silver tiara kept in a black satin-lined ivory jewelry box, was such a lovely piece. Blinsky couldn’t stand the thought of leaving it in the box. He already had enough gold and losing the small tiara wouldn’t be a large loss, so he decided to give it to his monkey – Piccolo (see Creatures of the Toyshop). He smiled at the thought of her running around in her pretty, shiny tiara. Sadly, as Barovian luck would have it, trapped inside the tiara is the sole of an evil gnome wizard named Aribetha Strangge. In his old age, Obtavious Swat forgot that he and his fellow adventurers used the tiara to imprison the gnome’s soul. Yesterday, when Blinsky placed the tiara on Piccolo’s head, silver tendrils cascaded from the tiara and into poor Piccolo’s skull, allowing Aribetha to control the monkey. Now, Aribetha has incapacitated Blinsky in the toyshop’s tower, brought many of the toys to life, and imprisoned or killed many of the workers and customers. The adventure includes costumes (which the character may wear), Strahd Hand Puppets, and a possessed Piccolo.

The Dread tunnels of Ruxbar were created by a cult of a lesser evil deity of the giant pantheon, known as Jargain to serve as a planar gate in hope of bringing chaos and destruction to the natural order of the world and power to the one who would control the gate. Ruxabar was the high cultist who completed the ritual but to his surprise nothing of what he expected came through the gate. Plague creatures, toxic gases and vapors, diseases of all kinds and decay lay quick waste to him and his cult. For some time the gate remained open and the settlements nearby were afflicted with diseases never seen before. The nearby town of Stagwood was quickly abandoned due to the plague. Rumor has it that the gods have weakened the gate and the cult has been destroyed. The remaining villages that managed to somewhat resist the plague are now hiring brave adventurers to venture into the tunnels and close the planar gate for good! Are you capable enough of surviving the horrors that reside in the Dreaded Tunnels of Ruxabar? Published by Mistfactor Press

Local villagers whisper of a mysterious place deep in the marsh - a place shrouded in mist and dotted with barrow mounds, ruined columns, and standing stones. The tomb-robbers who explore beneath the mounds - or rather the few who return - tell tales of labyrinthine passages, magnificent grave goods, and terrifying creatures waiting in the dark. Are you brave (or foolish) enough to enter Barrowmaze? Barrowmaze Complete (BMC) is a classic megadungeon for use with any old school fantasy role-playing game. BMC includes everything in Barrowmaze I and II in the same book in addition to new material, art, layout, and cover art by Ex-TSR artist Erol Otus. Barrowmaze Complete will keep your players on their toes and your campaign going strong. BMC is brought to you by the Old School Renaissance (so don’t forget your 10’ pole). This edition includes art by the aforementioned TSR artists Erol Otus, as well as Tim Truman, Jim Holloway. New old-school artists include Peter Pagano, Cory Hamel, Stefan Poag, Zhu Bajie, Stephan Thompson, and others.
/pic5652045.jpg)
Deep within the dark recesses of the Tomb of Nihalar, the final resting place of elven kings, the weapon of the wood elves of Imfe Aiqua stirs. Two individuals are drawn to the weapon—but only one can accept it. Who will take up the glaive of the revenant king and become the ruler of the forgotten elven city? Glaive of the Revenant King is a 3rd-level Fifth Edition adventure for 3-5 characters. Characters who survive the adventure should reach the 4th level by the adventure's conclusion. This is the major side quest in the Hand of Eight adventure path. It can be played as the kickoff for the larger adventure setting or as a one-shot adventure for your players. The campaign is intended to be set in the DMDave crowdsourced campaign world of Omeria. However, it can just as easily be inserted into any other mysterious, untamed wilderness. The adventure is written by renown Fifth Edition author, DMDave Hamrick. It's 40 pages of fast-paced fantasy adventure that includes zombie hordes, horrible monsters in dark forests, battles with orcs, and tombs filled with dangerous traps.

Old soldiers never die... For more than three decades, Dr. Rudolph van Richten stood against the forces of darkness, and hunted their servants in the far corners of the land of Mists. Now he had thought his long battle over, had thought he could spend his declining years in quiet enjoyment with old friends. But for some, a tragic end is inevitable. Dark forces have been gathering in the Mists. Their objective is to see Ravenloft's foremost expert on the supernatural destroyed, shattered in spirit as well as in body. From the crumbling edifice of Van Richten's childhood home, an enemy long thought vanquished spins a web of powerful evils and lost souls, drawing Van Richten to his doom. And then a group of heroes gets trapped in the web as well. . . . Witness the final stand of Rudolph van Richten! Inside this box is a grand-scale Ravenloft adventure that pushes heroes to the brink of madness, and draws them into the terrifying scheme to annihilate Rudolph van Richten. TSR 1141
In the dark days of the Chaos War, a band of heroes sets forth to recover the famed Chaos Reaver - a sword said to possess the power to banish creatures of Chaos from the land. Converted to 3.5e from the original SAGA version published in Polyhedron UK #7 (1999).

After enjoying a bit of free time in Cullifield while some members of your party finish their training, you hear word of a quick trip out to sea. Further investigation leads you to understand a certain list needs fulfilled and a drunken sea captain is willing to split the profits. Well, no need to sit around on your hands…let’s hit the waves!

Madness in Freeport, the final part of the Freeport Trilogy, details the final confrontation between the PCs, the Brotherhood of the Yellow Sign, and Sea Lord Milton Drac. In Part One, the Drac invites the PCs to the Grand Lighthouse Ball. Careful investigation can reveal the secret purpose of the lighthouse. In Parts Two and Three, the PCs must recover a powerful artifact to thwart the Brotherhood's plans. They must pass through an infamous pirate's hidden caves, then search a sunken temple of the serpent god Yig. In Part Four, the heroes must enter the Grand Lighthouse, AKA Milton's Folly, in a race against time to stop the Brotherhood's world-shaking master plan from coming to fruition. (Bibliographic note: This adventure was originally written for v.3.0, and later updated to the v.3.5 rules. The revised versions of Death, Terror, and Madness in Freeport were reprinted in an omnibus edition, along with two shorter filler adventures, as The Freeport Edition: Five Year Anniversary Edition.)

Dragonbowl is a setting and pulp action adventure in one. It plunges a party into a rich festival scenario that revolves around a deadly gladiatorial contest, where the dangers they face in the arena are almost secondary to those they encounter in the murky criminal underworld they find themselves in: a world that stinks of corruption, human trafficking, illegal dinosaur-trading, necromancy, blood sacrifice and unnatural arcane experiments. The action takes place in a vast cavern in Mount Waterdeep, known as the Underbelly, where not only Dragonbowl Arena, but also an entire festival grounds – consisting of temples, bars, casinos, funfairs and markets - has been constructed to host this grand sporting extravaganza. With Xanathar, Jarlaxle, Davil, Volo and the Black Viper all in attendance, and scores of 'entanglements' (faction missions) to keep players busy, Dragonbowl can be played as a sequel to Waterdeep: Dragon Heist, or as a first step towards the Undermountain and the Dungeon of the Mad Mage. Equally, it can be played as a stand alone adventure, or easily transported into other settings. The adventure is written for a party of four 6th level adventurers, and easily customisable for three to five players, of any mid-tier level (the adventure contains maps and handouts adapted for both 4 and 5 player tables). The adventure is designed to last around ten to fifteen 4-hour sessions, but can very easily be shortened or lengthened according to the DM's desire. The adventure features all three pillars of play: combat (in and out of the arena), social interaction (a succession of parties and parades, where players can get entangled in NPC business) and exploration (30+ locations in the festival grounds alone).

To Hell and Back Again is the perfect adventure for new players and veterans looking to experience Dungeons & Dragons in a new way! It's written as a solo adventure, where choices have gigantic consequences, but it also provides balanced rules to play with a group or a Dungeon Master as well! This 80 page adventure features: - A heart-pounding origins story that fits perfectly as either a prequel to Descent Into Avernus, a stand-alone adventure, or into your ongoing fantasy campaign. - Beloved characters like Lulu the hollyphant, Mad Maggie and her redcap gang, the archdevil Zariel, and many others brand new to this adventure. - Infernal War Machines, and exciting encounters with unique stat blocks. - Innovative Destiny and Traits mechanics that make your choices really matter. - A ton of possible outcomes that will fuel your character's many adventures to come! - Four gorgeous sample characters, with interactive character sheets designed to be new-player friendly so that you can jump right into the story if you'd like. - A community survey when you finish so that you can see how your outcomes and choices compared to other players!

“The Lamia’s Heart”: Your party are contracted by the nascent master of an unsanctioned thieves’ guild. To earn his favour, you must steal a singular gem from the mansion of a prominent merchant. Purloining this gem, however, may raise the ire of the city’s official thieves’ guild; notwithstanding, the reward is significant.

The Terror of Screeching Hill is an adventure designed for a party of four level 1-3 characters. Introduce your friends to Dungeons & Dragons or take a break from your current campaign and save the town of Stonehollow in this early level one-shot! To the villagers of Stonehollow, the flight of bats warns of an impending disaster. Earthquakes, which riddle the small mining town, often follow this omen causing cave-ins and trapping miners underground. Thankfully, the ground hasn't shaken in weeks. However, every night at sunset, a colony of bats fly over the town as a haunting cry echoes over Screeching Hill, a mound on the southern outskirts of the village. Villagers have begun to go missing, including the town's doctors Simon and Kirk Bartok, and some have suffered terrible wounds after being attacked by a relentless creature out of the darkness. With no doctors to treat the wounded and the expectation of more attacks, the villagers of Stonehollow turn to you for help. Will you investigate the terror of Screeching Hill and save the town from its reoccurring nightmare? Included: - A 16 page one-shot designed for level 1-3 characters - Unique maps - Two player handouts - A simplified document compatible with screenreaders