
In a distant dimension of existence, a collective of Modrons run experimental tests to find the answer to one question: What draws adventurers to places known as "Dungeons"? Hijacking the travel of adventuring parties, these Modrons subject them to a series of tests in their artificially created dungeon. Deadly combat, logic puzzles, "moral" challenges, and a plot about a kidnapped "Maiden" Modron by an "Evil Wizard Construct" can be found within. But not all is as it seems... Leading the experiment is a rogue Modron officer named the Creative Director, who has gone mad and morphed the tests into an elaborate death trap for adventurers. Seeking revenge against those it considers responsible for its “imprisonment”, it pits the adventurers against ever escalating challenges. Who will defeat the Creative Director and put an end the mad tests?

The Hag's Hexes is a 66 page guide designed by Dungeon Masters Guild luminaries like JVC Parry and Janek Sielicki alongside rising stars and old stalwarts like Matt Butler, Matthew Gravelyn, and Tim Bannock. It was created with one thing in mind: to make hags more than the sum of their (often meager) Challenge ratings, giving them the mechanics, roleplay potential, and weird magic that can inspire campaigns, lay low kings and warlords, and potentially ensnare unwary Player Characters into campaign-changing curses or long-term bargains that force them into terrible moral quandaries! Split into five chapters, the authors have provided everything a DM needs to terrify their players for years to come. The Bestiary features over a dozen monsters; some are new hags, some are their minions or even their mobile lairs, and one of them -- the Shaitan AKA Desert Hag -- was featured in Monsters of the Guild! Bargains & Curses is a chapter filled with ideas that can kick-start campaigns, threaten valued NPCs, or put Player Characters' very existence and morality at stake. Chapter 3 includes two dozen items of wonderment, weirdness, and dread, ranging from fairy tale-inspired items of whimsy to terribly cursed items of horror. Chapter 4 is titled "Filthy, Vile & Downright Dirty" and provides dozens of roleplaying tips to make hags come alive, new mechanics inspired by and expanding on Volo's Guide to Monsters (coven spell lists, aunties, grandmothers, alternative coven members), and ends with useful combat tactics for each of the hags from the Monster Manual and Volo's Guide, as well as tactics for covens. Finally, Chapter 5 presents five encounter groups (with sub-encounters) to give you quick story seeds and monster lists that you can put together in minutes to create a single encounter or to inspire a full campaign, and ends with three full-length adventures -- each with 3-5 encounters -- that showcase many of the new monsters, rules, magic items, and so on that appeared in earlier chapters. Each of these adventures comes with an encounter map meant to act as inspiration for hag lairs, and they include useful mechanical ideas for terrain effects and descriptive keywords listed directly on the map for added inspiration and easy customization! Designed by Tim Bannock. Written by Matt Butler, JVC Parry, Janek Sielicki, and Tim Bannock. Edited by Matthew Gravelyn and Tim Bannock. Cover Art by Elena Naylor. Cartography by Tim Bannock using Inkwell Ideas' Dungeonographer (Dungeonographer is copyright Inkwell Ideas). Layout & Graphic Elements by Elena Naylor with Tim Bannock. Interior Art by Arcana Games, Bruno Balixa, David Lewis Johnson, Dean Spencer, Earl Geier, Filip Gutowski, Jacob E. Blackmon, Joyce Maureira, Petr Kratochvil, Jayaraj Paul, Brian Brinlee, and Wizards of the Coast.

Unknown to even the mightiest of the great sorcerer-kings, a fire is stirring deep beneath the barren soil of Athas. Sheltered by the titanic bulk of the Black Spine Mountains, a terrible force has ripped open the very fabric of time and space. Now a shimmering portal stands open and a long-forgotten enemy assembles its sinister forces to invade the kingdoms under the dark sun. The only thing that stands in the way of this terrible fate is a band of heroes. Assembled from the four corners of this tortured world and bound together by the tangled cords of fate, they must face an enemy the likes of which they have never seen before. The odds are against them, but they dare not fail. The fate of the world is in their hands. The previous flip-book modules (Black Flames, Merchant House of Amketch, and Marauders of Nibenay) precede this adventure, but they are not necessary to enjoy Black Spine. Contains 3 - 96 page adventure books and 2 fold-out maps TSR 2428

For as long as men remember, the Lord of Evil Amphibians carried out unspeakable rites in his squatting temples situated far from civilization. Tales of human sacrifice, squirming servants, and rich but loathsome treasures were whispered of his followers. Now, unexpectedly, his servants have seemingly vanished, leaving behind their fanes to molder in the marshes. A brave band of adventurers gathers to explore one such tabernacle, eager to discover what riches—and terrors—the Lord of Evil Amphibians has left behind…

(From DM's Guild) The Shrine of Marthammor Duin is a short excursion meant to supplement an ongoing Princes of the Apocalypse campaign. At it's core however, this is a traveller shrine that could be devoted to a deity in your homebrew games or any of the other god's of travel in the Dungeons and Dragons pantheons. It includes one new monster, two new items, a shrine map, and a printable player handout for your adventure. This short series of encounters was created to help Tyar-Besil feel more like a real place that was integrated into the surrounding lands and not just a dungeon filled with mad cultists. It also provides a nice opportunity for you to deliver some of the campaign’s back story to your players in an organic way. It will be particularly fun to run with groups that have a dwarf in them who can translate the native dwarven text in the shrine for the rest of the party and connect with the kingdom of Besilmer.

This 4 to 6 hour module goes from Saltmarsh to Baldur's Gate in a race against time. A dark vision warns of a terribly cataclysmic event in Baldur's Gate and the characters are hired to deliver supplies before its too late. This adventure can be adjusted for any Tier 1, 2, or 3 party. It is intended to help usher characters from the Saltmarsh area to Baldur's Gate, just in time for Descent into Avernus. A challenging voyage they should give them a wild ride with new challenges at sea.

The Kroth Magg hobgoblins run the trade city of Glip Dak in the Troll Hills of Thar. From there they have taken control of the trade routes along the northern Moonsea. A young noble has been captured for refusing to pay their tariffs and his house looks to hire adventurers to rescue him.
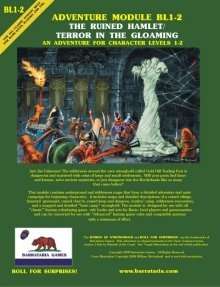
Into the Unknown! The wilderness around the cave stronghold called Gold Hill Trading Post is dangerous and scattered with ruins of large and small settlements. Will your party find fame and fortune, solve ancient mysteries, or just disappear into the Borderlands like so many that came before? This module contains underground and wilderness maps that form a detailed adventure and mini-campaign for beginning characters, including an abandoned village, haunted graveyard, ruined church, traders’ camp, wilderness encounters, and monster lairs. It also includes a ruined keep and dungeon as well as a mapped and detailed “base camp” stronghold. The module is designed for use with all “classic” fantasy roleplaying game rulebooks or sets for Basic- and Expert-level players and gamemasters. It can be converted for use with “Advanced” fantasy game rules and compatible systems with a minimum of effort. Cover art by William McAusland! Print version (with full art) available at www.barrataria.com. Picked as one of the best by Bryce Lynch at tenfootpole.org!

Modrons, Mephits & Mayhem is a Dungeons & Dragons 5E tier 2 adventure for three to five characters of levels 5-8. It is primarily set in a modron-designed research facility that has been abandoned by its creators but retains guardians that are still active. Additionally, two groups have broken into the facility with their own goals in mind; the githyanki and their red dragon cohort are antagonistic and provide the main source of combat in this adventure, while a modron traveling with a few mephits may prove friendly although ultimately troublesome. Inspired by adventure games in which the protagonists explore baroque, esoteric technological fortresses, and seeded throughout with factions that sport competing and often bizarre goals, Modrons, Mephits & Mayhem is sure to test the mettle of any group of players, and will provide endless amusement for Dungeon Masters seeking something different from the typical hack-and-slash dungeon crawl. This 70-page adventure features: *Two wilderness areas, random wilderness encounters, and a massive, interlinking 3-level dungeon filled with bizarre puzzles. *Ancient machinery powered by elemental portals, all of which can be activated, turned off, or manipulated by the player characters and the various factions within the modron facility. *Planar creatures like githzerai and githyanki, modrons, mephits, and elemental guardians, skillfully placed into the High Moor area of the Forgotten Realms setting. *Monsters and NPCs that have detailed (yet easy to run!) personalities and goals that will provide tons of roleplaying opportunities. *Notes and sidebars on running the NPCs with added complexity, or simplifying the NPCs' motives to make the adventure more straightforward. *Tactics notes for every single encounter! *An appendix that features all monster stat blocks, and both tagged (DM) and untagged (Player) versions of the dungeon maps. *Wilderness hex map by Elven Tower Cartography! Three interlinked dungeon levels by Dyson Logos...and one of them is a flying fortress! Cover art by Patrick E. Pullen!

A nearly-penniless merchant wants heroes to secure and return priceless heirlooms. But can they do it with goblins all around, raiding and pillaging? Can the heroes reach a peaceful settlement with the raiders, or will they wreak mayhem and slaughter? Find out in Eastbarrow! This package (adventure, maps, and handouts within) forms a complete module for use with DUNGEONS & DRAGONS® 5TH EDITION RULES. It is especially designed for Dungeon Masters to initiate play with a minimum of preparation. Also includes full-sized maps for the VTT of your choice! Old School Look and Feel!

Azaketh, a sly and industrious devil, prepares his revenge against his bitter enemy Zirkex. Naturally, the mortals affected by his schemes are mere pawns to further his goals. It is up to the heroes to stop Azaketh in his tracks before he takes control of a powerful weapon – Logrimm’s Tower Golem. The Tower Golem is an adventure designed for 3-7 2nd to 4th level characters and is optimized for five characters with an average party level (APL) of 3. It's the second and final chapter of the saga about Logrimm’s Tower Golem. The first chapter The Soulmonger isn't necessary to play The Tower Golem but it sets up the villian Azaketh and introduces NPCs that can help the characters conquer the Tower. The focus of The Tower Golem is set on roleplaying and interesting fights. In theory, the Tower is an infinite web of rooms and portals that the characters may never escape. However, eventually, the characters reach the end for one final encounter. You can change, interweave, or exchange the different parts as you see fit. There are several proposals and fully fleshed out levels in this document, but you may add your own adventures to the list!
Vorgansharax rules Phlan, using the Cult of the Dragon to extend his noxious gaze. But the green dragon seeks far more than control of the beleaguered town – ultimate power is nearly within reach. Will he reactivate the Pool of Radiance and ascend to greater prominence amongst his kind? A sequel to DDEX1-10 Tyranny in Phlan and Part Two of Under Emerald Claws.

Wherein a solid plan to ransom captured wands turns sour for three friends and their employees, and a local luminary loses his tongue.

The Grand Duchy of Geoff has recently been plagued by a rash of unusually weird and terrible monsters of an unknown sort. This western area, particularly the mountain fastness which separates the Grand Duchy from the Dry Steppes, has long been renowned for the generation of the most fearsome beasts, and it has been shunned accordingly -- save a handful of hardy souls with exceptional abilities. Within the last few months, however, a walled town not far distant from the area, and four small fortresses as well, have been destroyed by mysterious attacks! This classic adventure set on a crashed spaceship challenges the players assumptions, and expands on what's possible within the "fantasy" label. TSR 9033

Chapter 1 - When a relative of someone close to the characters goes missing from a nearby village, the players are asked to investigate. The party has to recover stolen goods from a thief before setting out from the City of Ravens Bluff. They travel through the wilds of Vesperin in search of the missing person, finding trouble and helping locals along the way. Chapter 2 - As the journey continues, the party arrives in a small hamlet suffering from a strange blight. The players will need to investigate the situation and choose sides in a longstanding feud between the mayor and a local magic user. Chapter 3 - After clearing a tribe of violent orcs from a nearby mountain pass to protect the residents of a town, the party will have to enter the lair of a long-dead dragon to rescue their quarry from a band of goblinoid slavers, where they discover an entrance into a dwarven city, lost and forgotten centuries ago. Chapter 4 - The party will have to traverse the ruins of the dwarven city, avoiding hazards and battling the horrors that lurk there, to uncover the identity of the slaver's leader. A discovery that will lead them through a treacherous forest to the city of Tsurlagol in search of a pirate ship called the Star Carver, and its drow captain, The Viper's Kiss. Along the way, they meet an unlikely ally. Chapter 5 - Once they arrive in Tsurlagol, the players will have to choose between gaining the assistance of the city council to fight the pirates head on, or making a deal with the Viper's Kiss, herself. The path they choose will either lead to an epic battle on the Sea of Fallen Stars, or into the deadly sewers and tunnels beneath the city to face an enclave of wererats, undead, and a tribe of mad, kraken-worshipping kuo-toa, in search of a fabled relic. The Laughing Horde of Ruin, Part 1 is the first module of an original 5e adventure campaign. It is designed for character level 1-5, and uses material from the Dungeon Master's Guide, Monster Manual, and Volo's Guide.

Despite the adventurers’ best efforts, more creatures joined under Bad Fruul’s banner. No longer content to simply attack caravans or isolated homesteads, the hill giant warlord descends upon Parnast at the head of a great force of humanoids. SEER warns the adventurers (directly now) in time to rally the town and prepare defenses, but a heroic effort is required to break the siege.

Orcus, the Demon Prince of Undeath, craves the power of the Raven Queen and mastery of death's domain. The key to his ascension and the secret to his destruction lies buried in the heart of the Abyss. As heroes chase Orcus into the abyssal depths, evil opposed them at every turn, and each victory brings them closer to their final fate. Concluded the epic series of adventures and the entire story line begun in Keep on the Shadowfell.
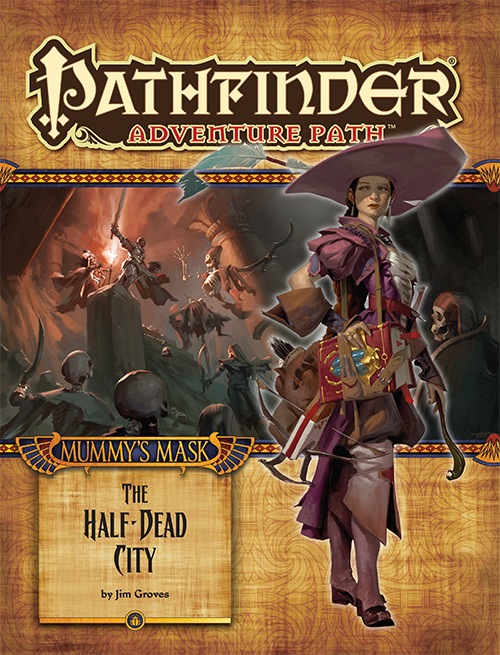
The Mummy's Mask Adventure Path begins with "The Half-Dead City," an exciting new adventure in the pyramid-laden realm of Osirion, Land of Pharaohs! In the city of Wati, the church of Pharasma holds a lottery allowing explorers to delve the tombs of the city's vast necropolis in search of the nation's lost glories. In the course of investigating dusty tombs and fighting their ancient guardians and devious traps, the heroes encounter a group of rival adventurers intent on keeping one tomb's treasures for themselves. At the same time, the heroes learn that a dangerous artifact has been stolen from the tomb. Can the adventurers defeat their rivals, or will they fall to the undead defenders of the city's necropolis?

This adventure has been designed as a one shot adventure for 4-8 players, pregen 5th level characters included, in 4-6 hours. It tells a classic story of the "good" races oppressing the "dark" races, with their warlike expansionist ways.

It stalks the jungles of Chult. On the path to the lost city lies an ancient danger, a creature that posseses the very jungle and destroys man, beast, and undead alike. Your party has seen the signs of its violence and destruction. Soon they, too, will be hunted by the entity known as Uluu Thalongh. It Walks the Jungle at Night is an adventure supplement for Tomb of Annihilation, designed for a party of 4 players of 5th-7th level. It is a sandbox-friendly adventure designed to fit within a broad adventuring area. The adventure includes strong DM guidelines to hasten or slow the adventure's buildup, allowing the Dungeon Master to control the adventure's pace and incoprorate its early phases into normal day-to-day travel. The adventure includes: -A wide series of random encounter options for the party to discover. They'll find victims of Uluu Thalongh who are relevant to the factions they've interacted with. -A magical item reward: Lash of the Jungle-Walker. -The full-page Myth of Uluu Thalongh, written to embrace Tomb of Annihilation's focus on legend and folklore. -The stat blocks for the Uluu Thalongh (with legendary actions!) and its possessed jungle. -An appendix for chase complications if or when the party flees from the dreadful entity.