
SEER has been rescued along with Ulcaster, the infamous Archmage that founded a wizard's school that is now in ruins in the foot hills of the Cloud Peaks. However, while leaving to get the two to safety a cloud ship arrived, unloading a shipload of pirates on the ruins. SEER knows what the are after and needs the heroes to stop them and their leader.

Meaningful decisions, unexpected twists and memorable characters are the foundations of this dark 4-hour adventure for 5th to 10th level characters. A chance encounter on an unassuming road leads to a dangerous and lucrative opportunity. But what seems simple on the surface turns out to be much more below. Thrust into a world where every enemy has an enemy and everyone has their own dark motive, the only chance to survive is to ally with the right foe. Sometimes “doing the right thing” comes only in shades of black. Six Summoned Swords is a stand-alone adventure that begins on the side of the road leading to Phlan and can be easily accessed by any adventurers traveling through the Moonsea region. In addition to a world full of intrigue and complex character choices, purchasing this adventure includes: An Official Adventurers League magic item certificate Printable portrait cards with roleplaying tips for important NPCs Gridded reference maps for combat encounters Condition icons to help track character status Special Certificate Holder ideal for event play NEW: Season 8 Item Unlock Handout - prints 9 to a page, one for every player! * Looking for an adventure to run at your special game day or convention? This adventure includes a “certificate holder” that features specially created art of the adventure’s magic item. When printed in colour and on card stock, it perfectly frames the official AL magic item certificate from this adventure and makes for an unforgettable souvenir. About the Swords Below the Moonsea Saga The saga consists of three adventures, with this adventure serving as a stand-alone prelude. The series continues with Six Striking Swords and Six Swords Unbound, the two of which should be played in tandem.

‘The Secrets of the Twisting Colossus’ is a tale of alchemy and transformation. The heroes are the material components in the creation of an addictive potion. The heroes are lured into the experiment by the alchemist Paricalus, and once the heroes understand the true purpose it will be too late. The only escape is to understand the subtle clues around them and to keep moving forward. At the end of the experiment lies salvation but also the grand finale. If the heroes escape the experiment, they can confront their tormentor. In this 5E module (suitable for level 4-6 & adaptable to any setting), you will find: • 40-page module. • 3 colored maps and downloadable options for FG, Roll20. • 3 Appendices covering NPCs, magic items, and alternative chambers. • Handouts containing visual depiction to entice players. • 2-3 sessions of gameplay. • A dynamic dungeon where chambers change position. • Rules for miniaturized game play. • Old-school play-style suggestions. • Possibilities to use the module as a springboard to planar adventures. If you enjoy this module please let me know. Any feedback is greatly appreciated. Have fun!

Fort Akor has come under attack by a dragon, but when the PCs seek out the beast in the surrounding jungle they discover the dragon may be the least of the fort’s troubles. The Pcs travel to Fort Akor, where they learn that the fort has been under attack by a dragon (which is really a tyrannosaur). Prince Henri asks the PCs to slay the dragon attacking his fort before it causes further damage. If the PCs investigate the fort before setting out after the tyrannosaur, they may discover the hidden corpse of its hatchling. They may also discover the truth behind the fort's dark history. Tracking the "dragon" to its lair and slaying it for Prince Henri forces the characters into conflict with a faction of the centaurs living in the jungle, who disposed the hatchlings corpse at the fort. Discoveruing the truth of the prince's conflict with the jungle natives might lead to an alliance. Pgs. 16-41

The Filbar Quest series continues with FQ8 – Uprising of the Undead. As you continue to pursue the lost pages from the Codex of Gamber Dauch (Daw-sch) you quickly discover that the dead have risen from their graves. A rogue mage known as Mortatus the Wicked has discovered the emerald pages from the ancient tome and is using the powerful magic to raise an army of the dead. Your cleric had better be in good graces with their deity!

The Hag's Hexes is a 66 page guide designed by Dungeon Masters Guild luminaries like JVC Parry and Janek Sielicki alongside rising stars and old stalwarts like Matt Butler, Matthew Gravelyn, and Tim Bannock. It was created with one thing in mind: to make hags more than the sum of their (often meager) Challenge ratings, giving them the mechanics, roleplay potential, and weird magic that can inspire campaigns, lay low kings and warlords, and potentially ensnare unwary Player Characters into campaign-changing curses or long-term bargains that force them into terrible moral quandaries! Split into five chapters, the authors have provided everything a DM needs to terrify their players for years to come. The Bestiary features over a dozen monsters; some are new hags, some are their minions or even their mobile lairs, and one of them -- the Shaitan AKA Desert Hag -- was featured in Monsters of the Guild! Bargains & Curses is a chapter filled with ideas that can kick-start campaigns, threaten valued NPCs, or put Player Characters' very existence and morality at stake. Chapter 3 includes two dozen items of wonderment, weirdness, and dread, ranging from fairy tale-inspired items of whimsy to terribly cursed items of horror. Chapter 4 is titled "Filthy, Vile & Downright Dirty" and provides dozens of roleplaying tips to make hags come alive, new mechanics inspired by and expanding on Volo's Guide to Monsters (coven spell lists, aunties, grandmothers, alternative coven members), and ends with useful combat tactics for each of the hags from the Monster Manual and Volo's Guide, as well as tactics for covens. Finally, Chapter 5 presents five encounter groups (with sub-encounters) to give you quick story seeds and monster lists that you can put together in minutes to create a single encounter or to inspire a full campaign, and ends with three full-length adventures -- each with 3-5 encounters -- that showcase many of the new monsters, rules, magic items, and so on that appeared in earlier chapters. Each of these adventures comes with an encounter map meant to act as inspiration for hag lairs, and they include useful mechanical ideas for terrain effects and descriptive keywords listed directly on the map for added inspiration and easy customization! Designed by Tim Bannock. Written by Matt Butler, JVC Parry, Janek Sielicki, and Tim Bannock. Edited by Matthew Gravelyn and Tim Bannock. Cover Art by Elena Naylor. Cartography by Tim Bannock using Inkwell Ideas' Dungeonographer (Dungeonographer is copyright Inkwell Ideas). Layout & Graphic Elements by Elena Naylor with Tim Bannock. Interior Art by Arcana Games, Bruno Balixa, David Lewis Johnson, Dean Spencer, Earl Geier, Filip Gutowski, Jacob E. Blackmon, Joyce Maureira, Petr Kratochvil, Jayaraj Paul, Brian Brinlee, and Wizards of the Coast.

A famous relic hunter seeks adventurers to help her find caches of treasure hidden by the now-defeated followers of the Cult of the Dragon. Her maps and notes may lead the way to great wealth—or a terrible death. And do other parties have designs on the treasure as well?

East of Beregost, nestled in the outskirts of the Wood of Sharp Teeth, Durlag’s Tower has intrigued and yet stymied adventurers for decades. Stuffed full of mechanical traps and arcane wards, and rumored to be inhabited by fiends, very few have managed to extract any REAL treasure from the former home of Durlag Trollkiller. However, a powerful item in the ancient fight against the giants is said to be housed there, and the cloud giant Baron Rajiram has committed significant resources toward recovering it. After a pleasant tea in her garden, SEER calls upon you to beat him there and put a stop to his efforts! Continued in Durlag's Tomb.
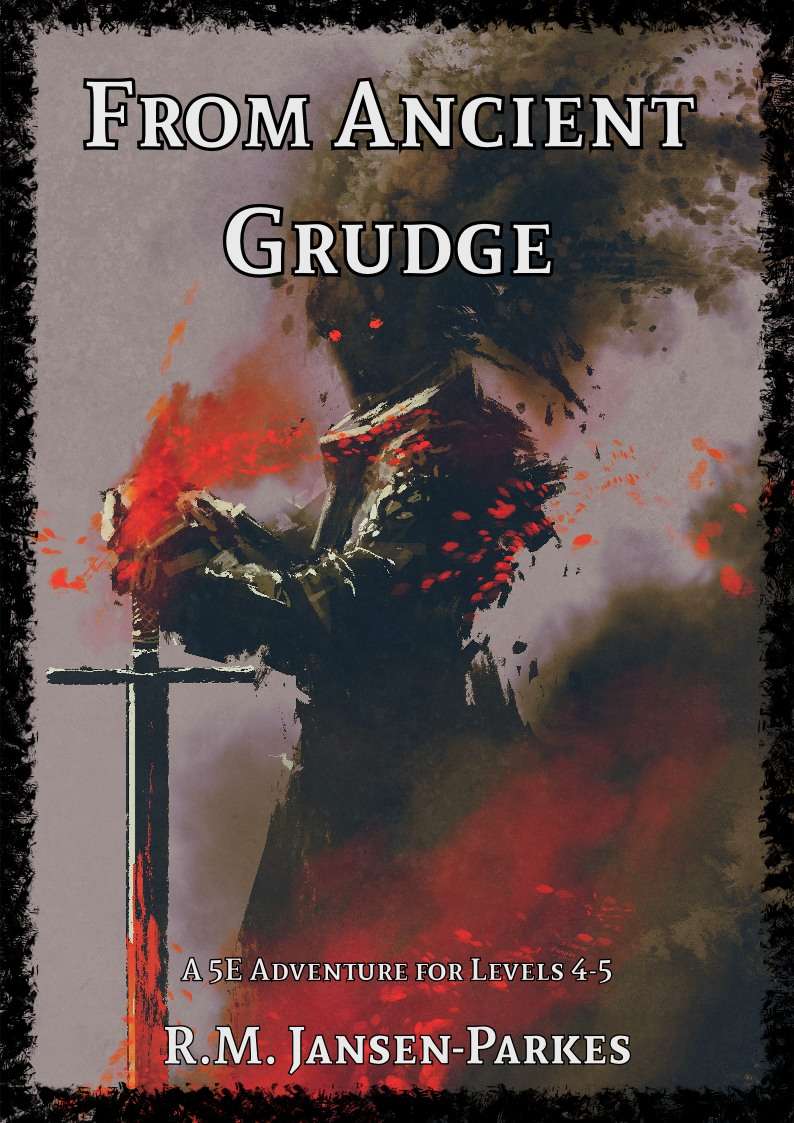
A Star-Crossed Tragedy. When the party is hired to investigate a haunted castle, they’re drawn into a tale of hatred, love and betrayal stretching back more then 300 years. Will they be able to free the ghosts haunting Arevon Castle, or will they find themselves just another footnote in its long history of misery?
Just beyond the fields of Orleans a small hole in the earth hides treasure and monsters. The townsfolk are far too scared to delve inside the abandoned cave, but the marquis needs its silver, and right quick. Just a couple of miles away from the town of Orleans, between rolling hills and well maintained forests, a small mine, long abandoned, lies in wait. Once a lucrative silver mine the “little cave” is now shunned by both the miners and its owners, the marquis of Orleans. Local whispers say that a few decades ago its miners stumbled upon something evil that lurked beneath the earth which killed the marquis’s son and twenty miners. Old people tell of a curse that lay on the mine which if reopened would cast doom upon the town. A few even tell of tiny demons, not taller than a housecat, that live in the mine and torment the smiths of the city. True or not these stories have all one thing in common: they have kept people from using the mine and extracting its precious silver ore. This that has plagued the marquises for three generations already and so the last heir of the family, Touvel of Orleans, is looking for brave adventurers, knights, sorcerers and all able bodied folk that wish to brave the mines and secure them from whatever evil may lurk inside them.

Blinsky's Toyshop is our take on what happens to Blinsky and Piccolo during, or after the Curse of Strahd campaign. Blinsky, the toymaker in Vallaki with the cute monkey wearing a pink tutu, received a large inheritance from a long-time client. The client, Obtavius Swat, a retired adventurer and avid collector of toys, left his entire estate to Blinsky. The estate included coin, precious gems, art, and his collection of toys, some made by Blinsky and others he acquired during his travels. Blinsky used the fortune to pay a wizard to create a small island in the middle of Lake Zarovich, located just outside of Vallaki. He then paid masons and workers to build a fantastic new toyshop, which he designed to be an experience for both the young and old alike. Though the number of children in Barovia was increasing, mostly imparted to the devil Strahd’s downfall, Blinsky wanted to touch the inner child of the adults in the city. He wanted happiness. He wanted smiles. He named the castle Blinsky’s Toyshop of Marvels. One of the toys, a small silver tiara kept in a black satin-lined ivory jewelry box, was such a lovely piece. Blinsky couldn’t stand the thought of leaving it in the box. He already had enough gold and losing the small tiara wouldn’t be a large loss, so he decided to give it to his monkey – Piccolo (see Creatures of the Toyshop). He smiled at the thought of her running around in her pretty, shiny tiara. Sadly, as Barovian luck would have it, trapped inside the tiara is the sole of an evil gnome wizard named Aribetha Strangge. In his old age, Obtavious Swat forgot that he and his fellow adventurers used the tiara to imprison the gnome’s soul. Yesterday, when Blinsky placed the tiara on Piccolo’s head, silver tendrils cascaded from the tiara and into poor Piccolo’s skull, allowing Aribetha to control the monkey. Now, Aribetha has incapacitated Blinsky in the toyshop’s tower, brought many of the toys to life, and imprisoned or killed many of the workers and customers. The adventure includes costumes (which the character may wear), Strahd Hand Puppets, and a possessed Piccolo.
A one-shot adventure of dark fantasy, tragedy, and horror... - 4-6 hour adventure for 3rd - 5th level characters. - 24 pages of an elegant, easy to read PDF. - 4 custom handouts that pair with the adventure. - 2 custom monsters. - 10+ trinkets and magic items for handing out to your players. - 6 gorgeous free battle maps that can be found here: https://www.dmsguild.com/product/434359/Map-Pack-01--The-Sorrows-of-Southsward-Keep
Skelg the Ripper, envoy from the Land of the Linnorm Kings, lies wasting in his villa on the outskirts of Absalom. A frigid curse followed Skelg from his northern homeland and grips his bearish heart in its frosty embrace. As the bizarre freezing ailment pushes Skelg to the brink of death, the Society dispatches you and your fellow Pathfinders to uncover the secrets of the freezing curse before Absalom falls to its icy grip.

The king summons the heroes to investigate the death of a knight, and the final fate of the king's long-missing son. The knight and his entire order was killed by a Dragon! Yay we get to fight a dragon in the first issue of Dungeon Magazine! Much travel over many different terrain types featuring avalanches, volcanoes spewing lava, and many random encounters (not detailed here) before the heroes reach their real goal: A lake with a ruined wizard's tower and dragon's cave. Opens with a particularly byzantine Background section for the DM involving a prince you never meet, pirates you never meet, knights you never meet, and deep gnomes you never meet. See Out of the Ashes in Dungeon #17 for sequel to this adventure. Pgs. 42-60

If you but have the will Sonja, you may use your strength to make the world your home. You may become a wanderer, the equal of any man or woman you meet. (The Ring of Ikribu) Red Sonja #1 Steel met steel as Sonja slashed wildly before her. Sparks flew into the air; the mercenary's sword flew to the ground. Her arms vibrated with the contact and her hands grew numb as she tightened her grip on the mighty sword. Still they came - only four in all, but with deadly intent shining deep within theiir hungry eyes. What do these men seek? Why would they rather die than run? TSR 9183

The Kroth Magg hobgoblins run the trade city of Glip Dak in the Troll Hills of Thar. From there they have taken control of the trade routes along the northern Moonsea. A young noble has been captured for refusing to pay their tariffs and his house looks to hire adventurers to rescue him.

Did you know there’s a skeleton inside each of us? The players will find themselves in a community of scared anthropomorphic rabbits and exploring the lair of undead wizards looking for flesh to wear. There are opportunities for combat, roll play, puzzle-solving and exploration. This was written as a submission for the Summer Adventure Design Contest over at Bryce's Adventure Design Forum.

Why should anyone travel the cracked cobblestones of the Old Road? The fortress that once cast its shadow across the road does so no longer - some whisper that the earth swallowed the fortress whole in an age long past. Four brave adventurers resolved to discover the truth and set off down the Old Road, but they never returned. This adventure is a first level adventure for beginning players set in the dungeon of the fallen fortress.

"Wherein the local clergy makes the terrible mistake of not hiring enough assassins for the job." Synopsis: The heroes have just returned from the abyss (Occipitus) and reestablish themselves in Cauldron, when they are assaulted by a group of professional assassins. After they repel the attack, they trace back the lead to the temple of Wee Jas, where they find plenty of opposition from the second in command, Ike Iverson. After dispatching of the cleric and securing of a (spare) soul cage, the group finds evidence of a place important to the cagewrights' cause - an ancient underground complex named Karran Kurral. Mounting an expedition to that place, they find more evidence towards the horrific destiny on schedule for Cauldron. However, they gain access to the Soul Pillars after defeating a dracolich, that they can use to gather plenty of intelligence on the cagewrights' plans. Pgs. 12-51

A top the crown of the Isle of Dread, a hateful monster broods. Spawned by the Price of Demons, the architect of the shadow pearls dwells deep under the ruins of ancient Thanaclan. As long as this vile monster lives, the threat of the savage tide remains, looming dark on the horizon. "City of Broken Idols" is the seventh chapter of the Savage Tides Adventure Path, a complete campaign consisting of 12 adventures appearing in Dungeon magazine. For additional aid in running this campaign, check out Dragon magazine's monthly "Savage Tidings" articles, a series that helps players and DMs prepare for and expand upon the campaign. Issue #354 of Dragon magazine features the totemic demonslayer, a new prestige class that focuses on fighting and defeating demons, be they at the heart of the Isle of Dread or encountered in the depths of the Abyss itself. The central mesa of the Isle of Dread is taboo to the locals, a place shrouded in mystery and cloaked in rumor. The time has come to confront the evil that dwells atop the island’s savage crown. Pgs. 54-84