Can an ancient, smashed relic be put back together? Your employer thinks it can and sends you to find some of the fragments. A colorful town, detective work, interesting NPCs, a new race, and a challenging trip to the dump await you. The surrounding region inspires additional adventures.
Throw your party into an action movie in this pulse-pounding, single-session adventure inspired by Die Hard. This adventure sends your party to celebration of the winter solstice, on the top floors of an archmage's tower. When a group of mercenaries led by a revenge-seeking criminal mastermind crash the party and take the guests hostage, the adventurers are plunged into their own real-life action movie. Yipee Ki-Yay! General Features - Designed for a level 3 party - Playable in 3-4 hours (and playtested) - Gritty and dangerous; the party starts without any weapons or spellcasting and must ambush the mercenaries to arm themselves. - Includes 8 new magic items and 3 new stat blocks. - 7 fully-mapped floors of the wizard's tower, modeled after the floorplans of the real-life building where the original Die Hard was filmed. Why Players Will Love It - Your choices matter! This is not a linear adventure by any means. You're dropped in a dangerous situation, deprived of your gear, and what happens next is up to you. - You're in an action movie! Ever wanted to crawl around air ducts or up elevator shafts, or swing from a roof and smash through a window? Now you can! - Deadly, but with a safety net. The first to die gets a fun surprise, and stays in the game. - Fun loot! If you continue with these characters after this adventure, you'll have some fun new toys to play with. - It's Die Hard! If you're a fan of the movie, you'll be a fan of this adventure. Why GMs Will Love It - It's flexible and easy to run, and rewarding without being overcomplicated. - A quick-reference page contains all the information you might need at a moment's notice, including suggested on-the-fly combat encounters, NPC names, and a cast list with roleplay suggestions for each character. - A plot checklist to help keep you on track during the game. - Most importantly, information is right where you expect to find it.
This module is designed for characters who have made their way through the Freeport Trilogy. Characters new to Freeport are at disadvantadge, however. Hell in Freeport sends the characters to the depths of the Hell as pawns of an undead duke. When they discover the truth of their mission, they must race against a sinister clock to save two cities. Act 1 kicks off with a battle against a cornugon on the Freeport docks. The characters are hailed as heroes for defeating the fiend, and are summoned to the Church of Retribution to help in the battle against Hell. Tee old inquisitor who greets them is actually Jalie Squarefoot, an infernal lich who took this form to search for the perfect cat's-paw. Squarefoot wants to take the souls of Freetown, a city in Hell, but must first get around a contract poin: he can't take the city until the Tyre tower clock-now stopped- strikes midnight. He sends the party to Devil's Cry, an inslan off the coast of Freeport, with instructions to close the gate to Hell hidden inside. In truth, he knows the party will be transported straight to the Third Circle when they try. Inside Devil's Cry the party finds the remnants of a great battle fought between an invading devil's army and the Church of Retribution, and battle their way past undead defenders until they reach the gate itself and unwittingly trigger it. Act 2 begins with the party in a twin of the complex they explored in Devil's Cry, but now they are deep in Hell. They fight their way back to the cavern entrance, only to find that they are not on the Prime anymore. When they voyage back their homeport, they instead find themselves in Freetown, a city of scaped slaves in a dark mirror image of Freeport. Once in Freetown, they make the acquaintance of the city's mayor Wycleffe-a servant of Jalie Squarefoot-who persuades them to go on a quest to Tyre to restart the tower clock. They travel the Styx to the Eight Circle and fight their way into a long-buried vity, and then into the tower clock itself. They restart the clock and begin the trip home, but are waylaid by devils and taken prisioner. Act 3 opens with the party naked and in chains in the infernal prison called the Forge. They learn that Jalie Squarefoot and Wycleffe have duped them, and that the supposed rebels of Freetown are actually its protectors. The characters must escape or win their freedom in the gladiator pits before the tower clock they restarted destroys both Freetown and their home city of Freeport. They battle back to Freetown, taking revenge on their captors in the process, and capture the city from Wycleffe with the help of the rebels. Finally it falls to the PCs to enter the tower clock and stop it and Jalie Squarefoot before the fiend's plan can come to fruition. After being tricked and manipulated throughout the adventure, the party finally has their revenge on the duke and his minions.

E2, following up on Death's Reach, the PC's first travel to Sigil following the smuggled remains of the primordial Timesus. The pursuit then leads into the Abyss, through the White Kingdom to face Doresain, the Ghoul King, exarch of Orcus. The module certainly is epic, placing the PCs up against powerful monsters like greater demons, death knights, and a demilich. It may be frustrating that the PCs arrive too late to disrupt the plot (have to allow for the finale in the next adventure) but taking out Orcus' right hand ghoul may be satisfying. Includes a skill challenge for crossing a portion of the Abyss For environments, City refers to Sigil.

A strange, foreign wizard calling himself Kelvan has appeared at the same time a mountain materializes out of thin air. He asks you to recover the Gloomblade from a Netherese ruin in order to help him with his research into this strange new mountain. A Two-Hour Adventure for 5th-10th Level Characters. Optimized for five 8th-level characters.
When the Pathfinder-obsessed daughter of one Qadira's most powerful trade princes goes missing trying to impress the Society, her father angrily demands the Pathfinders track her down or face expulsion from Katheer. Tracking the missing princess leads you to an underground complex filled with traps, tricks, and a creature so powerful, she's lived for a thousand years. Can you save the princess and uncover the power of the Eternal Obelisk?

A simple hunt for a werewolf, or so we thought. Find its lair and slay the beast. No use for wolfsbane or other superstitions. Silver and magic would win the day. A worthy challenge, but nothing horrific, surely. Yet we never expected what we found in the Graenseskov, and our hubris cost us dearly... 𝐓𝐡𝐞 𝐁𝐞𝐚𝐬𝐭 𝐨𝐟 𝐆𝐫𝐚𝐞𝐧𝐬𝐞𝐬𝐤𝐨𝐯 is an 80-page bookmarked Ravenloft® adventure for characters of 1st-4th levels focused on mystery and exploration. It can be used in conjunction with 𝐂𝐮𝐫𝐬𝐞 𝐨𝐟 𝐒𝐭𝐫𝐚𝐡𝐝, either as an introduction to Barovia or adapted as a side quest, as part of the original expanded Ravenloft setting, or it can be used as a stand-alone horror adventure-setting. 𝐓𝐡𝐞 𝐚𝐝𝐯𝐞𝐧𝐭𝐮𝐫𝐞 𝐡𝐨𝐥𝐝𝐬 𝐚𝐩𝐩𝐫𝐨𝐱𝐢𝐦𝐚𝐭𝐞𝐥𝐲 𝟏𝟔 𝐭𝐨 𝟐𝟒 𝐡𝐨𝐮𝐫𝐬 𝐨𝐟 𝐠𝐚𝐦𝐢𝐧𝐠 𝐰𝐢𝐭𝐡𝐢𝐧 𝐢𝐭𝐬 𝐩𝐚𝐠𝐞𝐬, and potentially much more for groups embracing an investigative style of play. In the mists at the edge of Count Strahd von Zarovich’s realm lies the Graenseskov, a land of deep woods and bleak hills overrun with wolves. A Beast haunts these misty lands, leaving bloody corpses and terror in its wake, the product of a hag’s curse placed upon the boyar’s manor. But the Beast is no arbitrary killer. The PCs find themselves drawn into the mystery of uncovering the Beast’s identity and breaking the hag’s curse before the Beast’s final victim gurgles their last breath and the Beast is beyond any hope of redemption. Requires the 𝐃𝐮𝐧𝐠𝐞𝐨𝐧 𝐌𝐚𝐬𝐭𝐞𝐫'𝐬 𝐆𝐮𝐢𝐝𝐞 and the 𝐌𝐨𝐧𝐬𝐭𝐞𝐫 𝐌𝐚𝐧𝐮𝐚𝐥. This is a 63 Mb ZIP file containing a watermarked PDF of the updated adventure, a PDF with handouts, a PDF DM's cheat sheet, and PNG files of the Graenseskov region map for the DM and players. 𝐅𝐞𝐚𝐭𝐮𝐫𝐞𝐬: • The DM (or the Tarokka) determines the guilty suspect and their motives, offering a different experience for each group’s play-through. • A vivid cast of characters with a NPC index. • Escalating random encounters, special events, and techniques for DMing a mystery. • New monsters: black annis hag & loup du noir. • All units given in SI & metric. • Handouts and maps for DMs and players. • DM's cheat sheet with quick prep notes, clue checklist, handy Tarokka tables, tips on running the Beast, and a decision point flowchart. 𝐓𝐡𝐞 𝐓𝐨𝐦𝐞 𝐒𝐡𝐨𝐰 May 16, 2016 DM's Guild Pick of the Episode! Thanks James! http://www.thetomeshow.com/e/round-table-119-giants-and-the-talented-bestiary/ 𝐂𝐇𝐀𝐍𝐆𝐄 𝐋𝐎𝐆 𝐉𝐮𝐥𝐲 𝟐, 𝟐𝟎𝟏𝟔 𝐔𝐩𝐝𝐚𝐭𝐞: The big update! Fixed several editing and grammar errors, including an error in Appendix D, and the repeated paragraph on page 12 (page 13 in new document). Added a new special event - Hanging the Vistani - to Chapter 1 which ties together several dangling plot threads. Clarified "Adjusting the Adventure" & added Werewolves in the Mist to the "Adventure Hooks" in the Introduction. Added two pieces of thematic filler art. 𝐀𝐩𝐫𝐢𝐥 𝟏𝟖, 𝟐𝟎𝟏𝟔 𝐔𝐩𝐝𝐚𝐭𝐞: Added a DM's cheat sheet PDF to the zip file.

A handful of would-be adventurers gathers to explore an ancient tomb, eager to trade their discoveries for a ticket to a better life. What they find within presages the advent of the Age of Worms, an era of darkness, decay, and writhing doom. "The Whispering Cairn" is the first installment of the Age of Worms Adventure Path, a complete campaign consisting of 12 adventures, several "Backdrop" articles to help Dungeon masters run the series, and a handful of poster maps of key locations. For additional aid in running this campaign, check out Dragon's monthly "Worm Food" articles, a series that provides additional materials to help players survive this campaign. Pgs. 14-47

Once a naval powerhouse, the Kingdom of Bane ruled the waters wherever they went. Four decades ago the neighboring countries noticed a stark difference taking over the once lush Bane. As the years progressed, rumors swirled about the downfall of the proud nation but the overall view was that a curse took over. The kingdom had been famous for the multitude of riches and magic it once possessed and it is widely believed that undiscovered treasures await any adventurer brave enough to test their mettle against the curse as well as the elements. This offering is 70 pages of magic, challenges, and a lot of urban discoveries. This scenario can be cut up and used as individual projects or as a massive campaign. The original campaign allowed the players to move from fifth level up to eighth!

Awash in a sea of phlogiston, three wizards battle for mastery of reality! But with each new day all gains are lost and the game begins anew. It is up to the adventurers to upset this ancient balance, winning free of the shrinking demi-plane before all is reduced to the roiling stuff of raw Chaos! Will you strike a bargain, swearing fealty to one of the fell masters? Or will you attempt to master your own fate, pitting your luck and skill against arcane foes? Whatever you decide, you must act quickly, for gray worms press in from all sides and time grows short! An exploration-based adventure for 2nd level PCs, Fate's Fell Hand challenges new and old players alike. Only the most cunning of PCs can hope to thwart the machinations of three dire wizards and escape Fate's Fell Hand!

Take the adventuring party on a journey through a nasty, smelly swamp as they follow an exotic map which (they hope) leads to a grand treasure. Unknown hazards, NPCs, adventure, and creatures stand between them and the X that 'marks the spot' on the map. This adventure includes: •Custom art •8 hand-drawn maps (color and black & white included) •3 new creatures •1 new magic item •Includes a printer-friendly version of the adventure. Into the Belly of the Beast runs smoothly as-is, but an additional 8 encounters are included. These encounters can be used to lengthen the adventure, or they could used separately and added to your own campaign.

The Soulmonger is shattered and its pieces scattered across the peninsula of Chult. Dire forces seek those shards for their own nefarious purposes, and the Red Wizards are rumored to have found a number of them already. Can you wrest those necromantic artifacts from the hands of the dread mages? Part One of the Broken Chains Series. A Four-Hour Adventure for 17th-20th Level Characters.

The Kingdom of Halruaa’s past is a mystery. The disappearance of the entire kingdom during the Spellplague and its subsequent return has always been looked upon as feat of magic that will never be replicated and Halruaa’s Council of Elders has dedicated itself to ensuring that this magic remains hidden. rumors are starting to surface that someone may have found a way to duplicate the feat and this has made faction leaders throughout Toril nervous, especially when recent communications with Faction agents in the area have grown silent. What can be discovered in the Kingdom of Halruua? Are the rumors true or is there something else entirely happening? The Discarded Gem is a 3 to 4-hour adventure for characters level 1 - 4.

This adventure works best after going through the original trilogy (Death, Terror, and Madness in Freeport). After exposing the madness and corruption of the previous Sea Lord, a succession crisis is upon Freeport. There are no heirs to the seat of power, leading the Captains' Council to overturn the Law of Succession. But opening up succession plunges the city into chaos as various factions vy for the title. The PCs will need to survive riots and secret plots to make sure the right man (or woman) ends up with the job.
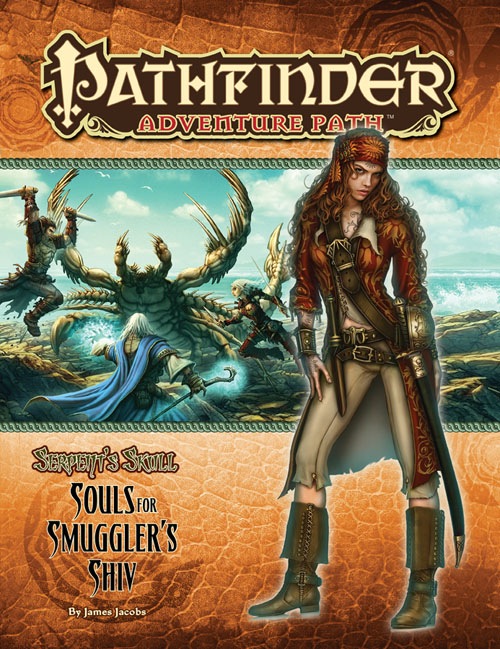
A deadly storm shipwrecks the passengers and crew of the Jenivere upon infamous Smuggler’s Shiv, an island off the coast of the jungle realm of Sargava. If they’re to have any hope of escaping the notorious pirates’ graveyard, the survivors will need to band together to outwit the isle’s strange beasts and legendary menaces. But can the PCs unite the swift-to-squabble castaways, especially when several seem to have mysterious goals of their own? And does Smuggler’s Shiv hide secrets even deadlier than its desperate denizens? This is part one of the Pathfinder Adventure Path "Serpent's Skull", but can be played as a standalone adventure that lasts approximately 10 four-five hour sessions. Great for first time dungeon masters. This is not a seafaring adventure. The PCs are shipwrecked on an island for the entire duration. This adventure ends with (hopefully) the PCs finding a way off the island (reaching level 3). It is therefore a great starting adventure with a definitive conclusion. After this module, you can continue with part two or change into your own homebrew.

A traditional "funhouse" dungeon, White Plume Mountain begins with the archmage Keraptis stealing three artifacts and leaving cryptic poems with their former owners. The players are hired to recover the items, and find a bizarre dungeon in the side of the eponymous volcano. TSR 9027

The Cage: A valuable trinket was stolen from the well-protected manor of the lady Morrigan Strange, and she enlists the help of some able-bodied adventurers to retrieve it. As it is the way of things, it turns out the problem is not as simple as it first seemed. A vile demon was trapped in the stolen orb and threatens to kill everyone in sight after its release! The package includes background information about the involved characters, a few details about the town of Beregost, several maps, and lots of adventure!

A chance encounter on the road leads to the beginning of a grand adventure. It is very much a first time adventure for new characters to dip their feet in. Can easily be adjusted to a bigger or smaller adventure. This is the first adventure in a miniseries with the following adventures being: A Mystic Circle An Urgent Rescue A Dark Veil Falls

This module features 5 locations ready to be put in any D&D 5e game. It features these 5 locations: - An old warehouse (lvl 1) An old building occupied by a gang of Kenkus that are trying to build a mechanical way to fly. - Ruined Sanctum (lvl 2) A decayed temple lost to time, some decades ago it was breached by some blights and they still use it as a resting place and a trap for adventurers. - The Lunar dove (lvl 3) A small and secretive brothel used by the elites. Unbeknownst to them, however, the Owner spies and hoards secrets to use to their advantage. - Cave of Mending (lvl 4) A cave with a magical healing lake, protected by a Druid that uses it to heal the wildlife from the surrounding area. - The temple to Xotarr (lvl 4) A hidden temple to an evil God where the cultists partake in calculated sacrifices.

The Bloodhand orcs have a prisoner that may hold the answers to the strange goings on and the key to stopping the enemy. What can you do to convince them to hand the prisoner over? Part Twelve of Misty Fortunes and Absent Hearts.