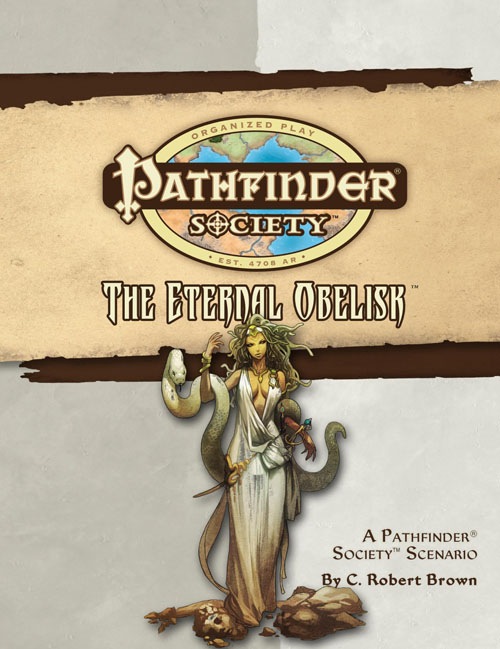
When the Pathfinder-obsessed daughter of one Qadira's most powerful trade princes goes missing trying to impress the Society, her father angrily demands the Pathfinders track her down or face expulsion from Katheer. Tracking the missing princess leads you to an underground complex filled with traps, tricks, and a creature so powerful, she's lived for a thousand years. Can you save the princess and uncover the power of the Eternal Obelisk?
Jack Mooney owner of the "Jack Mooney & Sons" Circus. Wants to hire the PCs to capture a great cave bear with a brilliant golden coat.

Sinister, twisting images...Horrific nightmares lurking at the corners of the mind...These are descriptions used to tell the tales of the Labyrinth of Madness. But these tales of the labyrinth are only legends, really, nothing more than stories used to frighten children at night - until a mysterious scepter is found, bearing within its crystal head a visage of insanity and terror, and also delivering a message: "Disturb not the Labyrinth of Madness again, and live a while longer." Now a powerful temple suffers from a tragic curse that is somehow linked to the labyrinth. Does there exist a group of heroes who can penetrate this dark and terrible place to life the curse...and survive? Labyrinth of Madness is a multiple-level, three- dimensional dungeon adventure, a puzzle within a puzzle, that commemorates 20 years of gaming with TSR. TSR 9503

An offer of exploration and adventure leads to a chilling underground dungeon. A mystical object is being asked to be retrieved by the local Wizard. This is the second adventure in a miniseries with the following adventures being: A Chance Encounter An Urgent Rescue A Dark Veil Falls

Gifts for Him is a short, challenging, open-ended, gothic-horror, 5E-compatible Christmas adventure for tier 1 characters to be run in about three sessions, but it can be easily adapted as a one-shot. It contains over 25 pages with original artwork, three original battle maps, three unique monsters, stat blocks for five NPCs, three magic items, and a partridge in a pear tree. ----- The village of Bargrave has a secret. Every year, on Christmas Eve, the villagers cower in their homes while a savage beast prowls the streets, wreaking bloody doom on whomever has not left it a suitable gift on their doorstep. But Elias Buhl has had enough. This year, the old farmer won’t be buying the beast a gift, hoping instead to bait it into attacking him at his homestead, where he will trap and kill it once and for all. But he can’t do it alone. Buhl has hired a band of adventures to help him fortify his home, set traps, and slay the creature. They have three days to prepare, gather allies and equipment, and plan their defense. Or… They can dig a little deeper and uncover what Bargrave has been hiding all these years. Will they slay the beast, as agreed? Might they capture it to use it for their own ends? Can it be redeemed? Or will they die — their blood melting the snow — just the latest victims of the creature’s reign of terror? --- Gifts for Him is a complete, playtested, illustrated adventure that is currently pay what you want.

The characters are summoned by the Norse gods to track down two dwarves, one of whom has made a weapon for the giants to use against the gods. The mission takes the characters to Jotunheim, on the plane of Gladsheim, to take the god-slaying weapon from the giants.
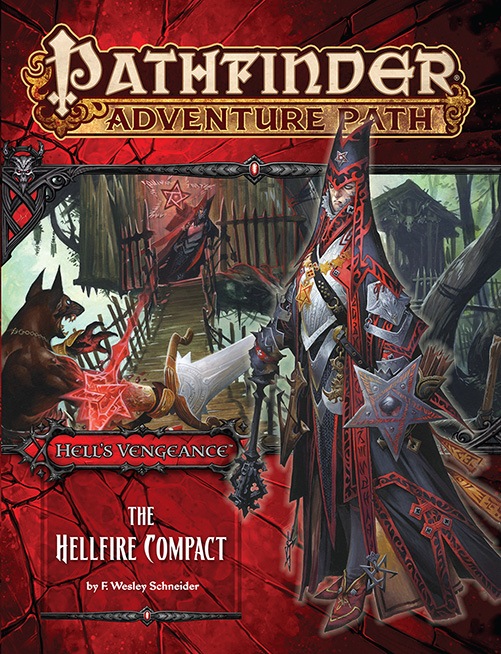
The Hell's Vengeance Adventure Path begins with "The Hellfire Compact," an exciting new adventure in which the players take the roles of evil characters in the diabolical empire of Cheliax! A paladin of Iomedae and knight-errant of the Glorious Reclamation comes to the town of Longacre, inspiring the citizens to join the uprising against the Thrice-Damned House of Thrune. First as amoral mercenaries, then as retainers of the wicked archbaron of Longacre, the evil adventurers must move quickly to put down the insurgency and keep the town from falling to the knight's rebellion.

The Characters come across an ancient wizard's tower. The nearby keep has been reduced to rubble over the ages, but the tower is in perfect condition. It is surrounded by an impenetrable force field that cannot be breached - not even by the ghost of the long-dead wizard, who has been trapped within for centuries. Surely there must be great treasure within this magical abode. But how to get to it?

In the far reaches of the world, under a lost and lonely hill, lies the sinister Tomb of Horrors. This labyrinthine crypt is filled with terrible traps, strange and ferocious monsters, rich and magical treasures, and somewhere within rests the demilich. Remake of the original AD&D adventure.

This alternate starter campaign takes you to all the familiar locations of the Lost Mine of Phandelver adventure from the other side of the veil. Some places look the same, some very different. The entire plane is trying to strip you of your mind, your memory, and your motivation. Discover how the Forge of Spells was fueled. Learn the location of lost adventurers from the original Phandelver expedition. See what Cragmaw Castle looked like in its prime. All of this and more, as this takes you from level 1 to level 5 with well over 20 hours of play time. If you are looking to start a new campaign or just experience familiar locations in a new setting, this supplement accommodates. Inside you'll find: Maps: Nine encounter maps Cragmaw Castle rebuilt, including the upper floor, and underground level. Wave Echo Cave before it was tunneled. A very different looking Redbrant Hideout Ruins of a town similar to Phandalin A swamp and muck version of Cragmaw Hideout Plus new magic items, and more Monsters: 37 new creatures Lore Information on a shadowy Yuan-ti empire A new offshoot of the abyssal demonhive A cult using the stoic ways of stone to evade the Raven Queen's watchful eye and pilfering ways. New players vying for control of the Shadowfell Shadowfell Guide: Information on the plane, its inhabitants, and included with this supplement is the best selling Shadowfell Random Encounters appendix. Easter Eggs Hidden throughout the story are references to Lost Mine of Phandelver. Including references to other hard cover books as well.
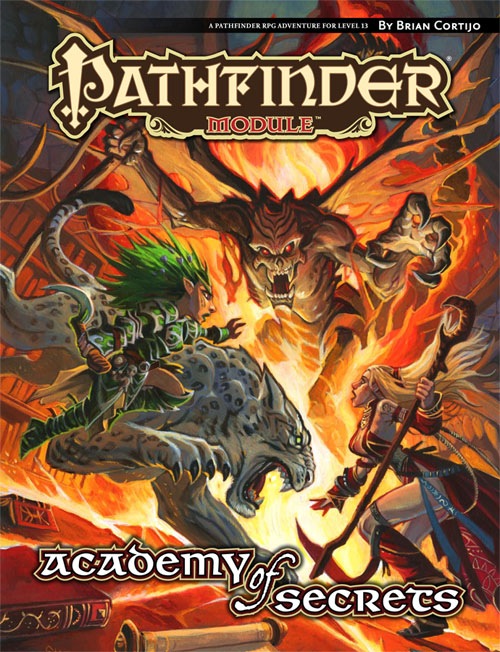
Every year the Acadamae—Korvosa’s prestigious school of the arcane arts—opens its gates to the city to host the Breaching Festival, where the most skilled infiltrators are invited to enter the magically guarded Hall of Wards or die trying. Testing their luck against the university’s strongest defenses, the competitors pull out all the stops as they vie for a chance at a fortune in gold and magical treasure. This year, the school’s headmaster has invited the heroes to participate, against the contest’s longstanding traditions.
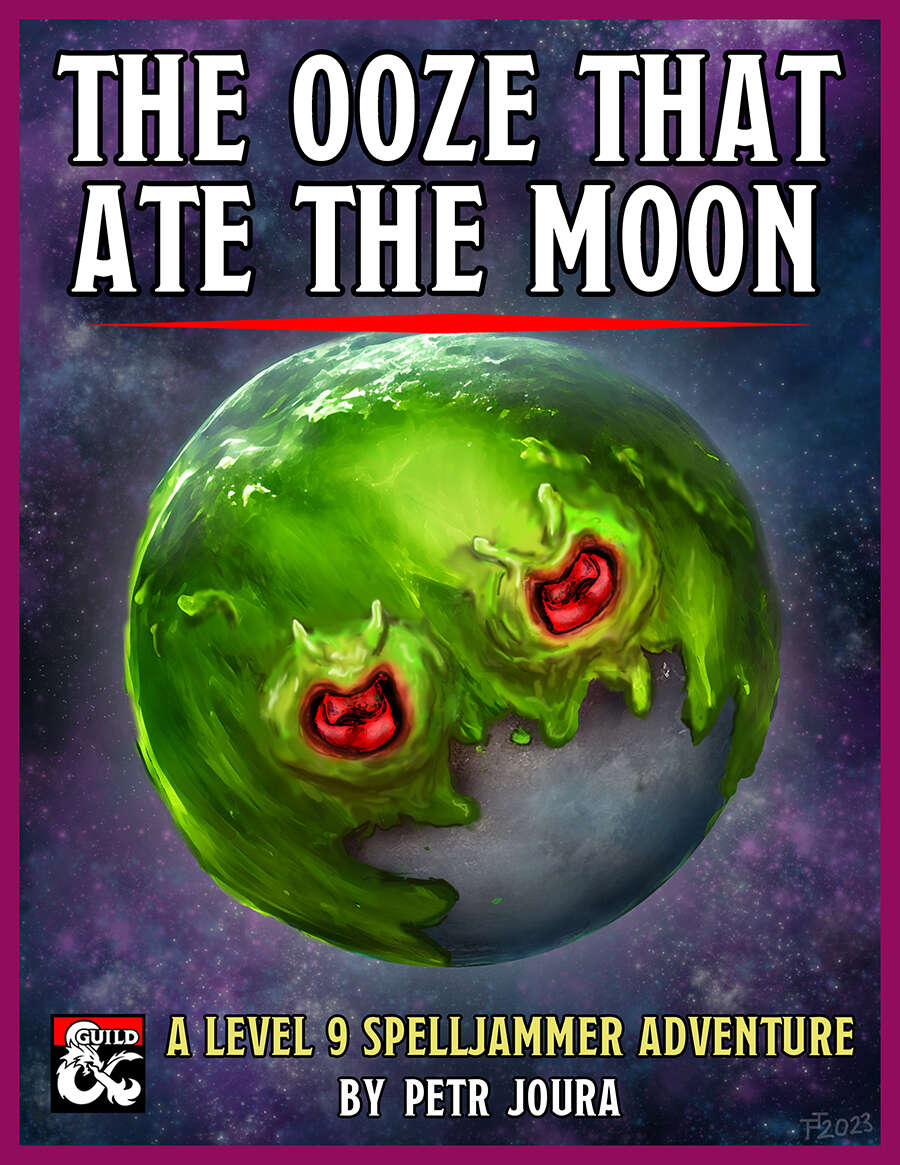
The moon is turning green. A colossal tide of green slime has begun to engulf it, threatening to dissolve it entirely. As it does so, a tide of demonic madness begins to engulf the lands below. As the green shadow flows across the night sky, the world turns mad. The source? An insane cult of plasmoids dedicated to Juiblex, the demon lord of oozes and slimes. Soon the moon may be gone, the first part of a mad plan to dissolve the multiverse into the primordial slime of the Abyss. If only some heroes could appear before it’s too late... The Ooze That Ate The Moon is 5th-edition Dungeons & Dragons adventure based on the Spelljammer campaign setting. It is an investigative high-orbit pulp thriller paired with the wacky zaniness of Spelljammer, and every playthrough is likely to be different. It is designed for four 9th or 10th level characters and to be run in 3 to 6 three-hour sessions, or 2 to 3 longer sessions. It can be run as multi-session one shot or as part of an ongoing campaign. It fits perfectly after the events of Light of Xaryxis, but is written so as to be easily incorporated into any non-Spelljammer campaign. It requires the 5th Edition Spelljammer boxed set to run. Gameplay is based around investigation and roleplaying, with a good smattering of combat in the later acts. The climax of the adventure presents the players with a problem that has no clear solution. They’ll have to use all their wits and resources to overcome it, but can they do so in time?
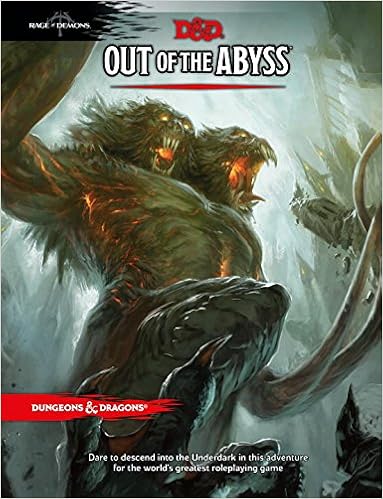
The Underdark is a subterranean wonderland, a vast and twisted labyrinth where fear reigns. It is the home of horrific monsters that have never seen the light of day. It is here that the dark elf Gromph Baenre, Archmage of Menzoberranzan, casts a foul spell meant to ignite a magical energy that suffuses the Underdark and tears open portals to the demonic Abyss. What steps through surprises even him, and from that moment on, the insanity that pervades the Underdark escalates and threatens to shake the Forgotten Realms to its foundations. Stop the madness before it consumes you! Note for DMs: This adventure is not for the faint of hearted, to run or to play. The module starts with 10 NPCs traveling with the party through the grueling Underdark. This number can grow. The encounters within the book are often incredibly deadly for the characters that would be going through it. This is because the module expects them to run or talk their way through the events, or, in some cases, the module expects them to lose. If your players aren't the kind of party to run, talk, or surrender, do not get this adventure. The module almost requires that you use milestone leveling because the experience provided does not commonly get players to the levels they should be once they get to certain milestones in the story (7th when they leave the underdark, 15th when they face the demon lords.) Good luck and happy questing.
A deadly encounter for a party of level 7-10s. Brave the crypt in an attempt to save Lord Eldark's son. This challenging dungeon is adaptable and easy to run in any existing campaign. It has some very tough encounters and is available for free on DM guild!

Hunt for the Thessalhydra is a short adventure published by Wizards of the Coast as a tie in to the "Stranger Things" franchise and part of the Stranger Things Dungeons & Dragons Starter Set. The adventure features characters, locations, and monsters inspired by that series. The adventure is suitable for characters of level 3-5.

Sewers of the Underguild is an adventure designed for characters of at least 11th level, and characters up to 15th level will find plenty of challenges. Hidden within these narrow passages and filth-filled channels is a guild of vampiric rogues, led by their master Sangre and his aide, a nycaloth called Ankoz. Deadly traps abound, so a skillful rogue will be a lifesaver. Because of the high likelihood of desperate combat with numerous vampiric and monstrous opponents, it is suggested that a cleric and at least two fighters be prepared to beat back the many watchdog monsters the guild employs. You can hide the locales in Sewers of the Underguild in any ruin or location that fits your campaign purposes. A thriving metropolis that just happens to have a large crime and vampire problem would fit the bill nicely. In the Lost Lands campaign setting of Frog God Games, the Underguild is located in the sewers beneath the ruins of Curgantium, the ancient imperial capital of lost Hyperboria. Located at the edge of the modern Kingdom of Foere, the Underguild still finds itself located centrally enough to pull the strings of its weblike network running throughout the former lands of the Hyperborian Empire.

The characters, members of the Clifftop Adventurers’ Guild, have been tasked with acquiring the Chains of Mur’taal, an artifact tied to Thelanis, by their guild handler, Lhara. This artifact is the latest in a series that Provost Nigel Faurious has commissioned the Clifftop guild to retrieve for him. The adventure starts when the characters arrive in Rhukaan Draal via Orien caravan. They’re given a chance to explore a small portion of the city before they head to a local bar to meet their contact provided by Lhara. Accompanied by a local guide, they make their way to the Seawall Mountains, where they’ll have to follow clues and their intuition to find the Valley of the Hero, which conceals the artifact that they’ve been hired to obtain. In order to earn the artifact, characters must first pass three tests laid before them by the Story: The Test of Courage, the Challenge of Wisdom, and the Trial of Honor. Once they finish the tests and collect the artifact, the party heads back toward Rhukaan Draal. But there are Marguul forces in the area, and they don’t intend to let the heroes escape with a priceless piece of their folklore…

The Cagewrights are defeated. The Tree of Shackled Sould is no more. Lord Vhalantru has been exposed and put down for the menace he truly was. The town of Cauldron has been saved from volcanic apocalypse. The heroes of Cauldron have earned their place in history, and more than deserve a time of rest, yet fate is not so kind. For the true menace behind the curtain still lives. As long as Adimarchus, the demon prince of madness, continues to dream his haunted dreams and writhe away the years in torment in the fiendish asylum of Skullrot, Cauldron can never be truly safe. "Asylum" concludes the Shackled City Adventure Path that began with "Life's Bazaar" (Dungeon #97) and continued with "Flood Season" (Dungeon #98), "Zenith Trajectory" (Dungeon #102), "The Demonskar Legacy" (Dungeon #104), "Test of the Smoking Eye" (Dungeon #107), "Secrets of the Soul Pillar" (Dungeon #109), "Lords of Oblivion" (Dungeon #111), "Foundation of Flame" (Dungeon #113), "Thirteen Cages" (Dungeon #114), and "Strike on Shatterhorn" (Dungeon #115). Pgs. 40-65

The Sea Witch is a short adventure for four 10th-level characters. The difficulty of the adventure can be adjusted by changing the level of main antagonist (Black Molly, the sea hag pirate) or by altering the number of her ogre servants. To tailor the encounter to groups of different levels, refer to table 4-1 in Chapter 4 of the DUNGEON MASTER’S GUIDE. The adventure is set off a lightly populated coastline known as Misty Bay, but adapts easily to any coastal region in existing campaigns. The sea hag known as Black Molly is a notorious pirate who has plagued the coastal cities for the better part of a decade. A successful Knowledge (local) check (DC 15) will reveal that Molly and her ogre crew have a filthy reputation as merciless killers who delight not only in plundering vessels for their riches, but also in destroying the ships themselves and sending all hands to the bottom of the sea. Now the villain and her followers have seized control of the Old Lighthouse of Misty Bay located off a lightly populated coastline. For generations the lighthouse beacon has protected the fishermen of this region, warning them of the dangerous rocks that lurk just below the level of the high tides. Recently, the hag has put out the beacon, darkening the lighthouse; misery and destruction are sure to follow as ships start to blunder into the rocks. Blackmail is apparently Black Molly’s aim in this venture: She conveyed a message to the nearest shore community, the fishing village of Poisson, demanding the princely sum of 50,000 gp. Until she receives this ransom, she intends to hold the lighthouse and its beacon hostage. The fate of the human keepers who tend the lighthouse is unknown to the seaside communities at this time, but they fear the worst. The Sea Witch is ostensibly a rescue mission: The PCs are pitted against the evil of Black Molly and the brawn of her savage ogre crew. It is the heroes’ task to retake the lighthouse and, if possible, free its captives from the clutches of their jailer. What neither the PCs nor the shore communities yet realize is that while she 1would be pleased to have the gold, Black Molly is in fact after bigger treasure. Molly has no intention of giving up the lighthouse — at least, not until she finds what her master sent her here for. Lying on the sea floor practically at the base of the rock on which the lighthouse sits is the wreck of the war galley Flying Cloud, which according to popular legend was captained by a cleric who wore around his neck an amulet of the planes. Black Molly wants this prize, but so far she hasn’t been able to find it. She’s scoured the wreck without finding any sign of the magic item. Now she’s trying to determine where to search next, for the item might well be somewhere near the wreck. If she can’t find it, she’ll start torturing her captives to find out if they have any useful knowledge about the amulet.

The rubble-strewn passageway twists and turns, winding ever deeper into the mountain, lower and lower into the bowels of the ancient, forbidding halls of long-dead dwarves. The torchlight flickers, threatening to succumb to the oppressive darkness. Creeping along one striated granite wall, Arikus the warrior moves cautiously toward the great cavern ahead, its sides and walls disappearing into the gloomy distance. Cocking his head to one side to listen, he holds his hand up for a moment, demanding unconditional quiet from from his companions. Then , his arm relaxing in relief, he waves everyone forward and moves into the open. Before him, scattered to the far walls of the enormous cavern, are piles upon piles of glittering treasure - coins from countless kingdoms, sparkling gems, exquisite jewelry, and items of wondrous power - enough for twenty kings' ransoms. Arikus laughs gleefully, thrusting both hands into the nearest cache of coins to let them runs through his fingers. At that moment, a monstrous shadow looms threateningly over him. Looking up, Arikus blanches and stumbles back in horror before the terrible visage of a Great Red Wyrm. The fearsome dragon opens its razor-filled maw and spews forth a gout of white-hot flame, engulfing the hapless warrior.... The ultimate Dungeon Master Fantasy! This is the most deluxe dungeon. Designed to appeal to discriminating and demanding role-players. Adventurers, beware. This is more than just a dragon hunt. Within the lair of the beast lie cruel and deadly traps, befuddling conundrums and puzzles, and cunning minions that will be the end of overconfident or careless adventurers. Comprised of three 64-page books, for two adventures that link to one super-campaign 12 full-color reference cards 16 special player handouts Eight Monstrous Compendium sheets A Sheet of cardstock standups with 24 plastic bases. Six full-color poster maps, two of which link together to make a giant tactical playing surface for use with miniatures or the included cardstock figures. TSR 1089