
𝐓𝐡𝐞 𝐁𝐥𝐚𝐜𝐤𝐟𝐥𝐚𝐦𝐞 𝐂𝐮𝐫𝐬𝐞 𝐇𝐚𝐬 𝐑𝐞𝐭𝐮𝐫𝐧𝐞𝐝! Step into a town where darkness has taken root, and every shadow hides a deadly secret. In The Return of the Blackflame Curse, you and your party will unravel the twisted mysteries of Whitethorn Rose, a cursed town teetering on the edge of doom. 𝐄𝐱𝐩𝐥𝐨𝐫𝐞 • 36 rooms across 4 floors (Basement, 1st Floor, 2nd Floor, Attic) • 5 detailed maps with day/night and transparent variants Explore the haunted Huxley Manor, a sprawling, intricately detailed estate with 36 rooms and 4 floors, each filled with terrifying encounters and bone-chilling secrets. With 5 beautifully illustrated maps, including day/night variants, you’ll be fully immersed in a tale of fear and survival. 𝐅𝐢𝐠𝐡𝐭 • 13 monster statblocks, each with their own lore • A intense boss fight with the vengeful Morgana Blackflame Face off against 13 custom monsters, each with unique abilities and terrifying backstories. From creeping apparitions to vengeful spirits, every encounter will test your players’ courage and strategy. And when it comes time for the ultimate showdown? Prepare for a climactic boss fight with Morgana Blackflame herself, a ghost hellbent on consuming the town in flames once more. 𝐃𝐢𝐬𝐜𝐨𝐯𝐞𝐫 • 13 tragic ghosts, each with chilling backstories • 8-page Ghost Hunting Compendium as a player handout • Solve mysteries and exorcise spirits to lift the curse But it’s not just monsters you’ll have to worry about. The town itself is alive with haunted events and 13 restless ghosts, each carrying a tragic tale. Investigate, exorcise, and piece together the dark history that binds them to this cursed place. To help your players dive deeper into the supernatural, we’ve also included an 8-page Ghost Hunting Compendium as a handy player handout. 𝐏𝐫𝐞𝐩𝐚𝐫𝐞 • 7 homebrew magic items, including a powerful Fated Item with 3 variants • 6 different charms to protect your players from the curse • 9 Magic Item Cards to print and hand out to players, with artwork, in 2.5 x 3.5 inches (MTG-sized) • 43 haunted events to keep players on edge Don’t go into battle unprepared. Arm your adventurers with 7 custom magic items, including 1 Fated Item with 3 powerful variants. Stock up on 6 unique charms to ward off the curse, and keep your party on edge with 43 haunting events that can strike at any time. 𝐑𝐮𝐧 • 17 monster cards for easy reference, with artwork, in 88mm x 125mm (Tiny Epic size) • Ghost Tracking Sheet for smooth management of the adventure • 36 small room cutouts for quick navigation during gameplay • 24 VTT tokens for easy integration into your online games For GMs, we’ve made running the adventure easier than ever. With 24 VTT tokens for monsters and NPCs, a Ghost Tracking Sheet to manage exorcisms, and 17 monster cards for quick reference, everything you need is at your fingertips. Plus, 36 cutouts in the description of every room, provide clear guidance for navigating the sprawling manor. 𝐏𝐫𝐞𝐬𝐞𝐧𝐭 • 7 detailed town locations for investigation • 7 NPC background and roleplay sheets to add depth to the world • 1d12 Superstition Table to bring the town’s eerie atmosphere to life Bring the town of Whitethorn Rose to life with 7 detailed NPC background sheets and 7 town locations, giving your players more ways to explore, interact, and investigate. And for added flavor? A 1d12 Superstition Table to bring out the eerie quirks of the locals. 𝐏𝐥𝐚𝐲 • Battle against the darkness with strategic challenges and eerie storytelling • Solve the murder mystery, lift the curse, and guide your players through an unforgettable experience With The Return of the Blackflame Curse, every decision matters, every room hides a deadly secret, and every ghost has a story to tell. Get your copy now and take your players on a journey into the heart of darkness. This is more than just an adventure—it’s a test of survival.
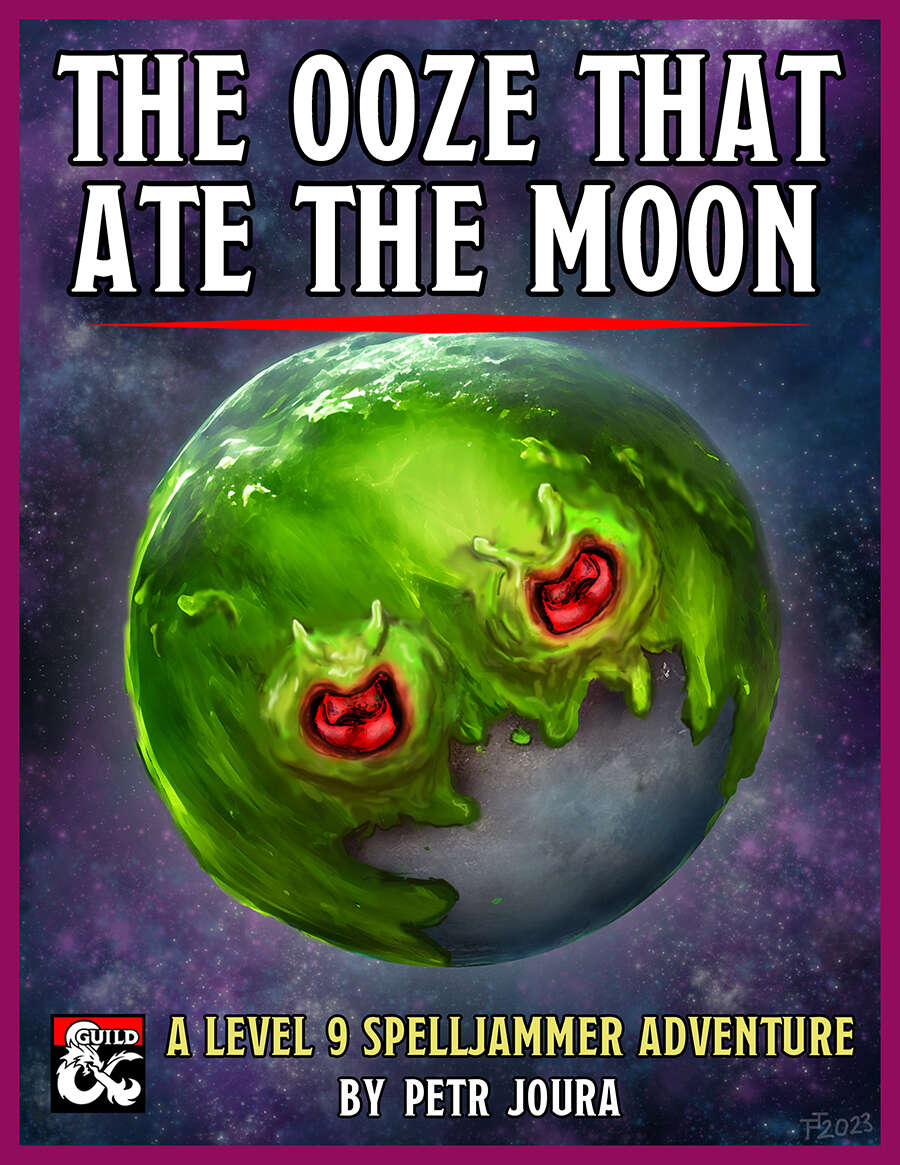
The moon is turning green. A colossal tide of green slime has begun to engulf it, threatening to dissolve it entirely. As it does so, a tide of demonic madness begins to engulf the lands below. As the green shadow flows across the night sky, the world turns mad. The source? An insane cult of plasmoids dedicated to Juiblex, the demon lord of oozes and slimes. Soon the moon may be gone, the first part of a mad plan to dissolve the multiverse into the primordial slime of the Abyss. If only some heroes could appear before it’s too late... The Ooze That Ate The Moon is 5th-edition Dungeons & Dragons adventure based on the Spelljammer campaign setting. It is an investigative high-orbit pulp thriller paired with the wacky zaniness of Spelljammer, and every playthrough is likely to be different. It is designed for four 9th or 10th level characters and to be run in 3 to 6 three-hour sessions, or 2 to 3 longer sessions. It can be run as multi-session one shot or as part of an ongoing campaign. It fits perfectly after the events of Light of Xaryxis, but is written so as to be easily incorporated into any non-Spelljammer campaign. It requires the 5th Edition Spelljammer boxed set to run. Gameplay is based around investigation and roleplaying, with a good smattering of combat in the later acts. The climax of the adventure presents the players with a problem that has no clear solution. They’ll have to use all their wits and resources to overcome it, but can they do so in time?
Pirates and powderkegs. An undersea menace has the merchants of Scalabar up in arms. A strange sea monster is plaguing the trade ships near Scalabar, a coastal city. You have arrived in Scalabar at the behest of Sora Calhaigne. The lady of House Calhaigne needs brave heroes to investigate the loss of her galleon, the Morning Star. She has reason to believe that the sea monster is not what it seems. Includes a list of random city encounters, a keyed map of the port city, Scalabar, as well as a simple overland map of the Scalabar coast, a map of a typical two-story warehouse, a keyed map of the pirate caves, and a keyed map of the ship Thresher. Pgs. 10-27

Sinister, twisting images...Horrific nightmares lurking at the corners of the mind...These are descriptions used to tell the tales of the Labyrinth of Madness. But these tales of the labyrinth are only legends, really, nothing more than stories used to frighten children at night - until a mysterious scepter is found, bearing within its crystal head a visage of insanity and terror, and also delivering a message: "Disturb not the Labyrinth of Madness again, and live a while longer." Now a powerful temple suffers from a tragic curse that is somehow linked to the labyrinth. Does there exist a group of heroes who can penetrate this dark and terrible place to life the curse...and survive? Labyrinth of Madness is a multiple-level, three- dimensional dungeon adventure, a puzzle within a puzzle, that commemorates 20 years of gaming with TSR. TSR 9503

The Sea Witch is a short adventure for four 10th-level characters. The difficulty of the adventure can be adjusted by changing the level of main antagonist (Black Molly, the sea hag pirate) or by altering the number of her ogre servants. To tailor the encounter to groups of different levels, refer to table 4-1 in Chapter 4 of the DUNGEON MASTER’S GUIDE. The adventure is set off a lightly populated coastline known as Misty Bay, but adapts easily to any coastal region in existing campaigns. The sea hag known as Black Molly is a notorious pirate who has plagued the coastal cities for the better part of a decade. A successful Knowledge (local) check (DC 15) will reveal that Molly and her ogre crew have a filthy reputation as merciless killers who delight not only in plundering vessels for their riches, but also in destroying the ships themselves and sending all hands to the bottom of the sea. Now the villain and her followers have seized control of the Old Lighthouse of Misty Bay located off a lightly populated coastline. For generations the lighthouse beacon has protected the fishermen of this region, warning them of the dangerous rocks that lurk just below the level of the high tides. Recently, the hag has put out the beacon, darkening the lighthouse; misery and destruction are sure to follow as ships start to blunder into the rocks. Blackmail is apparently Black Molly’s aim in this venture: She conveyed a message to the nearest shore community, the fishing village of Poisson, demanding the princely sum of 50,000 gp. Until she receives this ransom, she intends to hold the lighthouse and its beacon hostage. The fate of the human keepers who tend the lighthouse is unknown to the seaside communities at this time, but they fear the worst. The Sea Witch is ostensibly a rescue mission: The PCs are pitted against the evil of Black Molly and the brawn of her savage ogre crew. It is the heroes’ task to retake the lighthouse and, if possible, free its captives from the clutches of their jailer. What neither the PCs nor the shore communities yet realize is that while she 1would be pleased to have the gold, Black Molly is in fact after bigger treasure. Molly has no intention of giving up the lighthouse — at least, not until she finds what her master sent her here for. Lying on the sea floor practically at the base of the rock on which the lighthouse sits is the wreck of the war galley Flying Cloud, which according to popular legend was captained by a cleric who wore around his neck an amulet of the planes. Black Molly wants this prize, but so far she hasn’t been able to find it. She’s scoured the wreck without finding any sign of the magic item. Now she’s trying to determine where to search next, for the item might well be somewhere near the wreck. If she can’t find it, she’ll start torturing her captives to find out if they have any useful knowledge about the amulet.

This alternate starter campaign takes you to all the familiar locations of the Lost Mine of Phandelver adventure from the other side of the veil. Some places look the same, some very different. The entire plane is trying to strip you of your mind, your memory, and your motivation. Discover how the Forge of Spells was fueled. Learn the location of lost adventurers from the original Phandelver expedition. See what Cragmaw Castle looked like in its prime. All of this and more, as this takes you from level 1 to level 5 with well over 20 hours of play time. If you are looking to start a new campaign or just experience familiar locations in a new setting, this supplement accommodates. Inside you'll find: Maps: Nine encounter maps Cragmaw Castle rebuilt, including the upper floor, and underground level. Wave Echo Cave before it was tunneled. A very different looking Redbrant Hideout Ruins of a town similar to Phandalin A swamp and muck version of Cragmaw Hideout Plus new magic items, and more Monsters: 37 new creatures Lore Information on a shadowy Yuan-ti empire A new offshoot of the abyssal demonhive A cult using the stoic ways of stone to evade the Raven Queen's watchful eye and pilfering ways. New players vying for control of the Shadowfell Shadowfell Guide: Information on the plane, its inhabitants, and included with this supplement is the best selling Shadowfell Random Encounters appendix. Easter Eggs Hidden throughout the story are references to Lost Mine of Phandelver. Including references to other hard cover books as well.

Manthrak's Malicious Steamroller After an experiment with a teapot goes wrong, a wizard's tower rolls through the forest, crushing all beneath it. Its owner, Manthrak the Meticulous wants it back. It's up to you and your companions to stop the tower's rampage before something even worse happens. Manthrak’s Malicious Steamroller is a short, high-octane one-shot adventure module for a party of four or five 4th level characters. With no setting specific details, it can be easily dropped into any campaign, or run on by itself for an action-packed escapade. Included: Full-color 13-page PDF Virtual tabletop maps - Gridded & Non-gridded Accessible & print-friendly PDF A fun, unforgettable experience

Continue the adventure inside the Dwarven Forge world of Mythras with the second part of this new gaming trilogy, The Hidden Valoria Campaign. Now entrenched in the tapestry of The Patina Court, the players must begin unraveling an even greater mystery that lies beneath the streets. Taking the adventure to the sewers, get ready to explore some of the locations that have made Valoria so famous among its players over the years This adventure is formatted to both 1E & 5E gaming rules. Also available in PDF.

Centuries ago, a beholder named Yeryl fled from the place of his birth and wandered the countryside in search for a place to call home. After many sleepless nights spent carving out a safe nook for himself in the wilderness, he at last slipped into slumber. In his dreams, he found an ideal place for his lair: long-abandoned ruins hidden amidst a dull and barren valley. Yeryl spent years transforming the place to suit his paranoid designs. Visitors were rare enough, and the few that made it to Yeryl’s lair were quickly destroyed or forced into the beholder’s service, building the lair ever deeper and more magnificent. As time went on, Yeryl finally completed his task. Safe at last, but with nothing to occupy his mind, Yeryl was struck by melancholy; was this lonely and empty life truly what he had chosen for himself? On that day, Yeryl made a decision: next time an adventurer came to his lair, he would welcome them in. With this resolution in mind, Yeryl began to dismantle his traps and replace them with ones he considered to be more fun. Unfortunately, for all his good intents, Yeryl has not yet realised that killing people is a bad way of getting them to like him. Yeryl's Super Happy Fun Murder Dungeon is a highly obnoxious and mildly ridiculous collection of traps, combat and puzzles designed to test your players' wits and patience. It is optimised for a group of four to five 3rd level players, but the text also contains a guide for level adjustments for different sized groups.

Jungle, tomb rading style adventure that sets the group to a new locale, with it's own eco systems and cultures. Exploration adventure, with glint of gold as a catalyst. The adventurers accidently find a map, which leads them to this unknown land. "Can you unravel the map's mysteries and find your way to the promised treasure? Or will your dreams end only in death and an unmarked grave far from home! Only the bravest characters of levels 3-5 will live to discover that all that glitters is not gold, but much, much more!" TSR 9126

An offer of exploration and adventure leads to a chilling underground dungeon. A mystical object is being asked to be retrieved by the local Wizard. This is the second adventure in a miniseries with the following adventures being: A Chance Encounter An Urgent Rescue A Dark Veil Falls
A killer is stalking the warforged of Sharn. Some say the murderer is a vengeful spirit, while others blame human bigotry and fear. Can the adventurers expose the truth that lies hidden in the depths of Sharn? Steel Shadows is a D&D adventure suitable for four characters of 7th level. This adventure is set in the city of Sharn in the Eberron campaign setting. Since this is a mystery themed adventure, at least one of the characters should have the Investigate feat. The adventure includes a sidebar for scaling the adventure for lower and higher level characters.
The young heroes of the town of Kassen are ready for their coming-of-age ceremony, an old tradition in which they retrieve a piece of the eternal flame burning in the tomb of the town's founder. Yet when they arrive there, they find only the corpses of their fellow townsfolk, dead bandits, and mysterious animated skeletons. The novice heroes must brave the traps and perils of the Crypt of the Everflame, discover the source of the corruption that has awakened an ancient evil, and defeat a menace that seeks vengeance against Kassen and its people. Part One of Price of Immortality.

Gifts for Him is a short, challenging, open-ended, gothic-horror, 5E-compatible Christmas adventure for tier 1 characters to be run in about three sessions, but it can be easily adapted as a one-shot. It contains over 25 pages with original artwork, three original battle maps, three unique monsters, stat blocks for five NPCs, three magic items, and a partridge in a pear tree. ----- The village of Bargrave has a secret. Every year, on Christmas Eve, the villagers cower in their homes while a savage beast prowls the streets, wreaking bloody doom on whomever has not left it a suitable gift on their doorstep. But Elias Buhl has had enough. This year, the old farmer won’t be buying the beast a gift, hoping instead to bait it into attacking him at his homestead, where he will trap and kill it once and for all. But he can’t do it alone. Buhl has hired a band of adventures to help him fortify his home, set traps, and slay the creature. They have three days to prepare, gather allies and equipment, and plan their defense. Or… They can dig a little deeper and uncover what Bargrave has been hiding all these years. Will they slay the beast, as agreed? Might they capture it to use it for their own ends? Can it be redeemed? Or will they die — their blood melting the snow — just the latest victims of the creature’s reign of terror? --- Gifts for Him is a complete, playtested, illustrated adventure that is currently pay what you want.
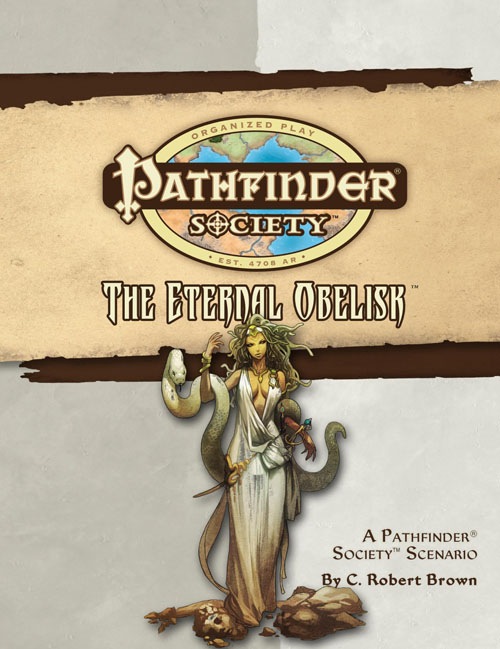
When the Pathfinder-obsessed daughter of one Qadira's most powerful trade princes goes missing trying to impress the Society, her father angrily demands the Pathfinders track her down or face expulsion from Katheer. Tracking the missing princess leads you to an underground complex filled with traps, tricks, and a creature so powerful, she's lived for a thousand years. Can you save the princess and uncover the power of the Eternal Obelisk?

While you search for treasure, others search for you. A treasure vault without guards or traps - can it be true? Pgs. 16-30

The end of the road. A lonely fort stands on the banks of a mighty river. It is here the hardy bands of adventurers gather to plan their conquests of The Hill, the hulking mass that looms over this tiny settlement. The Hill is filled with monsters, they say, and an evil witch makes her home there. Still, no visitor to The Hill has ever returned to prove the rumors are true or false. The thrill of discovery is too great to pass up, and only the river stands in the way. The adventurer's boat is waiting! This module is designed for use with the D&D Basic Rules. A trip through the wilderness begins a unique challenge for the novice player and Dungeon Master. TSR 9078

The Thieves Guild Ebonclad has learned of a construct that would make an ideal guardian or soldier. Unfortunately the constructs creator is looking to sell this to The Crown. It is in Ebonclad's best interest to intercept this construct before its abilities can be demonstrated. The party plays the role of a group of saboteurs, required to sabotage or destroy a construct named Marx before it can be demonstrated to The Crown in less than a day’s time. The mission’s primary objective is to locate the construct Marx and destroy or sabotage it. If Marx is destroyed outright, the party will need a patsy to pin the crime on. If possible, the party should steal Eva Dalphane’s schematics for Marx, as well as investigate how the artificer brought the construct into the city undetected.

The Tranquil foothills of the Sword Mountains are quickly plunged into chaos, as a series of earthquakes spread their way through the region. Adding to this danger, bands of vicious, flesh-eating monstrosities have clawed out of the shattered earth, attacking travellers and local residents. Rumours of wealth and riches have drawn the adventurers to the area; little do they know that it is not gold and jewels these monsters protect, but a volatile portal into the Underdark with a disturbing secret.

The characters, members of the Clifftop Adventurers’ Guild, have been tasked with acquiring the Chains of Mur’taal, an artifact tied to Thelanis, by their guild handler, Lhara. This artifact is the latest in a series that Provost Nigel Faurious has commissioned the Clifftop guild to retrieve for him. The adventure starts when the characters arrive in Rhukaan Draal via Orien caravan. They’re given a chance to explore a small portion of the city before they head to a local bar to meet their contact provided by Lhara. Accompanied by a local guide, they make their way to the Seawall Mountains, where they’ll have to follow clues and their intuition to find the Valley of the Hero, which conceals the artifact that they’ve been hired to obtain. In order to earn the artifact, characters must first pass three tests laid before them by the Story: The Test of Courage, the Challenge of Wisdom, and the Trial of Honor. Once they finish the tests and collect the artifact, the party heads back toward Rhukaan Draal. But there are Marguul forces in the area, and they don’t intend to let the heroes escape with a priceless piece of their folklore…