Half-orc proprietress, Sielu Kaitsija, a night hag, lost a bet with a glabrezu and guards his "extremely valuable bottles" as forfeit. She must also curb her natural instinct for slaughter. But that doesn't mean her dingy bar is a safe place to visit

Finish up this Dwarven Forge world of Mythras trilogy in the epic conclusion of The Hidden Valoria Campaign. Master your occupation of the neighborhood of the Patina Court. In this climactic end your players will fight paralyzing hate crawlers, kobold trap masters, spiders, and even a dragon and a mummy lord before a final betrayal awaits This adventure is formatted to both 1E & 5E gaming rules. Also available in PDF.

The village of Orașnou is buried in winter's snows and facing starvation. An unseen beast has ravaged the livestock culled to pay Lord Strahd's tax and the village is thrown into panic and chaos. Can you find the monster and save the village from starvation, or worse? Part eight of Misty Fortunes and Absent Hearts.

Vampire Church is a Fifth Edition plug-in adventure for four characters with an average party level (APL) of 5, 8, 11, or 14. This document offers details for each level and makes adjustments accordingly. A small church hides a dark secret: all of its priests are vampires. As a plug-in adventure, the adventure content serves as drop-in material for game masters who wish to add a dungeon to a preexisting campaign or need a side quest. If you need a hook for this adventure or already have a similar hook, the Vampire Church Hooks table offers details for introducing this adventure to your players.

Figgy Puddin' Steals Christmas is a short adventure Designed for use with Shadowdark RPG. The adventure is designed for three to six characters of low to mid experience. The anticipated run-time is 2- to 4-hours. There's a bit of roleplay in this adventure, which may extend the playtime. Adventure Background A traveling jester known as Figgy Puddin’ and her Coal Smudge Gang have stolen Christmas presents and now hold them for ransom. While safe and secure in her lair, she awaits either a payment of an outrageous ransom, or a crew of heroes to claim the presents after they navigate her not-so-festive lair. What's the Adventure? After you introduce the hook, the adventure occurs in Figgy Puddin's lair - a refurbished kobold bunker consisting of eight rooms. As the characters explore the linear dungeon, they encounter new creatures, complete challenges, and are tested about their Christmas knowledge. However, the final confrontation with the naughty Figgy Puddin' could make for a very Unhappy and Unmerry Christmas for our heroes, the children of Thistleton, and their parents. Who Is Figgy Puddin’? Figgy Puddin’ was once a happy jester who loved Christmas. For years she traveled the realm, bringing fun and festive cheer to villages and children while preparing the way for Santa. However, times have become tough, and entertainment doesn’t always pay as well as one would like. As Figgy prepares for retirement, she’s learned she doesn’t have enough gold to last. During this time, she’s also decided that Santa doesn’t know who she is, let alone appreciate the work she puts in every year. Using her savings, extortion, blackmail, and other nefarious means, she’s convinced several mechanical geniuses and arcane specialists to help her refurbish her underground bunker with wondrous effects, creatures, and tests.

'Fierce' was written for the annual release of Fierce, a tasty Berliner Weisse, at Off Color Brewery in Chicago, Illinois. It's a one-shot intended for both beginner players and DM's, with the space for personal flair to be added or to be run as-is.

An artifact belonging to an ancient couatl god has been stolen from his shrine. Can the characters recover the Fangs of Oatali before the god's wrath unleashes a devastating cataclysm upon the jungle? Fangs of Oatali is a pulp-action adventure set in the jungle and includes: -Stealthy raids, hidden enemies, and the clash of two primal gods -Angry pterodactyls, massive sinkholes, and earth-quaking magic -Combat cards for each monster, PC, and special treasure -Beautiful, hand-drawn maps by Beware the Wizard, as well as high-quality digital maps for use with virtual table tops

This uniquely styled adventure involves players starting out with little information about the characters they will play. No characters are prepared in advance. This is a nonstandard method of play. Player characters only know their names, ability scores, race, and background. This adventure was created to give the feeling we got as kids just starting out with D&D. It will be great for new players and seasoned vets alike. Who is in charge? Who is torturing the players? Let the chaos begin…

The Sea Witch is a short adventure for four 10th-level characters. The difficulty of the adventure can be adjusted by changing the level of main antagonist (Black Molly, the sea hag pirate) or by altering the number of her ogre servants. To tailor the encounter to groups of different levels, refer to table 4-1 in Chapter 4 of the DUNGEON MASTER’S GUIDE. The adventure is set off a lightly populated coastline known as Misty Bay, but adapts easily to any coastal region in existing campaigns. The sea hag known as Black Molly is a notorious pirate who has plagued the coastal cities for the better part of a decade. A successful Knowledge (local) check (DC 15) will reveal that Molly and her ogre crew have a filthy reputation as merciless killers who delight not only in plundering vessels for their riches, but also in destroying the ships themselves and sending all hands to the bottom of the sea. Now the villain and her followers have seized control of the Old Lighthouse of Misty Bay located off a lightly populated coastline. For generations the lighthouse beacon has protected the fishermen of this region, warning them of the dangerous rocks that lurk just below the level of the high tides. Recently, the hag has put out the beacon, darkening the lighthouse; misery and destruction are sure to follow as ships start to blunder into the rocks. Blackmail is apparently Black Molly’s aim in this venture: She conveyed a message to the nearest shore community, the fishing village of Poisson, demanding the princely sum of 50,000 gp. Until she receives this ransom, she intends to hold the lighthouse and its beacon hostage. The fate of the human keepers who tend the lighthouse is unknown to the seaside communities at this time, but they fear the worst. The Sea Witch is ostensibly a rescue mission: The PCs are pitted against the evil of Black Molly and the brawn of her savage ogre crew. It is the heroes’ task to retake the lighthouse and, if possible, free its captives from the clutches of their jailer. What neither the PCs nor the shore communities yet realize is that while she 1would be pleased to have the gold, Black Molly is in fact after bigger treasure. Molly has no intention of giving up the lighthouse — at least, not until she finds what her master sent her here for. Lying on the sea floor practically at the base of the rock on which the lighthouse sits is the wreck of the war galley Flying Cloud, which according to popular legend was captained by a cleric who wore around his neck an amulet of the planes. Black Molly wants this prize, but so far she hasn’t been able to find it. She’s scoured the wreck without finding any sign of the magic item. Now she’s trying to determine where to search next, for the item might well be somewhere near the wreck. If she can’t find it, she’ll start torturing her captives to find out if they have any useful knowledge about the amulet.

What began as a subtle sickness has now spread into a full-blown contagion of magical origins around Roslof Keep! Although protected from the outbreak by their Mithel Standard, the Company of the Ivory Scimitar is now challenged with not only continuing their quest to defeat the Dungeon but also saving the town that they have grown to love. With unlikely allies forming from the other Mithel Companies, as well as unforeseen help within the labyrinth itself, the Ivory Scimitar must now take on the perilous task of curing the Violet Corruption while trying to discern the nature of its cause from somewhere deep within Mithelvanr's mad dungeon of self-propagating monstrosities! This adventure is formatted to both 1E & 5E gaming rules. Also available in PDF.

All ocean voyages are fraught with peril, yet a voyage to the infamous Isle of Dread might seem to some old salts to be a deliberate goading of the gods of the sea. Many of those who have attempted the voyage before managed to return to civilization often choose not to speak of the trials they experienced on that dangerous route, yet those whose lips can be loosened by a draught of grog whisper amazing stories... tales of pirates, sea monsters, terrifying storms, and perhaps most harrowing of all, of a strange and sinister land without land, a floating graveyard of dead ships mired in a sargasso the size of an island. This place has many names, but its most well-known may be it's most apt - Journey's End. "The Sea Wyvern's Wake" is the third chapter of the Savage Tide Adventure Path, a complete campaign consisting of 12 adventures appearing in Dungeon magazine. For additional aid in running this campaign, check out Dragon magazine's monthly "Savage Tidings" articles, a series that helps players and DMs prepare for and expand upon the campaign. Issue #350 of Dragon magazine features a regional guide to the seafaring environs the PCs can expect on the journey to the Isle of Dread. It’s time to bid farewell to the city of Sasserine as the PCs board the Sea Wyvern for a 3,000-mile voyage south into the uncharted waters of the Vohoun Ocean. Their destination: the Isle of Dread. Pgs. 16-48

Nobody complained when the raids by goblins stopped. Until word got around that the monsters had been slain by other monsters! Our heroes have been sent to investigate and remove any remaining threat. Published by Fortiter Games.

A Halfling girl battling a rare disease that no magic can cure. A fruit, which has the power to heal and the power to corrupt, now guarded by mad siblings. A journey through a hostile forest, a trapped tower, and a dungeon to retrieve the fruit to heal the young girl. Will your heroes be triumphant, or will they perish while attempting to retrieve the mysterious fruit?
:strip_icc()/pic530611.jpg)
Travelling long distances is the constant lot of the adventurer. This time, their quest will take them across the sea, and deep into the interior of a country they know little about, to retrieve an artefact stolen by one bunch of clerics from another. Now, we all know that meddling in the affairs of the Gods can be a hazardous affair, but this time the Gods haven't been worshipped for hundreds of years, and their clerics slaughtered each other in a great battle back in the distant past. Maybe this is that adventure we've all been waiting for, where the treasure is just sort of sitting there, and all we have to do is go and get it... A complete 40-page adventure, with stats for the D&D/AD&D games, and background information to use with the Pelinore campaign.
A Giant Ransom is a short adventure for four 11th-level characters. There are opportunities for diplomacy, stealth, and combat, based on the choices the PCs make, so any mix of classes is appropriate. The adventure can be set in any campaign world, in a frontier region near glacier-covered mountains. In the story thus far, the PCs have been tasked by Duke Ambrinigan, a local lord, to recover a stolen statue of a golden lion. The lion was stolen in transit by frost giant raiders, and was to be ransomed back to the Duke for 10,000 gp. The PCs were sent to perform the exchange. The giants, however, were attacked by the white dragon Whildenstrank, who stole the statue and retreated to his lair in the middle of a nearby glacier. The PCs encountered the remaining giants, and then set off westward toward the dragon's lair. They traveled across the flat part of the glacier, encountering the frost giant ranger Velg the Dragon Tamer, as well as some burrowing bulettes. The PCs now have entered the Ice Canyons: a maze of twisting passageways surrounding the black spire of rock that the dragon calls home. They have just heard sounds of a battle ahead.

The Submerged Spire of Sarpedon the Shaper lies to the west of the Isle of the Dismemberer. On the northwestern shore of this island, crumbling steps spill from the shore directly into the sea. There, a seaweed choked stone path can be glimpsed winding down into the depths. At low tide, a quarter mile along the path, a lone onion dome may be seen poking through the waves. In the twilight of the sorcerer lords, The Submerged Spire was the jewel of the Shattered Isles. Within his submarine redoubt, Sarpedon penetrated ever deeper into the organic mysteries. Now, its for- lorn dome the roost of seagulls, its secrets slumber beneath the waves.
In 1492 DR, a group of adventurers are approached by a ghost in Candlekeep who urges them to investigate the unsolved, grisly murder of the Yellowcrest family in Waterdeep five years prior. The investigation leads the adventurers to the nearby village of Greenfast, which is plagued by a secretive cult.

A top the crown of the Isle of Dread, a hateful monster broods. Spawned by the Price of Demons, the architect of the shadow pearls dwells deep under the ruins of ancient Thanaclan. As long as this vile monster lives, the threat of the savage tide remains, looming dark on the horizon. "City of Broken Idols" is the seventh chapter of the Savage Tides Adventure Path, a complete campaign consisting of 12 adventures appearing in Dungeon magazine. For additional aid in running this campaign, check out Dragon magazine's monthly "Savage Tidings" articles, a series that helps players and DMs prepare for and expand upon the campaign. Issue #354 of Dragon magazine features the totemic demonslayer, a new prestige class that focuses on fighting and defeating demons, be they at the heart of the Isle of Dread or encountered in the depths of the Abyss itself. The central mesa of the Isle of Dread is taboo to the locals, a place shrouded in mystery and cloaked in rumor. The time has come to confront the evil that dwells atop the island’s savage crown. Pgs. 54-84
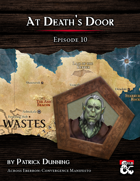
At Death’s Door is a dungeon crawl that takes place almost entirely in the upper chambers of the Lair of the Keeper. This lair belongs to an ancient dracolich that perhaps styles themselves after the legends of the Keeper, or perhaps even inspired them. Stormhome. The player characters are called to the home city of House Lyrandar to meet with Guild Handler Lhara regarding their quest for an artifact tethered to Dolurrh, the Realm of the Dead. The Descent. Traveling by airship over the horrors of the Demon Wastes, the party descends into a vast canyon to find the Lair of the Keeper. After agreeing on a pickup point, the party skydives into the hellish landscape and hides to avoid the notice of a would-be god, then explores the surrounding area. The Lair of the Keeper. The bulk of the adventure takes place in the upper chambers of a dracolich’s lair in a manifest zone tied to Dolurrh, the Realm of the Dead. Surviving the horrors of this place is the main challenge of the adventure. The Ghaash’kala. There is one last challenge standing between the players and their escape to the airship. The orc tribes called the Ghaash’kala consider it their holy duty to protect the rest of the world from the horrors of the Demon Wastes. They will attempt to stop anything from escaping the Wastes, unfortunately including our heroes.

FQ6 – Vortex at the Temple continues the quest for the missing pages of the Codex of Gamber Dauch. This adventure takes the PCs to the ancient temple of Kabish Mo-Del a former druidic stronghold. Once there the party will have to battle creatures and puzzles to continue. If successful the party may just find themselves in a foreign land and have to find their way back home!