
FT – Earldom of Curwood is a companion to Filbar offering FQ8 – Uprising of the Undead! This supplement gives an overview of one of the major cities in the Duchy of Bast and is the starting place for FQ8. The community is known for its diverse economic structure and makes for a nice respite for weary adventures!
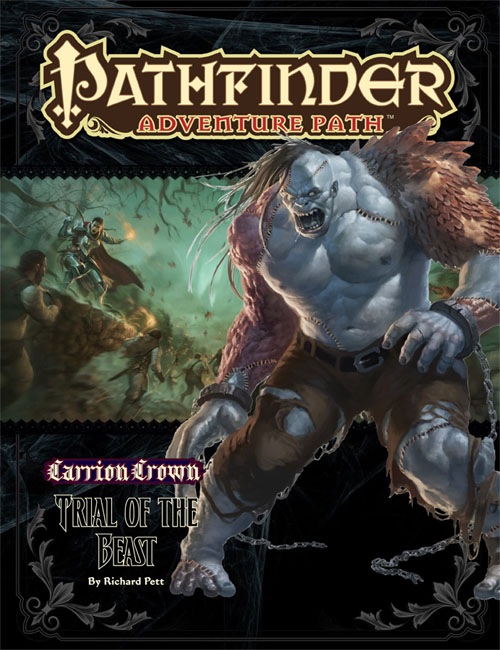
Evil Stitched to Evil The rampaging abomination known as the Beast of Lepidstadt has been captured! Yet rather than destroy the monster for its countless murders and untold crimes, the city council demands the creature receive a fair trial. Upon traveling to Lepidstadt, the adventurers find themselves caught up in the anger and investigations surrounding the Beast’s judgment. Soon it’s up to them to discover whether the legendary monster is truly a killer or merely the instrument of some greater evil—and either way, whether it’s too dangerous to be allowed to survive. This volume of Pathfinder Adventure Path continues the Carrion Crown Adventure Path and includes: • “Trial of the Beast,” a Pathfinder RPG adventure for 4th-level characters, by Richard Pett. • An investigation into the secret society called the Esoteric Order of the Palatine Eye, by Brandon Hodge. • Revelations on the faith of Pharasma, goddess of birth, death, and fate, by Sean K Reynolds. • Terror upon terror for Laurel Cylphra in the Pathfinder’s Journal, by F. Wesley Schneider. • Four exciting and deadly new monsters, by Rob McCreary, Patrick Renie, and Sean K Reynolds.
Freeport is a fantasy “free city” you can place in a fantastic setting. Its basic premise is a pirate city gone legit… at least on the surface. In truth, the pirate tradition is alive and well in Freeport, but camouflaged by a veneer of respectability. These days the city’s pirates are privateers, legalized pirates Freeport loans out to the highest bidder. You’ll learn more in the short history of the city that follows. This should help give you a taste of the flavor of Freeport before the adventure begins and the given background is all you need to run this adventure. It is an ideal starting place for a new campaign as the player characters find themselves stranded in Freeport after a deal goes sour. A seemingly simple job plunges them into the strange underside of the city, where they uncover secrets worth dying for. Death in Freeport is the first from the Freeport trilogy, together with Terror in Freeport and Madness in Freeport. Synopsis: Death in Freeport drops the player characters into the midst of political and magical intrigue, as the hidden Brotherhood of the Yellow Sign manipulates events to bring its dread god to the world. Freeport is still a bustling center of trade, but evil currents run beneath the surface. There are secrets here, and questions unanswered. The characters will undoubtedly learn there is more here than they expect in a simple seaport. The question is, will that knowledge kill them? As the adventure begins, the player characters (PCs) have just come to Freeport on a merchant ship. While on the docks, the PCs are attacked by a press gang, who mistake them for easy marks. The press gang is handily beaten off; since they are unused to real resistance. A bookish young man named Brother Egil then approaches the PCs. He says that he’s been looking for a group that can take of itself, and that he has a job for them if they are interested: finding a missing librarian. The missing man, Lucius, disappeared two days previously, and Egil is eager to find him. Egil gives the PCs some background on Lucius and his strange behavior. The PCs are then free to investigate: They are likely to visit Lucius’s home, the temple to the God of Knowledge, and an orc pirate ship. This should form a picture of Lucius as a man searching for his own past—who found something he wasn’t counting on. Following a trail of clues, the PCs learn about the Brotherhood of the Yellow Sign. With a little luck, the PCs can trail the cultists back to their hideout, penetrate the lair, and discover secret tunnels underneath it. Deep underground they find degenerate serpent people, and eventually Lucius himself. The librarian has been tortured badly and will die without aid. The PCs also have to deal with the leader of the cult, a man they may recognize from the temple. When the cult priest is slain, they are in for an even bigger surprise. He was not human at all, but a serpent man in disguise. What this means for Freeport only the gods can say.

A handful of would-be adventurers gathers to explore an ancient tomb, eager to trade their discoveries for a ticket to a better life. What they find within presages the advent of the Age of Worms, an era of darkness, decay, and writhing doom. "The Whispering Cairn" is the first installment of the Age of Worms Adventure Path, a complete campaign consisting of 12 adventures, several "Backdrop" articles to help Dungeon masters run the series, and a handful of poster maps of key locations. For additional aid in running this campaign, check out Dragon's monthly "Worm Food" articles, a series that provides additional materials to help players survive this campaign. Pgs. 14-47

Melvaunt is a city of merchants and metalsmiths. The docks are constantly filled with ships from Hillsfar, Mulmaster, and more distant ports. The northern coast of the Moonsea is an inhospitable place, and its people have a reputation for being rough and unfriendly. But they don’t go around murdering one another in the streets. At least, not usually. Was that a scream you just heard? Part One of The Chaos in Melvaunt.

FQ6 – Vortex at the Temple continues the quest for the missing pages of the Codex of Gamber Dauch. This adventure takes the PCs to the ancient temple of Kabish Mo-Del a former druidic stronghold. Once there the party will have to battle creatures and puzzles to continue. If successful the party may just find themselves in a foreign land and have to find their way back home!

A combination wilderness/dungeon module, first searching for then exploring the temple of Tharizdun. Tharizdun is long gone from the place, so there's no epic final fight. Rather, a mysterious Black Cyst waits at the bottom of the dungeon. The encounter with it is almost scripted, having no hazard except for careless/foolish players. Contains several monsters from the Fiend Folio. Loosely follows Lost Caverns of Tsojcanth. TSR 9065
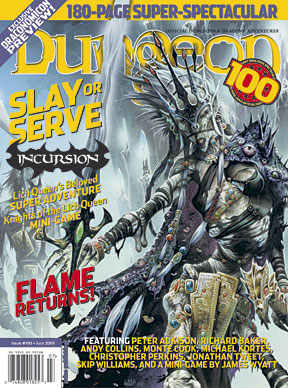
The PCs follow the trail of some particularly competent kobold thieves to the lair of a dragon cult deep in the swamp. There they discover efforts underway to grant sentience to the skeleton of a powerful red dragon once named Flame. Eventually the PCs determine that trouble has returned to the Western Mountains in the form of a band of fire giants ruled by a clone of the original red dragon named Flame.

As your party closes in on the coast of the Newmack Sea you are greeted by a large group of the duke’s military. After gaining an audience with General Zulta you discover that your reputation has preceded you. The general asks your party if they could assist him in the capture of the rogue mage Oxidosus who is currently trapped in his island fortress. A cautionary note, if the players make poor decisions TPK is a very real possibility!
Invasion from the Planet of Tarrasques is a single-session, over-the-top, gonzo action adventure meant for four to six level 20 characters. The adventure serves as a capstone for Waterdeep: Dragon Heist and Waterdeep: Dungeon of the Mad Mage, but can be modified for any setting. What’s more fun than one tarrasque? How about multiple tarrasques stomping across Waterdeep? How about a whole planet full of tarrasques ready to rumble? If that sounds exciting, then Invasion from the Planet of Tarrasques is for you. Halaster Blackcloak died... but then he came back... with reinforcements...

This adventure is a prequel to the first ever stand-alone module published Palace of the Vampire Queen by Wee Warriors She is simply called the Vampire Queen. A being so powerful and evil that the mere mention of her title, raises shrieks of horror and anguish. Her reach is seemingly infinite and her machinations sinister beyond the un-derstanding of mortal men. But those very same mortals must stop her. The path to victory leads to only one place. A place of legend and mystery; the Palace of the Vampire Queen! For the first time the ruined Palace Keep is detailed and ready for exploration! The adventure includes one new monster and two new magic items. This module is designed for the First Edition game using six to eight characters of first level.

THRESHOLD! The northernmost town in the Duchy - and your last stop before your adventures begin. Threshold, the gateway to mysterious castles, lost temples, deadly caves and caverns. You have heard the stories and legends, now you wish to see for yourself. This product provides a complete campaign adventure that will take beginning characters from 1st all the way to 3rd level and possibly beyond, drawn from the first nine modules of the B-series adventures. See individual adventure entries for Boss, Common Monster and Items lists. TSR 9190

Some of the hamlets outlying Hillsfar have been struck by an odd malady. Rumor has it a traveling carnival visited those hamlets before the disease struck. Does coincidence not equal causation or is something sinister afoot?
Millennia ago, aberrations from Xoriat, the Realm of Madness, were driven from Eberron. The Gatekeeper druids–mostly orcs–placed powerful dimensional seals throughout Khorvaire to prevent the creatures of Xoriat from returning. To repair a breach in one of the seals at a settlement called Tjorda, a Sealguard Complex was built. An immortal guardian ws tasked with attending to the repaired crack in the seal. Thousands of years later, the Gatekeeper druids rediscovered the sealed complex. Even without knowing its precise history, they ascertained its sacred nature and have guarded it from then on. Being sealed in to protect the site and commune with the inner guardian is considered a great honor. Much of this history has long-since been forgotten. But 10 years prior to the adventure’s start, Vilda Karrte–a relic hunter with her own agenda–tracks a Xoriat artifact called the Spiral Well to the complex. Turned away by the Gatekeeper, she forces her way inside, grievously injuring them. Having discovered Vilda’s journals, Provost Nigel Faurious, through the Clifftop Adventurers’ Guild Handler Lhara, tasks the adventurers with recovering the Spiral Well.
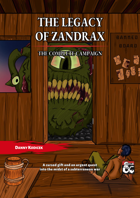
Deep in the forest, an ancient pyramid was constructed many millennia ago for an unknown purpose as part of a forgotten modron war. Within it is a labyrinth of strange traps, taxing puzzles, and some unwelcome troglodytes. This adventure for 1st-3rd level characters can be played as the first part of the Legacy of Zandrax campaign or as a standalone one-shot.

This Adventure is based on the web comic series, Table Titans. It is set in the same village that part of the comic takes place in, however the path of the adventure does not follow the story line set in the comics. There are familiar elements that are a wink and a nod to fans of the comic, but it is a unique story. The adventure is set around the village of Haverford, currently beset by an unknown [i]Terror[/i] that has resulted in many many deaths in the surrounding forest. The adventures have arrived at this once peaceful hamlet and if they discover the source of the [i]Terror[/i] plaguing the region they will be handsomely rewarded. The Terror of Haverford is a starter adventure. Characters will advance from level 1 to 4 if completed. This adventure has both social and combat encounters, as well as combat encounters that can be solved socially. If characters aren't thorough in their investigations they will be taken by surprise by what lies ahead.

A fiend lurks among the Black Blade goblins. A shapeshifting barghest fashioned by the General of Gehenna to exact revenge on all goblin-kind. It’s aim: to kill as many goblin leaders as possible… A masked goblin approaches the party asking for help. Two tribe leaders are dead. But a rival for chief has control of the crime scene. Will the party discover the barghest among the goblin ranks? Can they stop this imposter before it strikes again? Adventure Overview The adventure’s story is spread over 4 parts and takes approximately 4 hours to play. The adventure begins with a Call to Action scene. Part 1: Goblin Politics. Krill sends his emissaries to implore help from any strong intermediary. The party is asked to investigate the murder of Thrawn in Dringly’s lair. This is Story Objective A. Part 2: The Opposition. Gain entry into Dringly’s lair and investigate the murder of Thrawn. Gather enough evidence to find the killer. This is Story Objective B. Part 3: To The Lair! Now that the players have determined the barghest (Yeep) is to blame, they need to get to Krill’s lair quickly as he is in imminent danger. This is Story Objective C. Part 4: The Barghest.When the players arrive at the lair, they need to get to Krill and expose and defeat the barghest. This is Story Objective D. Adventure Background A barghest named Yeep has begun its onslaught of attacks against the Black Blade goblins. Starting with Chief Gnar, then his second in command Thrawn, the barghest is moving methodically down the line of command. Krill is now chief. But he has some problems: Two leaders of the Black Blades are dead. Who killed them and why? Is he next? Dringly, the next in command, has decided to take his lair for himself, declaring himself Chief of the Black Blades. Who are the Black Blades? The Black Blades are a tribe of goblins in the local area. They are known for dipping their blades in a dark black substance. It is rumored these blades are poisonous. The Black Blades regularly attack passersby on the road to rob them. The Black Blades have two lairs, one run by a chief who leads the whole tribe, and another overseen by a boss lieutenant. The Black Blades have a well-established pecking order which is how Krill stands to become chief. The next in line is Dringly, who has also declared himself chief and wants Krill dead. Krill suspects that there is something suspicious about two leaders being killed within a day of each other, but he has already burned Gnar’s body without any investigation. He needs to investigate the body of Thrawn, but it is in Dringly’s lair. Krill wishes to avoid direct confrontation with Dringly at the present for three reasons: 1) Any violence would only kill his own tribe members and further divide the lairs. 2) He believes there is still hope for negotiation to reunite the Black Blades. 3) He believes that if he were to attempt negotiations himself, Dringly would kill him. This adventure features: Two maps. Ready for your favorite Virtual Tabletop. A full color pdf. A black and white pdf. One custom monster, a reprint of barghest, all others available in the Monster Manual. Four hours of entertainment involving: roll playing a goblin bard, investigating a murder scene, tracking down a barghest before it strikes again. Applicable to any setting.
The set-up is interesting in a way – the PCs are plain folks of the Vale, everyday people, and the module begins promising, with the Thor-ordained sporty trek around the vale that inevitably results in trouble. The module, obviously, tries to chronicle the step from everyday-Joe/Jane to hero and the tidbits on culture provided are intriguing. But this, as much as I’m loathe to say it, is one of the worst modules FGG has ever released. If I didn’t know any better, I wouldn’t expect Mr. Ward’s pen at work here. Let me elaborate: The premise, is unique and hasn’t been done much recently, but it suffers from this being an adventure – to properly invest the players in the setting a closer gazetteer, nomenclature, suggested roles and origins for casting talent – all of that should have been covered. They’re not. Worse, everything here is a) clichéd and b) a non-threat in the great whole of things.

With the approaching winter, cold winds and long nights, the people of North get excited about its centuries-long tradition: the visit of Mage Nicholai Klaus Noah, the bearer of good fortunes and gift-giver. However, for the first time in over century, Nicholai is late! At first, the people didn't bother, but as days and nights passed, rumors increased until it finally evolved to a complete despair as numerous children started disappearing from all over the place! The council has decided to find those children and learn what happened to the beloved Mage. And they are willing to pay a considerable reward for that.
Invasion of Veluna - Level 1 Demons have invaded Veluna, laying waste to Verbobonc and small towns! Survive the siege, and track down their origins. This adventure has inspiration from The Village of Hommlet. Infiltration of Dorakka - Level 2 Rumors of Demonic Invasions have the characters traveling across the lands of Iuz, surviving in the war torn wastelands to reach the Rift and back to infiltrate the capital of the fiendish Empire. This adventure has inspiration from The City of Skulls, with a special optional twist. Scant Rebellion - Level 3 Rumors of demonic forces across the Flanaess are forcing the hand of the Scarlet Brotherhood. Aid or covertly work against the Brotherhood to eliminate or save the Free Onwall Army of Rebellion and create a temporary peace. Assassination - Level 4 The Free Onnwall Army of Rebellion has been weakened. The Scarlet Brotherhood mean to end its threat with the permanent removal of a key leader and funder of the army. Beneath the Gnarled Root - Level 3 Mad demonic cultists wandering listlessly across the Gnarley have been ranting and raving of a secret asylum hidden beneath the gnarled root. Find the dungeon, and learn what secrets it may hold. Quarry of Elemental Chaos - Level 4 The demonic forces near the Gnarley have constructed a massive quarry to tap into the elemental chaos, using its power to locate a magical artifact for a greater evil. Dive into this massive dungeon and end the insanity in an adventure inspired by the Temple of Elemental Evil. Irongate Heist - Level 3 Azure Masks have tracked an important magical relic to be in the possession of a traveling author who has just come home to Irongate to celebrate his newest book launch. During the party, enter his home and steal the artifact while forces work against you. The Bright Desert - Level 4 Rary the Traitor has partnered with the demons to gain information on the Lost Pyramid of Kesh. Within is the legendary Scorpion Crown that would hand the fiends an army of tlincalli. You must race across the desert to reach the pyramid before Rary's forces in this adventure based on Rary the Traitor and Desert of Desolation. Bastion on the Borderlands - Level 5 The bravery of the characters has seen them rewarded with a bastion in Keoland abandoned by the Knights of the Watch due to political pressure. The characters may take a moment to breath, place roots down, or bring order to the nearby chaotic caverns in this adventure inspired by Keep on the Borderlands. The Neverending War - Level 6 Transported to and trapped within the neverending war in the lost city of Rauxes, the characters are tasked with ending the curse upon the city to escape this D&D roguelike adventure. Jungles of Hepmonaland - Level 7 The mirror of gates, an artifact to easily bring groups of people across the planes, has been split. The first piece has been discovered to be deep within the Jungles of Hepmonaland in this adventure inspired by Needle. Across the North - Level 8 Rumors of artifacts in a hidden vault in the northern Flanaess have circulated for decades, but with the keys now showing up, and demons circling, this rumor could be a key to stopping this invasion in this adventure inspired by Five Shall Be One. City of the Lizardking - Level 9 The Silent Ones have maintained a close relationship with a band of Lizardfolk in the Hool Marsh. Their recent silence, following a discovery of another piece of the Mirror of Gates could only mean one thing... They need to be saved in an adventure inspired by Tomb of the Lizardking. Lair of the Kraken - Level 10 The Ladies of Crede had discovered yet another shard of the Mirror of Gates, having it transported to Oakenisle when the shipment was attacked by a kraken. Now the characters must go on a very deep sea adventure to take back what is theirs. The Demonic Rainbow Dungeon - Level 11 Unbeknownst to most, beneath the Free City of Greyhawk is a massive dungeon constructed by a variety of creatures to funnel power for Demogorgon to maintain his charade of an alliance with the Queen of Chaos. Put an end to his scheming in this adventure inspired by Castle Greyhawk. Comes Sail Away - Level 12 The characters partner with the Scarlet Brotherhood to traverse the sea of worlds and enter the City of Glass in the Elemental Plane of Water, trying to gain the Ax of Severance before the Queen of Chaos. This adventure was inspired by The Vortex of Madness and Other Planar Perils. Fly Away With Me- Level 12 Dropped into the middle of Aaqa in the attempt to stop the Queen of Chaos' plan, the characters must naviagte politics and the infinite skies to reach the Ax of Severance before the demons. Through the Fire and the Flames - Level 12 Inspired by Secrets of the Lamp, this is a political-intrigue quest, with characters forced to navigate the politics of the City of Brass, getting a new sultan in power to gain the Ax of Severance before the demons under the Queen of Chaos can seize upon the chaos they wrought. Underground - Level 12 The characters must navigate the shifting labyrinths of the Elemental Plane of Earth to pull off a heist and find the Motherlode before the demons! Portal of the Drow- Level 13 The time has come to enter the Abyss. The nearest - permanent - portal is inside the drow city of Erelhei-Cinlu and is guarded by the son of Demogorgon. As a result, only one action is reasonable: besiege the great city in this adventure inspired by Vault of the Drow. Invasion of the Abyss - Level 14 Upon finding themselves in the Abyss, the characters arrive in the uppermost layer of the Abyss, trudging through 13 layers to reach the home of the Queen of Chaos in this adventure inspired by the Demonweb Pits.