
Stars Over Stormwreck is a short adventure for four to five characters with an Average Character Level of 4. This product is designed to act as a bridge adventure between the Dungeons & Dragons Starter Set adventure Dragons of Stormwreck Isle and the Spelljammer: Adventures in Space adventure Light of Xaryxis. Dragons of Stormwreck Isle takes characters from 1st level to 4th level, while Light of Xaryxis begins at 5th level. During Stars Over Stormwreck, the characters travel from Stormwreck Isle to the city of Luskan, with the challenges of that journey taking them from 4th to 5th level and preparing them to enter the adventure in Light of Xaryxis. This adventure assumes you already own both the D&D Starter Set: Dragons of Stormwreck Isle and the Spelljammer: Adventures in Space boxed set. About the Adventure As a new group of heroes engages with the challenges and revelations of Dragons of Stormwreck Isle, the discovery of a mysterious relic from another world suggests that even greater adventures lie ahead. After their Stormwreck trials are done, the characters take sea passage to Luskan on the trade ship the Western Wind, hoping to learn more about the mysterious egg that’s come into their possession. The trip will not be easy, though, as an attack by sea-elf cultists, the threat of mutiny, and the escape of dangerous creatures from the ship’s hold all threaten to cut short the party’s journey. And all the while, strange storms of shooting stars appear across the night sky like some sort of prophecy—but of coming glory, or of imminent destruction? Stat blocks are included, as well as an Astral Sea Encounter Generator Appendix and a Wildspace Generator Appendix, supplying you with new DM tools for your Spelljammer campaigns.
In Sharn Files: Secret of the stolen Beef Boranel you can cast a suspicion on the teammate while defenestrating the enemies. This one-shot mixes social deduction games a la Mafia or Blood on the Clocktower with fun combat encounters inspired by Tactical Breach Wizards! A perfect little distraction after you have traumatized your players during the main campaign and everyone needs a breather. This 3-5 hour one-shot for level 7 characters adds the character-driven tension to a simple but exciting dungeon crawl. Sharn Files tells the stories of Blackened Book, a special unit within Sharn Watch that takes on magical crimes. However, this mission is special, since our heroes need to not only raid an underground drug laboratory, but also find a traitor among themselves! Someone stole the Captain’s lunch and all of you are suspects. Find the traitor before the end of the mission, or risk to patrol the streets with the regular guards for a while. Features: - Over 25 lavishly-illustrated pages - 3-5 hours of gameplay - 2 custom-made encounter maps – a multi-level warehouse and a hazardous laboratory - 6 pre-generated characters, each one cuter than the other - 6 unique monsters perfect for throwing out of the windows - 4 new Magic Items approved for use by Sharn authorities - Additional subclass: Warlock who’s patron is the City itself 100% human made - no AI was harmed (or used) in the process.

This is a reclamation of the classic Mexican horror story designed to keep young adventurers wary of their curfews, La Llorona. In this tale, adventurers will face perilous encounters with beings that lurk in the shadows, and uncover what might have happened to drive a woman long ago to transform into a nightmarish legend.

Modrons, Mephits & Mayhem is a Dungeons & Dragons 5E tier 2 adventure for three to five characters of levels 5-8. It is primarily set in a modron-designed research facility that has been abandoned by its creators but retains guardians that are still active. Additionally, two groups have broken into the facility with their own goals in mind; the githyanki and their red dragon cohort are antagonistic and provide the main source of combat in this adventure, while a modron traveling with a few mephits may prove friendly although ultimately troublesome. Inspired by adventure games in which the protagonists explore baroque, esoteric technological fortresses, and seeded throughout with factions that sport competing and often bizarre goals, Modrons, Mephits & Mayhem is sure to test the mettle of any group of players, and will provide endless amusement for Dungeon Masters seeking something different from the typical hack-and-slash dungeon crawl. This 70-page adventure features: *Two wilderness areas, random wilderness encounters, and a massive, interlinking 3-level dungeon filled with bizarre puzzles. *Ancient machinery powered by elemental portals, all of which can be activated, turned off, or manipulated by the player characters and the various factions within the modron facility. *Planar creatures like githzerai and githyanki, modrons, mephits, and elemental guardians, skillfully placed into the High Moor area of the Forgotten Realms setting. *Monsters and NPCs that have detailed (yet easy to run!) personalities and goals that will provide tons of roleplaying opportunities. *Notes and sidebars on running the NPCs with added complexity, or simplifying the NPCs' motives to make the adventure more straightforward. *Tactics notes for every single encounter! *An appendix that features all monster stat blocks, and both tagged (DM) and untagged (Player) versions of the dungeon maps. *Wilderness hex map by Elven Tower Cartography! Three interlinked dungeon levels by Dyson Logos...and one of them is a flying fortress! Cover art by Patrick E. Pullen!

Ever feel like you just want to snatch all the blankets and pillows you can find and hide in your own warm little nest? Goblin Heist is a chaotic Tier 1 adventure where 1-6 players take control of goblin characters on a mission to steal as many cozy things as they can from the sleepy winter village of Little Humbleton. But be wary... the town has hired an adventurer to stop you! Can you and your goblin gang survive the cold, sneak into houses, steal the cozies, and escape before daybreak all without being caught? Goblin Heist is highly replayable, and features: - A choice of four adventurers protecting the town, each adding their own difficulty and flavour to the game - Variable weather conditions - Pursuit mechanics - Randomly generated challenges - Cozies - Stuffing sweets in your face

The Wizard's Assistant is a Tier 1 adventure for Dungeons & Dragons 5e. This adventure is designed to be accessible to both new and experienced Dungeon Masters, as well as players of all ages. Characters start at level 1 and end at level 5 - with plenty of possibilities for continuing the story after! The Wizard's Assistant starts simply, in the lonely village of Newfall. The wizard Iolanthe lives in Newfall with her assistant and romantic partner Diana, but Diana's hidden past is closing in. Adventurers come together over a seemingly simple task, only to find themselves embroiled in the machinations of a sinister gang. Can they locate Diana before her secrets tear her and Iolanthe apart? This game includes details of several locations, but can easily be adapted to nearly any setting.

The Frog People were never a threat before, more of a nuisance really, they would show up once a year steal a few things and drink some ale. Then they would be gone. This year though they did not leave and now they are taking people! The town needs help and it has found it in you and your friends.
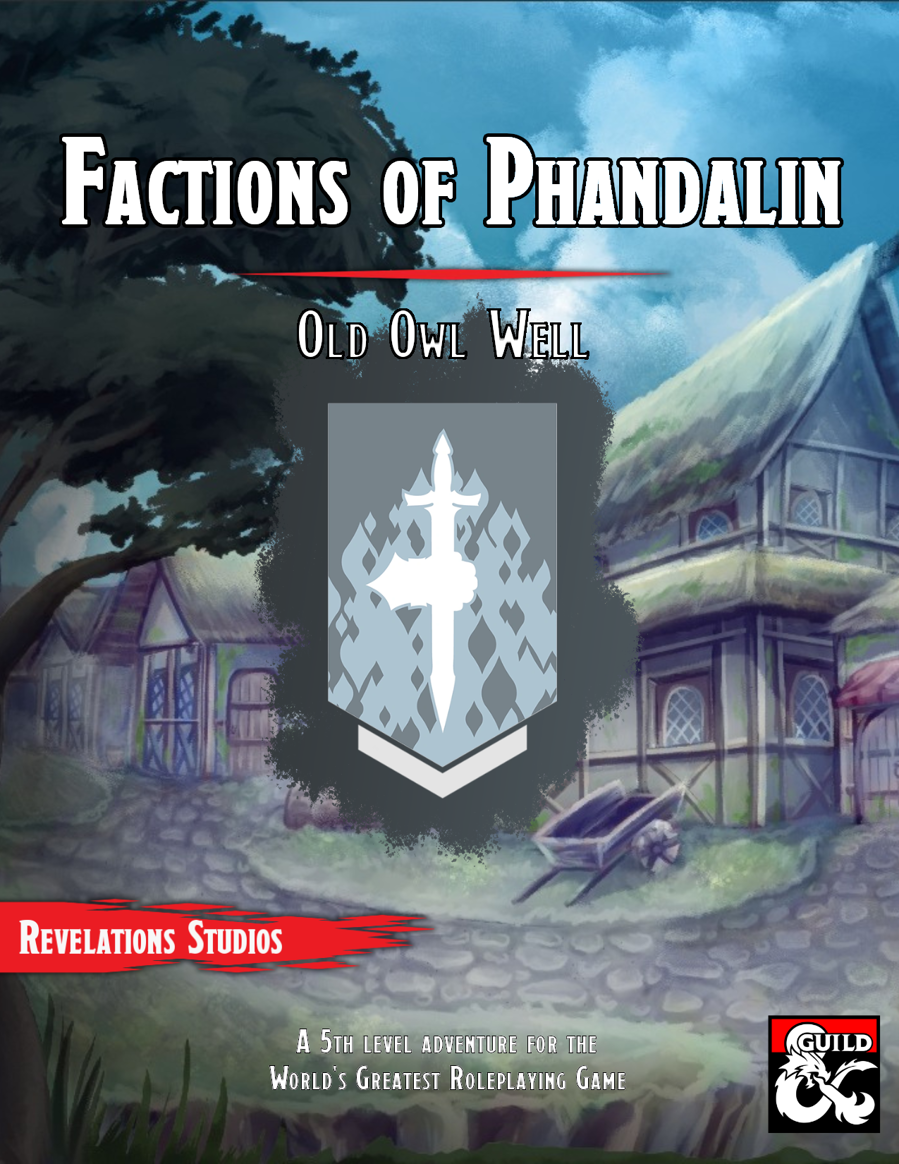
This book goes over the various rules around the faction of the Order of the Gauntlet in Phandalin and the Forgotten Realms, making it easy for any new or veteran DMs to integrate it more into the core stories being told, and making the faction feel more useful for the players that choose to join. In the adventure, the characters are tasked with exploring the depths of the Old Owl Well.
In the town of Easthaven, a group of adventurers is tasked on a routine mission to resupply an expedition to the Reghed Glacier. But everything is not quite as it seems, and it's not long before the chronographer's misfortunes become apparent.

The Kingdom of Halruaa’s past is a mystery. The disappearance of the entire kingdom during the Spellplague and its subsequent return has always been looked upon as feat of magic that will never be replicated and Halruaa’s Council of Elders has dedicated itself to ensuring that this magic remains hidden. rumors are starting to surface that someone may have found a way to duplicate the feat and this has made faction leaders throughout Toril nervous, especially when recent communications with Faction agents in the area have grown silent. What can be discovered in the Kingdom of Halruua? Are the rumors true or is there something else entirely happening? The Discarded Gem is a 3 to 4-hour adventure for characters level 1 - 4.

Kalakeri: The Forbidden Temple is a gothic horror adventure for 4-5 characters of 7-8th level. It can be played over the course of 8 hours for a one-shot, but works better when played slowly over the course of two games. This is the third part of the Carnival of Lost Souls campaign. It can also be played as a standalone adventure. Kalakeri: The Forbidden Temple features: Exploration of the ancient Greater Vochalam temple with a powerful eidolon guardian. Lots of dangers and rival explorers are waiting for the characters, among them the priests of Osybus and Firan Zal’Honan himself! Intense social encounters with the leaders of major forces of Kalakeri: Ramya, Arijani and Reeva, and the possibility to align with them. Random encounter table for Kalakeri travels, and mechanic for quick resolution of random combat encounters. New custom monsters to make combat encounters truly memorable and exciting. High-quality maps, also available in universal vtt format. Check out previous adventures in the series: Lamordia: The Hardest of Hearts and Dementlieu: Dance with the Devil! And look out for the next adventure in the Carnival of Lost Souls series: Valachan: Hunter’s Moon! It will be released in the next month. Once all four adventures are out, we will also release a special Campaign Guide, which will explain in detail how to best set up and play the campaign. However, if you want to start your campaign right now, don’t worry - we have included a short appendix at the end of each adventure that will explain the basics! Disclaimer: We are a team of writers from Ukraine, so the unprovoked war and senseless aggression of the terrorist state of russia influenced our initial timelines significantly. However, we are now as safe as we can ever be under the constant threat of missile strikes, and determined to finish the whole series! And after that - who knows, maybe even more cool adventures will follow ;) Made in Ukraine
Invasion of Veluna - Level 1 Demons have invaded Veluna, laying waste to Verbobonc and small towns! Survive the siege, and track down their origins. This adventure has inspiration from The Village of Hommlet. Infiltration of Dorakka - Level 2 Rumors of Demonic Invasions have the characters traveling across the lands of Iuz, surviving in the war torn wastelands to reach the Rift and back to infiltrate the capital of the fiendish Empire. This adventure has inspiration from The City of Skulls, with a special optional twist. Scant Rebellion - Level 3 Rumors of demonic forces across the Flanaess are forcing the hand of the Scarlet Brotherhood. Aid or covertly work against the Brotherhood to eliminate or save the Free Onwall Army of Rebellion and create a temporary peace. Assassination - Level 4 The Free Onnwall Army of Rebellion has been weakened. The Scarlet Brotherhood mean to end its threat with the permanent removal of a key leader and funder of the army. Beneath the Gnarled Root - Level 3 Mad demonic cultists wandering listlessly across the Gnarley have been ranting and raving of a secret asylum hidden beneath the gnarled root. Find the dungeon, and learn what secrets it may hold. Quarry of Elemental Chaos - Level 4 The demonic forces near the Gnarley have constructed a massive quarry to tap into the elemental chaos, using its power to locate a magical artifact for a greater evil. Dive into this massive dungeon and end the insanity in an adventure inspired by the Temple of Elemental Evil. Irongate Heist - Level 3 Azure Masks have tracked an important magical relic to be in the possession of a traveling author who has just come home to Irongate to celebrate his newest book launch. During the party, enter his home and steal the artifact while forces work against you. The Bright Desert - Level 4 Rary the Traitor has partnered with the demons to gain information on the Lost Pyramid of Kesh. Within is the legendary Scorpion Crown that would hand the fiends an army of tlincalli. You must race across the desert to reach the pyramid before Rary's forces in this adventure based on Rary the Traitor and Desert of Desolation. Bastion on the Borderlands - Level 5 The bravery of the characters has seen them rewarded with a bastion in Keoland abandoned by the Knights of the Watch due to political pressure. The characters may take a moment to breath, place roots down, or bring order to the nearby chaotic caverns in this adventure inspired by Keep on the Borderlands. The Neverending War - Level 6 Transported to and trapped within the neverending war in the lost city of Rauxes, the characters are tasked with ending the curse upon the city to escape this D&D roguelike adventure. Jungles of Hepmonaland - Level 7 The mirror of gates, an artifact to easily bring groups of people across the planes, has been split. The first piece has been discovered to be deep within the Jungles of Hepmonaland in this adventure inspired by Needle. Across the North - Level 8 Rumors of artifacts in a hidden vault in the northern Flanaess have circulated for decades, but with the keys now showing up, and demons circling, this rumor could be a key to stopping this invasion in this adventure inspired by Five Shall Be One. City of the Lizardking - Level 9 The Silent Ones have maintained a close relationship with a band of Lizardfolk in the Hool Marsh. Their recent silence, following a discovery of another piece of the Mirror of Gates could only mean one thing... They need to be saved in an adventure inspired by Tomb of the Lizardking. Lair of the Kraken - Level 10 The Ladies of Crede had discovered yet another shard of the Mirror of Gates, having it transported to Oakenisle when the shipment was attacked by a kraken. Now the characters must go on a very deep sea adventure to take back what is theirs. The Demonic Rainbow Dungeon - Level 11 Unbeknownst to most, beneath the Free City of Greyhawk is a massive dungeon constructed by a variety of creatures to funnel power for Demogorgon to maintain his charade of an alliance with the Queen of Chaos. Put an end to his scheming in this adventure inspired by Castle Greyhawk. Comes Sail Away - Level 12 The characters partner with the Scarlet Brotherhood to traverse the sea of worlds and enter the City of Glass in the Elemental Plane of Water, trying to gain the Ax of Severance before the Queen of Chaos. This adventure was inspired by The Vortex of Madness and Other Planar Perils. Fly Away With Me- Level 12 Dropped into the middle of Aaqa in the attempt to stop the Queen of Chaos' plan, the characters must naviagte politics and the infinite skies to reach the Ax of Severance before the demons. Through the Fire and the Flames - Level 12 Inspired by Secrets of the Lamp, this is a political-intrigue quest, with characters forced to navigate the politics of the City of Brass, getting a new sultan in power to gain the Ax of Severance before the demons under the Queen of Chaos can seize upon the chaos they wrought. Underground - Level 12 The characters must navigate the shifting labyrinths of the Elemental Plane of Earth to pull off a heist and find the Motherlode before the demons! Portal of the Drow- Level 13 The time has come to enter the Abyss. The nearest - permanent - portal is inside the drow city of Erelhei-Cinlu and is guarded by the son of Demogorgon. As a result, only one action is reasonable: besiege the great city in this adventure inspired by Vault of the Drow. Invasion of the Abyss - Level 14 Upon finding themselves in the Abyss, the characters arrive in the uppermost layer of the Abyss, trudging through 13 layers to reach the home of the Queen of Chaos in this adventure inspired by the Demonweb Pits.

The Thorn Hag, an ancient evil thought vanquished by the Elf Queen and her heroic companions many years ago, has arisen from the dead. A fey harp, created from the heart of the treant that perished in the battle, has gone missing from Satyrs' Glen and the Thorn Hag seems to be behind it. The PCs must track the missing harp through a warped and eerie wood and into an unseelie area of the Feywild to stop the Thorn Hag wreaking revenge upon the Elf Queen before it's too late - the clock is ticking. The Sylvan Harp is a D&D 5e adventure for 4-5 PCs of the 1st tier (Levels 1-4). The adventure has been designed with suitable alternatives to run the adventure for 1st, 2nd, 3rd or 4th-level characters, including advice for adapting creature numbers and/or powers to suit the level of your party. The adventure is estimated to take 8-12 hours to run. A timeline of events, and guidelines on how the actions of the PCs can affect those events, is included. The adventure includes nine new creatures: gwerthin, satyr bard, ash guardian, light guardian, treant spirit, pixie rot zombie, green dragon skeleton, thorn hag and thorn hag's hut. It also includes two new magical items: a powerful magical harp with a dark hidden secret and a crystal ball of clairvoyance. Also includes a player handout of the rhyming riddle of the fey, and maps of the area and a darkling tomb. Requires Volo's Guide to Monsters.

Nanfield is an island village of over 50 NPCs with mysteries plaguing both its present and its past. It contains a unique ecosystem and economy and a ship full of friendly pirates that will invite you by for dinner after accidentally attacking your party. It can be inserted into any campaign as an interlude during a travel montage, as a one-shot encounter, or as the base of future adventures. Nanfield contains over 50 NPCs you can use, several very unique and compelling characters, a Druid stat-bloc, a ship-to-ship fight, an investigation, and a fight with a Harpy (or more, depending on the outcome of the investigation).

A chance encounter on the road leads to the beginning of a grand adventure. It is very much a first time adventure for new characters to dip their feet in. Can easily be adjusted to a bigger or smaller adventure. This is the first adventure in a miniseries with the following adventures being: A Mystic Circle An Urgent Rescue A Dark Veil Falls

Bale, the kind gnome and owner of Bale's Outfitting Outpost, requests that the adventurers track down a group of youngsters that rented horses from him. The horses are overdue and Bale believes that he may have been swindled. Unbeknownst to the gnome, the party of young adventurers has met a dark fate. Will your adventurers accept Bale's request to track down the youngsters and, in doing so, find out what really happened? Or will they leave more blood on the trail? The module includes an introduction to Bale's Outfitting Outpost, encounter stat blocks, maps, and a battle stat tracker. Note: You do not need the Bale's Outfitting Outpost module to run this adventure.

Blinsky's Toyshop is our take on what happens to Blinsky and Piccolo during, or after the Curse of Strahd campaign. Blinsky, the toymaker in Vallaki with the cute monkey wearing a pink tutu, received a large inheritance from a long-time client. The client, Obtavius Swat, a retired adventurer and avid collector of toys, left his entire estate to Blinsky. The estate included coin, precious gems, art, and his collection of toys, some made by Blinsky and others he acquired during his travels. Blinsky used the fortune to pay a wizard to create a small island in the middle of Lake Zarovich, located just outside of Vallaki. He then paid masons and workers to build a fantastic new toyshop, which he designed to be an experience for both the young and old alike. Though the number of children in Barovia was increasing, mostly imparted to the devil Strahd’s downfall, Blinsky wanted to touch the inner child of the adults in the city. He wanted happiness. He wanted smiles. He named the castle Blinsky’s Toyshop of Marvels. One of the toys, a small silver tiara kept in a black satin-lined ivory jewelry box, was such a lovely piece. Blinsky couldn’t stand the thought of leaving it in the box. He already had enough gold and losing the small tiara wouldn’t be a large loss, so he decided to give it to his monkey – Piccolo (see Creatures of the Toyshop). He smiled at the thought of her running around in her pretty, shiny tiara. Sadly, as Barovian luck would have it, trapped inside the tiara is the sole of an evil gnome wizard named Aribetha Strangge. In his old age, Obtavious Swat forgot that he and his fellow adventurers used the tiara to imprison the gnome’s soul. Yesterday, when Blinsky placed the tiara on Piccolo’s head, silver tendrils cascaded from the tiara and into poor Piccolo’s skull, allowing Aribetha to control the monkey. Now, Aribetha has incapacitated Blinsky in the toyshop’s tower, brought many of the toys to life, and imprisoned or killed many of the workers and customers. The adventure includes costumes (which the character may wear), Strahd Hand Puppets, and a possessed Piccolo.

This quest is for a party looking to acquire diamonds to use as components for higher-level resurrection spells. To gather what they need, the characters embark on a brief expedition to the Elemental Plane of Earth where diamonds are fairly abundant. However, the party only has an hour to gather as many diamonds as they can before the portal—and the entire cave area—collapses. Includes a quest-related NPC that a player can control if they're waiting for their character to be resurrected.

Six short adventures to supplement your exploration of the jungles of Chult! These six fun adventures feature interesting challenges highlighting the dangers of the jungle. Each scenario is easy to drop into Tomb of Annihilation or any wilderness campaign. Includes the following adventures: Tavern Trouble - With a mysterious curse upon your guide, escaping lizards, and foes who have come to settle debts, your jungle trek gets interesting before you even leave the tavern! If Looks Could Kill - Crossing paths with a merchant prince's expedition can be very lucrative. The expedition members' agendas present interesting choices, as do the dangerous denizens of the swamp. Ambush from Above - Grung acrobats? With a team mascot? What is going on here? Mystic River - Traveling downriver suddenly comes alive with dangerous white water, carnivorous plants, a brontosaurus' tail... and an unusual spectator! Mudslide - It's been raining for days, and that rumble isn't a dinosaur! Run for your lives, and watch the creatures in the mud! Beautiful Plumage - Ancient ruins are now home to beautiful but dangerous singers. A batiri queen demands revenge and her tribe's totem awakens! Perfect for DMs running Tomb of Annihilation: Each adventure fully supports levels 1-10 Ready to run fun, with maps, art, and complete monster statistics Is traveling through the jungle getting dull? Drop in one of these innovative encounters providing interesting roleplay and combat experiences! Party unsure of where to head next? Each scenario provides links both to other Jungle Trek adventures and to Tomb of Annihilation plot points. Provides hours of play!

The Hag's Hexes is a 66 page guide designed by Dungeon Masters Guild luminaries like JVC Parry and Janek Sielicki alongside rising stars and old stalwarts like Matt Butler, Matthew Gravelyn, and Tim Bannock. It was created with one thing in mind: to make hags more than the sum of their (often meager) Challenge ratings, giving them the mechanics, roleplay potential, and weird magic that can inspire campaigns, lay low kings and warlords, and potentially ensnare unwary Player Characters into campaign-changing curses or long-term bargains that force them into terrible moral quandaries! Split into five chapters, the authors have provided everything a DM needs to terrify their players for years to come. The Bestiary features over a dozen monsters; some are new hags, some are their minions or even their mobile lairs, and one of them -- the Shaitan AKA Desert Hag -- was featured in Monsters of the Guild! Bargains & Curses is a chapter filled with ideas that can kick-start campaigns, threaten valued NPCs, or put Player Characters' very existence and morality at stake. Chapter 3 includes two dozen items of wonderment, weirdness, and dread, ranging from fairy tale-inspired items of whimsy to terribly cursed items of horror. Chapter 4 is titled "Filthy, Vile & Downright Dirty" and provides dozens of roleplaying tips to make hags come alive, new mechanics inspired by and expanding on Volo's Guide to Monsters (coven spell lists, aunties, grandmothers, alternative coven members), and ends with useful combat tactics for each of the hags from the Monster Manual and Volo's Guide, as well as tactics for covens. Finally, Chapter 5 presents five encounter groups (with sub-encounters) to give you quick story seeds and monster lists that you can put together in minutes to create a single encounter or to inspire a full campaign, and ends with three full-length adventures -- each with 3-5 encounters -- that showcase many of the new monsters, rules, magic items, and so on that appeared in earlier chapters. Each of these adventures comes with an encounter map meant to act as inspiration for hag lairs, and they include useful mechanical ideas for terrain effects and descriptive keywords listed directly on the map for added inspiration and easy customization! Designed by Tim Bannock. Written by Matt Butler, JVC Parry, Janek Sielicki, and Tim Bannock. Edited by Matthew Gravelyn and Tim Bannock. Cover Art by Elena Naylor. Cartography by Tim Bannock using Inkwell Ideas' Dungeonographer (Dungeonographer is copyright Inkwell Ideas). Layout & Graphic Elements by Elena Naylor with Tim Bannock. Interior Art by Arcana Games, Bruno Balixa, David Lewis Johnson, Dean Spencer, Earl Geier, Filip Gutowski, Jacob E. Blackmon, Joyce Maureira, Petr Kratochvil, Jayaraj Paul, Brian Brinlee, and Wizards of the Coast.